Farmhouse Bed
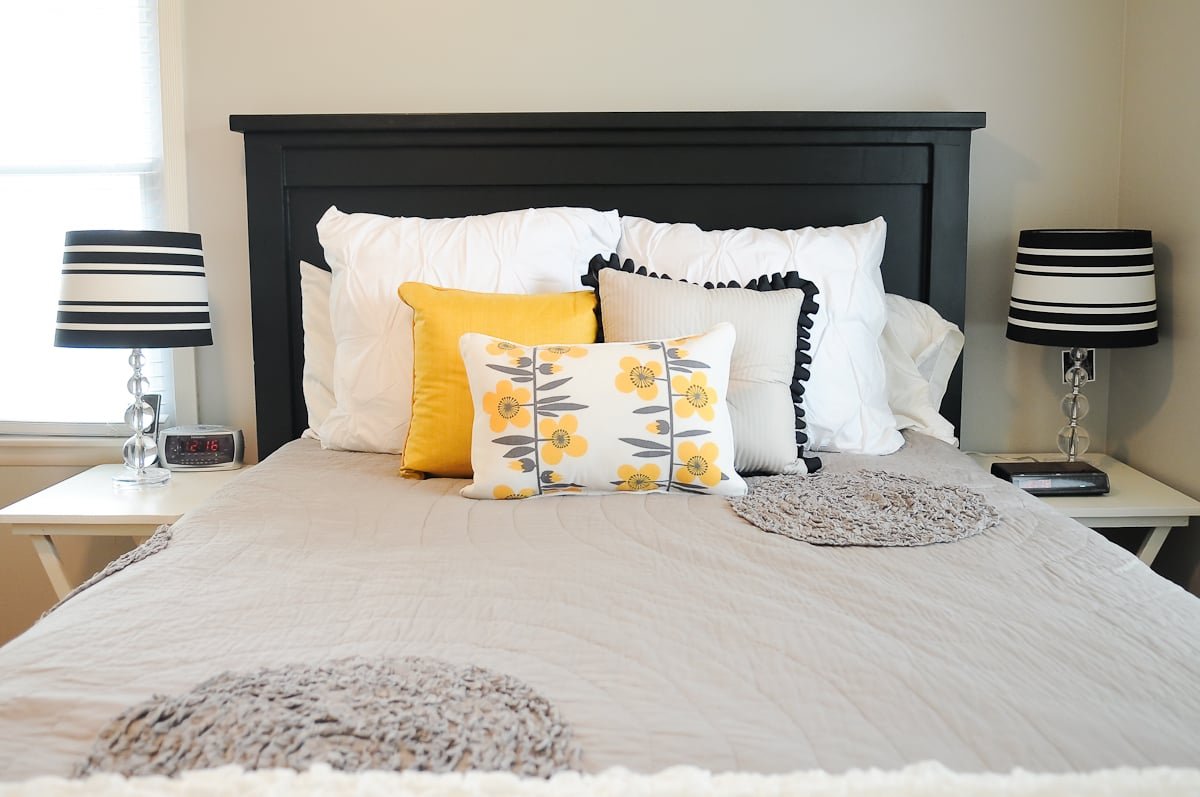
This beautiful farmhouse bed can be made for just a fraction of the cost to buy - all from standard, off the shelf lumber! You won't need a pocket hole jig or any special tools to build. This bed has been built thousands of times and is a reader favorite. You can also find the twin version, king version, and all our farmhouse bed plans here.
Specifications
| Project type | Beds and Bed Frames |
|---|---|
| Room | Bedroom |
| Style | Farmhouse Furniture |
| Difficulty | Intermediate |
| Estimated cost | $100-$150 |
Dimensions
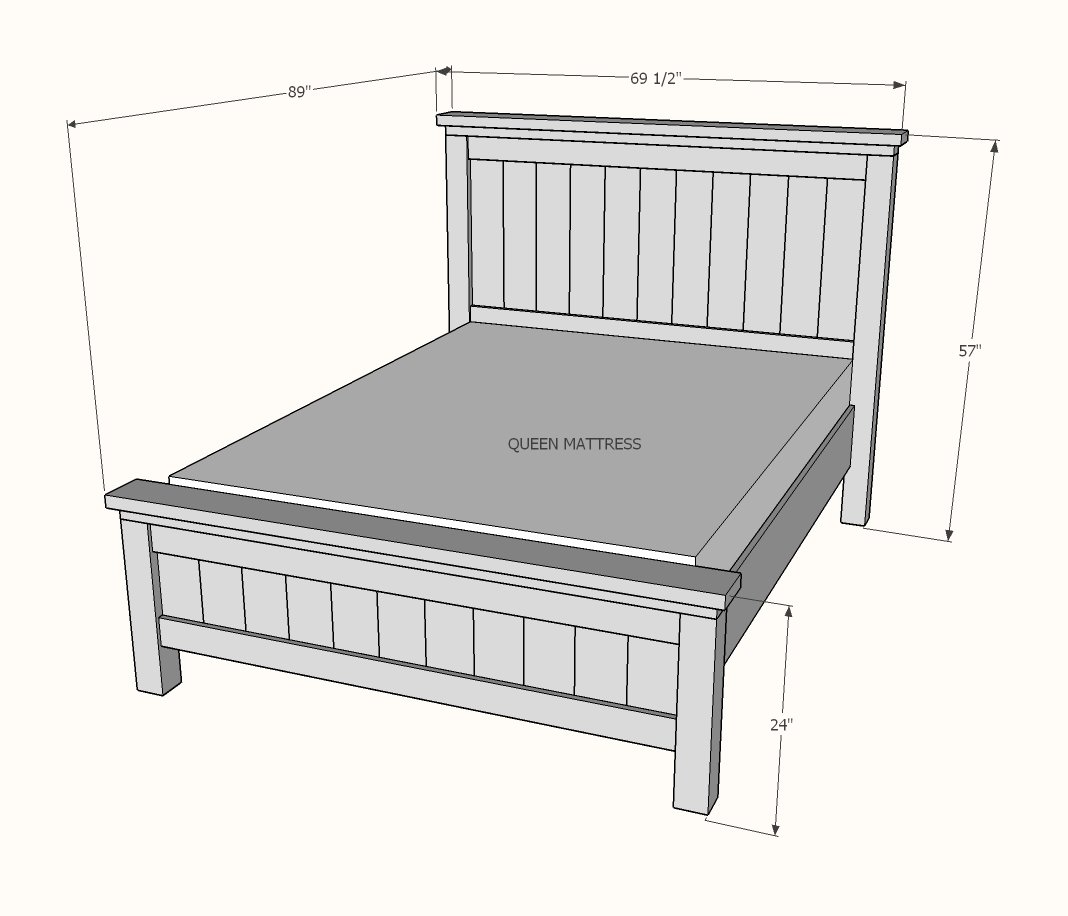
Use the size-specific shopping and cut lists below.
Shopping List
- 12 - 2x4 8 feet long
- 2 - 2x6 8 feet long
- 2 - 1x10 8 feet long
- 2 - 4x4 8 feet long
- 1 - 2x2 8 feet long
- 6 - 1x6 8 feet long
- 4 - 1x4 8 feet long
- 100 - 1-1/4" long brad nails
- 75 - 2-1/2" long self tapping wood screws (#8 star bit recommended)
Cut List
HEADBOARD CUT LIST
- 2 - 4x4 @ 54"
- 2 - 2x2 @ 30"
- 11 - 1x6 @ 30"
- 2 - 1x4 @ about 60-1/2" - measure and cut to fit
- 1 - 2x4@ 67-1/2" - measure and cut to fit
- 1 - 2x6 @ 69-1/2" - measure and cut to fit
FOOTBOARD CUT LIST
- 2 - 4x4 @ 21"
- 2 - 2x2 @ 8"
- 2 - 2x2 @ 3"
- 11 - 1x6 @ 15"
- 2 - 1x4 @ about 60-1/2" - measure and cut to fit
- 1 - 2x4@ 67-1/2" - measure and cut to fit
- 1 - 2x6 @ 69-1/2" - measure and cut to fit
MATTRESS SUPPORT FRAME/SIDERAILS
- 3 - 2x4 @ 83-1/2"
- 1 - 2x4 @ 60-1/2"
- 2 - 2x4 @ 12-1/2"
- 2 - 1x10 @ 80"
- 20 - 2x4 @ 32" - can be as short as 30" if you need to burn up scraps
Tools
- measuring tape
- square
- pencil
- safety glasses
- hearing protection
- drill
- compound miter saw
- nailer
- sander
Step-by-step Instructions
Step 1
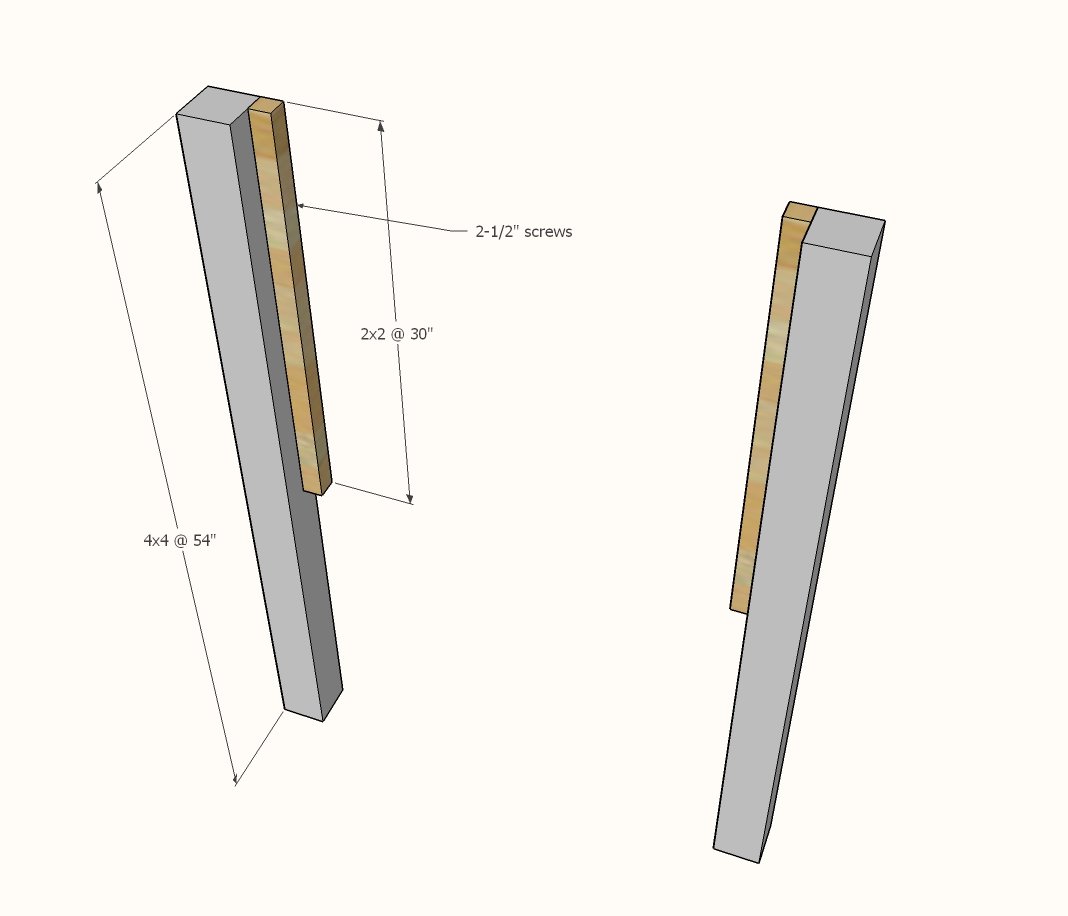
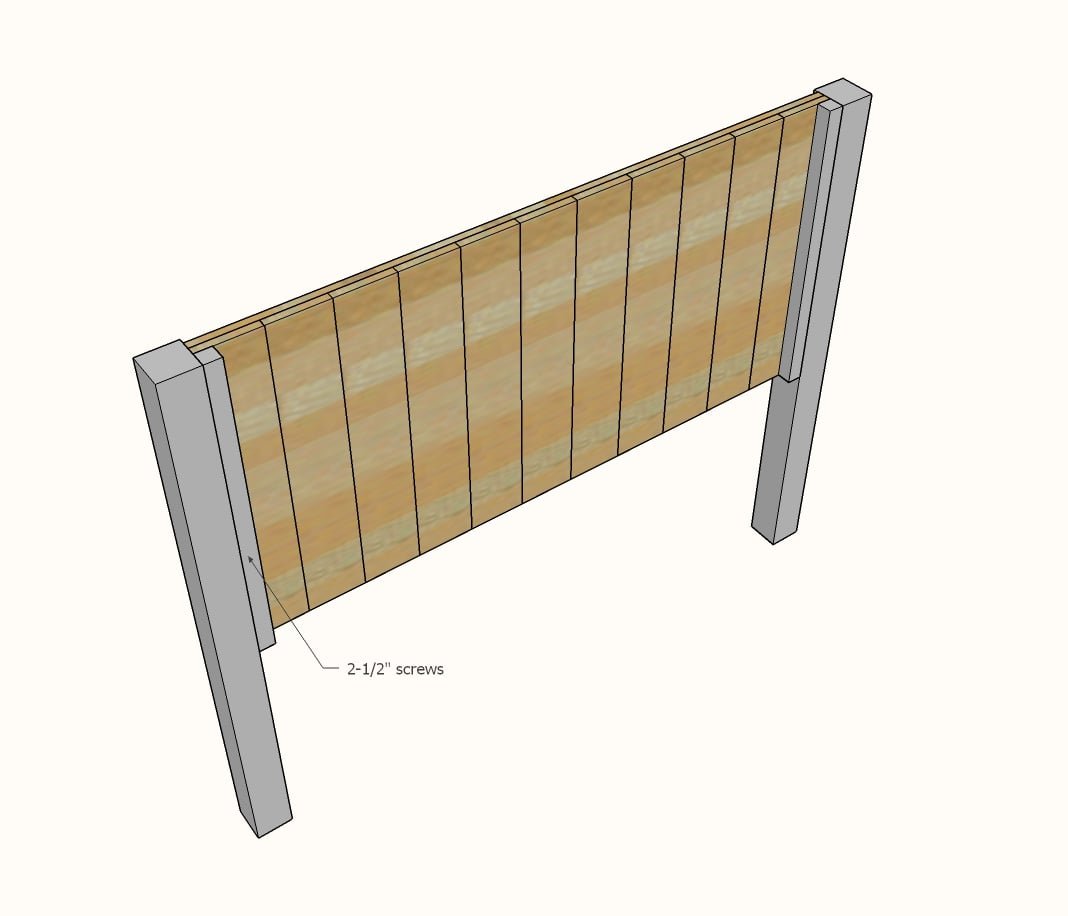
Attach the longest 2x2s to the longest 4x4s, flush to the back edge with 2-1/2" self tapping screws.
Step 2
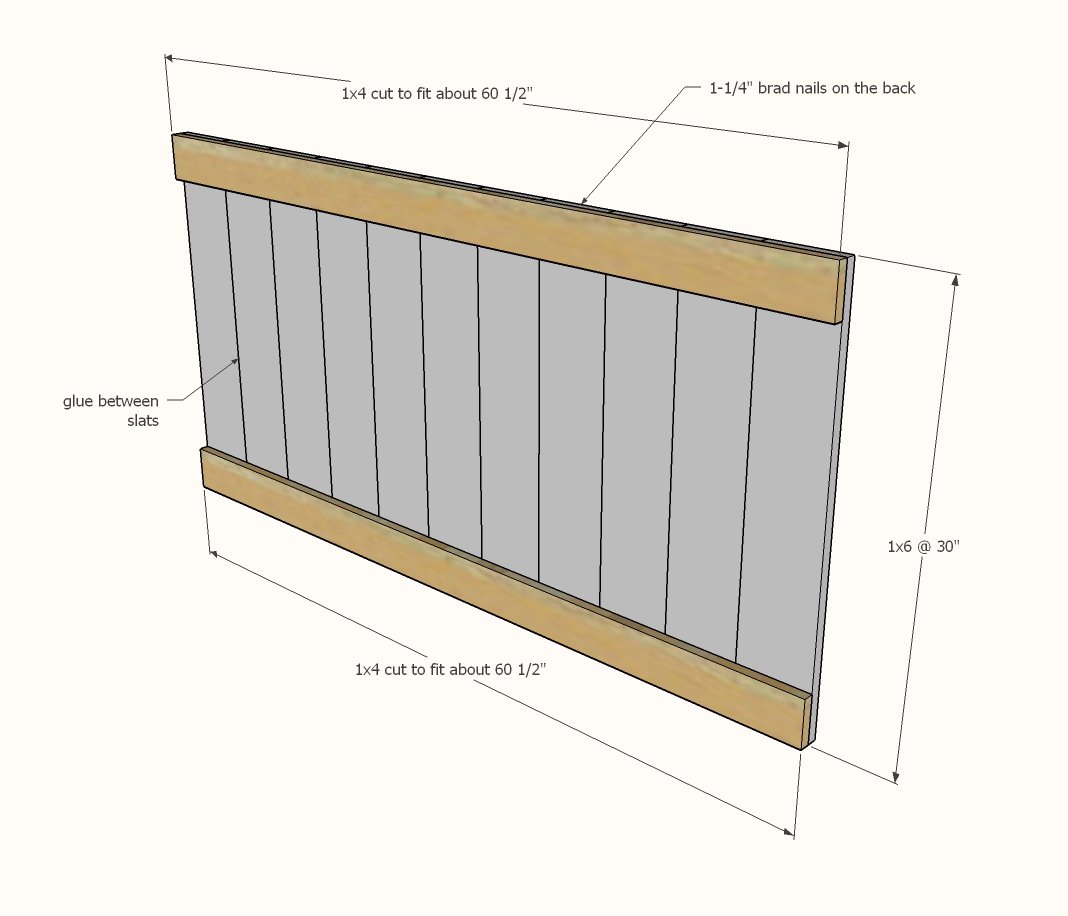
Layout the 30" 1x6 boards flat, side by side. Measure the overall width of all the 1x6 boards. Cut two 1x4s to this measurement. Nail the 1x6 boards with glue to the 1x4s. Apply glue between the 1x6 boards as you go. Make sure the panel is built square by measuring opposite diagonals (outside top corner of 1x4 to outside bottom corner of opposite 1x4) and adjusting so the opposite diagonals match.
Step 3
Attach the headboard panel to the 2x2s on the legs with 2-1/2" screws. Only screw to the headboard panel at the top and bottom portion backed by the 1x4s. Also attach the panel from the front 1x6s to the 2x2s with 1-1/4" brad nails.
Step 4
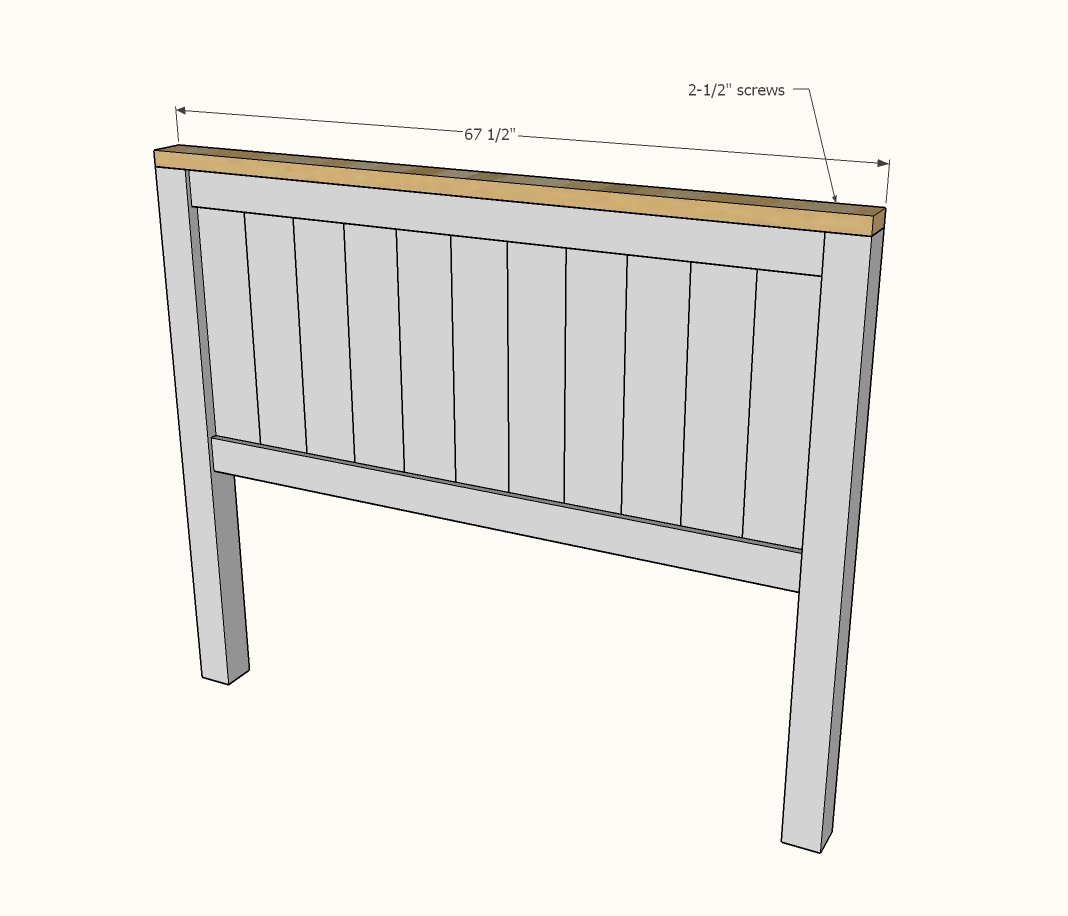
Measure and cut the 2x4 for the top. Attach with 2-1/2" screws.
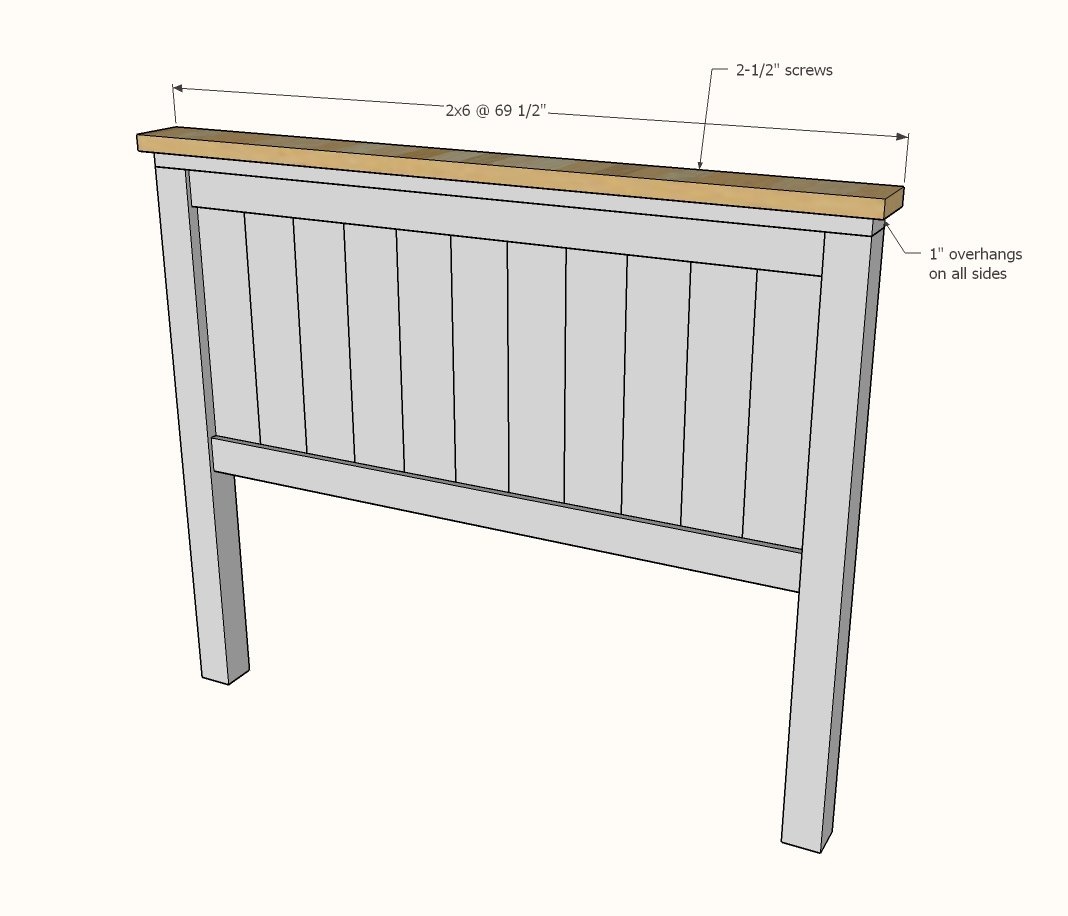
Repeat steps for the 2x6 top, leaving a 1" overhang on all four sides.
This completes the headboard build.
Step 6
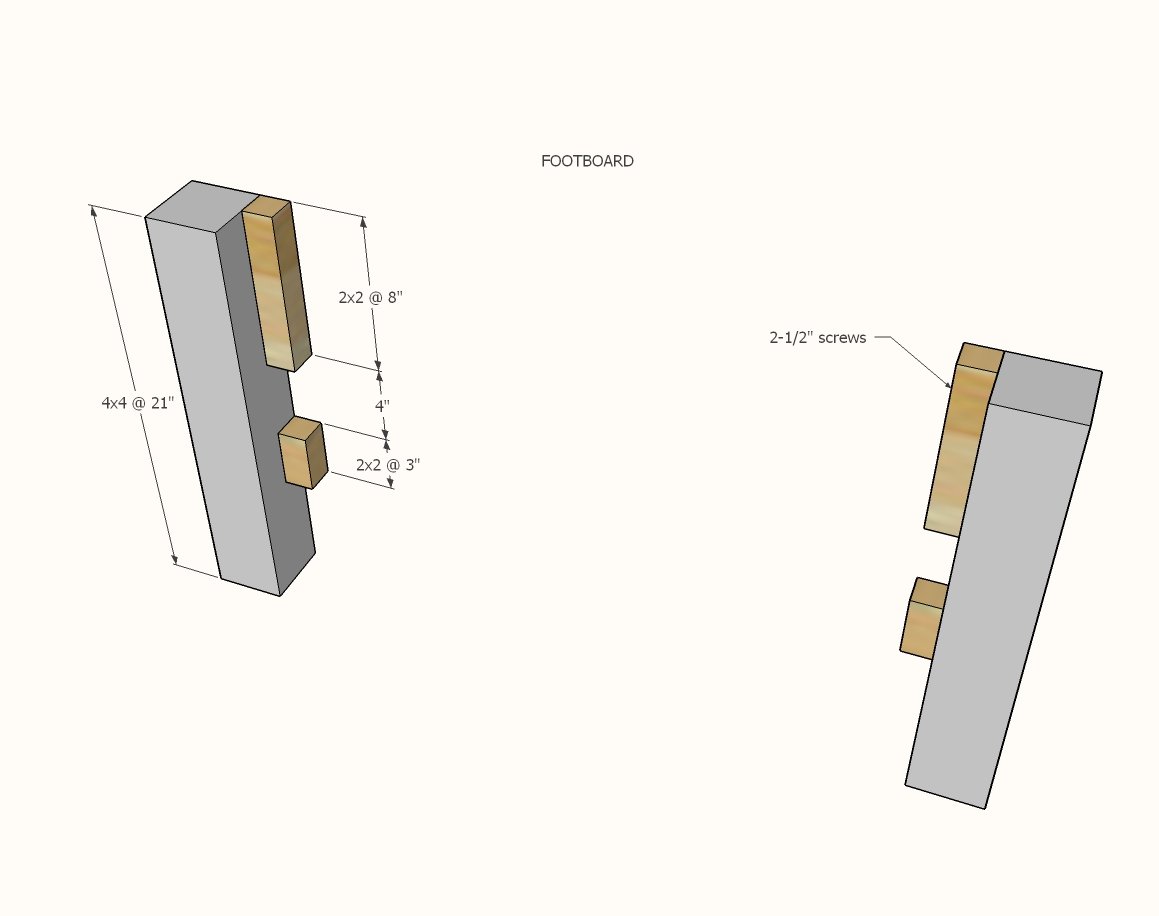
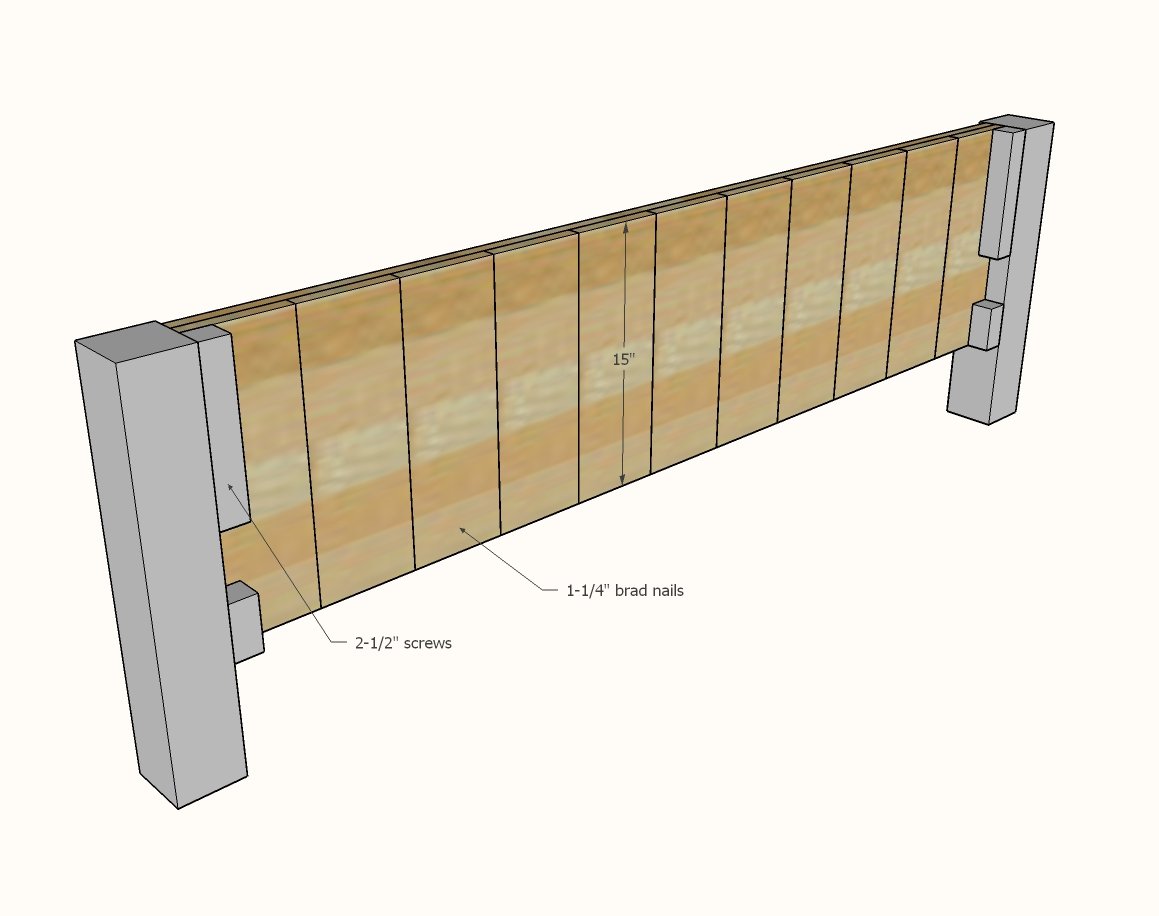
The footboard is constructed exactly as the headboard, with the exception of the 2x2 cleats and the overall height. Attach the 2x2 cleats with 2-1/2" screws. The smaller cleat may split on you since the wood piece is so small. You can predrill holes to help prevent wood from splitting.
Step 7
Build the panel and attach to the 2x2 cleats.
Step 8
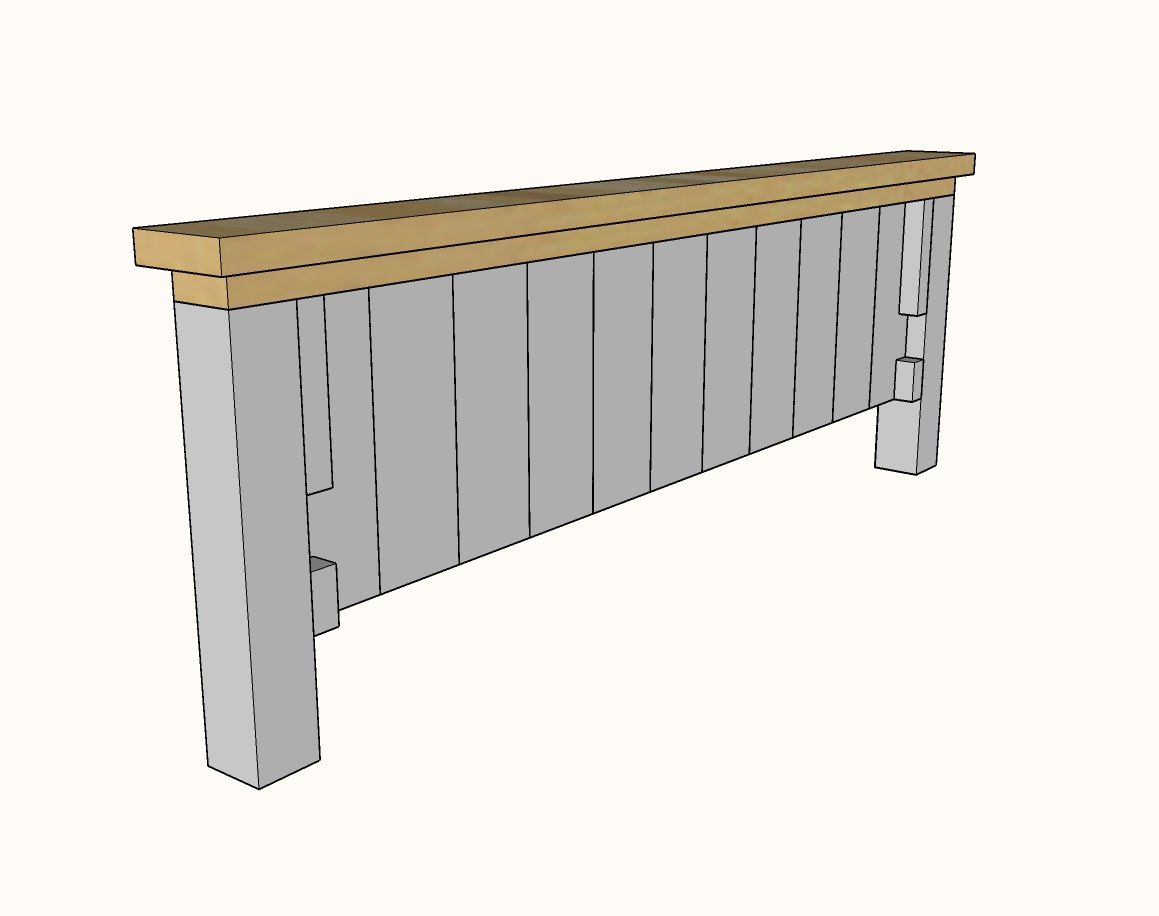
Attach top 2x4 and 2x6 to the footboard with 2-1/2" screws.
Step 9
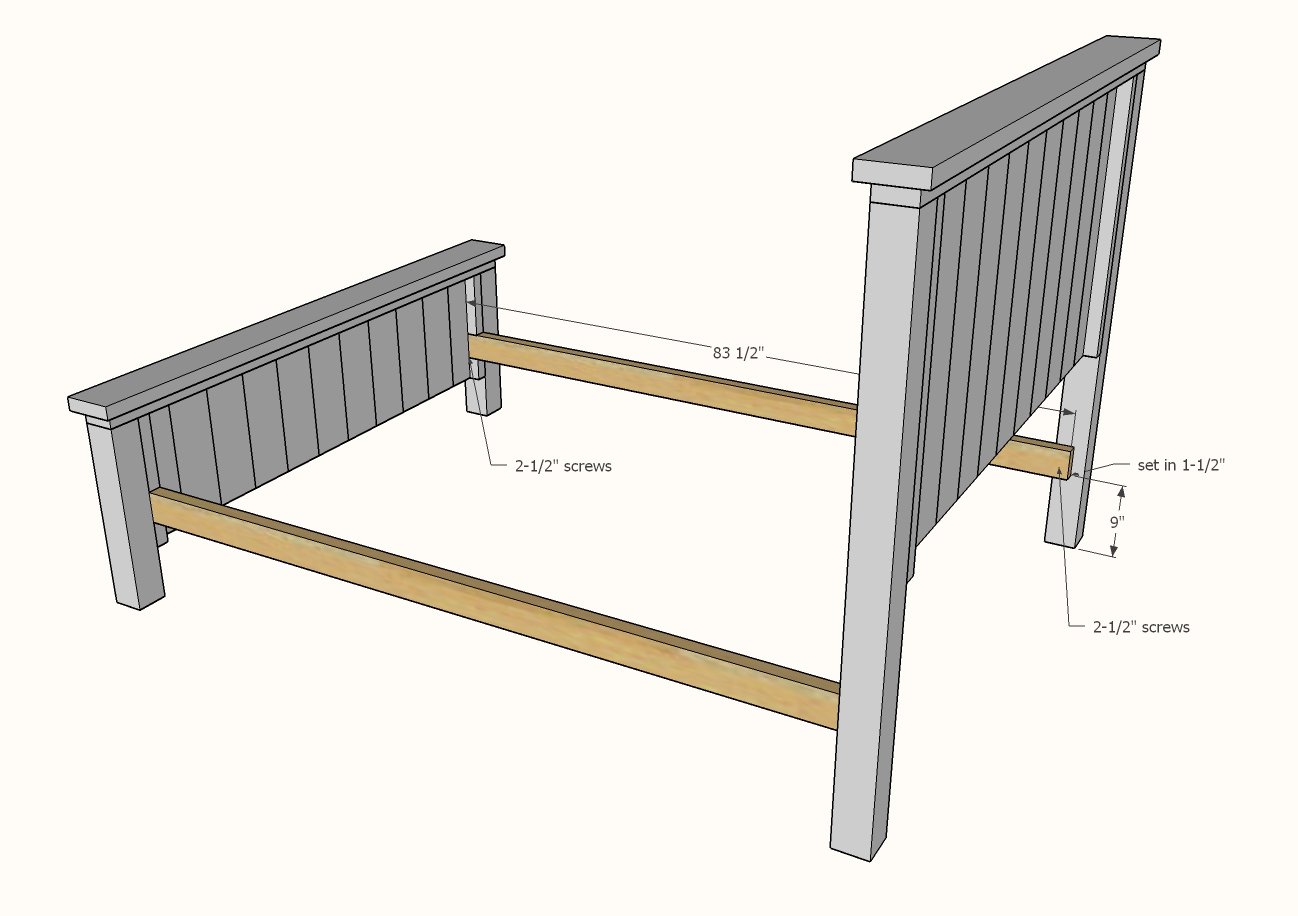
Attach the 2x4 cleat to the footboard, set in the 2x2 cleats, resting on the bottom cleat. Use 2-1/2" screws to attach the 2x4 to the 4x4 legs. Mark the headboard legs as shown in the diagram, and attach 2x4 cleat to the 4x4 legs with 2-1/2" screws.
Step 10
Use 2-1/2" screws to attach the headboard support between the cleats.
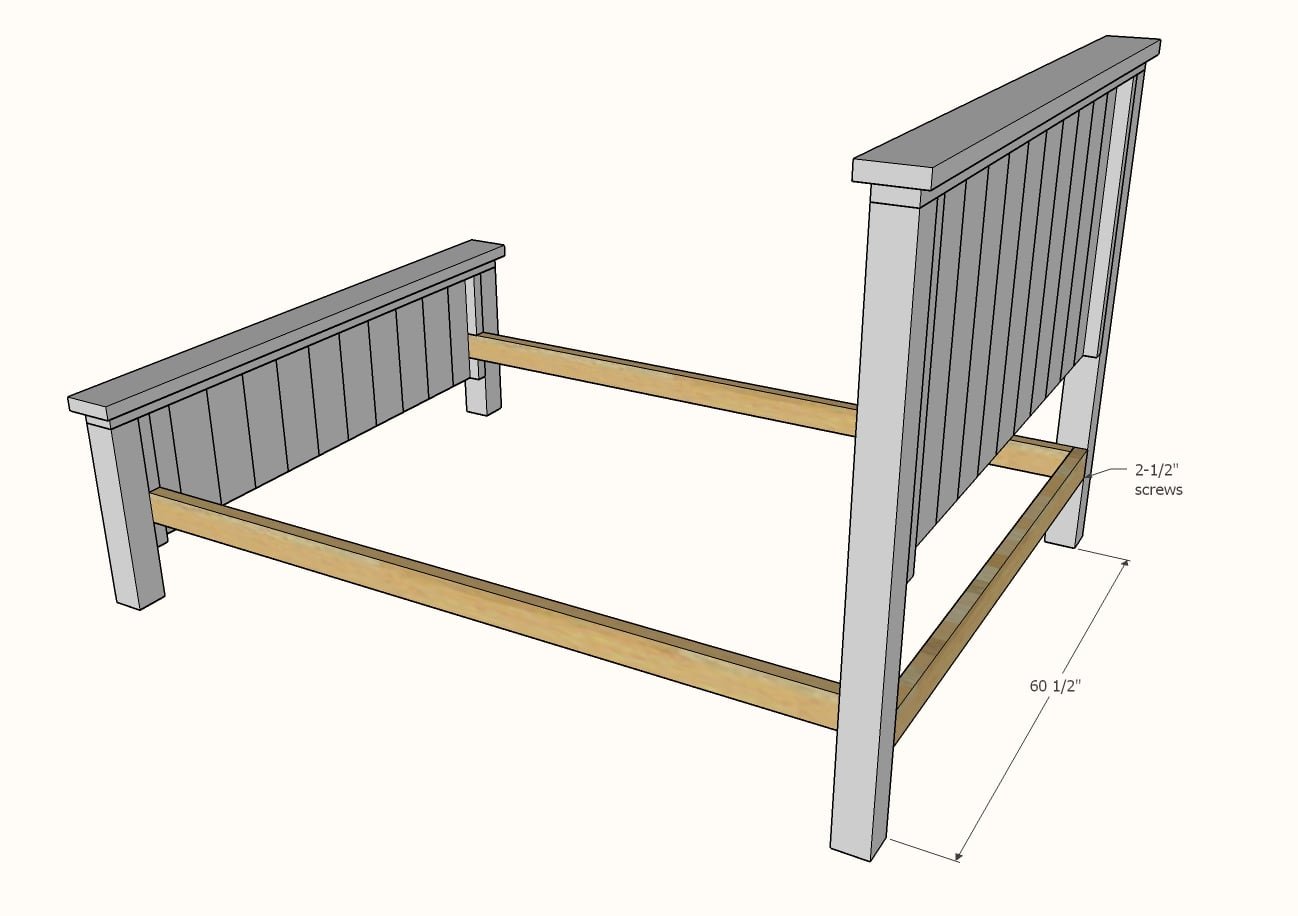
Center legs add a ton of support and strength to the bed.
First attach the shorter 2x4 "legs" to the center 2x4. Then place the center 2x4 in place inside the bed, and attach to the footboard and the headboard 2x4.
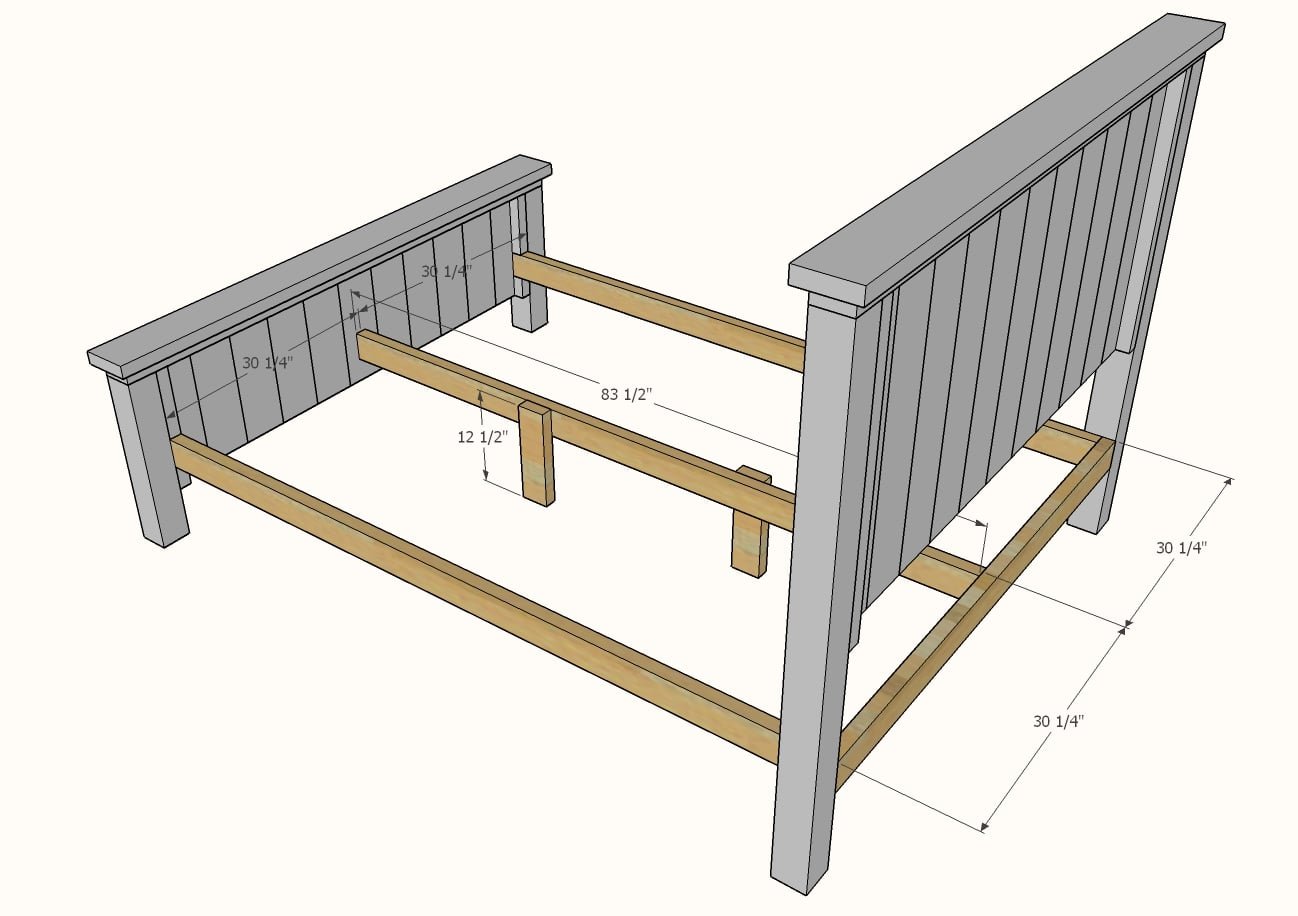
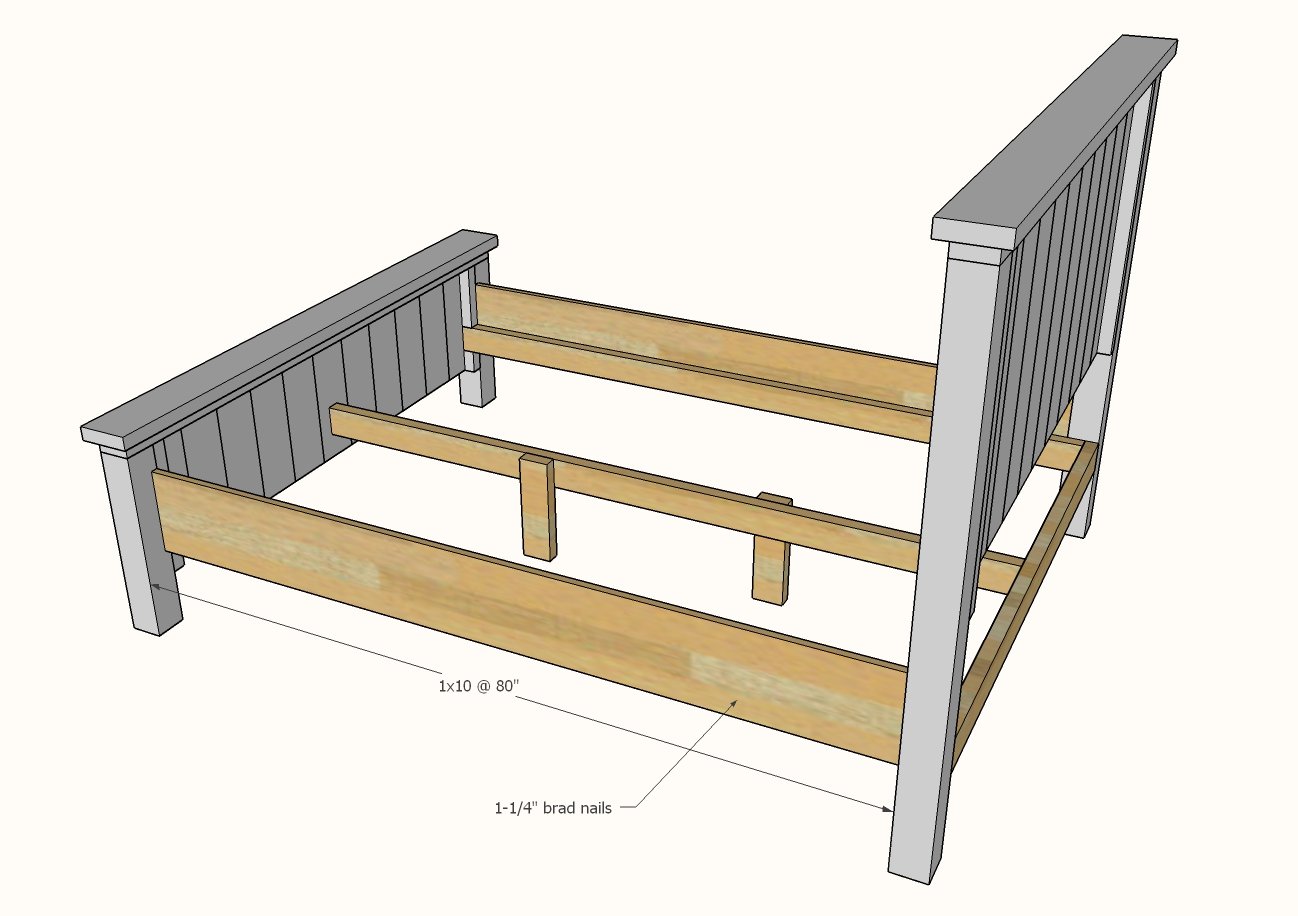
Measure and cut to fit the 1x10 siderails.
Attach with 1-1/4" brad nails and glue. NOTE: If you find your 1x10s need to be attached at the top, you can buy small L brackets and use to attach
Step 13
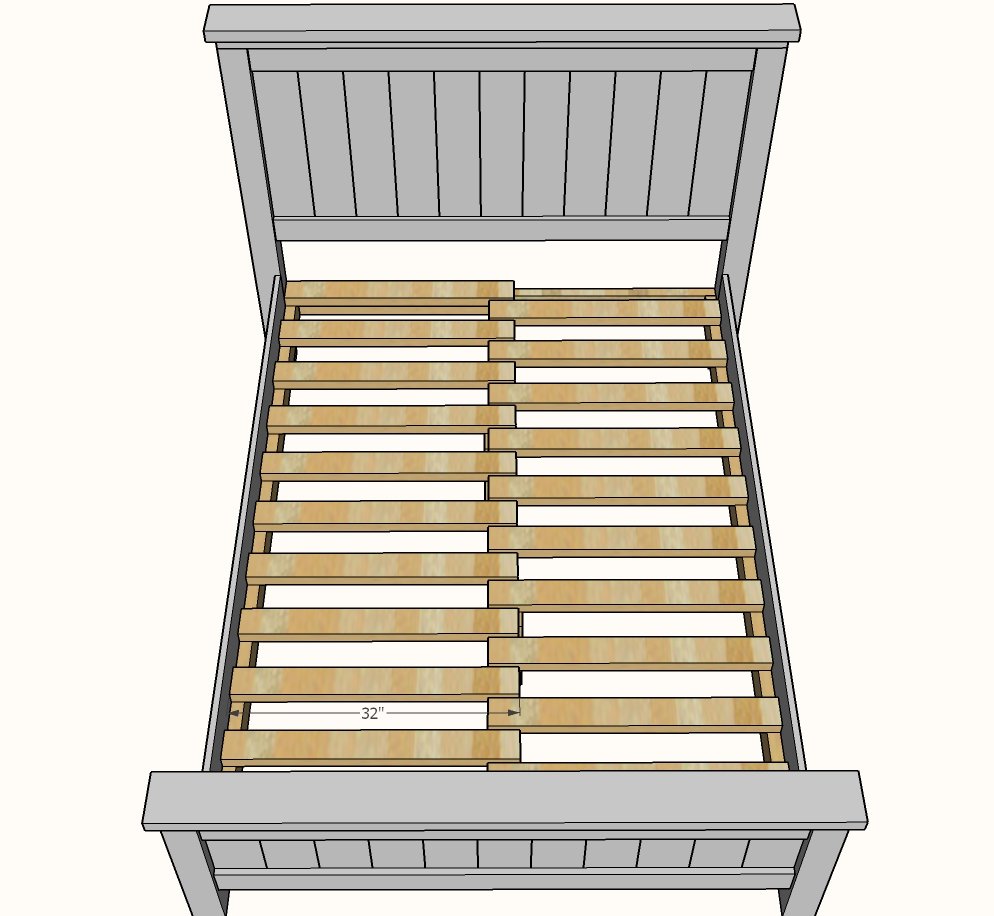
Cut the wood slats from remaining 2x4s and set inside the bed with about a 1/2" gap in between each slat. You only need one screw on the siderail cleat to attach - but you can also add screws to the center support.
Finishing
Sand all surfaces, starting with a medium grit and finishing with fine. Wipe off the dust, fill any holes or gaps with wood filler, and sand smooth once dry. Apply primer if you're painting, then finish with your choice of paint or stain and seal with a durable clear topcoat. For outdoor projects, use exterior-rated primer, paint or stain, and sealer so the piece stands up to the weather.
Source (temporary): https://www.ana-white.com/woodworking-projects/farmhouse-bed-queen-sized