Farmhouse Bed (Twin Size)
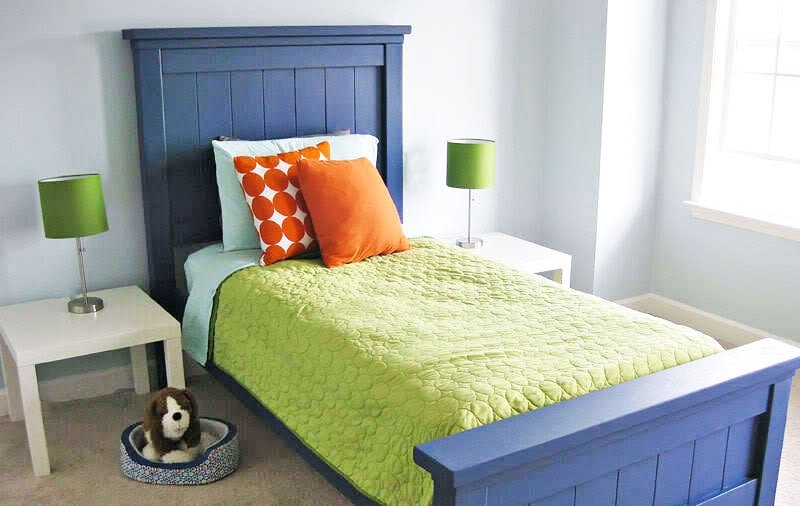
If you are looking for a classic farmhouse style bed for your child's room, this is the project for you. Featuring simple styling, large headboard and footboard tops, substantial legs, sturdy siderails, and the option to go with or without a boxspring, this beautiful bed is definitely worth your sweat! Step by step plans with diagrams and lots of readers submitted photos. Check out all our Farmhouse Bed plans here.
Specifications
| Project type | Beds and Bed Frames |
|---|---|
| Room | Bedroom |
| Style | Farmhouse Furniture |
| Difficulty | Intermediate |
| Estimated cost | $50 - $100 |
Dimensions
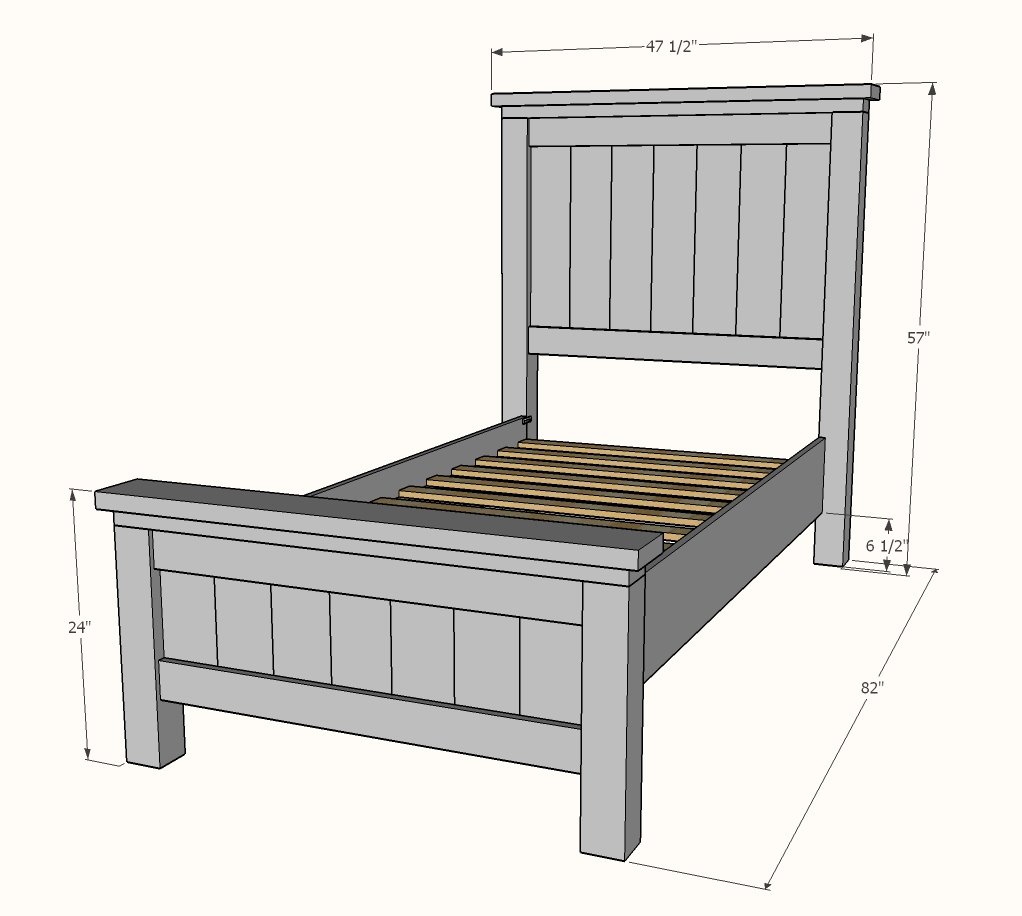
Use the size-specific shopping and cut lists below.
Shopping List
3 - 1x6 @ 8 feet long
1 - 1x6 @ 4 feet long
2 - 1x4 @ 8 feet long
2 - 4x4 @ 8 feet long
1 - 2x2 @ 8 feet long
4 - 2x4 @ 8 feet long
2 - 2x6 @ 8 feet long
2 - 1x10 @ 8 feet long
6 - 1x3 @ 8 feet long
2 - 1-1/2" x 1-1/2" L brackets
2 - 3" long straight mending plate brackets
Cut List
HEADBOARD
- 7 - 1x6 @ 30"
- 2 - 1x4 @ ~38-1/2" - measure and cut to fit
- 2 - 4x4 @ 54"
- 2 - 2x2 @ 30"
- 2 - 2x4 @ ~45-1/2" - measure and cut to fit
- 2 - 2x6 @ 47-1/2"
FOOTBOARD
- 7 - 1x6 @ 15"
- 2 - 1x4 @ ~38-1/2" - measure and cut to fit
- 2 - 4x4 @ 21"
- 4 - 2x2 @ 5-1/2"
- 2 - 2x4 @ ~45-1/2" - measure and cut to fit
- 2 - 2x6 @ 47-1/2"
BED FRAME & SIDERAILS
- 2 - 2x4 @ 80"
- 2 - 2x4 @ 8-1/2"
- 2 - 1x10 @ 75"
- 12 - 1x3 @ 38-1/2" - measure and cut to fit
Tools
- measuring tape
- square
- pencil
- safety glasses
- hearing protection
- drill
- circular saw
- nailer
- sander
Step-by-step Instructions
Cut the 1x6 headboard boards with a miter saw (preferred) or circular saw with straight edge.
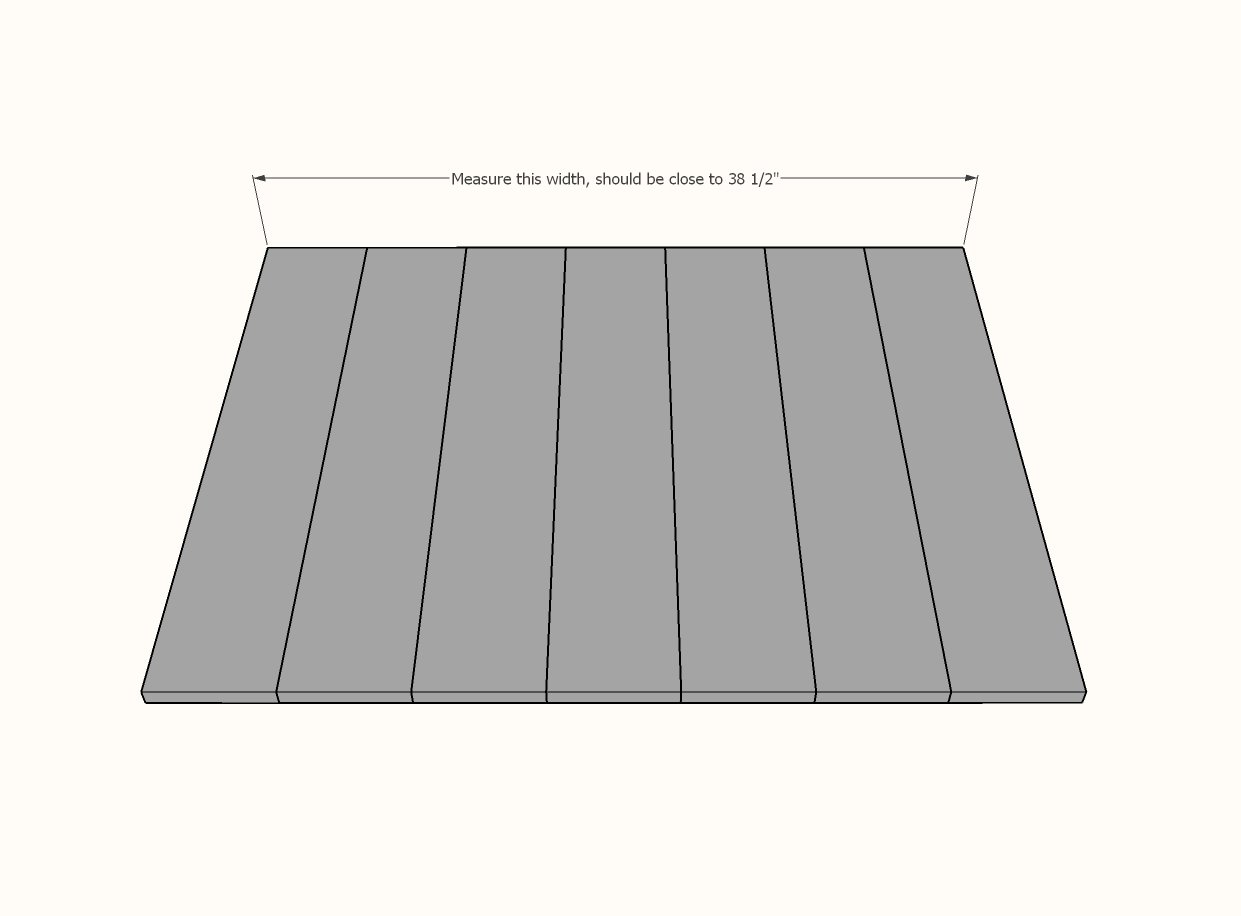
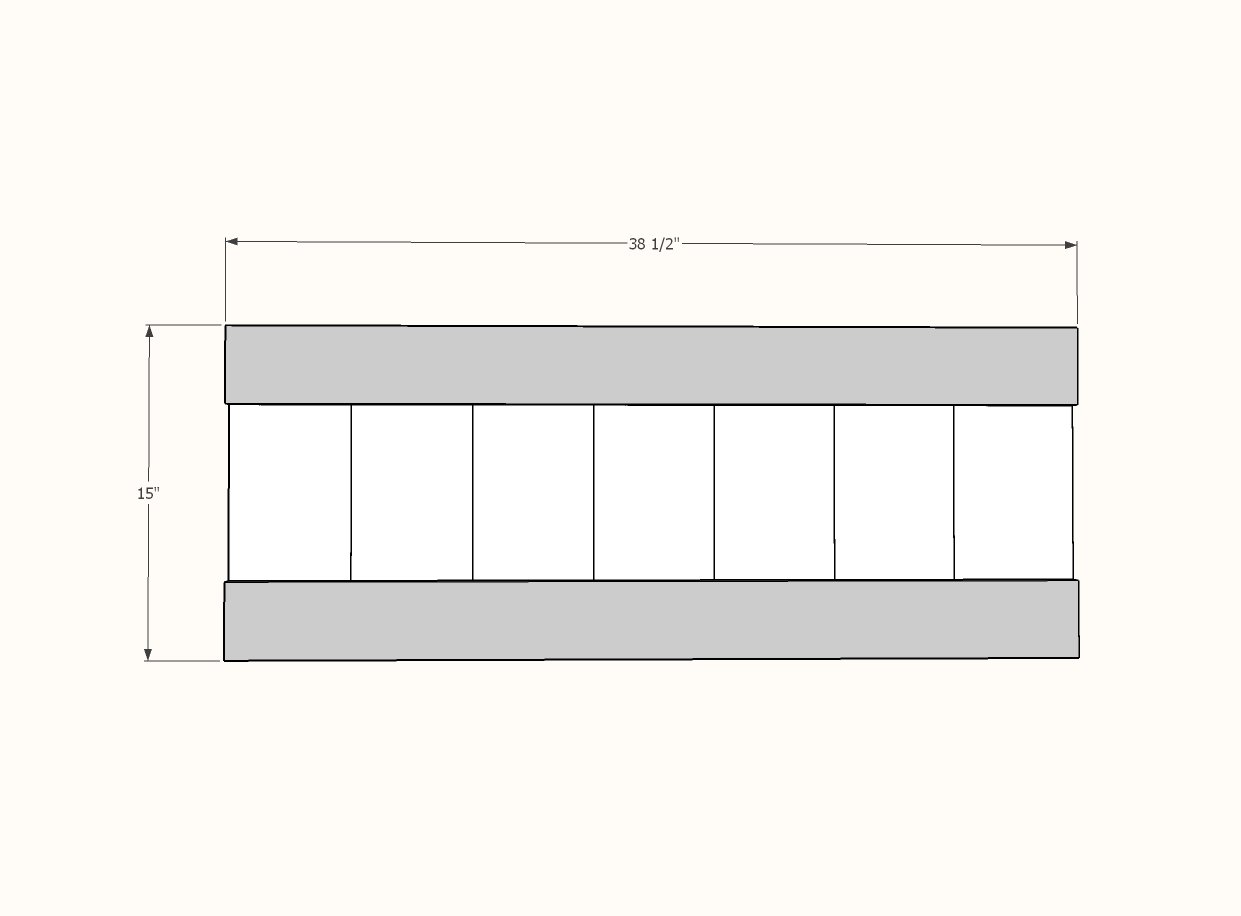
Lay out as shown in diagram. Measure the overall width. POCKET HOLE USERS: You can join the 1x6 boards together edge to edge with 3/4" pocket holes and 1-1/4" pocket hole screws.
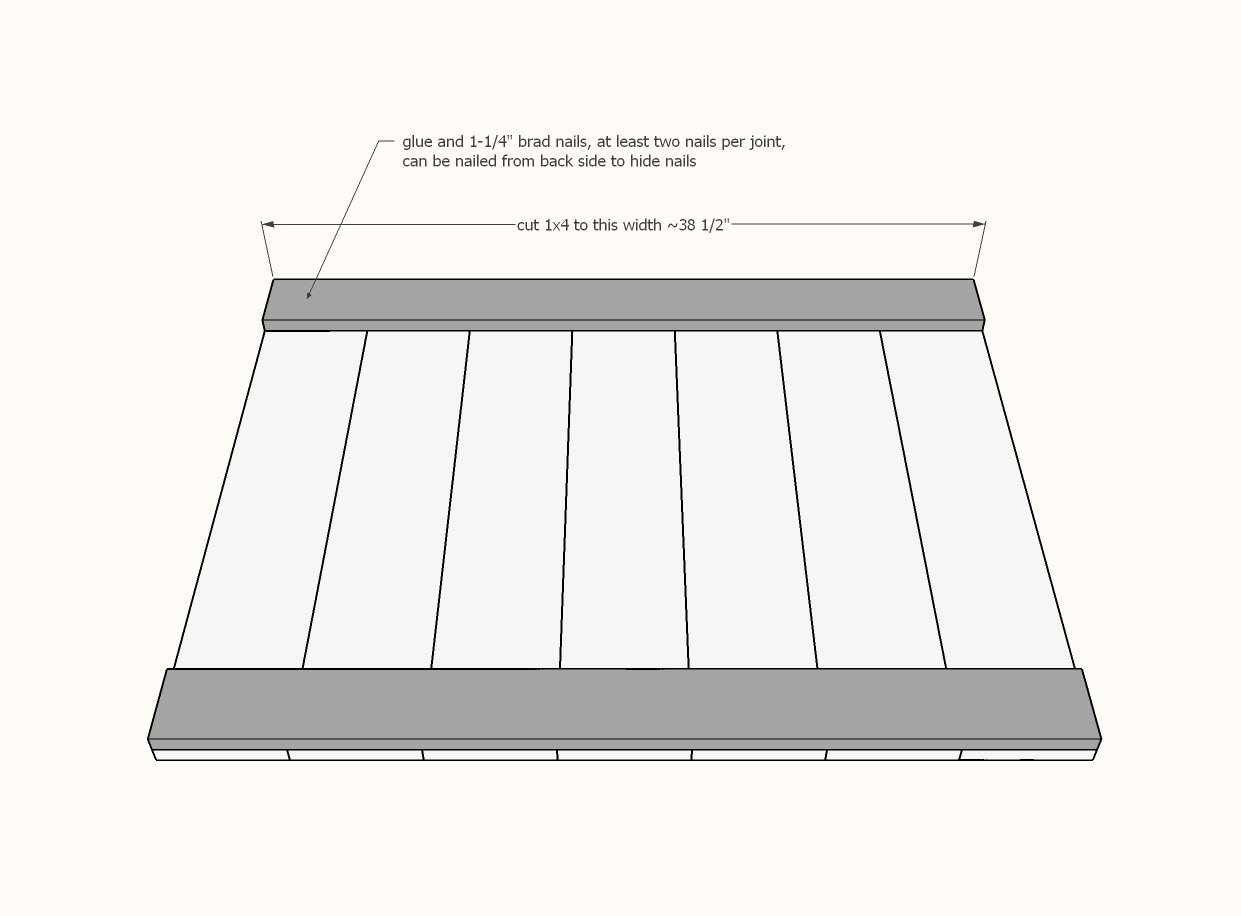
Attach 1x4 on top and bottom, with all outside edges flush, with 1-1/4" brad nails and glue.
Make sure the panel is square (not a parallelogram) by taking outside corner diagonal measurements and adjusting until the two opposite diagonals measurements match. POCKET HOLE USERS: Drill two 3/4" pocket holes on each end of the 1x4 boards. Attach to the 4x4 legs with 1-1/4" pocket hole screws. Then nail the 1x6 boards to the 1x4s.
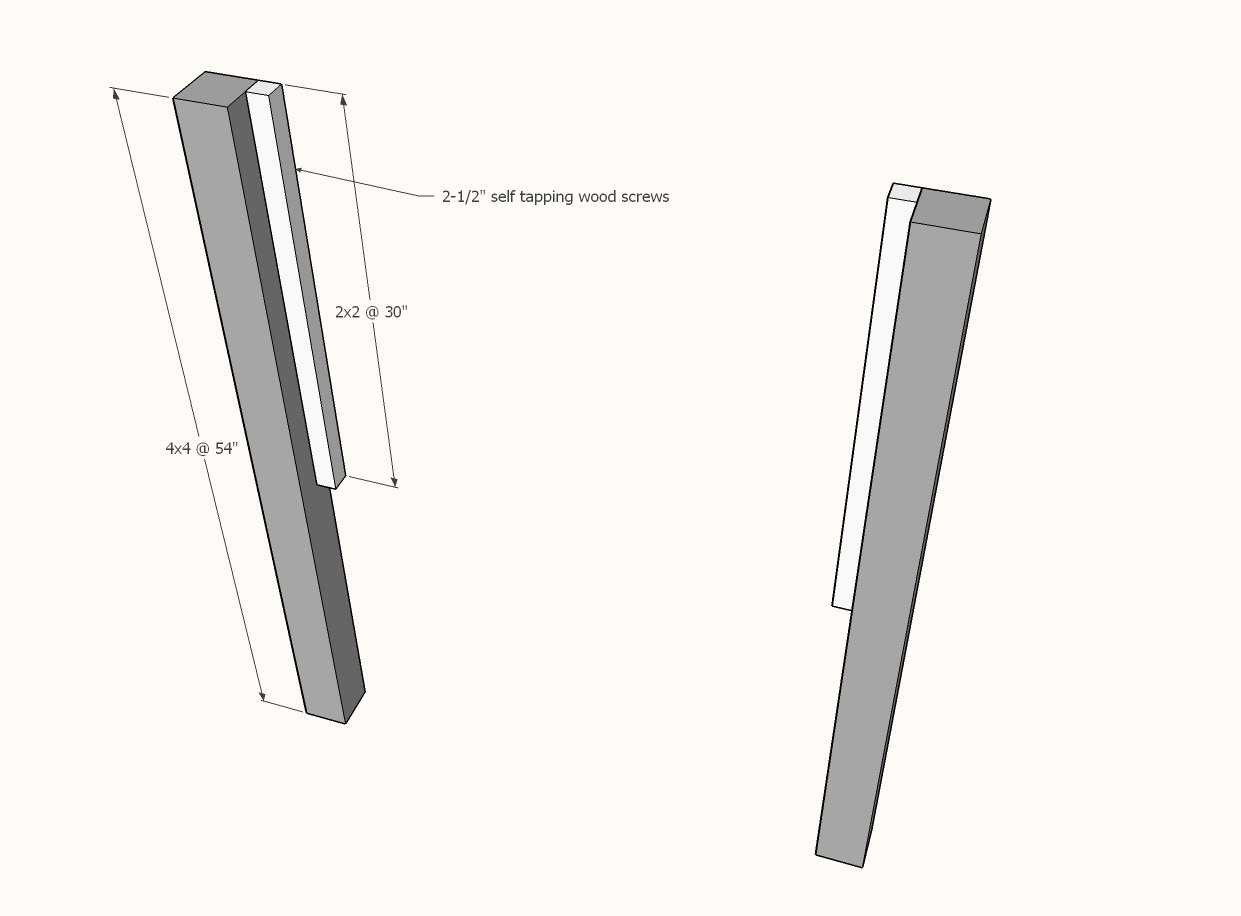
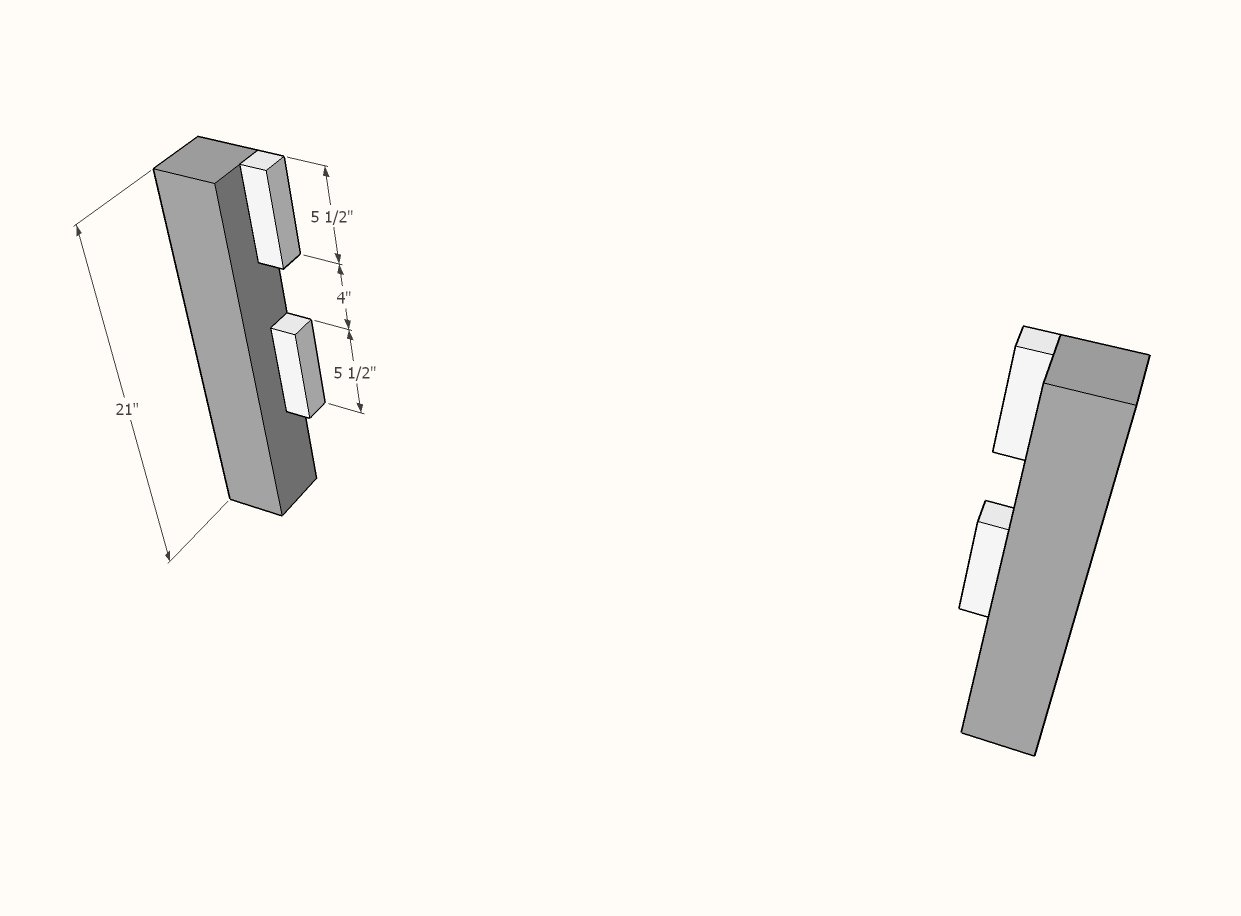
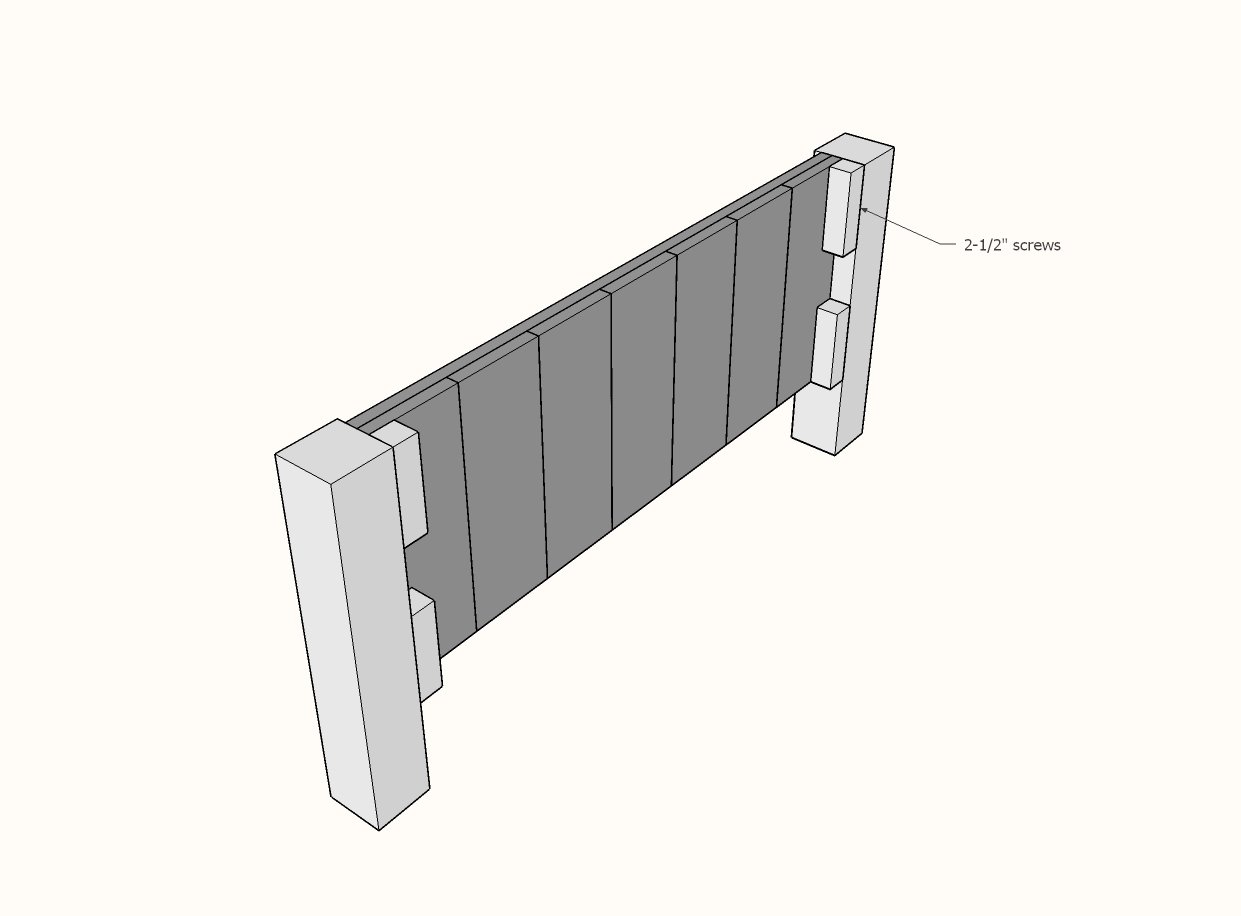
Use 2-1/2" screws to attach the 2x2 cleats to the inside back edge of the 4x4 legs.
POCKET HOLE USERS: Skip this step.
Attach panels to the 2x2 cleats with 2-1/2" screws and 1-1/4" brad nails and glue.
POCKET HOLE USERS: Skip this step.
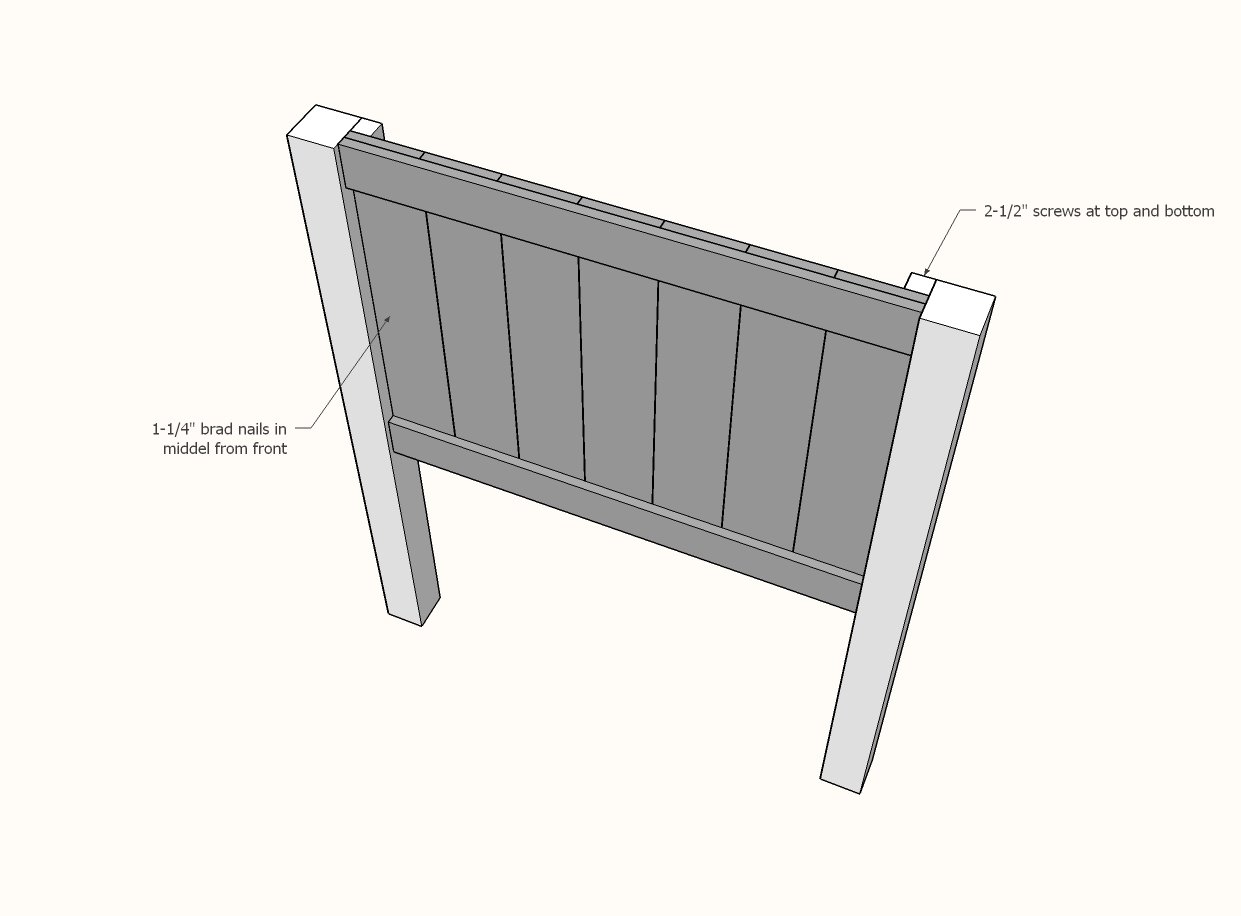
Step 5
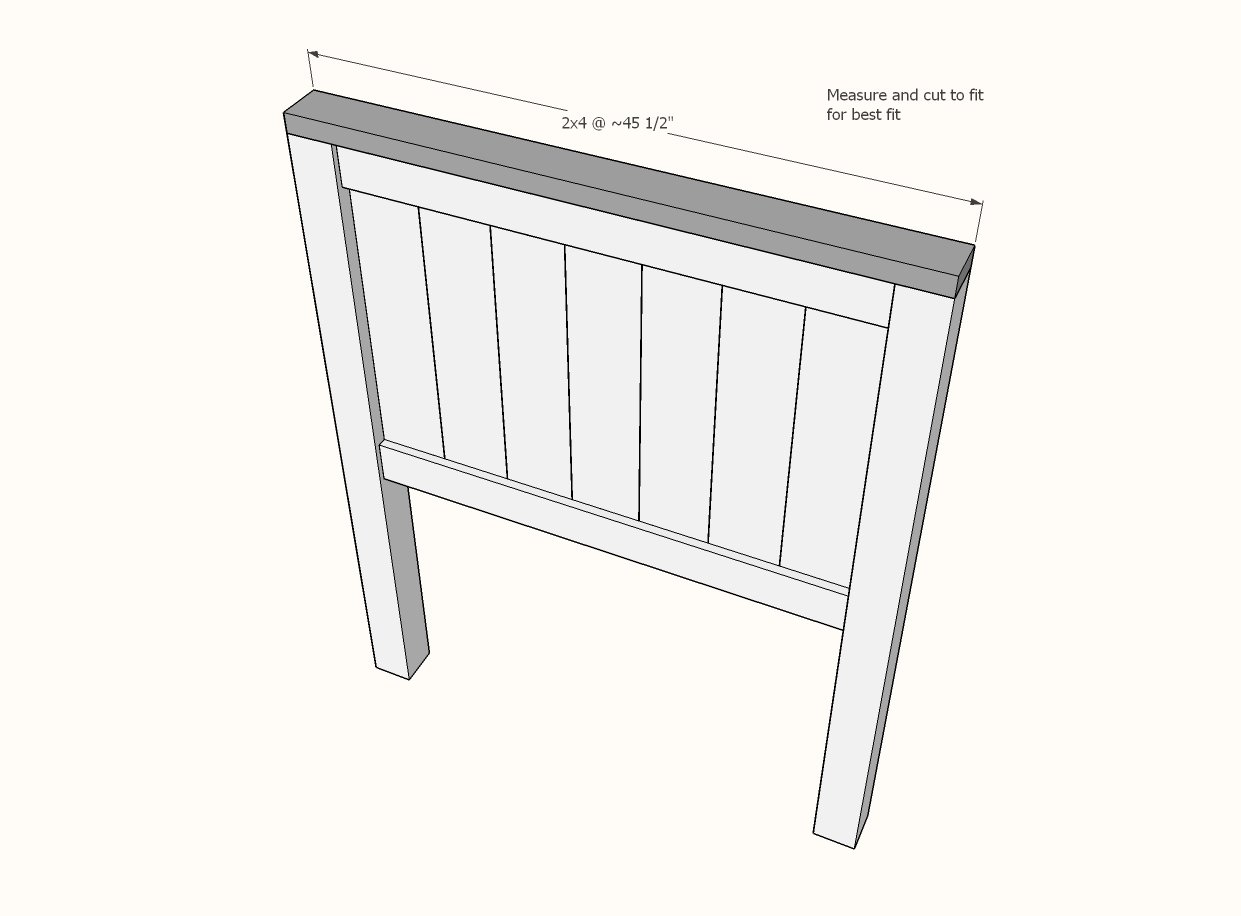
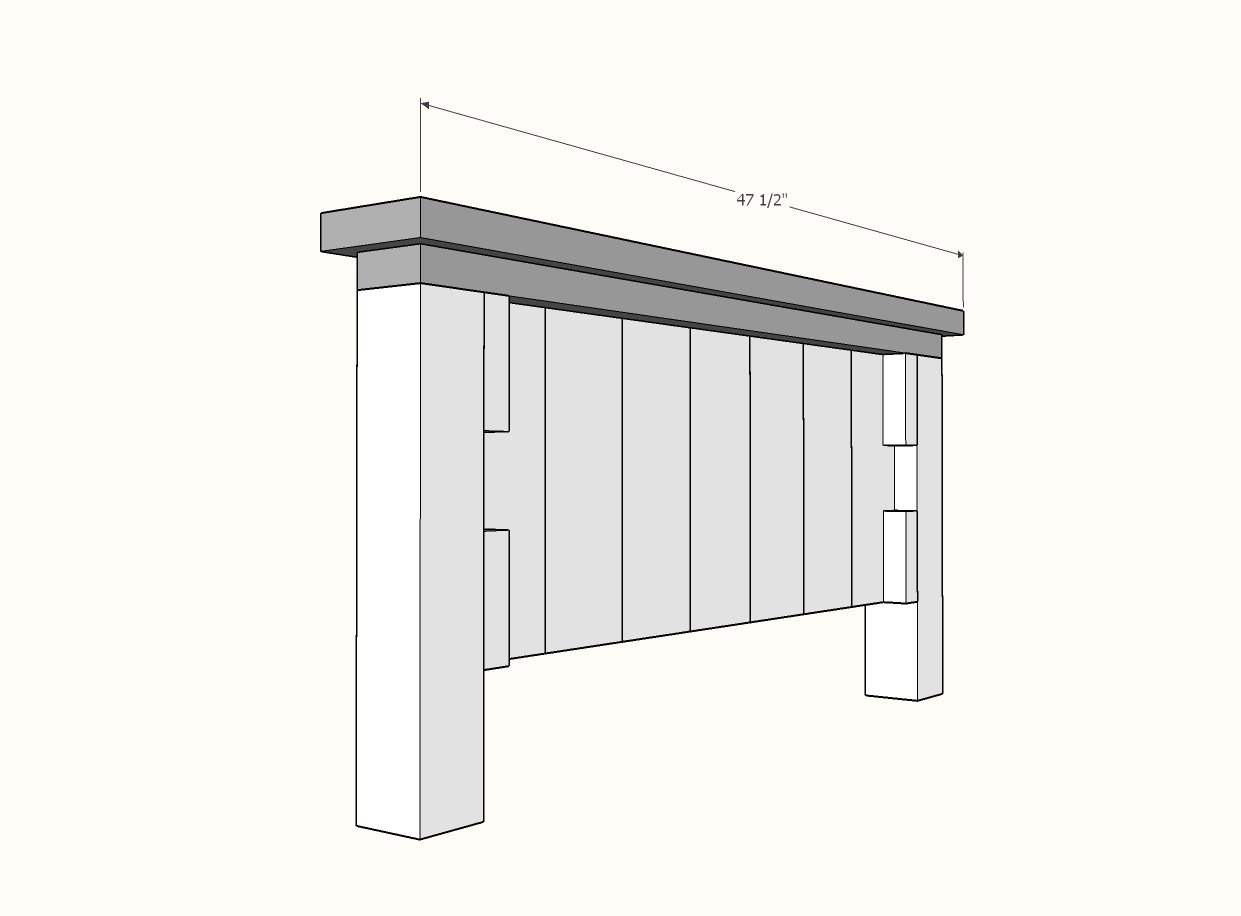
Measure and cut the top 2x4. Attach with 2-1/2" screws and glue.
Place 2x6 on top of 2x4. Make sure all outside edge overhangs are even.
Screw on with 2-1/2" screws and glue.
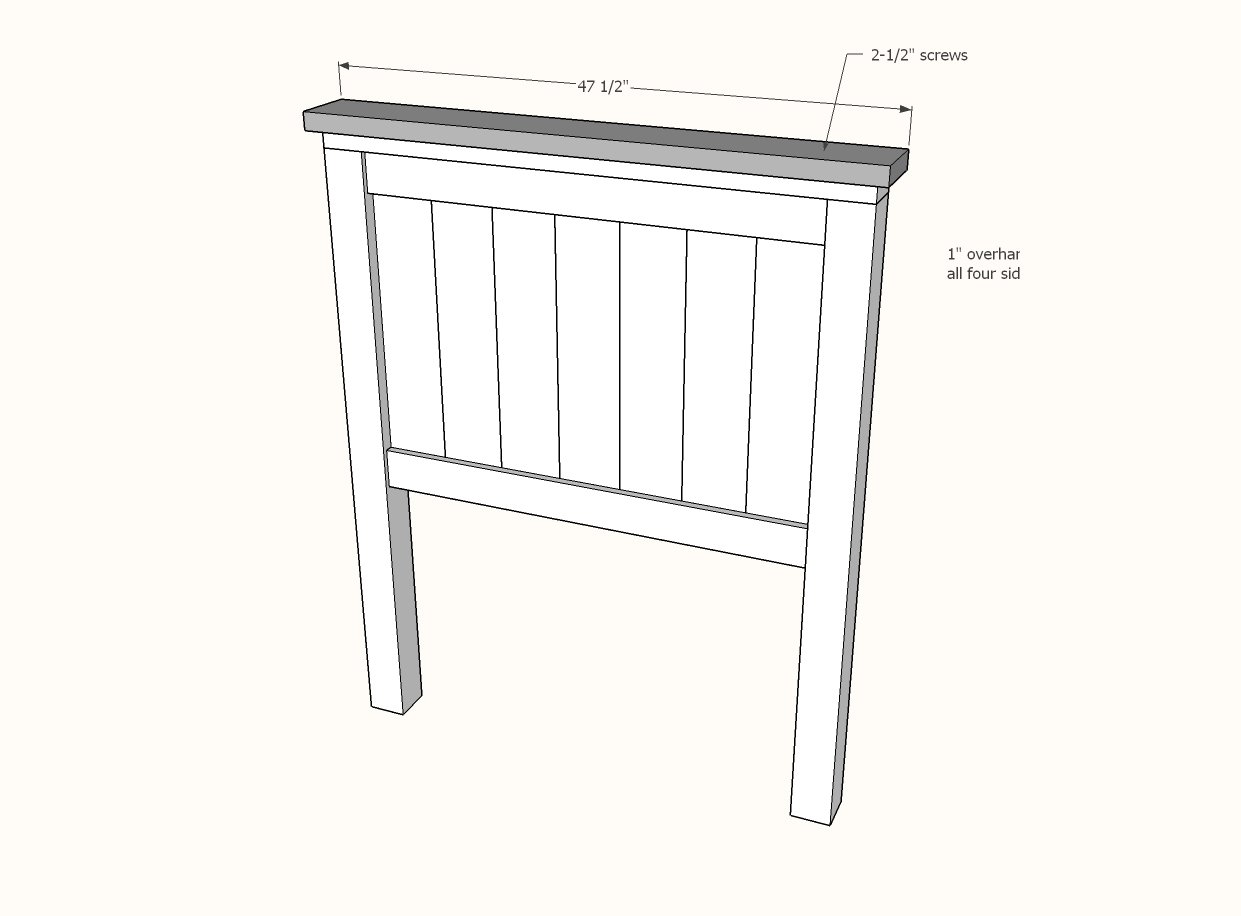
Step 7
Repeat the same steps for building the footboard panel.
Step 8
If using the cleats for attaching, leave a space in the cleats as shown for accepting the bed frame in later steps.
Step 9
Attach footboard panel as you did the headboard panel to the legs.
Step 10
Repeat steps to finish top of footboard.
Attach 2x4 cleats to the 4x4 legs with 2-1/2" screws.
The spacer blocks are not attached and are just used as guides for setting up the bed.
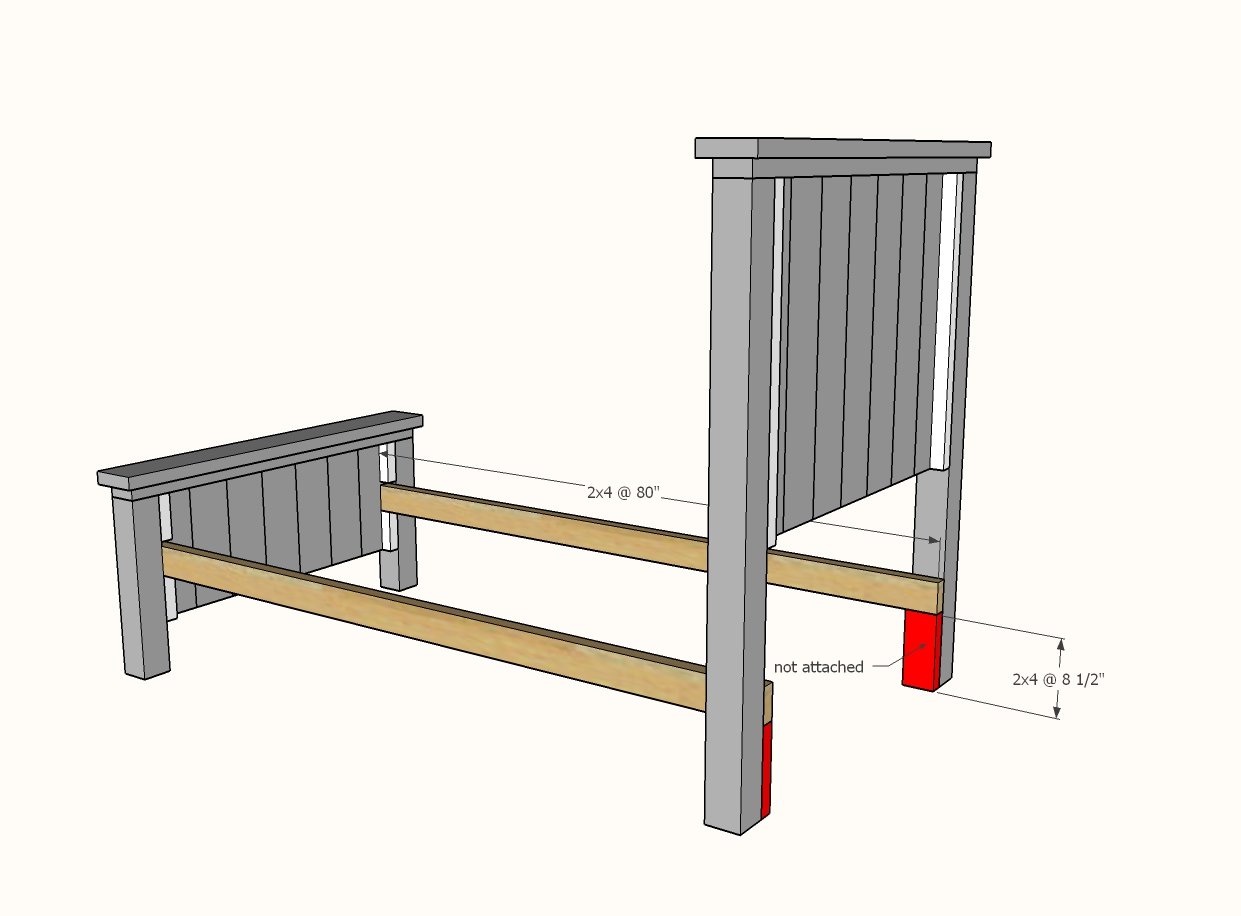
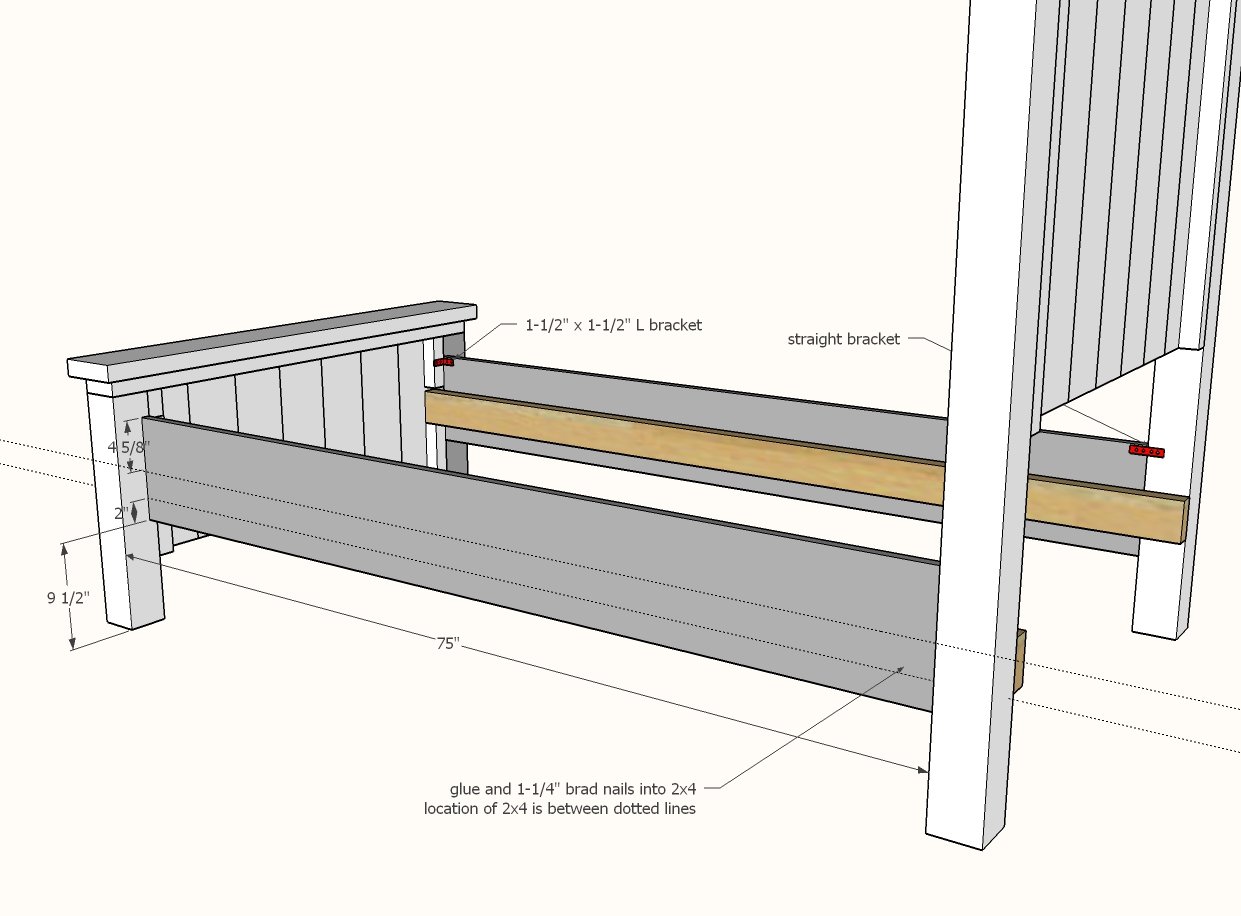
Place sidreails on cleats and attach with glue and 1-1/4" brad nails.
Also recommended is attaching with an L bracket and a straight bracket at tops. Pocket hole users can use a 3/4" pocket hole and 1-1/4" pocket hole screws.
Step 13
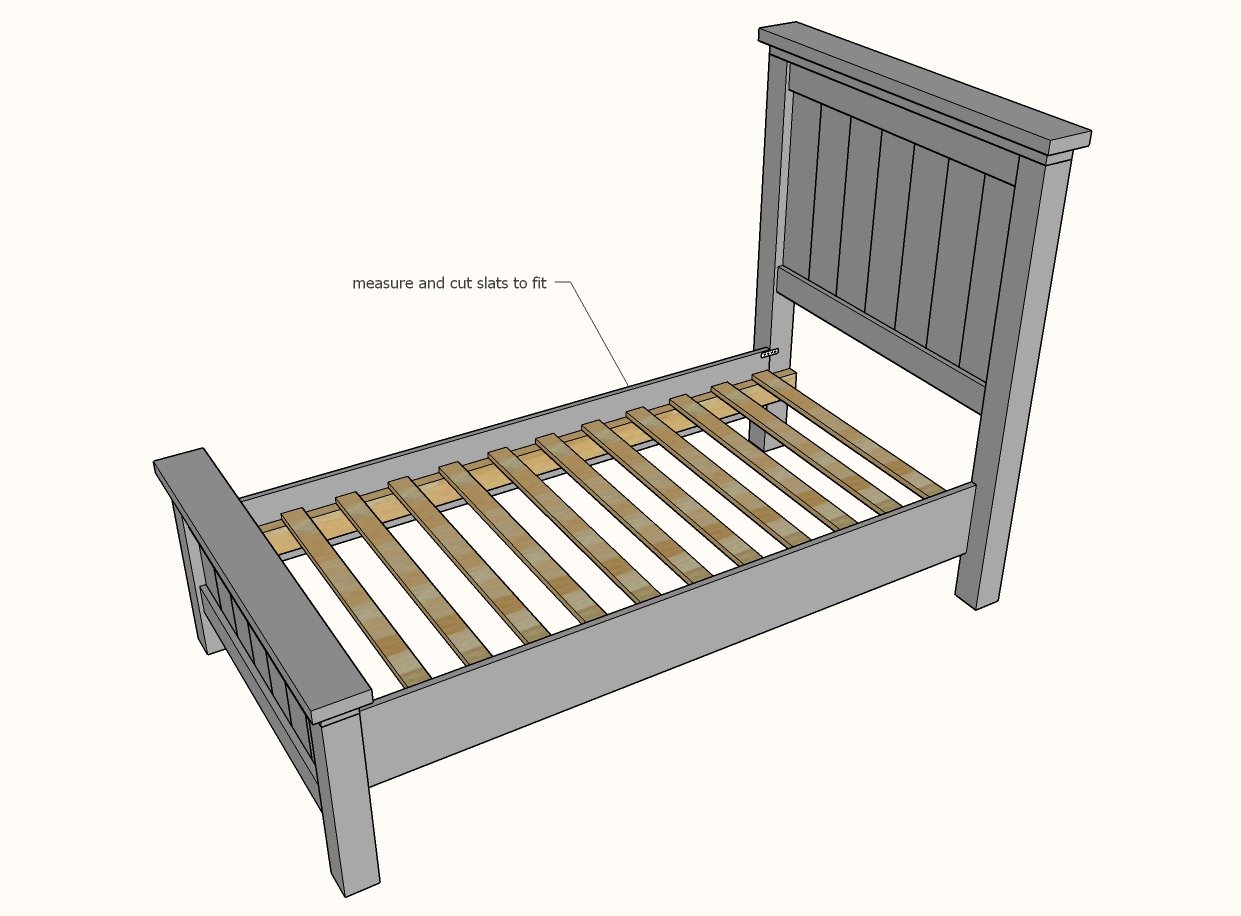
Lay slats in bed frame, space evenly. Screw down with 2" screws or 1-1/4" brad nails.
Finishing
Sand all surfaces, starting with a medium grit and finishing with fine. Wipe off the dust, fill any holes or gaps with wood filler, and sand smooth once dry. Apply primer if you're painting, then finish with your choice of paint or stain and seal with a durable clear topcoat. For outdoor projects, use exterior-rated primer, paint or stain, and sealer so the piece stands up to the weather.
Source (temporary): https://www.ana-white.com/woodworking-projects/farmhouse-bed-twin-size