Farmhouse Bench
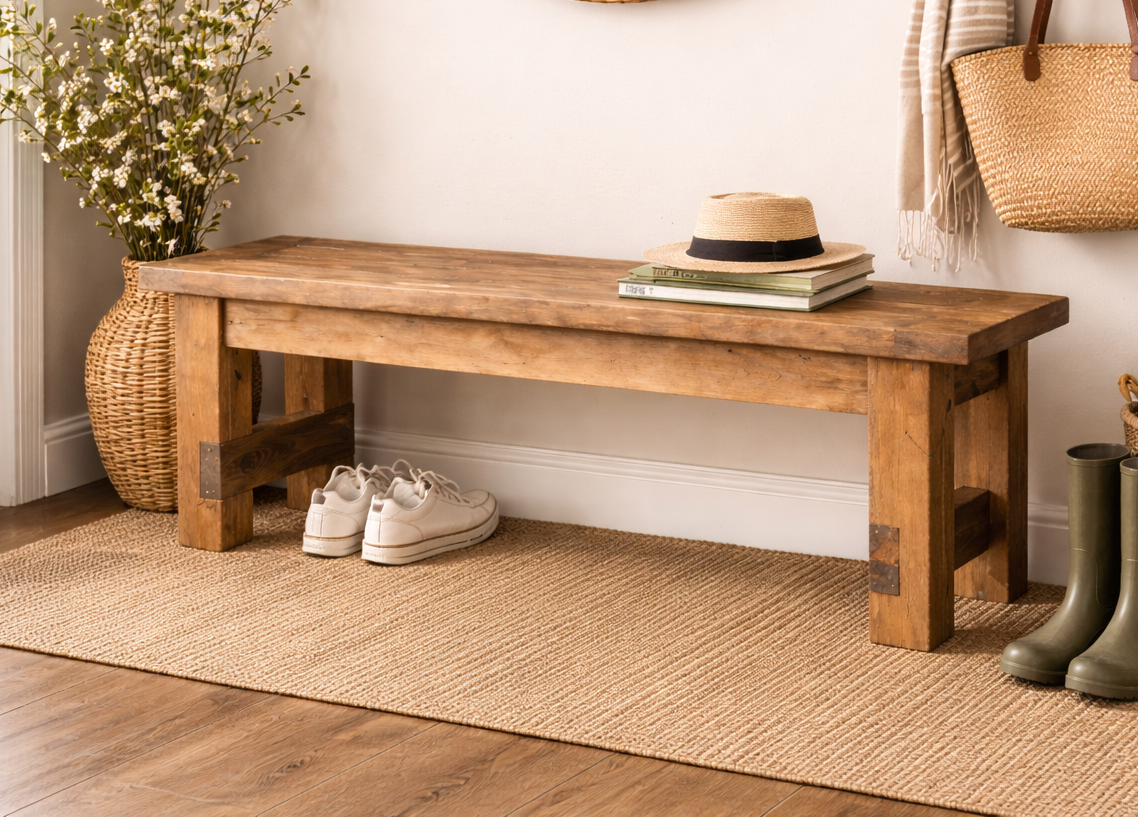
This farmhouse bench is easy to build and is rustic and substantial. It is designed to match our Farmhouse Table Plans.
Specifications
| Project type | Bench |
|---|---|
| Room | dining room |
| Style | Farmhouse Furniture |
| Difficulty | Starter Projects |
| Estimated cost | Under $20 |
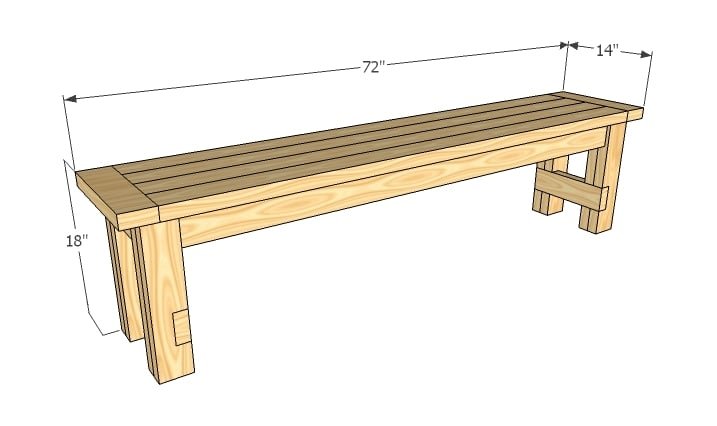
Dimensions
Use the size-specific shopping and cut lists below.
Shopping List
- 4 – 2x4s, stud length or 8 foot length
- 2 – 1x4s, 8 foot length
- 1 – 1×2, 8 foot length
- 2 1/2″ screws
- 2″ self tapping wood screws
Cut List
- 8 – 2x4s @ 16 1/2″ (Legs)
- 2 – 1×4 @ 2 1/4″ (Spacers)
- 2 – 1×4 @ 6″ (End Aprons)
- 2 – 2×4 @ 12″ (Stretchers)
- 2 – 1×4 @ 61″ (Side Aprons)
- 2 – 1×4 @ 9 1/2″ (Inner Aprons)
- 5 – 1×2 @ 9 1/2″ (Supports)
- 4 – 2×4 @ 65″ (Bench Seat Boards)
- 2 – 1×4 @ 14″ (Breadboard Ends)
Tools
- measuring tape
- square
- pencil
- safety glasses
- hearing protection
- circular saw
- sander
- countersink drill bit
Step-by-step Instructions
Step 1
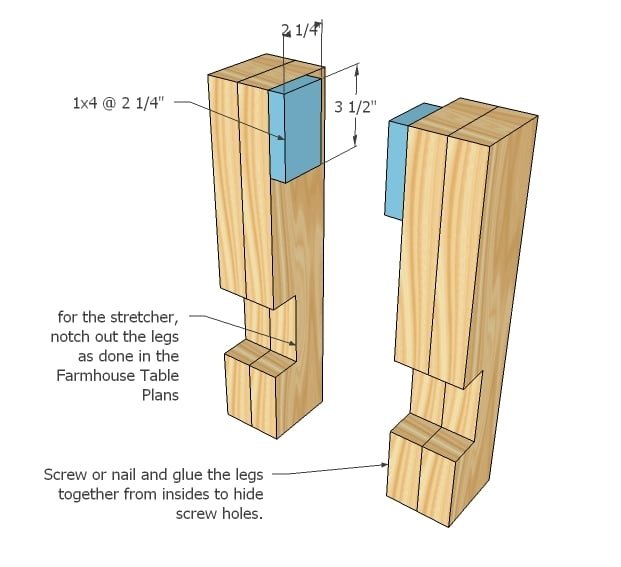
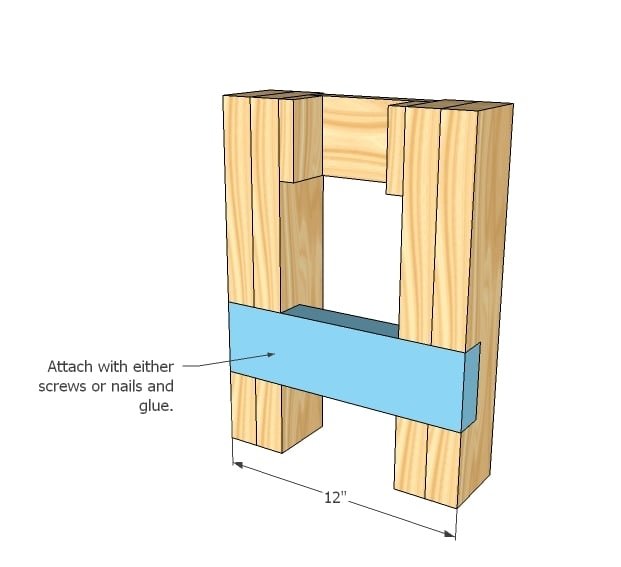
Legs The notches and stretchers on the legs is optional. Notch out your legs (for full instructions see the Farmhouse Table post) and laminate your legs together in pairs of 2 with glue and 2 1/2″ screws. Then take note of the placement of the spacers and attach to the insides of the legs. This will differ depending on the leg. Attach with 2″ screws and glue.
Step 2
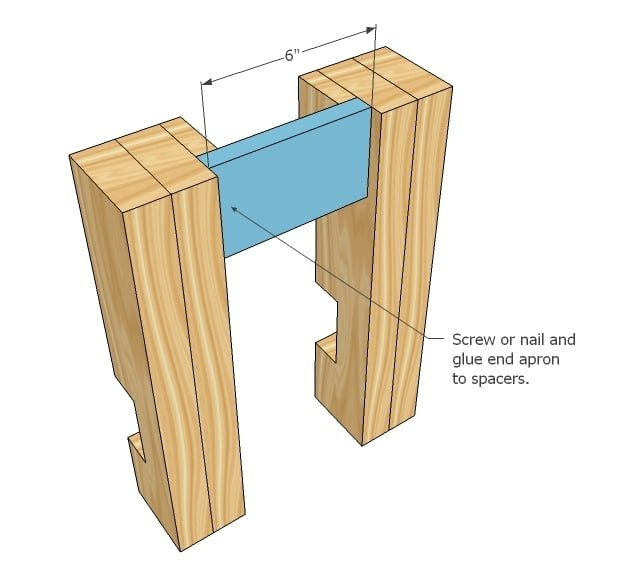
End Aprons Attach end aprons to the spacers as shown above. Use glue and 2″ screws.
Step 3
Stretcher The stretcher gets attached in the same method. Screws and glue.
Step 4
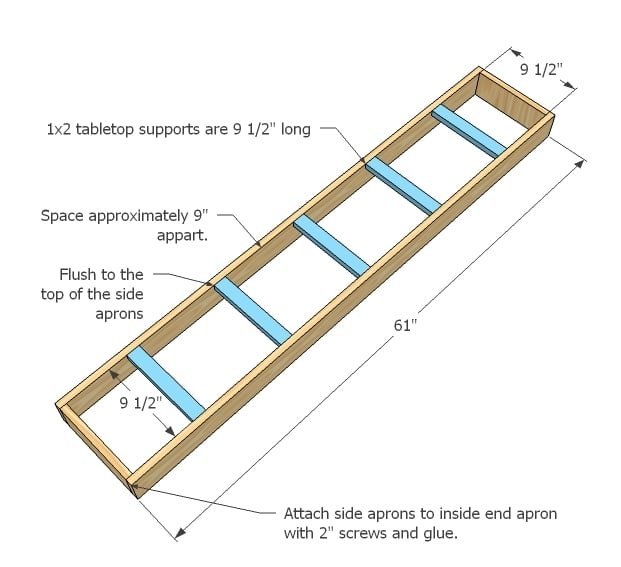
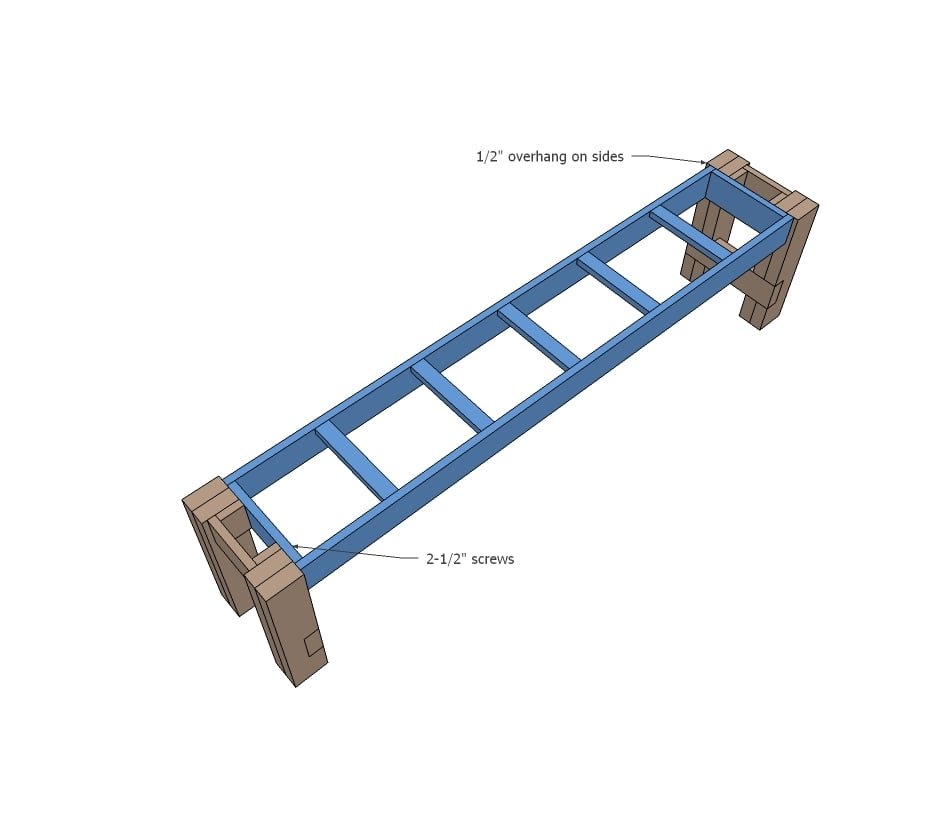
Bench Frame Build the bench frame, keeping the 1×2 supports flush to the top. Easy method is to flip it all over and keep the supports flush to the bottom:)
Step 5
Step 6
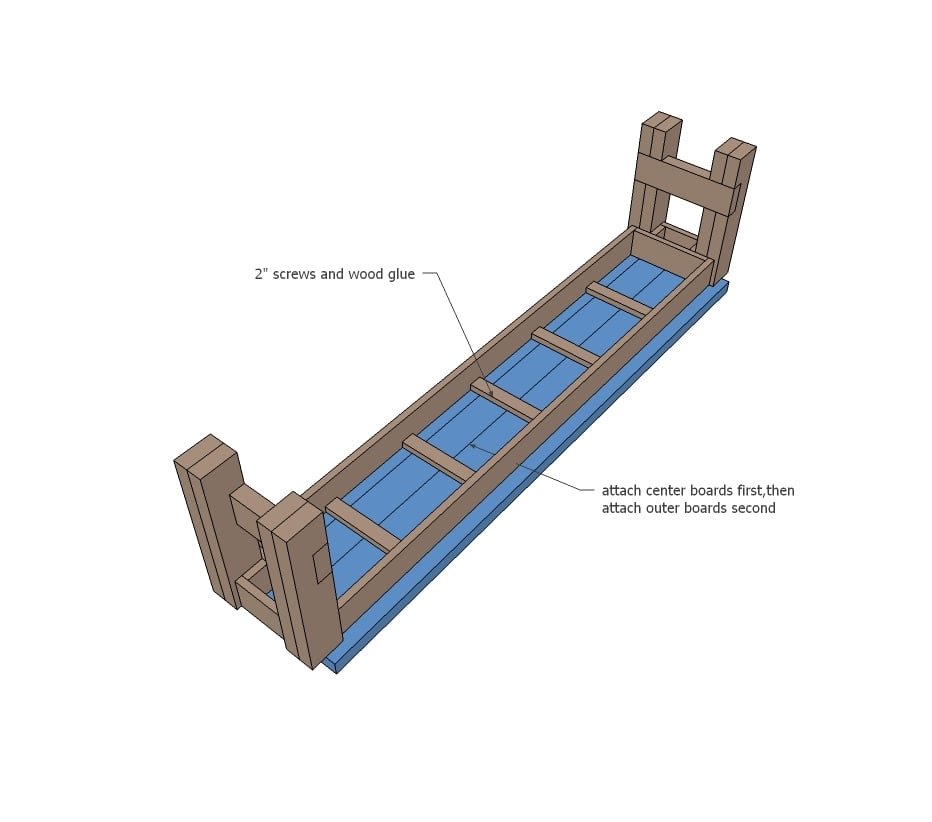
Seat Boards Find the center of the supports and begin attaching seat boards from the underside. Work with the boards to minimize gaps as you go. Attach all seat boards. If you have a pocket hole system, you would build your bench seat separate, and then attach.
Step 7
Breadboard Ends If you have a pocket hole system, you would attach the breadboard ends directly to the seat boards in step 6. Otherwise, attach to leg bases.
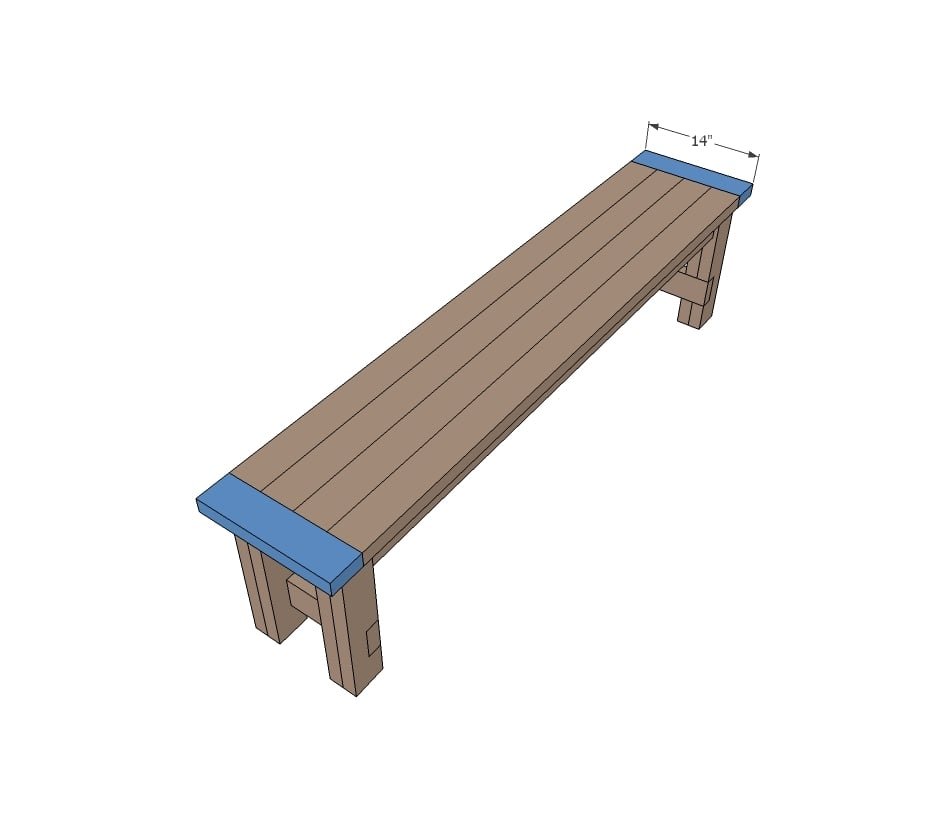
Step 8
Finishing If you are staining, be very careful to not let glue dry on the project, as these areas will not take stain. Fill holes with wood filler, sand and paint or stain as desired.
Finishing
Sand all surfaces, starting with a medium grit and finishing with fine. Wipe off the dust, fill any holes or gaps with wood filler, and sand smooth once dry. Apply primer if you're painting, then finish with your choice of paint or stain and seal with a durable clear topcoat. For outdoor projects, use exterior-rated primer, paint or stain, and sealer so the piece stands up to the weather.
Source (temporary): https://www.ana-white.com/woodworking-projects/farmhouse-bench-no-pocket-holes-version