Farmhouse Canopy Bed Frame (All Sizes)
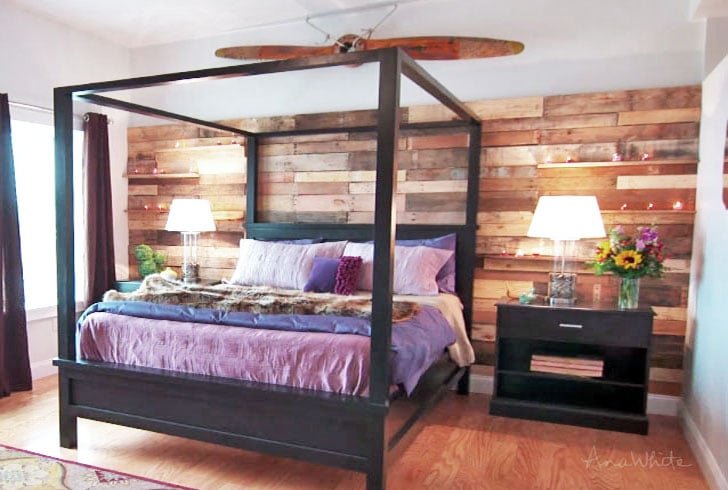
Need an amazing bed on a budget? Build your own farmhouse bed frame with canopy with off the shelf building lumber! include diagrams, shopping and cut lists for all standard mattress sizes. Want a bed without a canopy? Check out dozens more easy to build bed frame plans here. Want to convert your existing Farmhouse Bed into a canopy? We have plans to do that too!
Specifications
| Project type | Beds and Bed Frames |
|---|---|
| Room | Bedroom |
| Style | Farmhouse Furniture |
| Difficulty | Intermediate |
| Estimated cost | $150 - $200 |
Dimensions
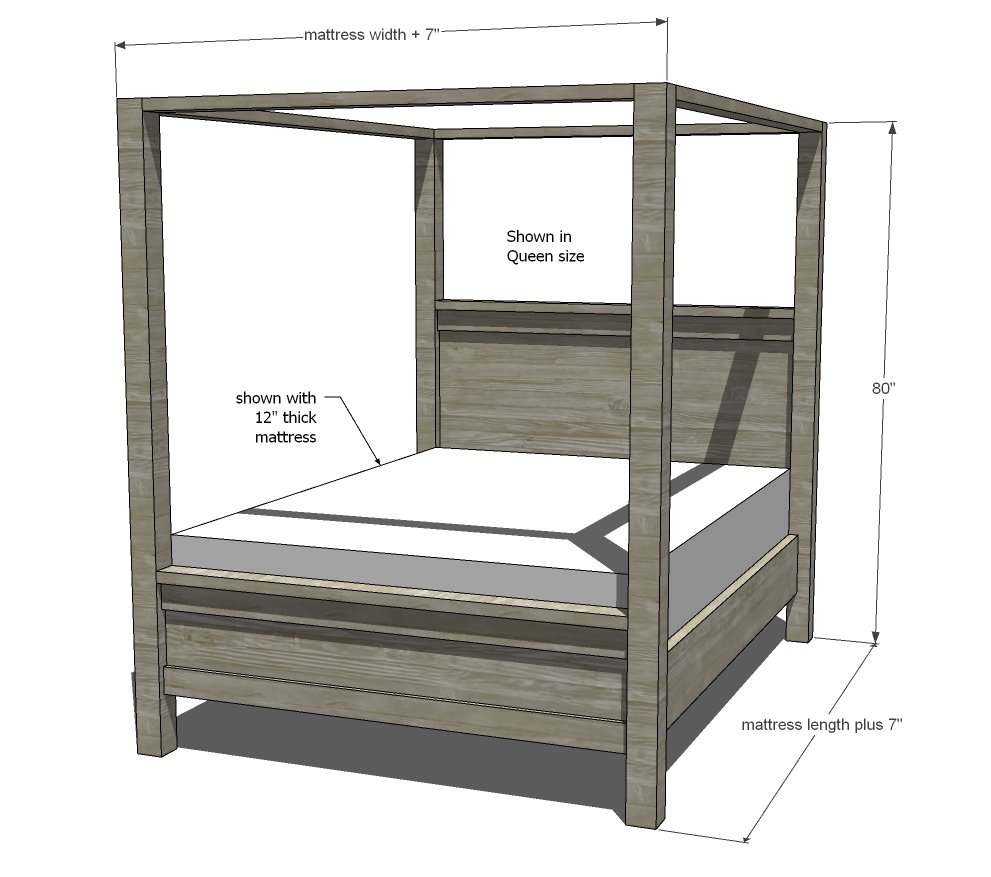
Use the size-specific shopping and cut lists below.
Shopping List
Board
Twin
Full
Queen
King
Cali King
1x4
1 @10'
3 @ 6'
3 @ 6'
3 @ 8'
3 @ 6'
2x4
7 @ 8'
5 @ 12'
5 @ 12'
11 @ 8'
11 @ 8'
2x10
2 @ 8'
2 @ 8'
2 @ 8'
2 @ 8'
2 @ 8'
4x4
4 @ 8'
4 @ 8'
4 @ 8'
4 @ 8'
4 @ 8'
3/4" plywood
48" x 48"
48" x 96"
48" x 96"
48" x 96"
48" x 96"
1x4 Slats
5 @ 8'
7 @ 8'
7 @ 8'
10 @ 8'
11 @ 6'
Cut List
Assumes the following mattress sizes:
- Twin 38" x 75"
- Full 54" x 75"
- Queen 60" x 80"
- King 76" x 80"
- California King 72" x 84"
HEADBOARD Cut List
Board
Twin
Full
Queen
King
Cali King
2 - 4x4 @
80"
80"
80"
80"
80"
2 - 2x4 @
38"
54"
60"
76"
72"
1 - 3/4" plywood @
30"x38"
30"x54"
30"x60"
30"x76"
30"x72"
1 - 1x4 @
38"
54"
60"
76"
72"
FOOTBOARD Cut List
Board
Twin
Full
Queen
King
Cali King
2 - 4x4 @
80"
80"
80"
80"
80"
2 - 2x4 @
38"
54"
60"
76"
72"
1 - 3/4" plywood @
15"x38"
15"x54"
15"x60"
15"x76"
15"x72"
2 - 1x4 @
38"
54"
60"
76"
72"
SIDERAILS Cut List
Board
Twin
Full
Queen
King
Cali King
2 - 2x10 @
75"
75"
80"
80"
84"
2 - 2x4 @
75"
75"
80"
80"
84"
SLAT SYSTEM Cut List
Board
Twin
Full
Queen
King
Cali King
2x4 Cleats
2 @ 78"
3 @ 78"
3 @ 83"
4 @ 83"
4 @ 87"
2x4 Center Legs
2 @ 15"
4 @ 15"
4 @ 15"
2x4 Top Tie In
1 @ 38"
1 @ 54"
1 @ 60"
1 @ 76"
1 @ 72"
1x4 Slats
10 @ 38"
21 @ 31"
21 @ 31"
10 @ 76"
11 @ 72"
Tools
- measuring tape
- square
- pencil
- safety glasses
- hearing protection
- kreg-jig
- drill
- circular saw
- compound miter saw
- table saw
- nailer
- sander
Step-by-step Instructions
Step 1
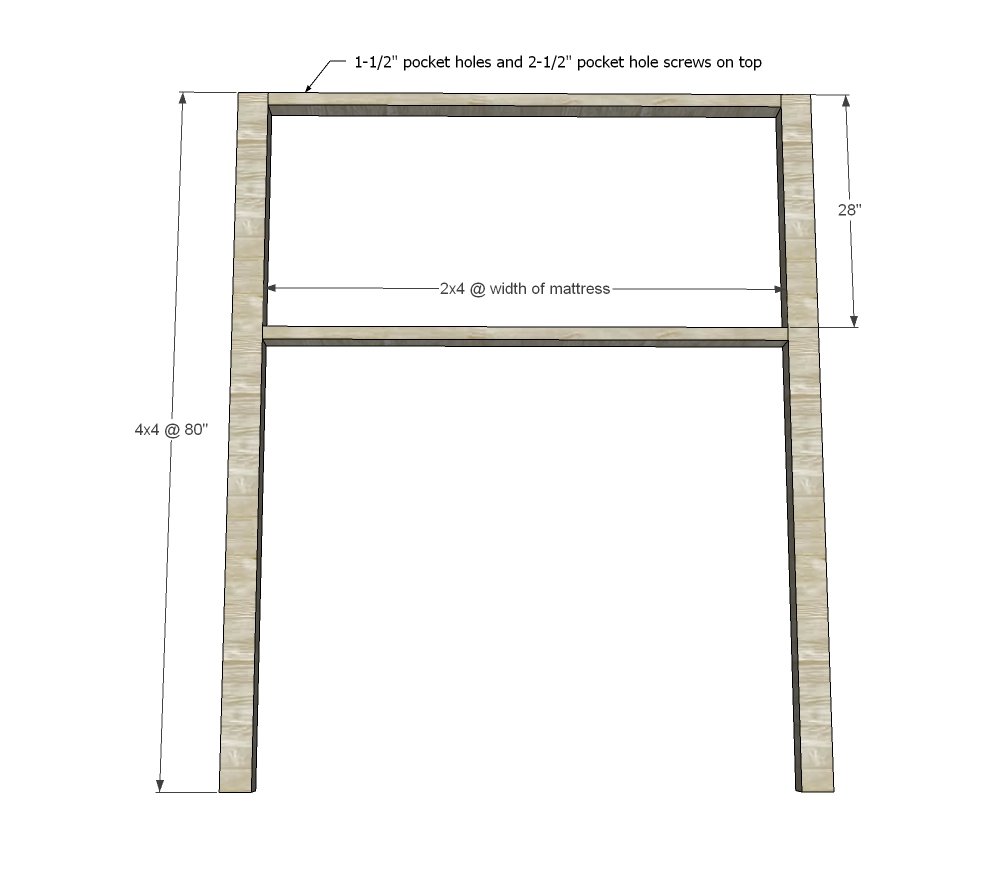
Drill two 1-1/2" pocket holes on each end of the 2x4s and attach to the 4x4s with 2-1/2" pocket hole screws.
Step 2
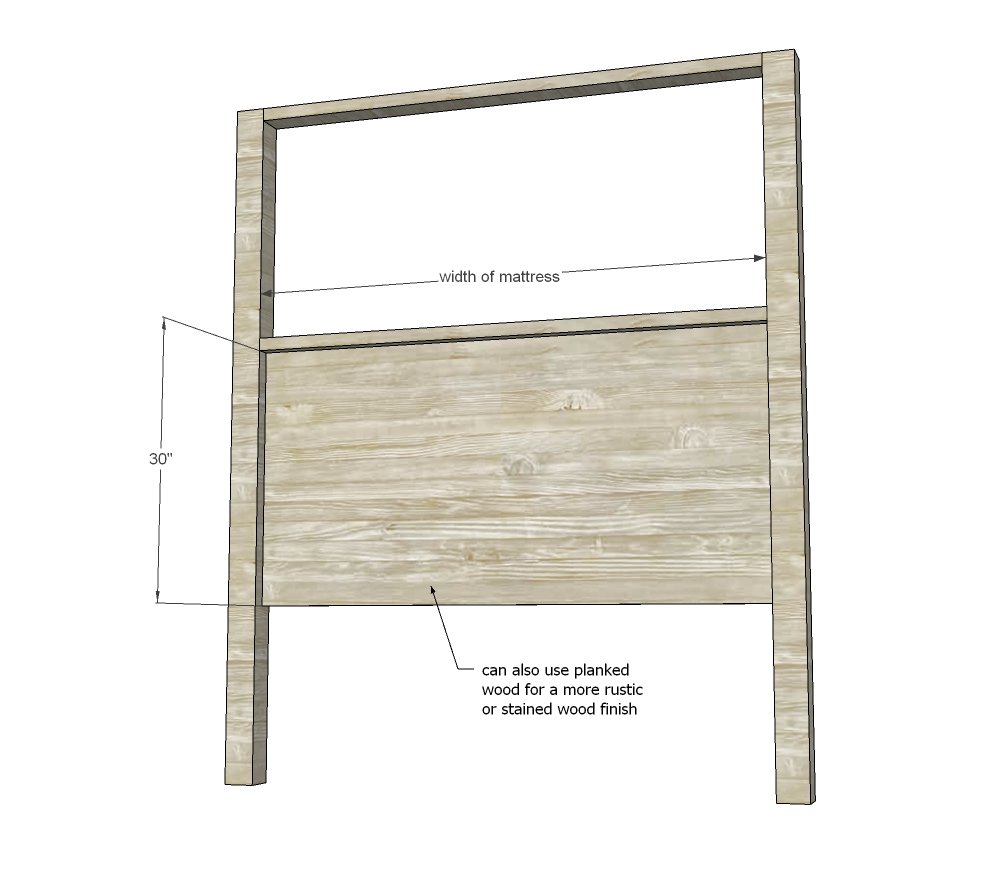
Drill 3/4" pocket holes on the top and sides about 8" apart (but not the bottom) back side of the headboard panel. Attach with a 1" space behind (and 1-1/2" space in front) to the 4x4 legs. This means the headboard panel is set up from the back edge of your 4x4 legs by 1". Use 1-1/4" pocket hole screws to attach.
Step 3
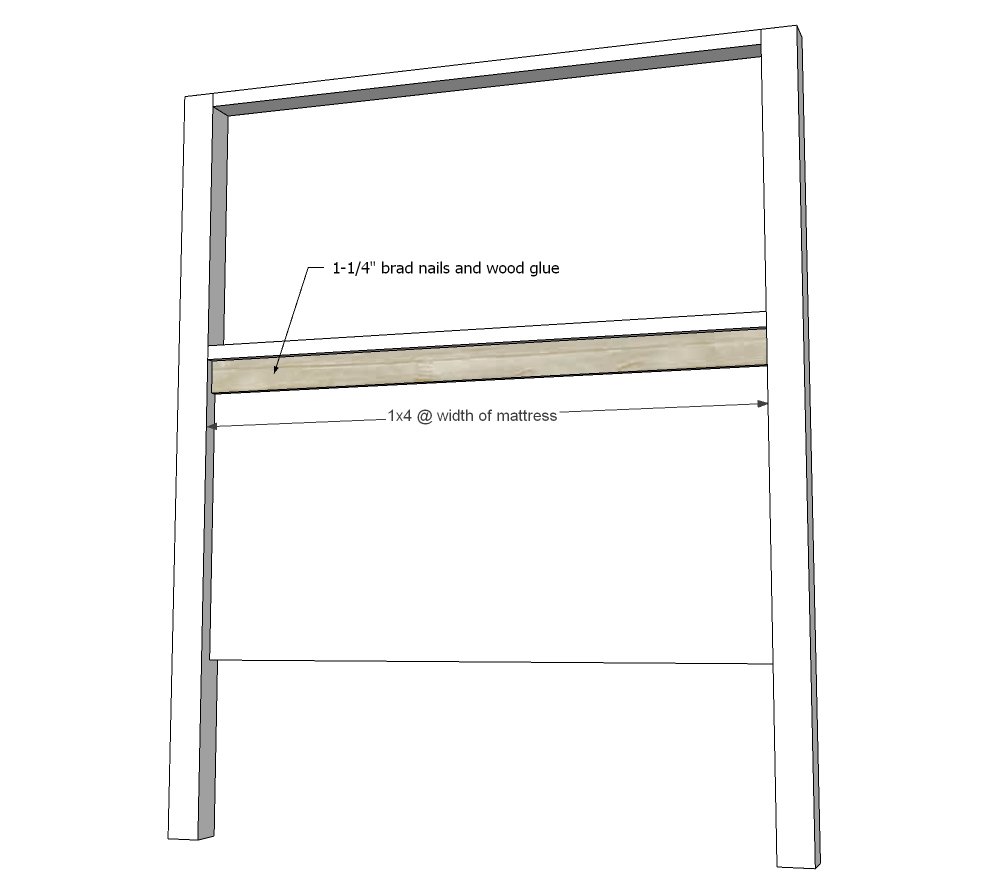
Use 1-1/4" brad nails and glue to attach 1x4 trim piece to top of headboard panel.
Step 4
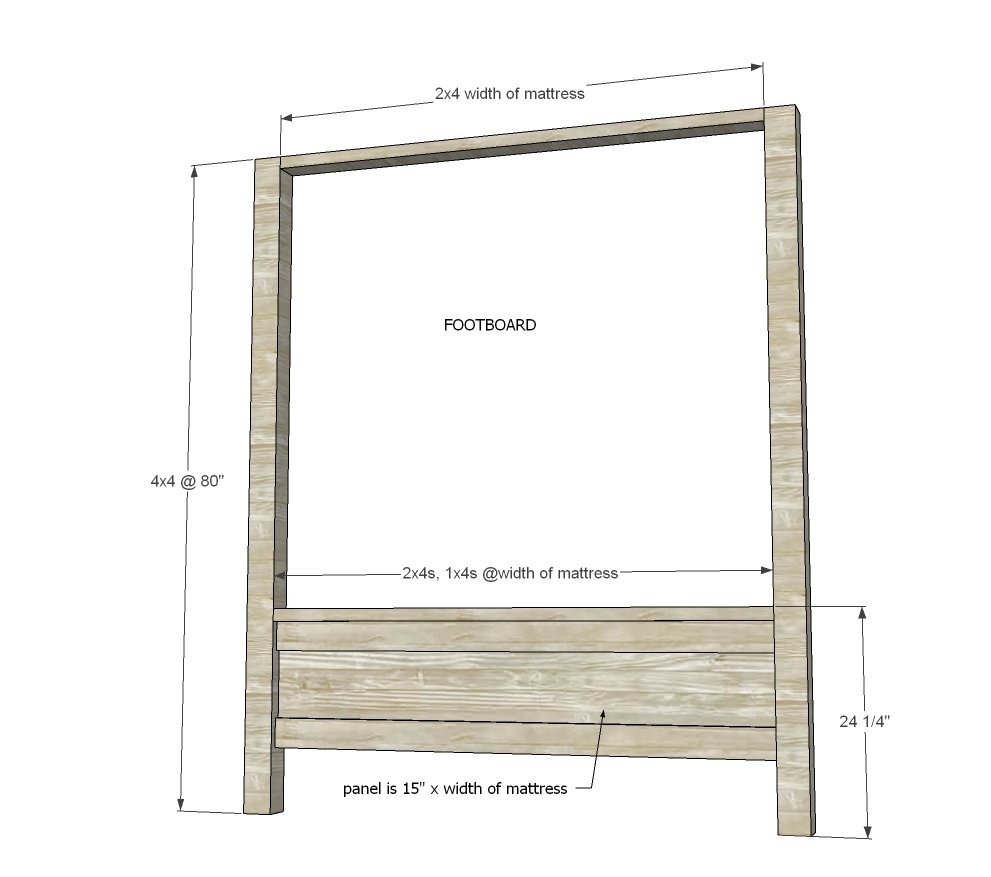
Repeat steps to build the footboard.
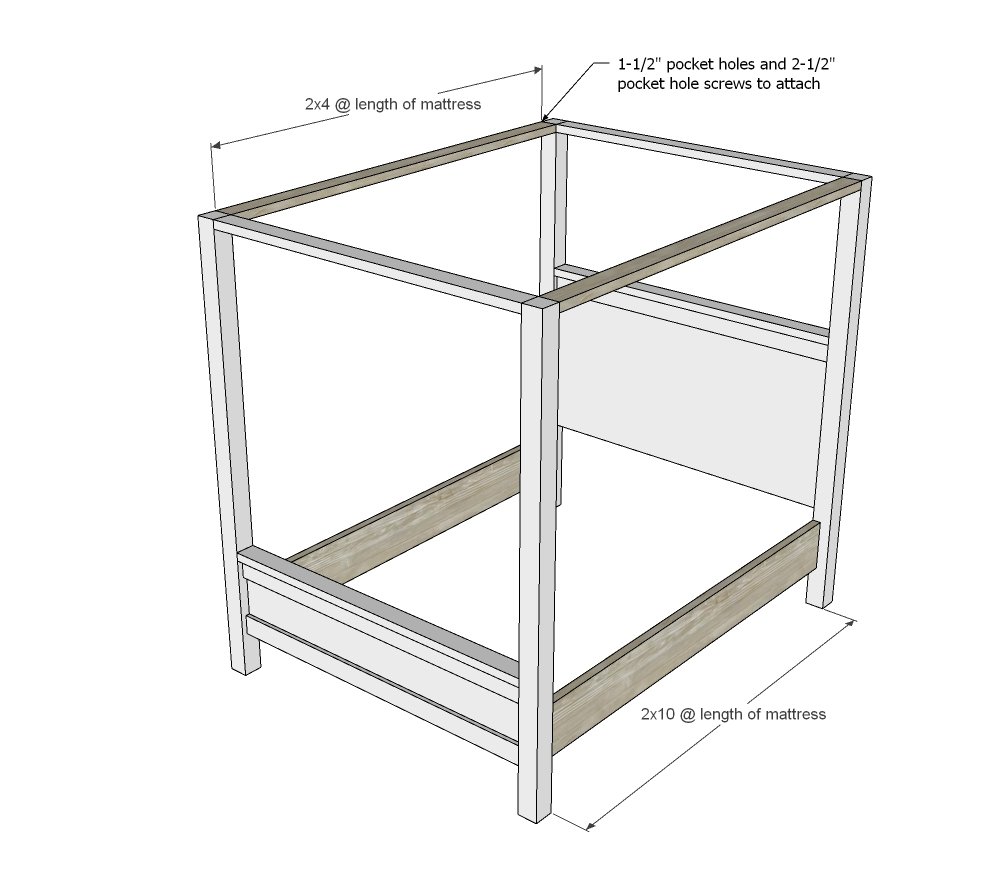
Paint or stain the footboard, headboard and the sideboard pieces shown before moving into the room.
Drill two 1-1/2" pocket holes on each end of the top 2x4s. Drill three 1-1/2" pocket holes on each end of the 2x10 siderails. Move pieces into the room. Assemble the bed with 2-1/2" pocket hole screws.
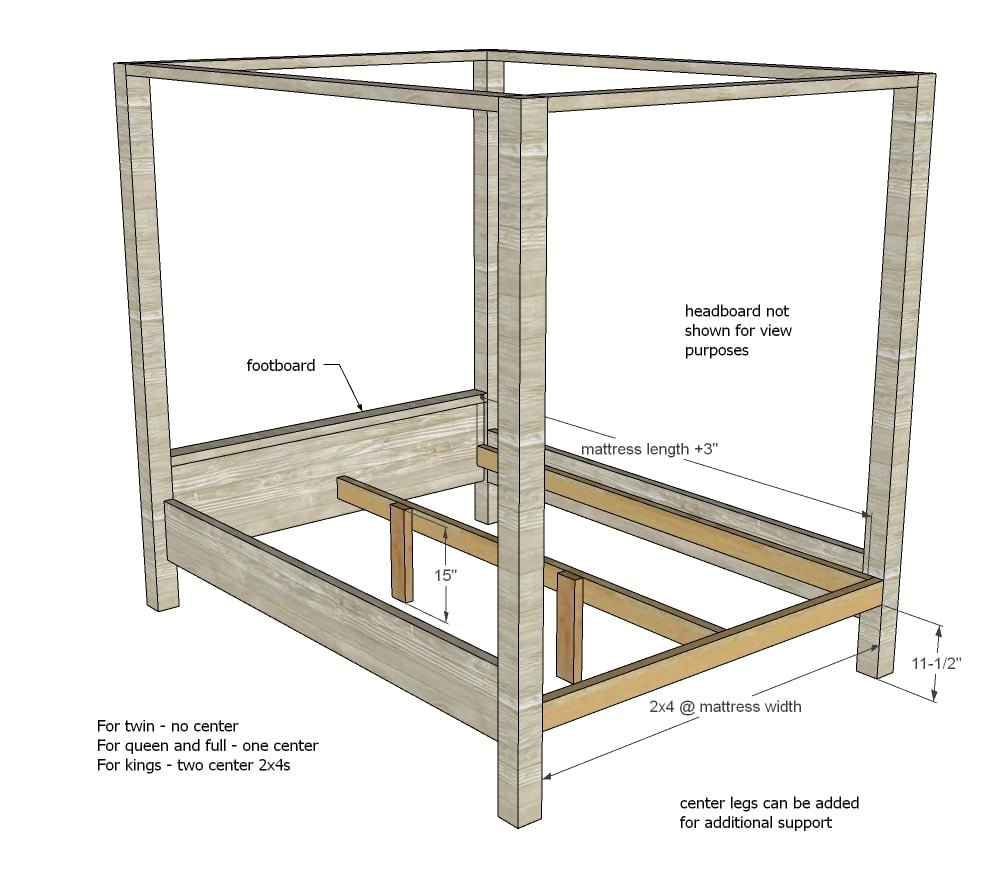
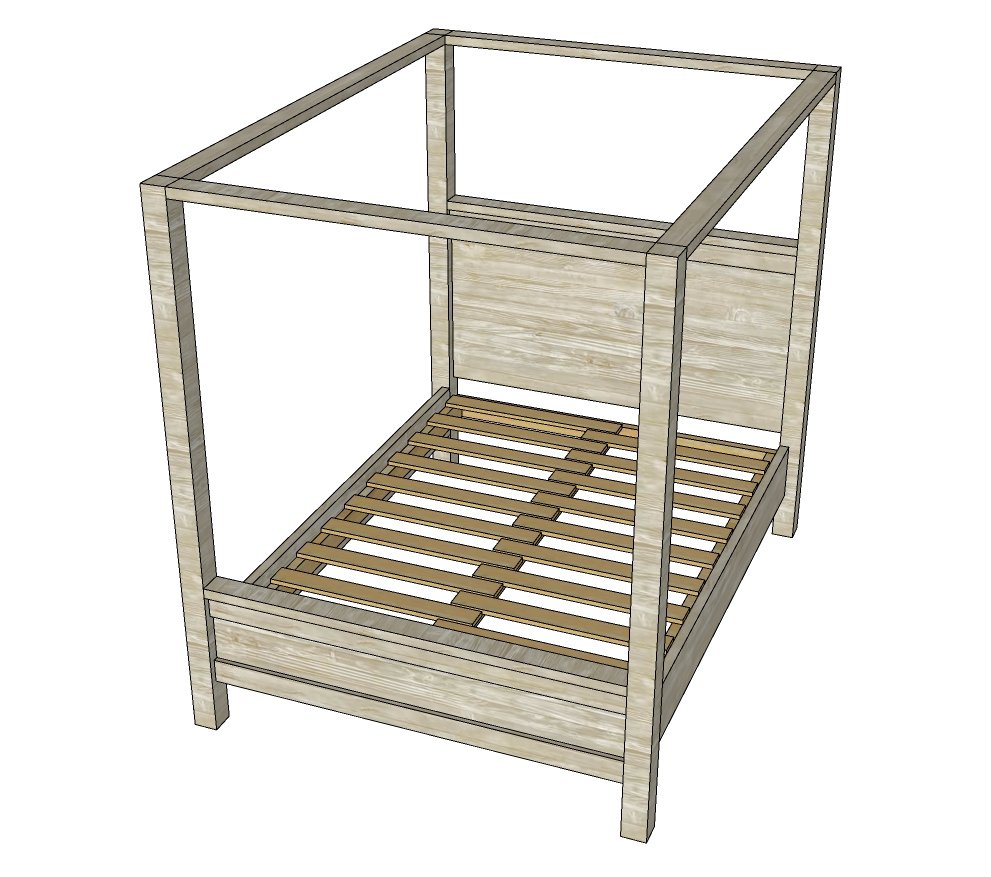
Build the center support framing.
The twin size does NOT need any center support. The queen and full should have one center support (as shown in the diagram) The kings can have one or two center supports. If you are using 3/4" thick bed slats (see next step) I definitely recommend two center supports.
Lay slats inside bed and screw down.
The mattress slats can be split to minimize material waste and also to use up scrap wood. You can use 3/4" plywood strips, any 1x material scraps, etc to fill in the slats. I don't like to leave more than 4" gap in between the slats. You should check with your mattress recommendations for the best slat system.
Step 8
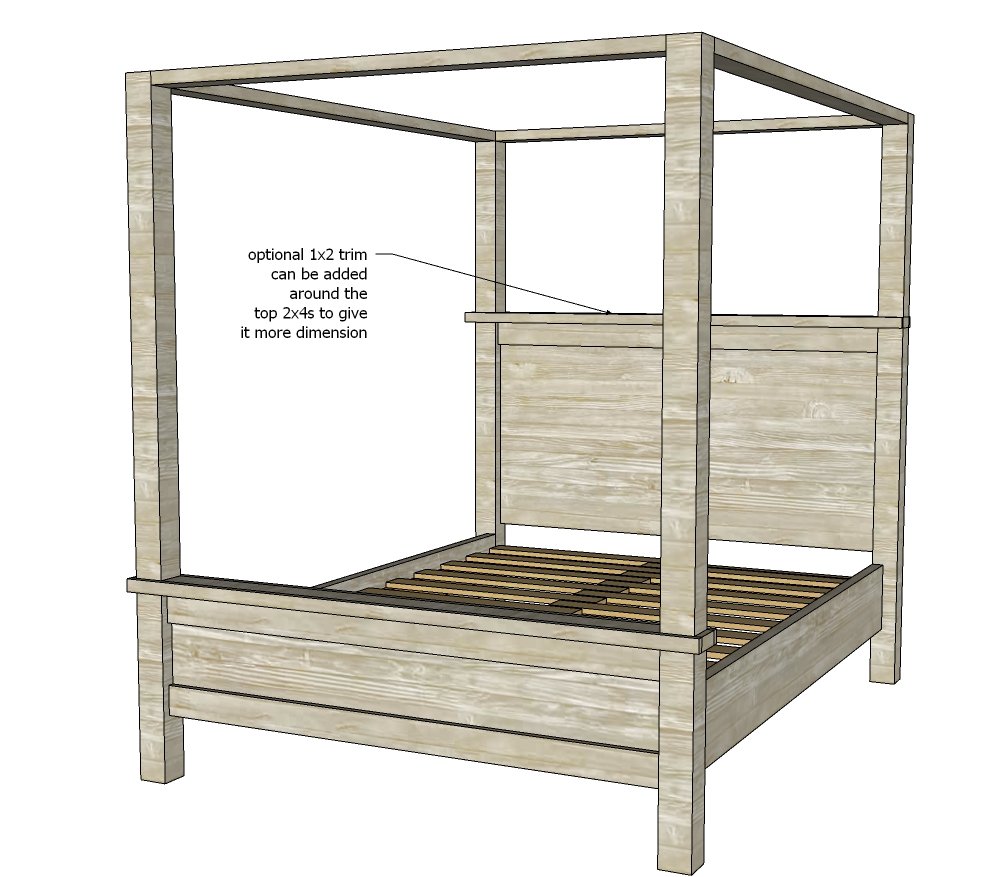
Optional 1x2 trim can be added around the top of the headboard and footboard panels to give the bed more dimensions. I did this with my bed.
Finishing
Sand all surfaces, starting with a medium grit and finishing with fine. Wipe off the dust, fill any holes or gaps with wood filler, and sand smooth once dry. Apply primer if you're painting, then finish with your choice of paint or stain and seal with a durable clear topcoat. For outdoor projects, use exterior-rated primer, paint or stain, and sealer so the piece stands up to the weather.
Source (temporary): https://www.ana-white.com/woodworking-projects/farmhouse-canopy-bed-frame-all-sizes