Farmhouse Console Table (Beginner
Build your own Farmhouse Console Table for under $100 in lumber and screws. This is a beginner friendly project plan designed for the novice builder with limited tools. Farmhouse Console Table Features • Outdoor friendly with slatted design and solid 2x construction • Solid wood design accepts stain beautifully • Extra long design fits behind sofas, sectionals, halls, and under TVs • Two good sized shelves fit standard off the shelf bins and baskets • Perfect to store and display Build the Entire Collection! This plan was SO popular, I went on to design an entire collection of plans to match! Here's the entire collection: Outdoor Table + Potting Bench Collection 6 matching premium plans • minimal tools • ad-free Get All 6 Plans in this Collection
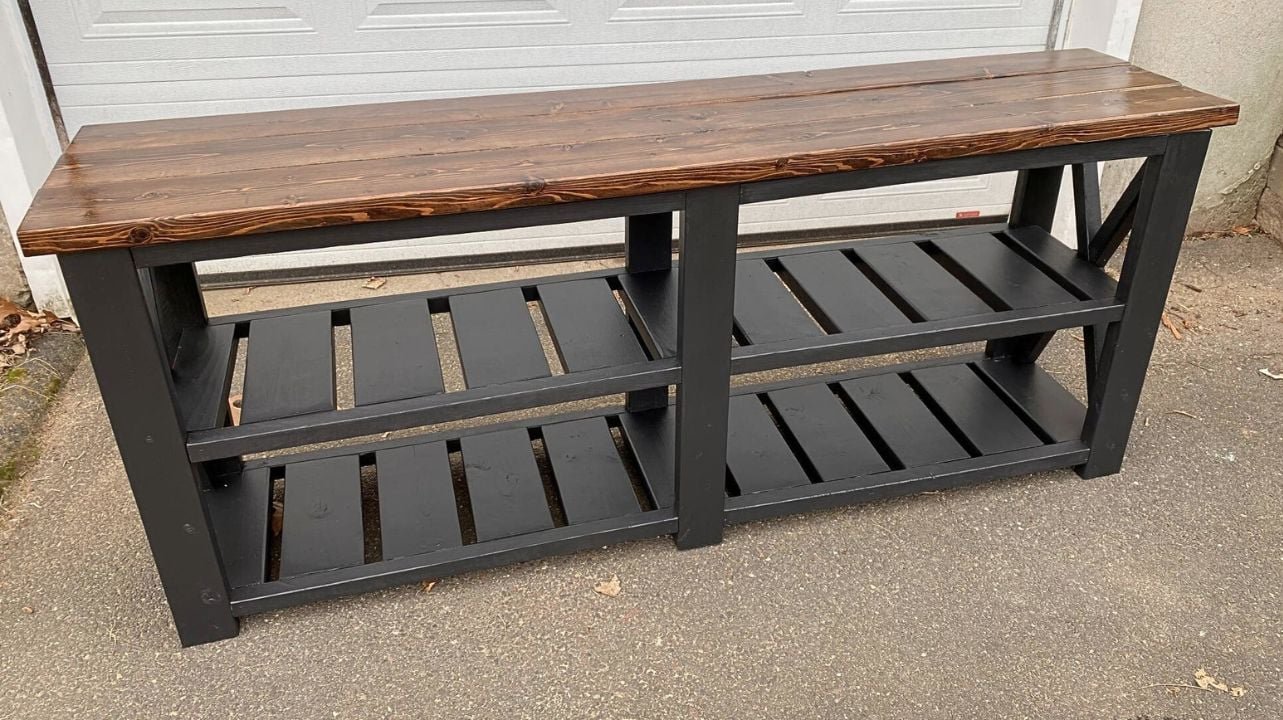
Specifications
| Project type | Outdoor Seating, Lounging and Accents |
|---|---|
| Room | Outdoor |
| Style | Farmhouse Furniture |
| Difficulty | Beginner Projects |
| Estimated cost | $50 - $100 |
Dimensions
Use the size-specific shopping and cut lists below.
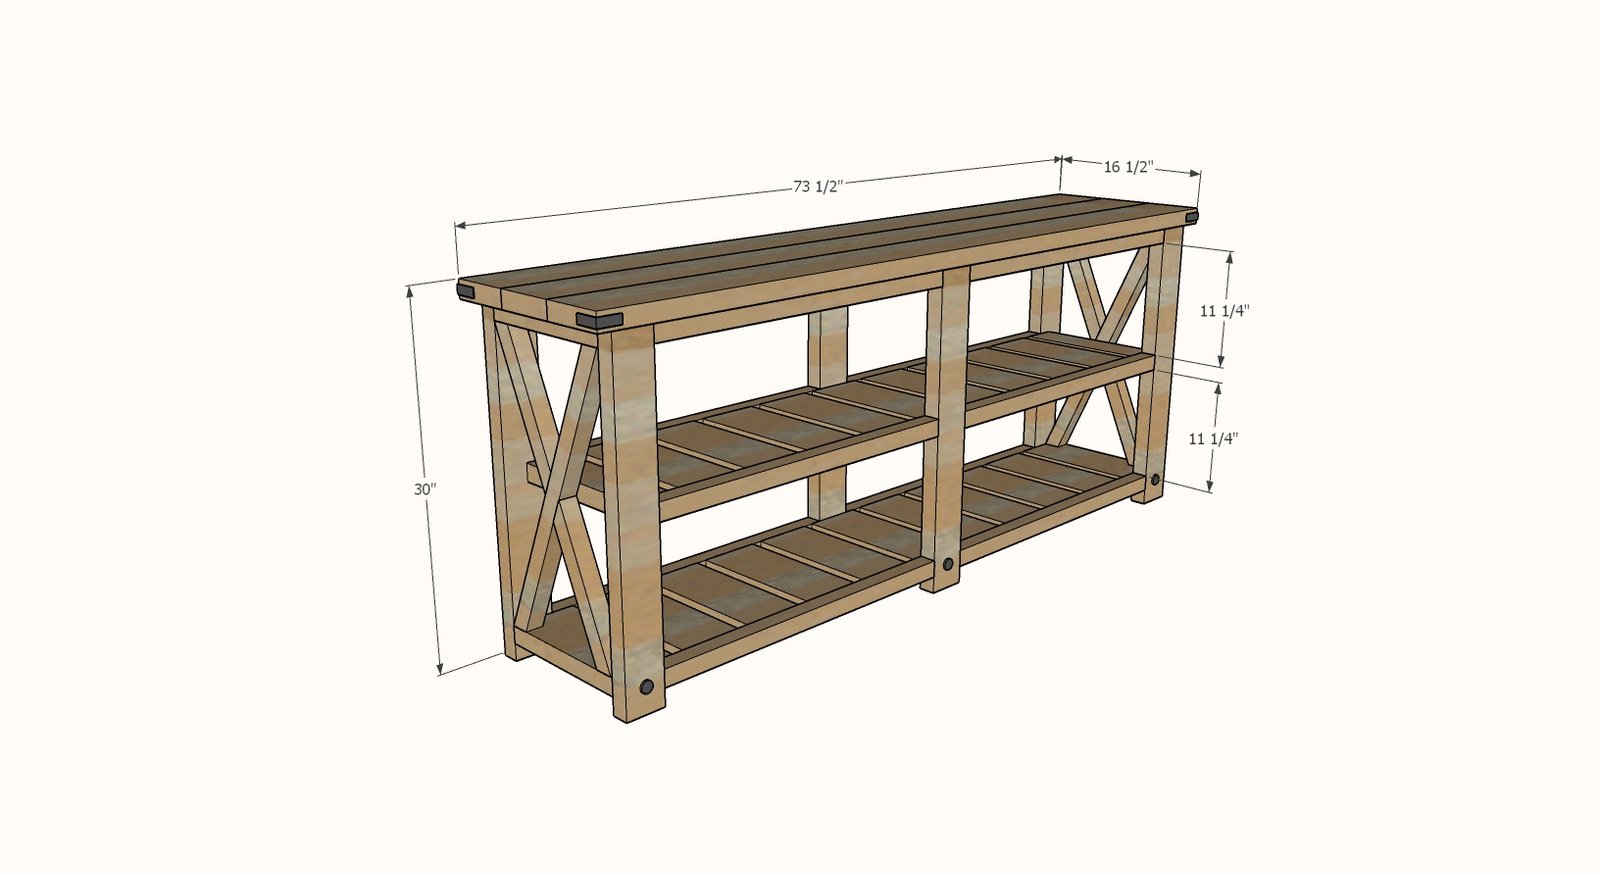
Shopping List
- 6 - 2x2 @ 8 feet long (yes, you can use 2x2 furring strips)
- 6 - 2x6 @ stud length or 8'
- 2 - 2x4 @ 104-5/8"
- 100 - 2-1/2" self tapping trim screws like these
Cut List
- 6 - 2x4 @ 28-1/2"
- 23 - 2x6 @ 12-1/2" (Since you are cutting SO many of these, consider clamping a stop block to your saw so you can speed up the cutting and keep the cuts consistent)
- 4 - 2x2 @ 26-1/4" - long point to short point, both ends cut at 24 degrees off square, end ARE parallel (this is the X pieces - you can cut to fit if you adjust the plans at all)
- 2 - 2x4 @ 12-1/2"
- 12 - 2x2 @ 30"
- 3 - 2x6 @ 73-1/2"
Tools
- measuring tape
- square
- safety glasses
- hearing protection
- drill
- compound miter saw
- sander
Step-by-step Instructions
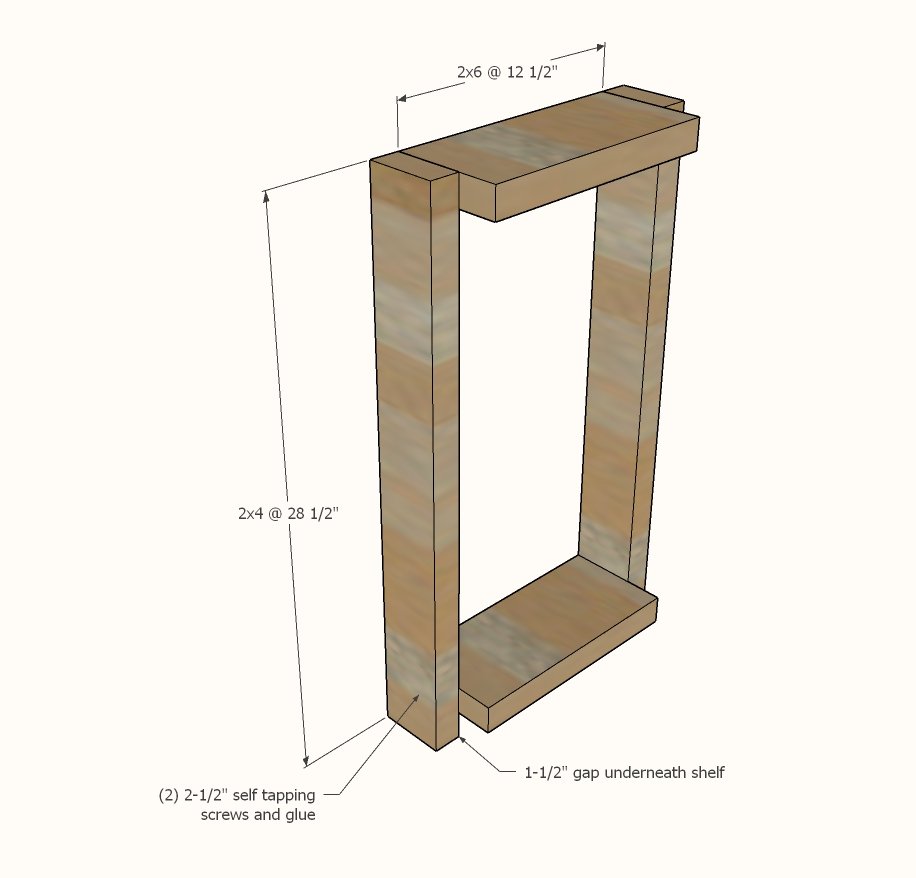
Build TWO end leg sets as shown below.
You can use a 2x2 block under the bottom shelf to help with getting the height right as you assemble.
Dry fit the two X pieces inside the legs.
Trace overlaps with a pencil on BOTH pieces. Cut only one of the 2x2s on the pencil lines. TIP: In the matching Farmhouse Coffee Table video, we go through this process in detail.
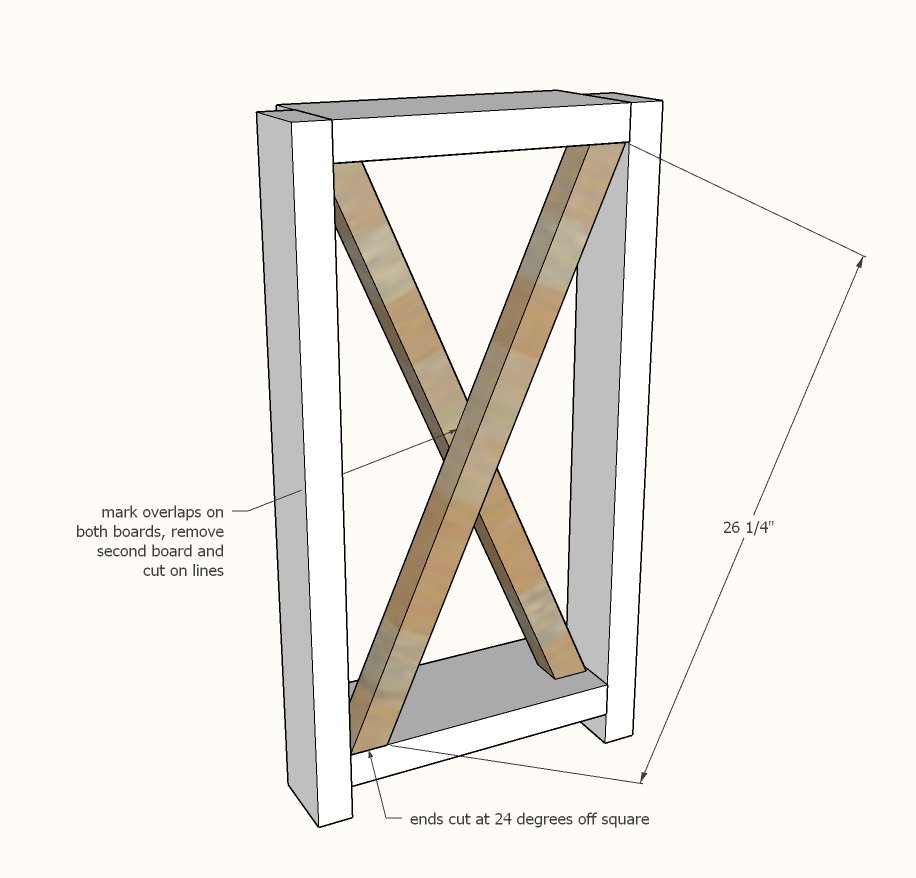
Attach the full 2x2 first inside the leg.
Then attach the lower shorter 2x2, matching the pencil lines traced on the full length 2x2. Attach upper. You'll need to screw at a slight angle to get the second board in (or you can just glue and clamp since the 2x4 in the next step will hold in in place as well).
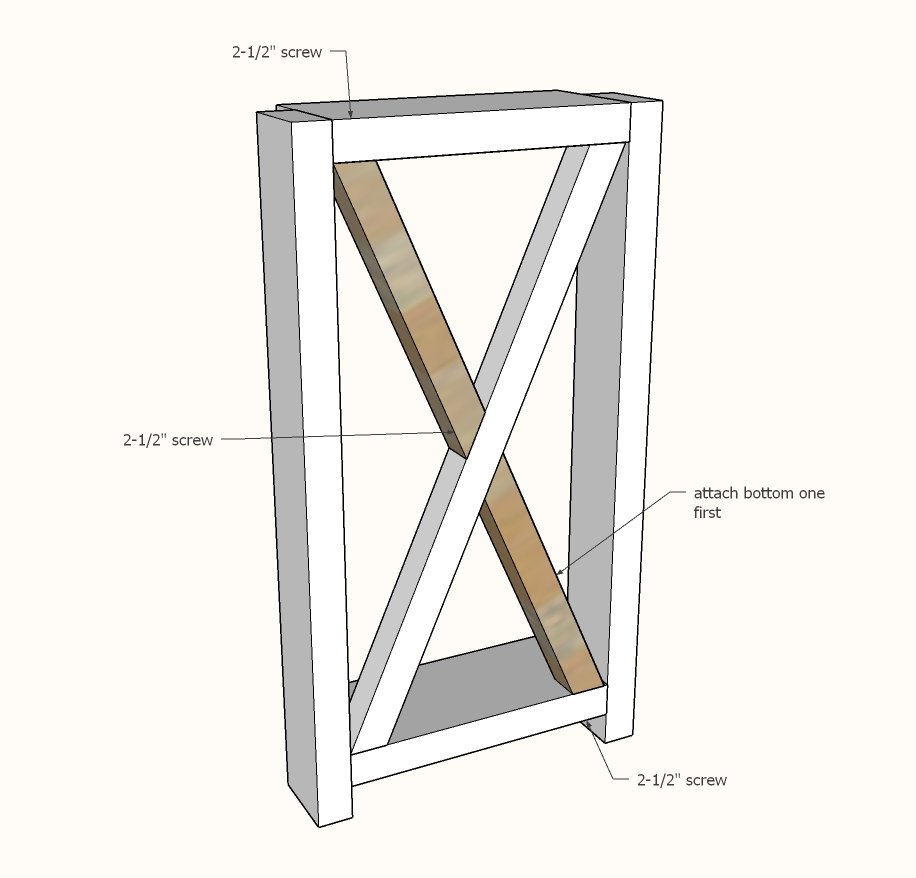
Step 4
Attach shelf 2x4 as shown, screw also to the X from outside.
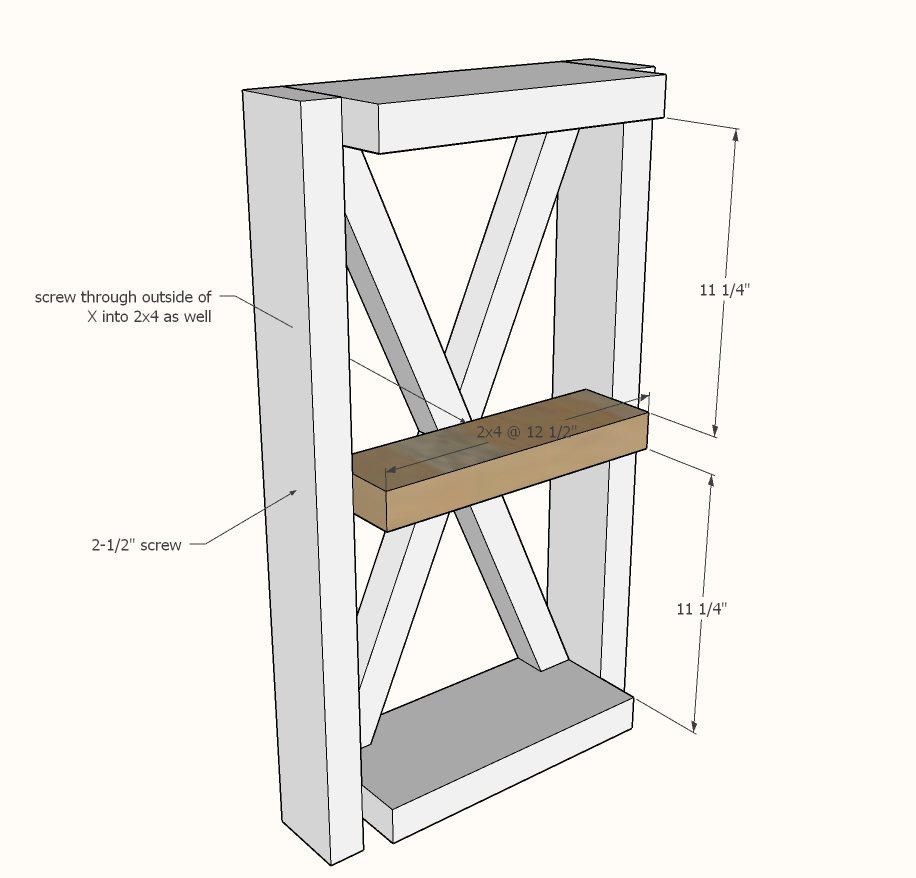
CENTER LEG
Build one center leg as shown. First, attach the legs to the top 2x6, all top edges flush (work upside down). Then, flip right side up, and add the lowest shelf, supporting underneath with a scrap piece of 2x material to elevate up 1-1/2" Now, turn on side, position the middle shelf and attach. Make sure you attach the 2x6 so it is perpendicular to the legs so you don't end up with a crooked shelf.
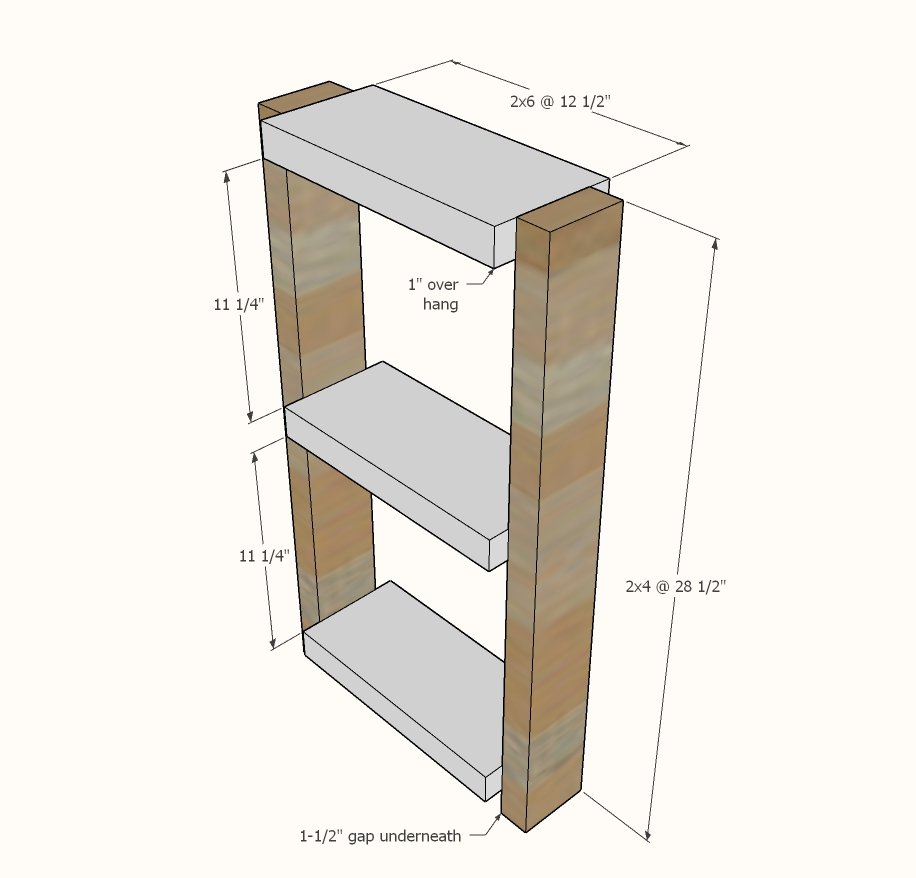
Step 6
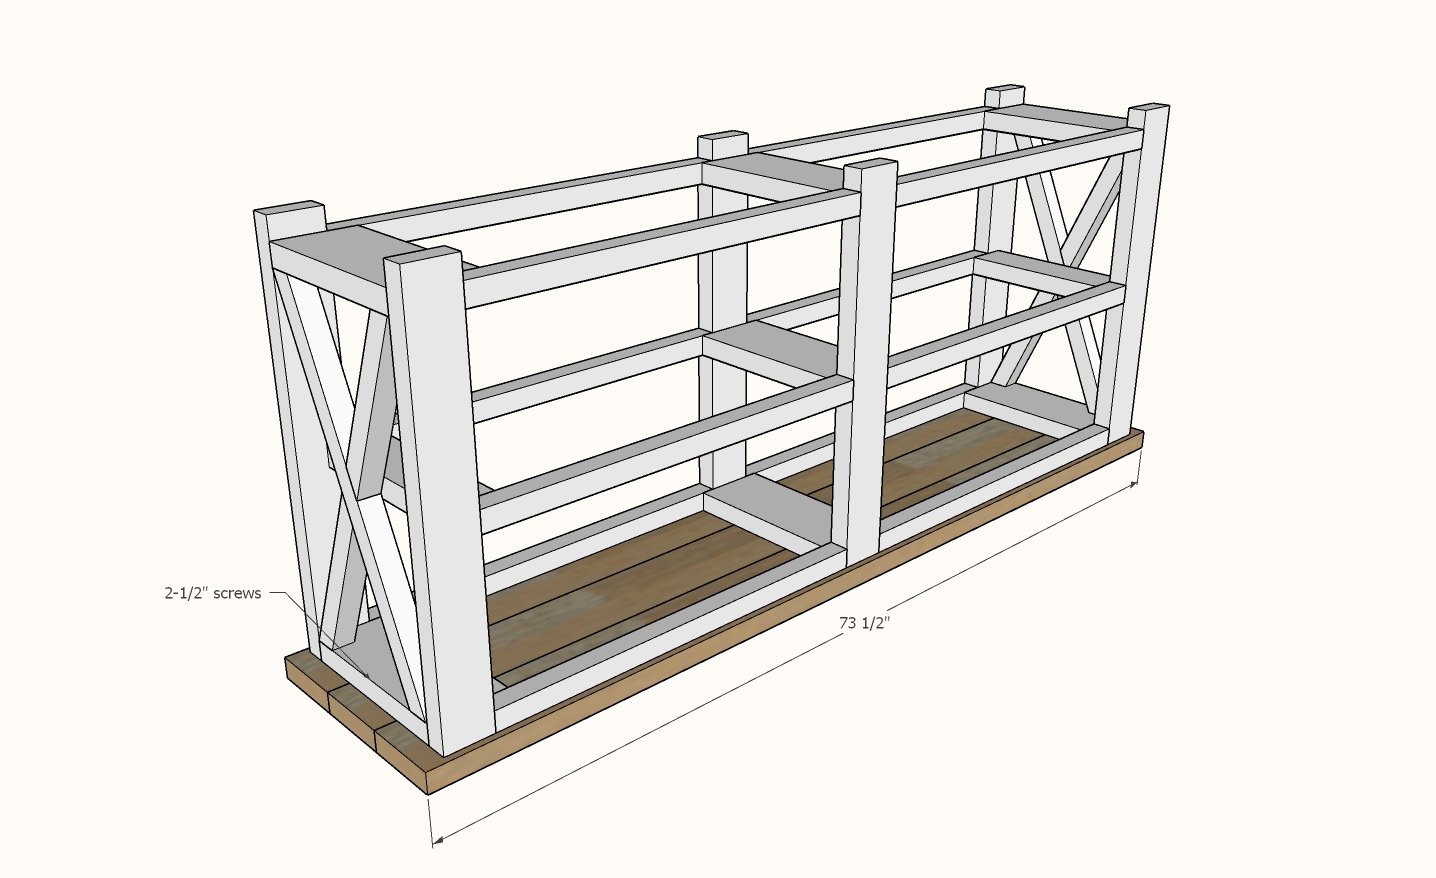
Place all the legs on a flat, level surface, about 30" apart (a second hand might be very helpful here). Attach legs together with the 2x2s. Screw at a slight angle, so the screws act as hooks into the wood and not pivot points. Use ample glue at all joints. NOTE: Be cautious of assembling this step on garage floors as they often slope to a drain.
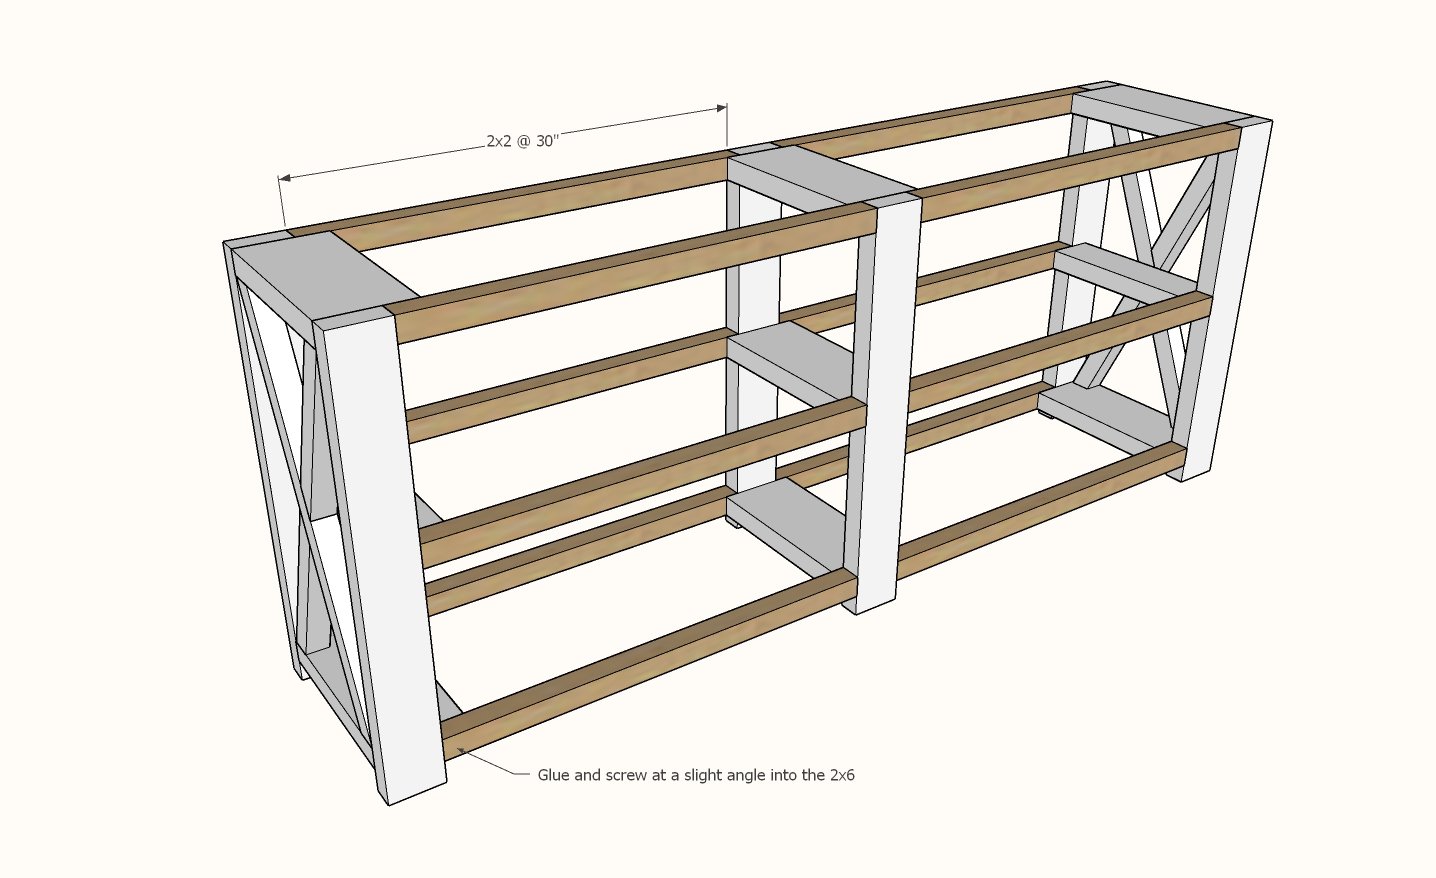
If you have a Kreg Jig, first attach the tabletop boards together. If not, no biggie.
Lay the tabletop boards down on a flat, level surface. Place console table frame centered on the tabletop boards. Attach from underneath with 2-1/2" screws.
Step 8
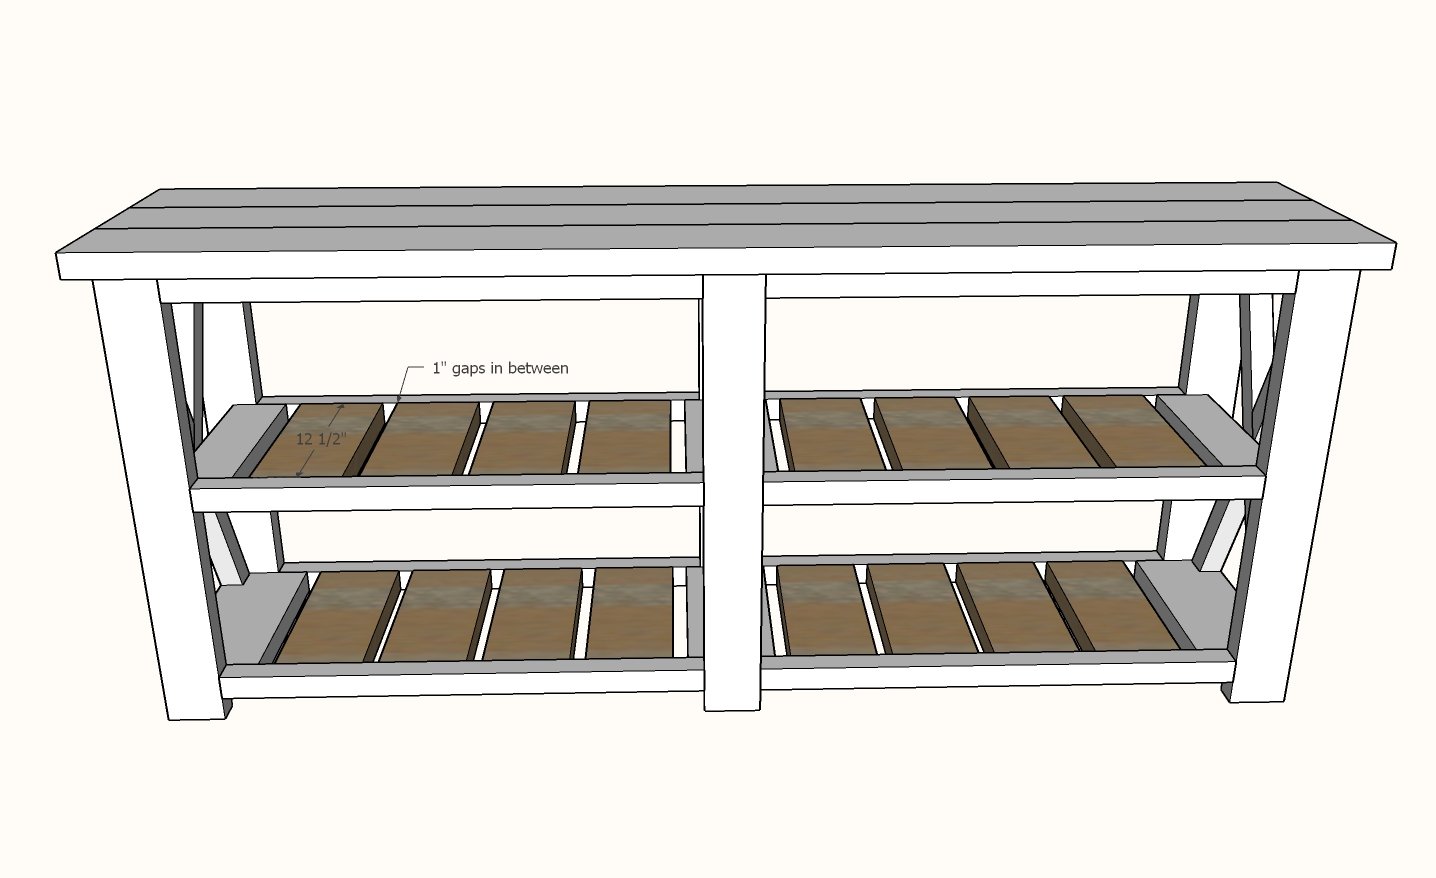
Add shelf boards with a 1" gap in between to the shelves, two screws per joint.
Finishing
Sand all surfaces, starting with a medium grit and finishing with fine. Wipe off the dust, fill any holes or gaps with wood filler, and sand smooth once dry. Apply primer if you're painting, then finish with your choice of paint or stain and seal with a durable clear topcoat. For outdoor projects, use exterior-rated primer, paint or stain, and sealer so the piece stands up to the weather.
Source (temporary): https://www.ana-white.com/woodworking-projects/farmhouse-console-table-beginner-indooroutdoor