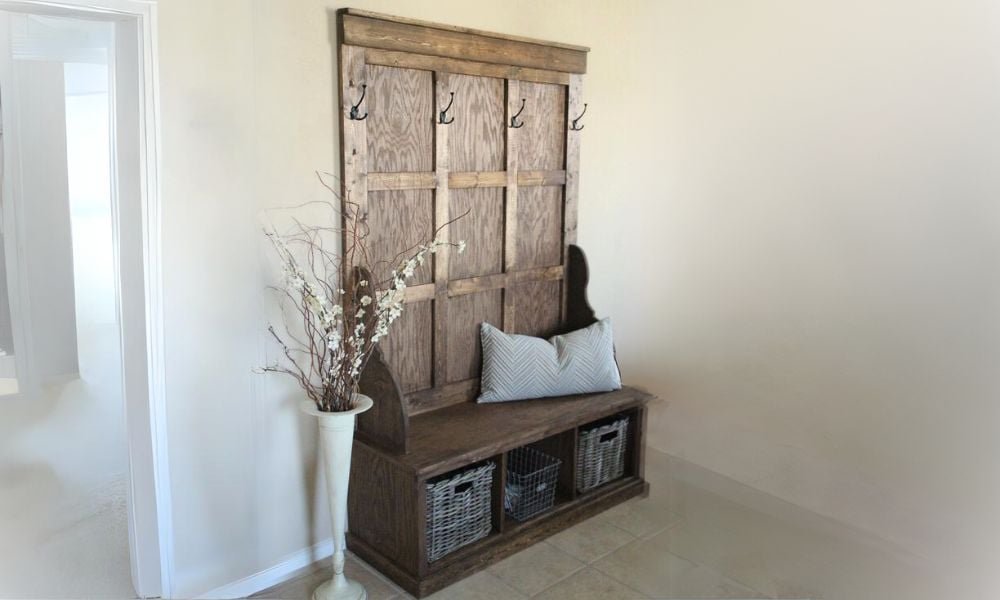
Farmhouse Hall Tree
to build a Farmhouse Hall Tree. Step by step plans include shopping list, cut list, and detailed diagrams to help you build your own hall tree.
Specifications
| Project type | Bench |
|---|---|
| Room | Storage Solutions |
| Style | Farmhouse Furniture |
| Difficulty | Advanced |
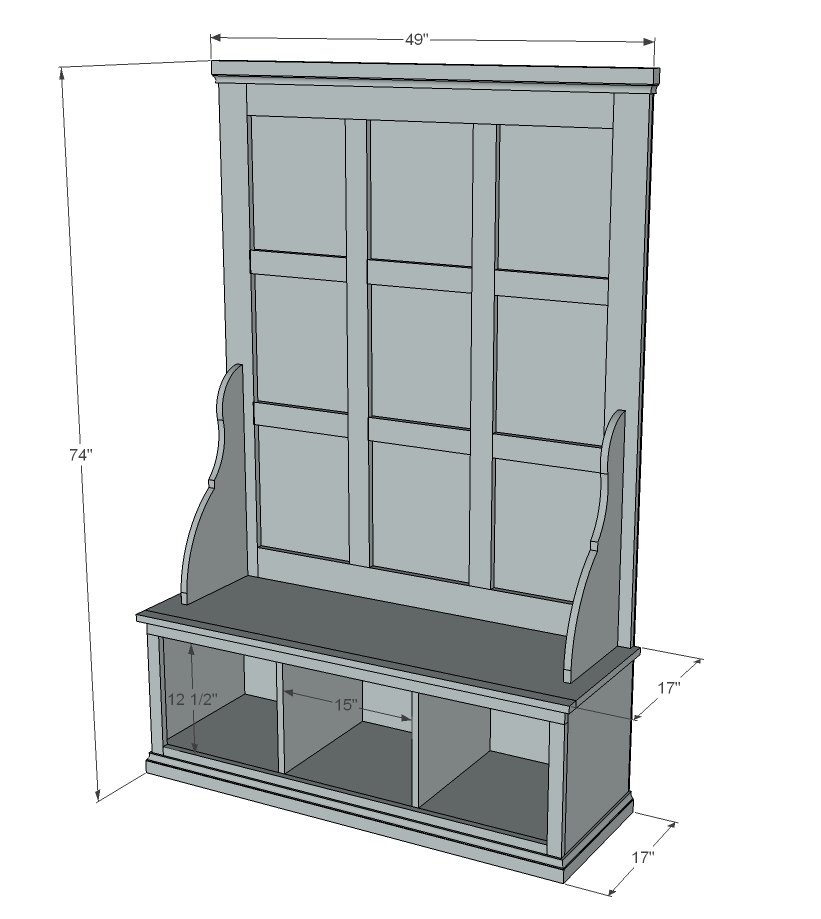
Dimensions
Use the size-specific shopping and cut lists below.
Shopping List
- 1 sheet ¾” plywood ripped into strips 15 ¾” wide (referred to as 1x16 in plan)
- 2 – 1x4 @ 8 feet long
- 2 – 1x2 @ 8 feet long
- 3 – 1x3 @ 8 feet long
- 1 – 1x6 @ 4 feet long
- 1 – 1x12 @ 4 feet long
- 1 – sheet ½” plywood (if you need to you can rip into strips 16” wide to transport)
- 8 feet of 2 ¼” base moulding
- 1 ¼” PH screws
- 1 ¼” finish nails
Cut List
- 1 – 1x16 @ 49 ½”
- 1 – 1x16 @ 46 ½”
- 2 – 1x16 @ 14”
- 2 – 1x16 @ 17 ¼”
- 2 – 1x3 @ 46 ½”
- 1 – 1x2 @ 49 ½”
- 1 – 1x2 @ 48”
- 2 – 1x2 @ 15 ¾”
- 1 – 1x3 @ 45”
BACK
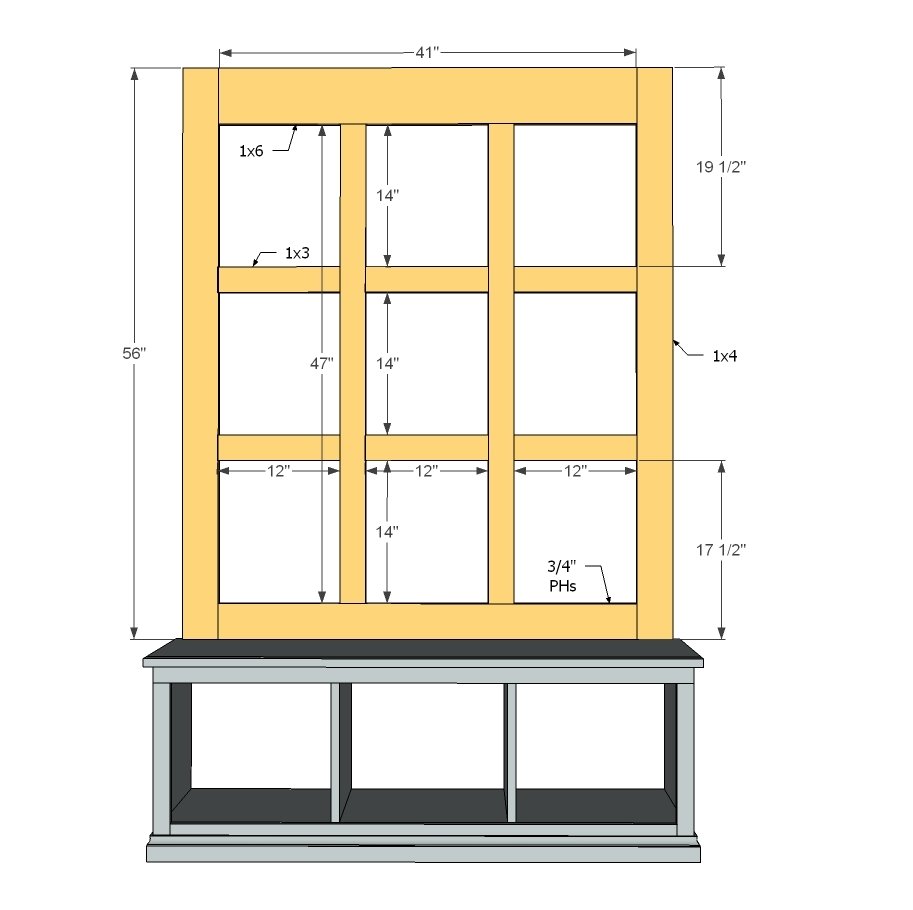
- 2 – 1x4 @ 56”
- 2 – 1x3 @ 47”
- 6 – 1x3 @ 12”
- 1 – 1x4 @ 41”
- 1 – 1x6 @ 41”
- 2 – 1x12 @ 24”
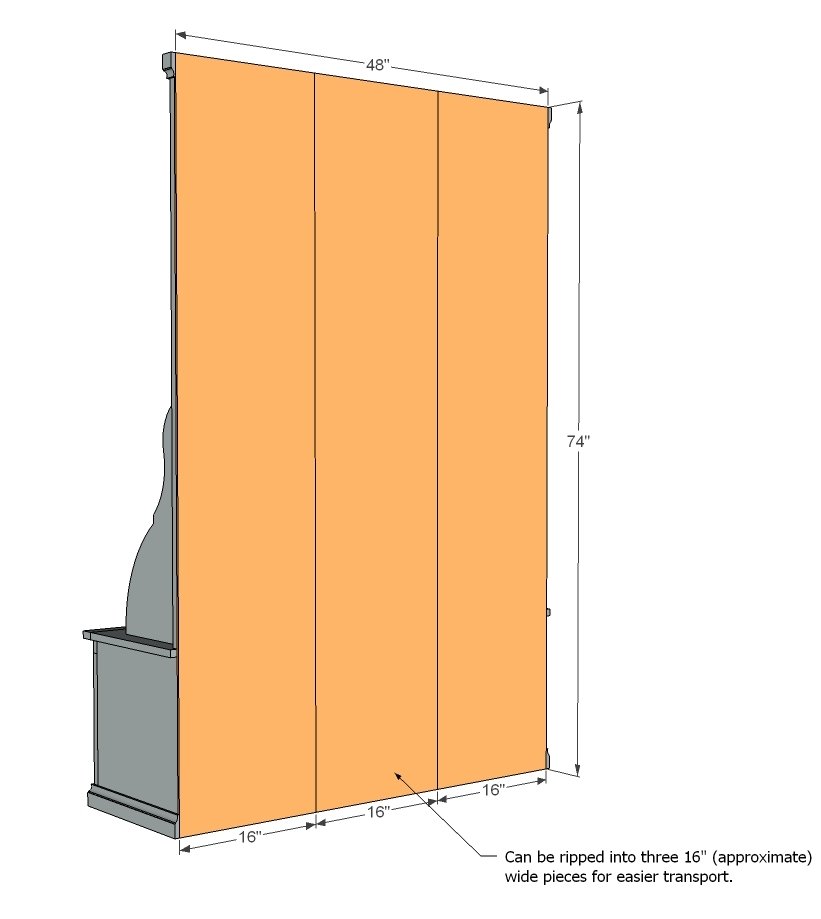
- Back is ½” plywood 48” x 74”
Tools
- measuring tape
- square
- pencil
- safety glasses
- hearing protection
- kreg-jig
- drill
- circular saw
- jigsaw
- nailer
- sander
- countersink drill bit
Step-by-step Instructions
Step 1
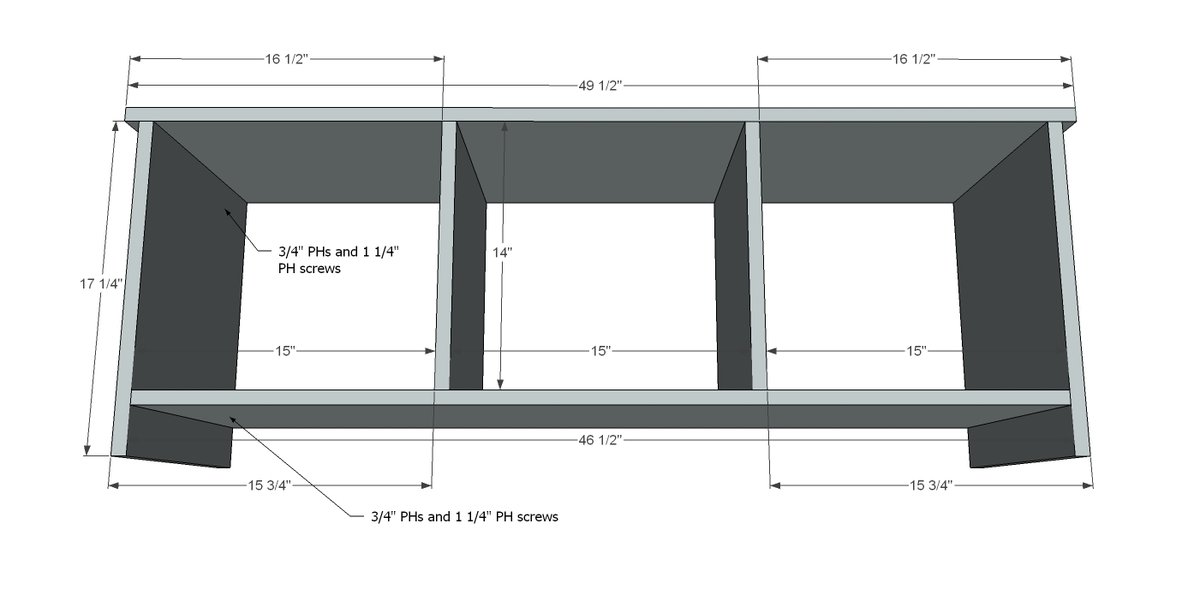
Start by building the bench storage area. It's pretty simple, just follow along the plans and you'll be fine! TIP: If you want to use larger moulding on the bottom, you could raise the bottom by 1" (making the dividers 1" shorter) and use a 1x4 instead of a 1x3 for support.
Step 2
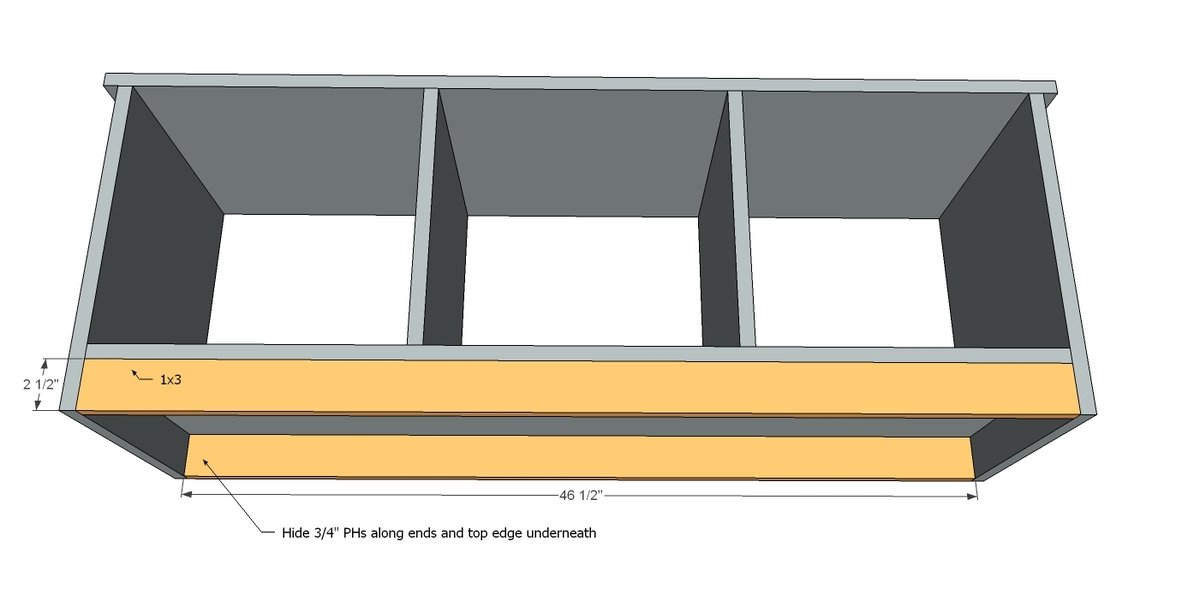
Now add the bottom supports. These are so when someone heavy sits on the hall tree the weight is transferred directly to the floor.
Step 3
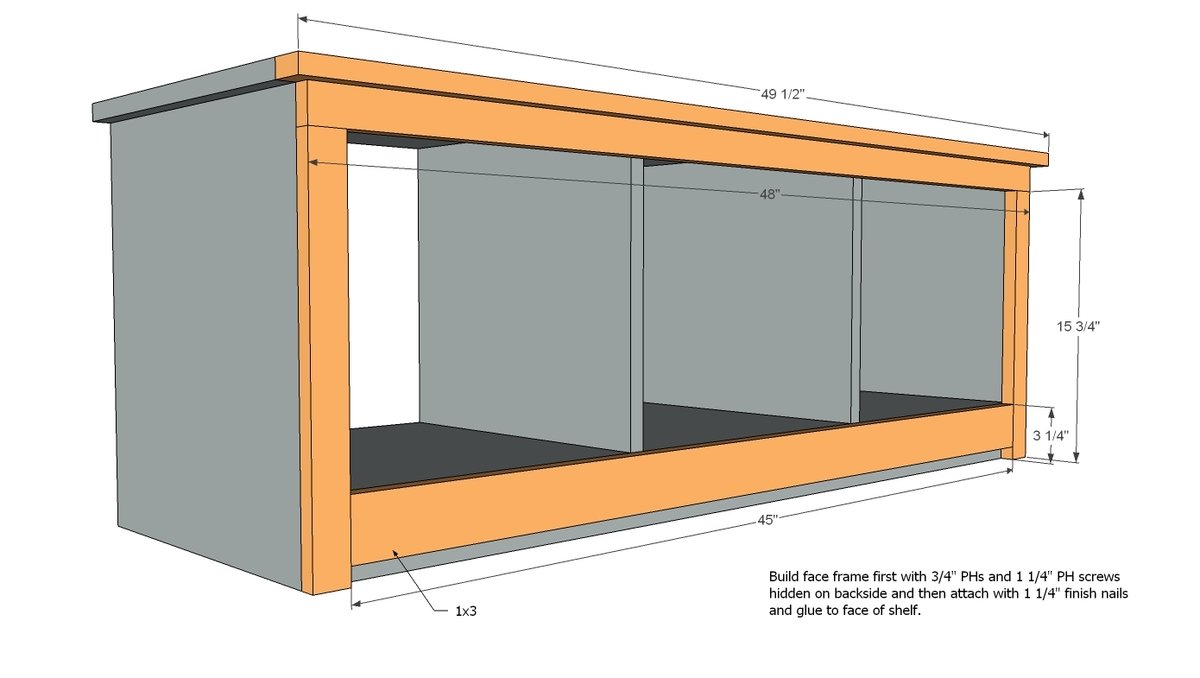
Build your face frame with 3/4" PHs and 1 1/4" PH screws and attach with 1 1/4" finish nails and glue.
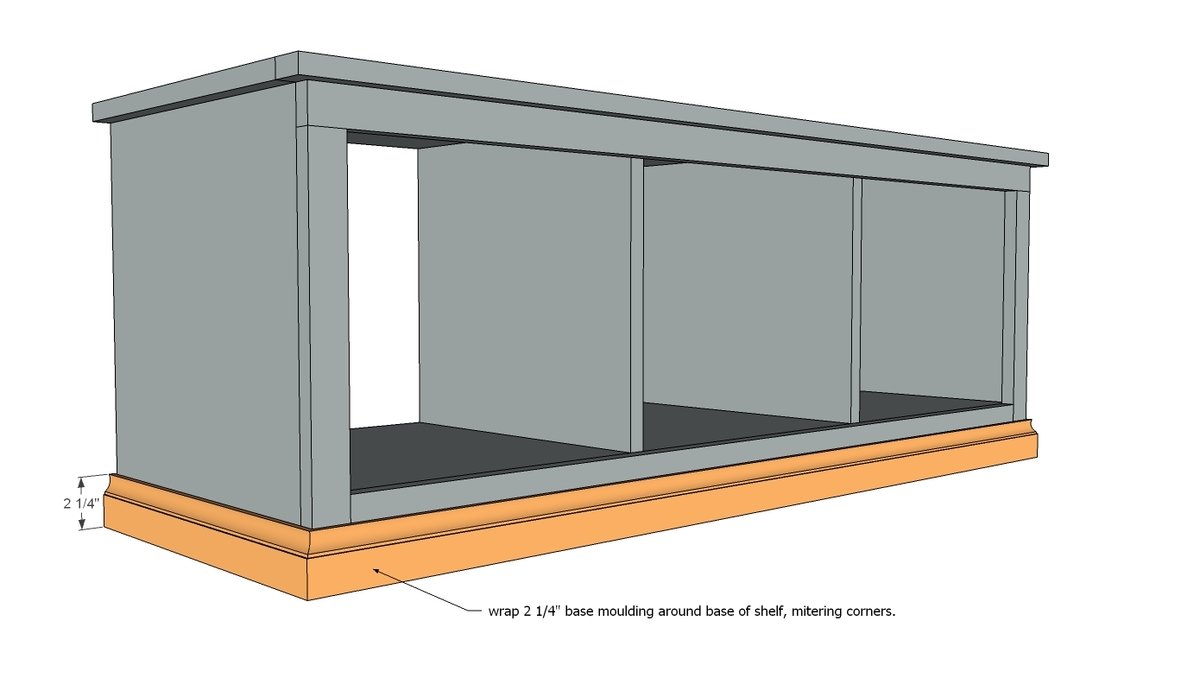
Wrap the bottom in 2 1/4" base moulding.
TIP: If you made the bottom higher, you will want to use 3 1/4" base moulding.
Step 5
Step 6
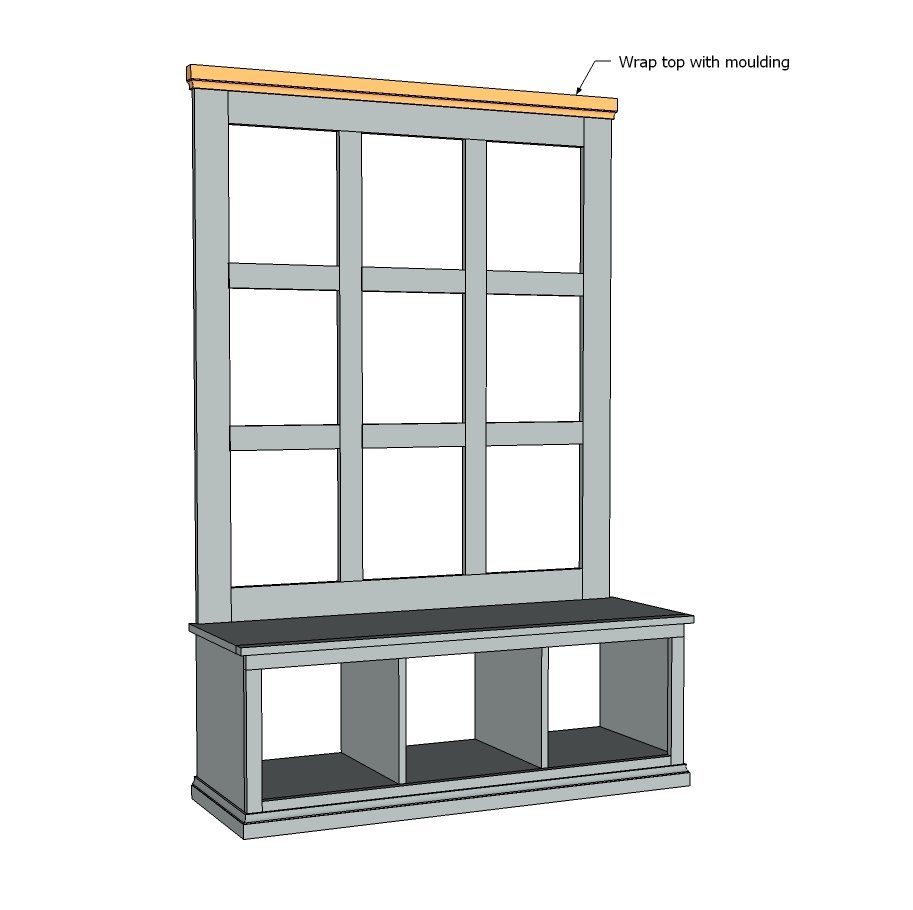
Now add the top moulding. A simple 1x2 on top would be cute too!
Step 7
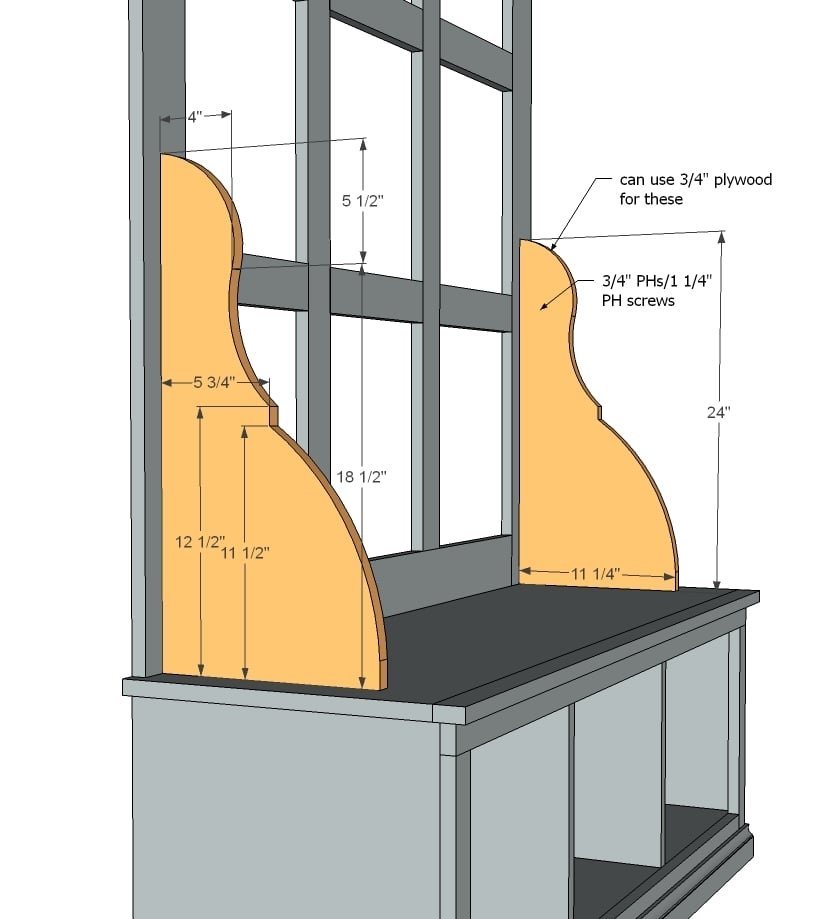
You can use leftover plywood to cut these out too! From the 1x12, mark the pattern and carefully cut out with jigsaw. Clamp the two pieces together and sand until they match exactly. Attach in place.
Step 8
Now add the back. The back is shown in three just in case you had to cut it to fit it in your car.
Finishing
Sand all surfaces, starting with a medium grit and finishing with fine. Wipe off the dust, fill any holes or gaps with wood filler, and sand smooth once dry. Apply primer if you're painting, then finish with your choice of paint or stain and seal with a durable clear topcoat. For outdoor projects, use exterior-rated primer, paint or stain, and sealer so the piece stands up to the weather.
Source (temporary): https://www.ana-white.com/woodworking-projects/farmhouse-hall-tree