Farmhouse Jewelry Wall Cabinet
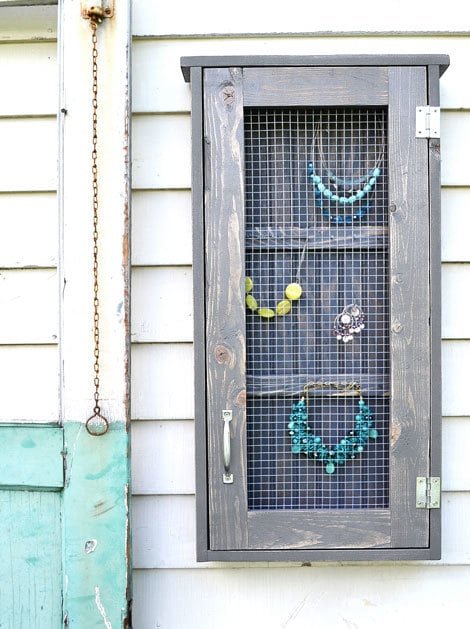
Make this farmhouse style wall jewelry cabinet! from
Specifications
| Project type | Hutch Plans |
|---|---|
| Room | Bathroom |
| Style | Cottage Style Furniture Plans |
| Difficulty | Starter Projects |
Dimensions
Use the size-specific shopping and cut lists below.
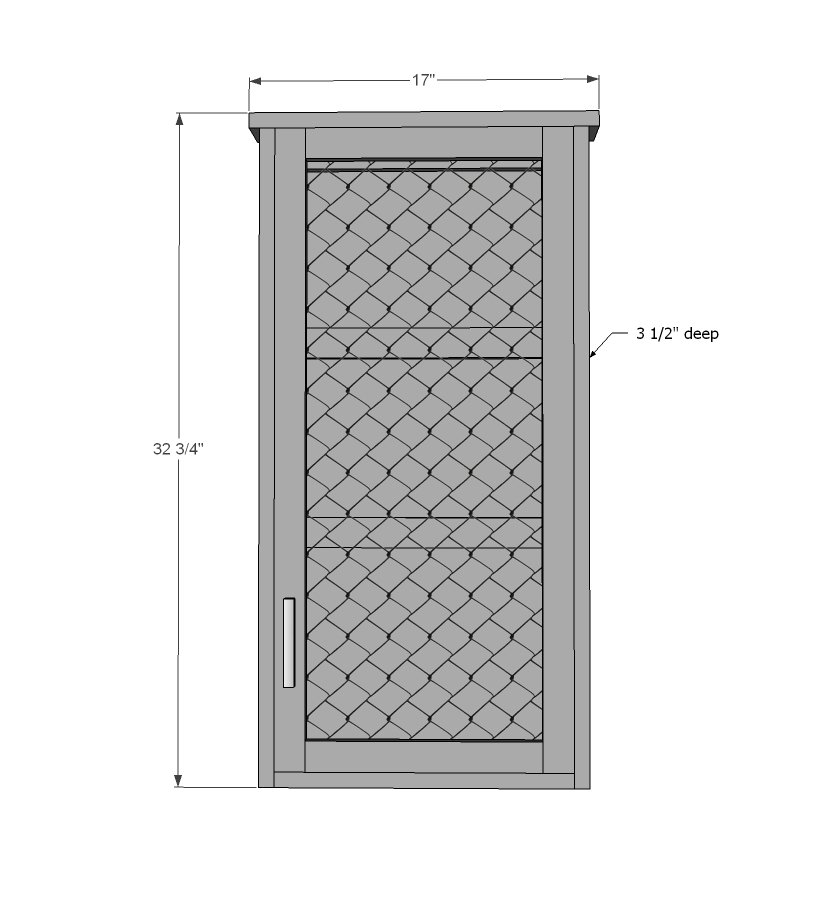
Shopping List
1 - 1x4 @ 8 feet long
1 - 1x3 @ 8 feet long
1 - 1x2 @ 8 feet long
1/4" plywood or beadboard for back @ 16" x 32" (optional)
1 set narrow profile hinges
1 handle
chicken wire or hardware cloth
magnetic clasp or hasp (optional)
You'll need some staples for attaching the hardware cloth or chicken wire
Cut List
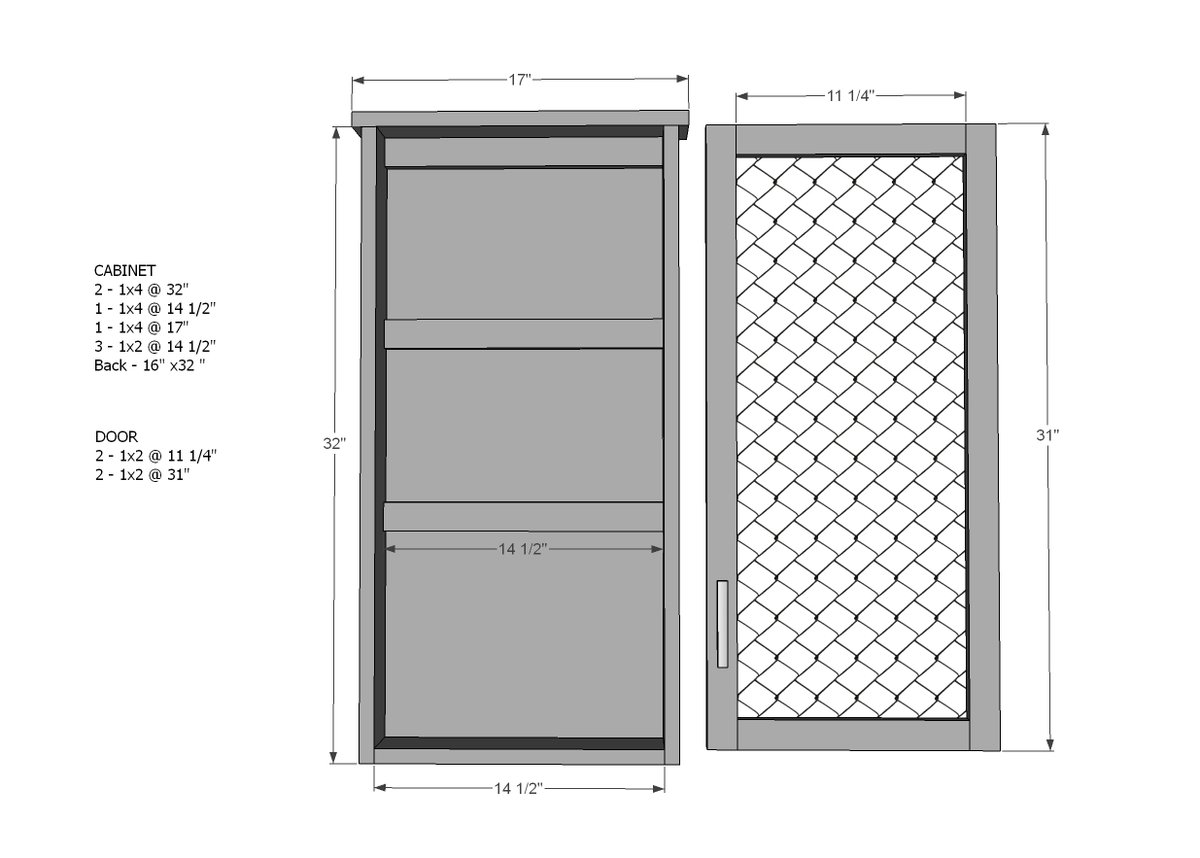
2 - 1x4 @ 32"
1 - 1X4 @ 14 1/2"
1 - 1X4 @ 17"
2 - 1X2 @ 14 1/2"
Back is 16" x 32"
DOOR
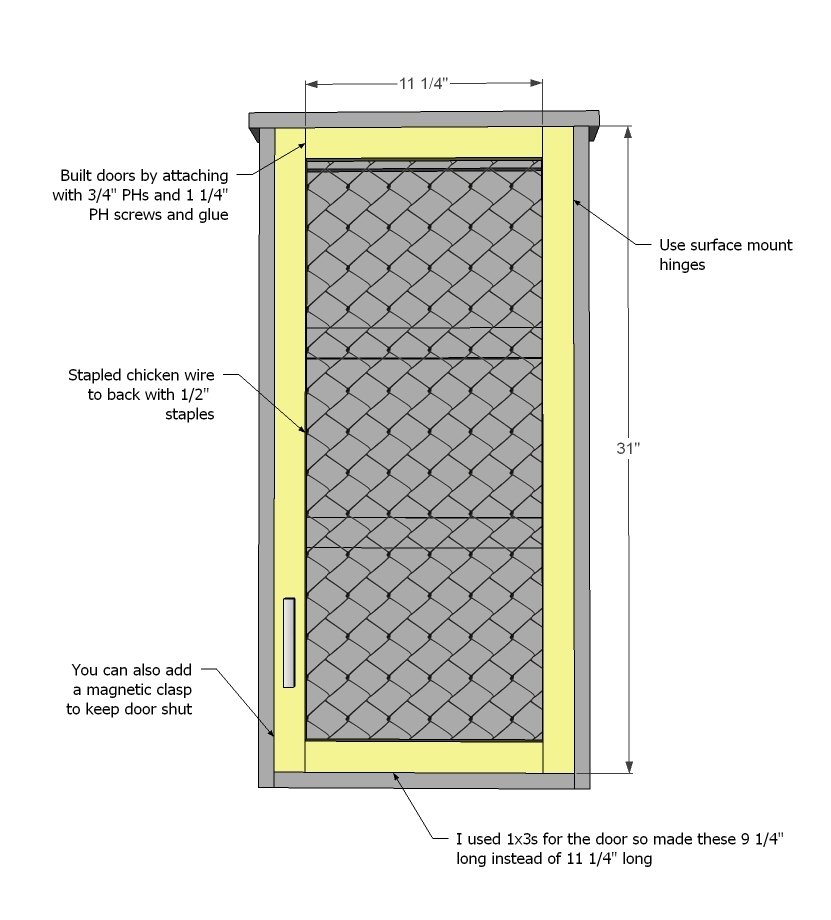
2 - 1x3 @ 9 1/4"
2 - 1x3 @ 31"
Tools
- measuring tape
- square
- pencil
- safety glasses
- hearing protection
- kreg-jig
- drill
- circular saw
- nailer
- sander
- staple gun
Step-by-step Instructions
Step 1
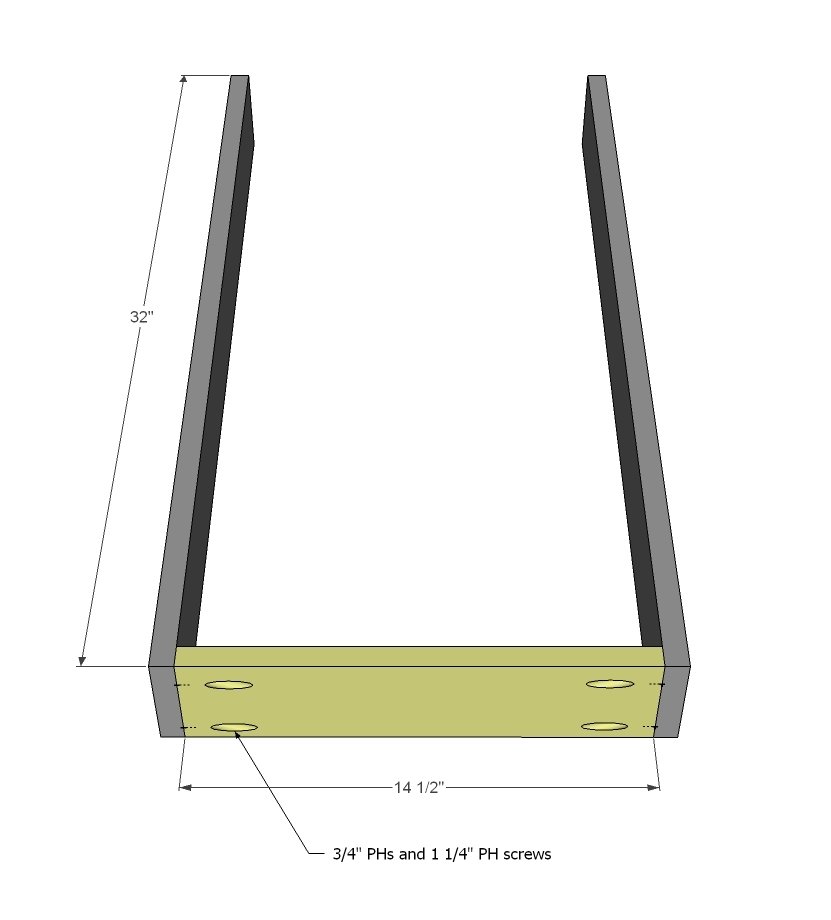
Okay - just build the box bottom as shown here. If you don't have a Kreg Jig, you can certainly countersink or even nail and glue. TIP: If you wish to attach top with pocket holes, drill two 3/4" PHs facing upward on the inside of the sides for attaching the top in later steps.
Step 2
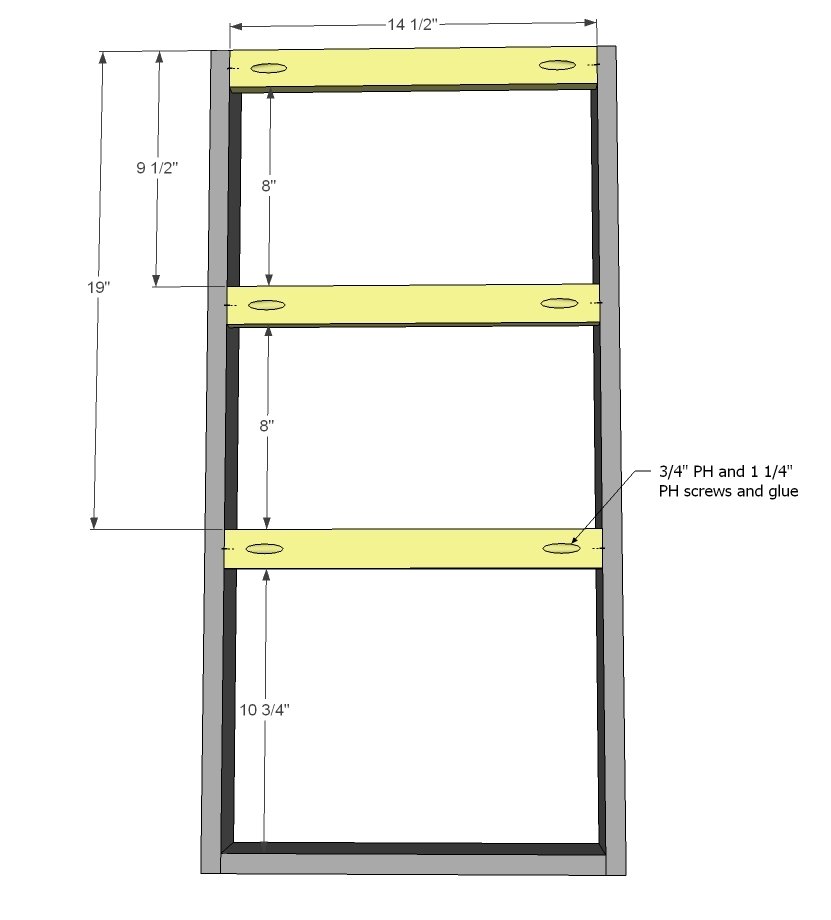
Then add the back supports. I actually adjusted my placement for the length of my necklaces. Remember, you can loop necklaces a couple times around a nail to shorten. TIP: You'll hang the cabinet through a screw through these back supports.
Step 3
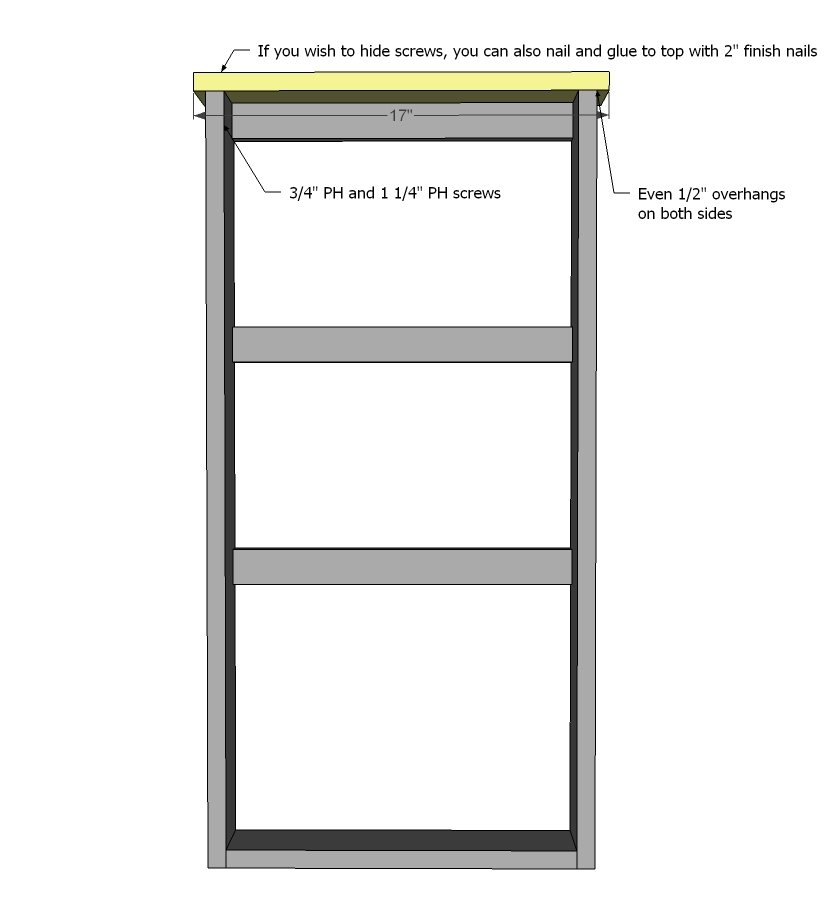
Now add the top.
Step 4
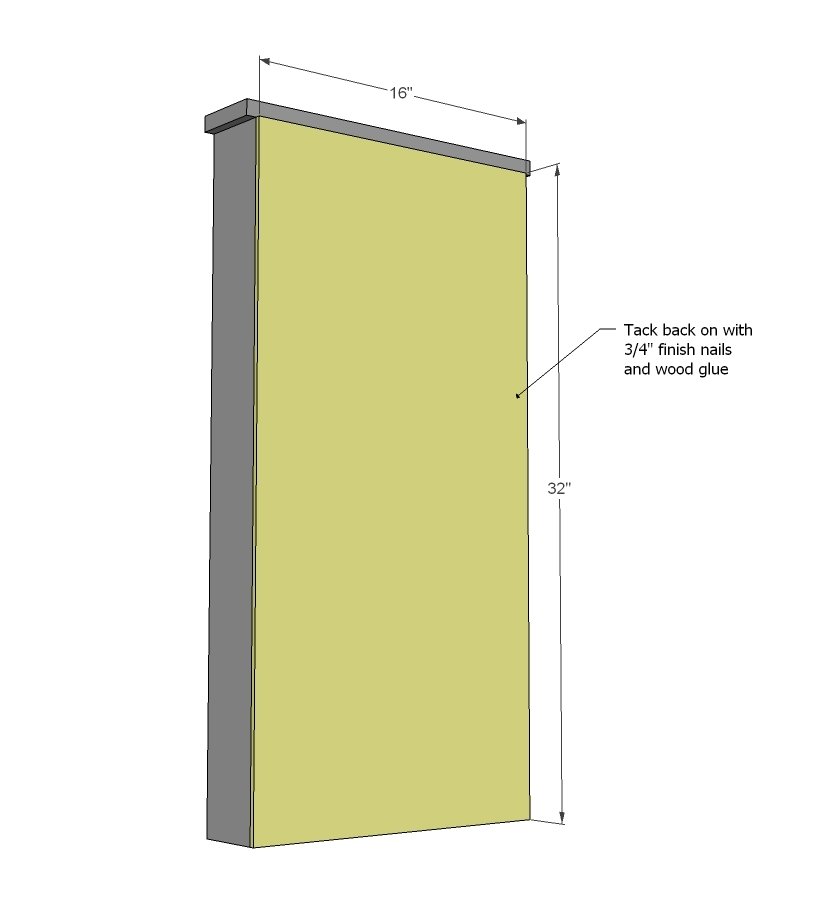
And then the back. Again, back is optional.
Step 5
Step 6
And a cheat sheet...
Step 7
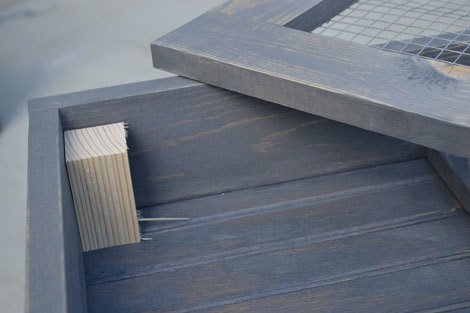
May I suggest cutting blocks 2 3/4" long and placing inside the project?
Step 8
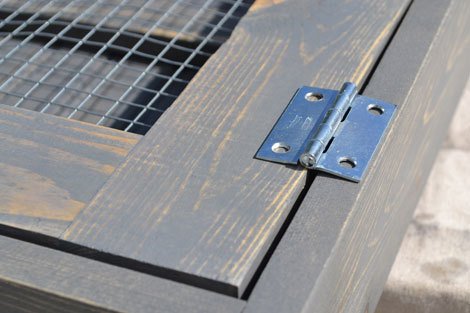
Then when you go to put the hinges on, just rest the door on the blocks!
Step 9
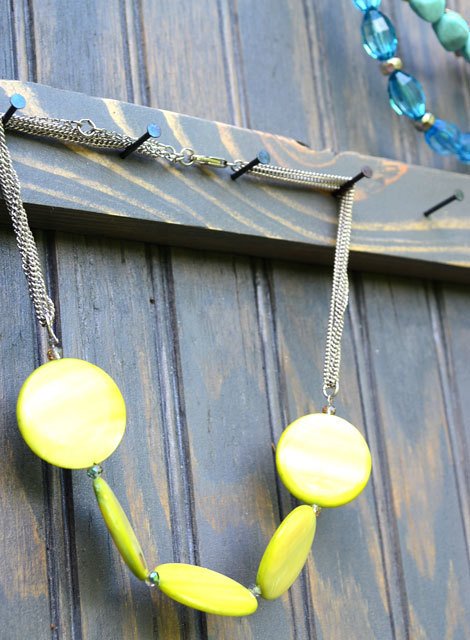
And I just nailed a nail every inch or so for hanging the necklaces.
Step 10
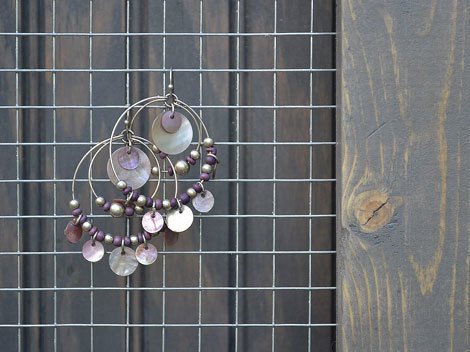
And stapled on hardware cloth with 1/2" staples from the back. Use tin snips to cut the wire - it's much easier than wire cutters. Or try to find spring loaded wire cutters.
Finishing
Sand all surfaces, starting with a medium grit and finishing with fine. Wipe off the dust, fill any holes or gaps with wood filler, and sand smooth once dry. Apply primer if you're painting, then finish with your choice of paint or stain and seal with a durable clear topcoat. For outdoor projects, use exterior-rated primer, paint or stain, and sealer so the piece stands up to the weather.
Source (temporary): https://www.ana-white.com/woodworking-projects/farmhouse-jewelry-wall-cabinet