Farmhouse Kitchen Island & Bar
A farmhouse style island featuring a bar and two large cubboards with shelves, three shelves and a large drawer.
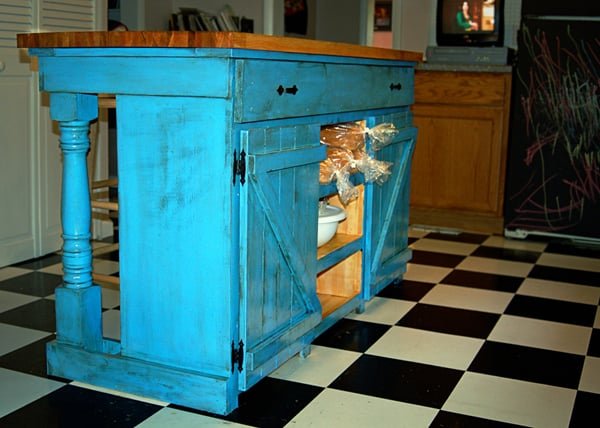
Specifications
| Project type | Kitchen Island Plans |
|---|---|
| Room | kitchen |
| Style | Farmhouse Furniture |
| Difficulty | Advanced |
| Estimated cost | $100-$150 |
Dimensions
Use the size-specific shopping and cut lists below.
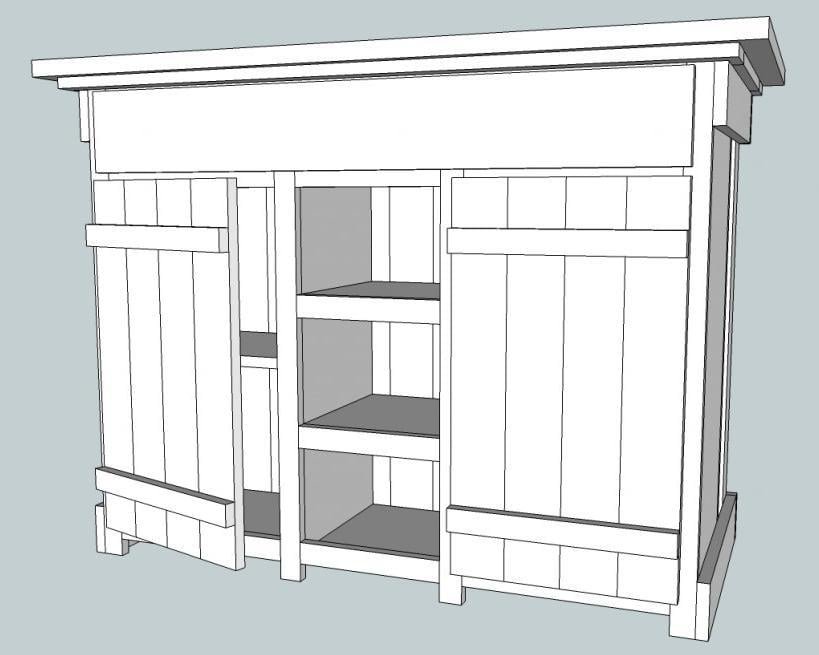
Shopping List
(7) 1×4 16′ long
(1) 1×6 8′ long
(3) 1×12 16′ long
(7) 1×2 6′ long
(1) 4″ post 8′ long OR (2) turned stair banisters
(1) 2′x5′ butcher block
(2) Sets door hinges
whatever other hardware you want, I used 2 handles for the top drawer.
*Note purchasing already turned stair banisters will move this project up into the $200 range.*
Cut List
16 – 1 x 4 @ 33.25″ Back slats
2 – 1 x 4 @ 56″ (measure first) Back trim
2 – 1 x 12 @ 33.25″ Sides
2 – 1 x 12 @ 54.5″ (Measure first) Top & bottom shelf
2 – 1 x 12 @ 25″ Shelf Dividers
2 – 1 x 12 @ 18″ Side Shelves
2 – 1 x 12 @ 17″ (measure first) Center Shelves
2 – 1 x 2 @ 31.75″ Front Side Trim
2 – 1 x 2 @ 27.75″ Center Front Trim
2 – 1 x 2 @ 16.5″ Side Shelf Trim
2 – 1 x 2 @ 17″ (Measure first) Center Shelf Trim
1 – 1 x 2 @ 56″ (Measure first) Drawer trim
4 – 1 x 4 @ 21″ Side trim
2 – 4 x 4 or Turned Stair banister @ 33.25″
1 – 1 x 4 @ 56″ (measure first) Back skirting
2 – 1 x 4 @ 5.5″ Leg support
2 – 1 x 4 @ 7.25″ Leg support
2 – 1 x 4 @ 59″ Top support
2 – 1 x 4 @ 16″ Side Top Support
1 – 1 x 2 @ 52″ (measure first) Center Top support
10 – 1 x 4 @ 25.5 Door slats
4 – 1 x 2 @ 17.5 (measure first) Door Trim
Optional, 2 – 1 x 2 @ measurement Door “Z” trim
1 – 1 x 12 @ 50″ Drawer bottom
1 – 1 x 4 @ 50″ Drawer back
2- 1 x 4 @ 12.25″ Drawer sides
1 1 x 6 @ 53.75″ (measure first) Drawer front
Tools
- measuring tape
- square
- pencil
- hammer
- safety glasses
- hearing protection
- drill
- circular saw
- nailer
- sander
- level
- countersink drill bit
Step-by-step Instructions
Lay Back slats side by side, keeping square.
Measure total distance across and adjust the back trim cut. Round up to the nearest 1/4″ if you have to. Set aside, we will attach these later, to help keep everything square. I recommended using wood screws to build the frame. Mark 5.5″ from top and 1.25″ from bottom of Sides Double check that the top & bottom shelf are cut 1.5″ less than the back trim. Attach top shelf so that the top of the shelf is 5.5″ from the top of the side. Attach bottom Shelf so that the bottom of the shelf is 1.25″ from the bottom of the side. Attach Shelf Dividers to top and bottom shelf, 18″ from the side. Measure Center space to double check center shelf cut. Insert and attach side shelves and center shelves as shown in the diagram. * Note, When I built this, I left out one side shelf so that i could fit my garbage can inside. Feel free to position the shelves as needed*
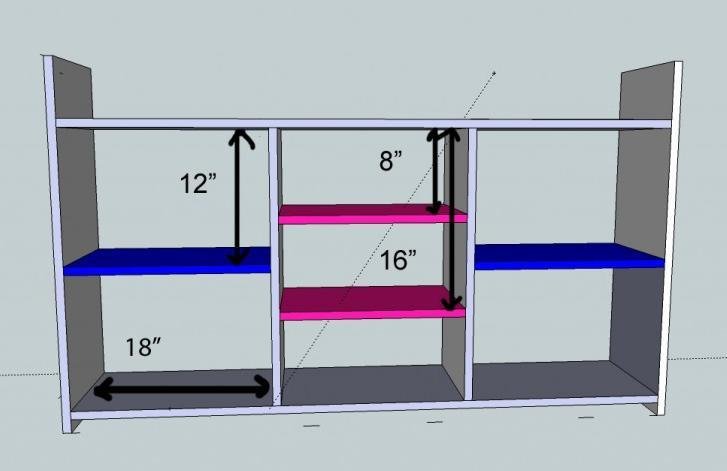
Step 2
* note If you want to get a more rustic look sand down & shape vertical edges of slats before attaching them* For the remainder of the instructions I recommend using a nail gun if you have it. Use nails that won’t show through on the other side. Now that the frame is constructed, attach the back slats and then attach the back trim.
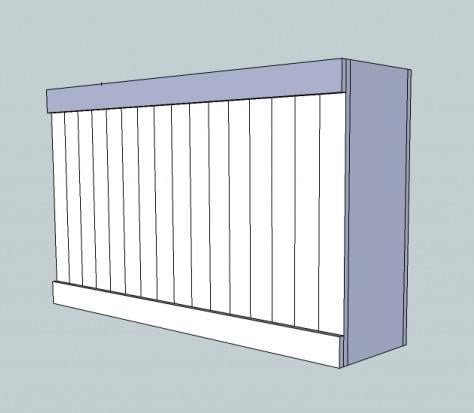
Next take the front Side trim and attach it so the edges are flush with the sides.
Attach the center front trim so that the inner edges are flush with the center shelves. There should be no trim hangover in the center shelves.
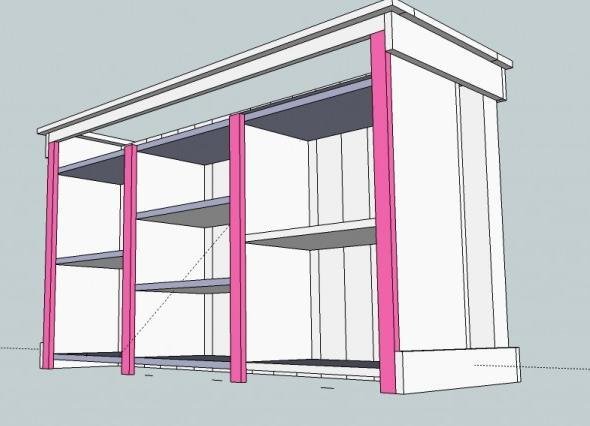
Attach top side shelf trims so that the top is flush with the upper side of the top shelf.
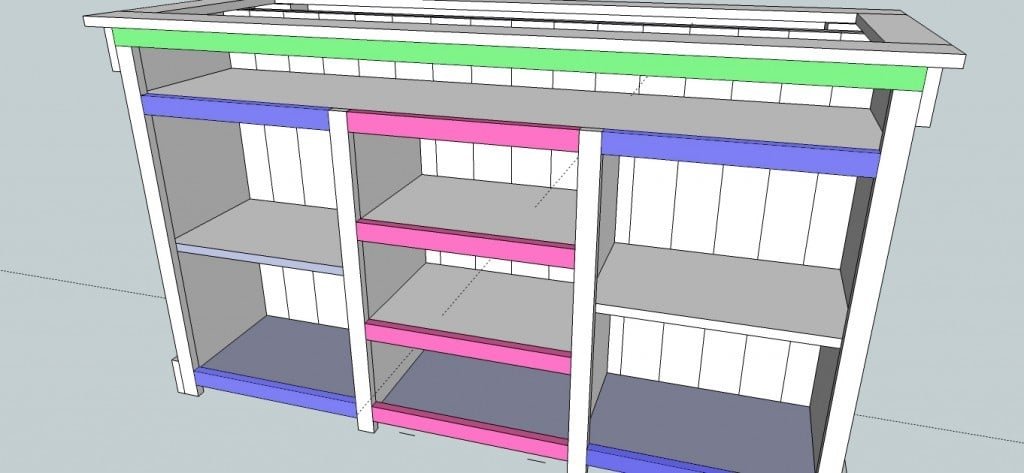
Attach bottom side shelf trim so that the bottom is flush with the lower side of the bottom shelf. Measure space between center front trim to check the center shelf trim cut. Attach upper most center trims so that the top of the trim is flush with the upper side of the center shelves. Attach bottom most center trim so that the bottom is flush with the lower side of the bottom shelf. Attach top trim so that it rests above the side trim, see diagram.
Step 5
Step 6
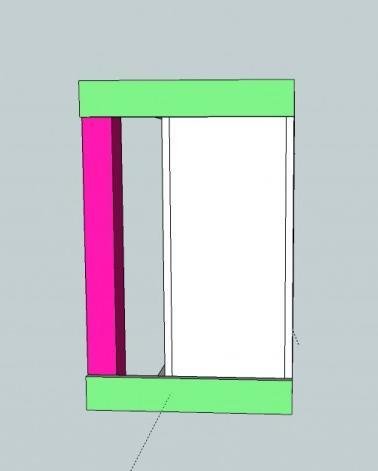
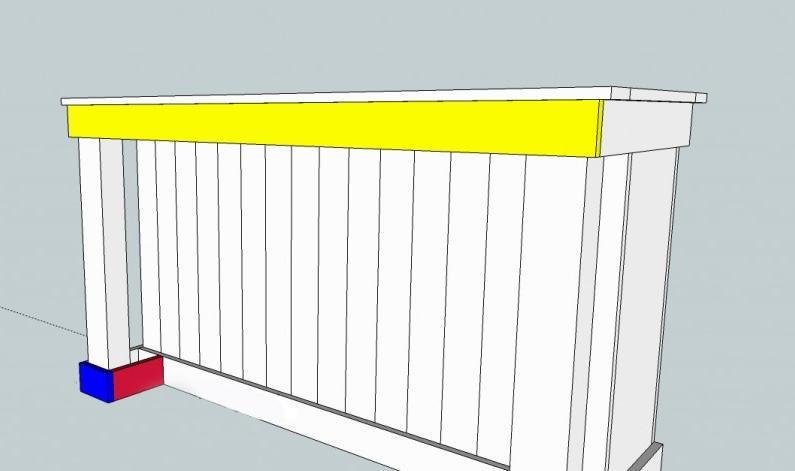
Double check distance between upper side trims and adjust back skirting cut. Attach back skirting in line with side trim. For the leg supports, attach the 7.25″ long one to inside of posts or banisters, aligned with the floor. The edge touching the island will have to be glued. The 5.5″ leg supports then attach to the ends of the posts or banister, align with side trim and inner leg support.
Step 7
Center Top supports along front and back of island. Center Side Top Supports along Side Trim. Check to make sure everything is square and attach. Inset Center top support along center (back slats) of island & attach. Center Butcher Block & Attach. I used screws and drilled up from the top supports so that they didn’t show.
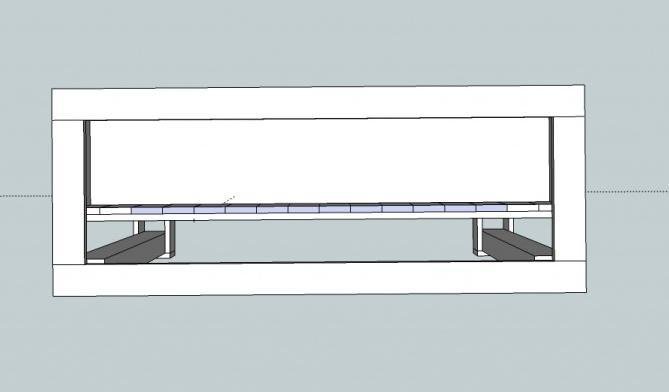
Island Doors:
Make 2 * note If you want to get a more rustic look sand down & shape vertical edges of slats before attaching them* Lay door slats next to each other & measure to double check door trim measurement Attach door trim 3 ” from top and bottom to door slats. Optional “Z” trim Take a 1×2 and cut one end at a 45 degree angle. Place it across the door slats, between the door trim and mark the other end. Cut at 45 degree angle and attach.
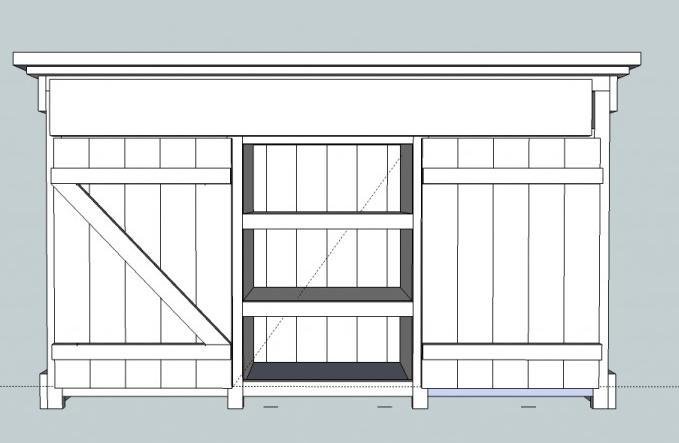
Island Drawer:
Attach drawer back to drawer bottom so that the drawer back next to, not on top of the drawer bottom Attach drawer sides Double check drawer front measurement. To attach the drawer front, set the drawer inside the island and mark where it should line up. Attach drawer front
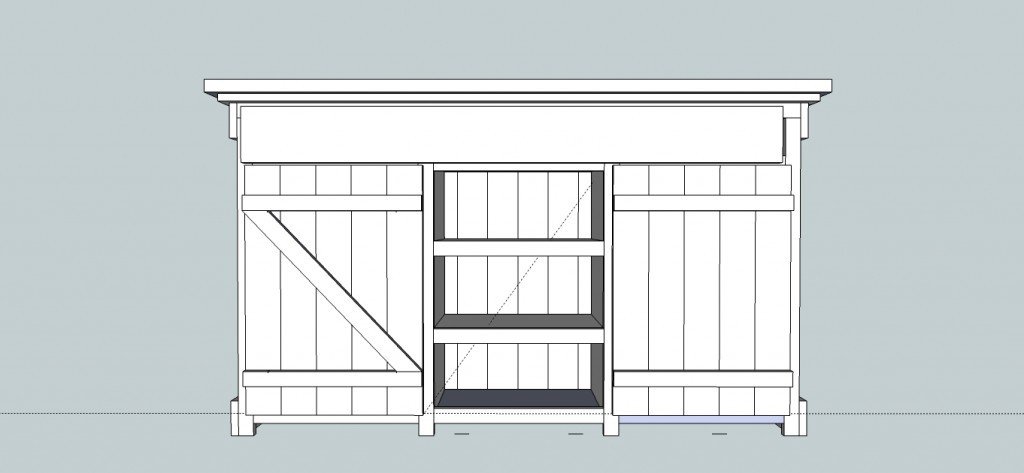
Finishing
Sand all surfaces, starting with a medium grit and finishing with fine. Wipe off the dust, fill any holes or gaps with wood filler, and sand smooth once dry. Apply primer if you're painting, then finish with your choice of paint or stain and seal with a durable clear topcoat. For outdoor projects, use exterior-rated primer, paint or stain, and sealer so the piece stands up to the weather.
Source (temporary): https://www.ana-white.com/woodworking-projects/farmhouse-kitchen-island-bar-plans