Farmhouse Modular Family Mudroom
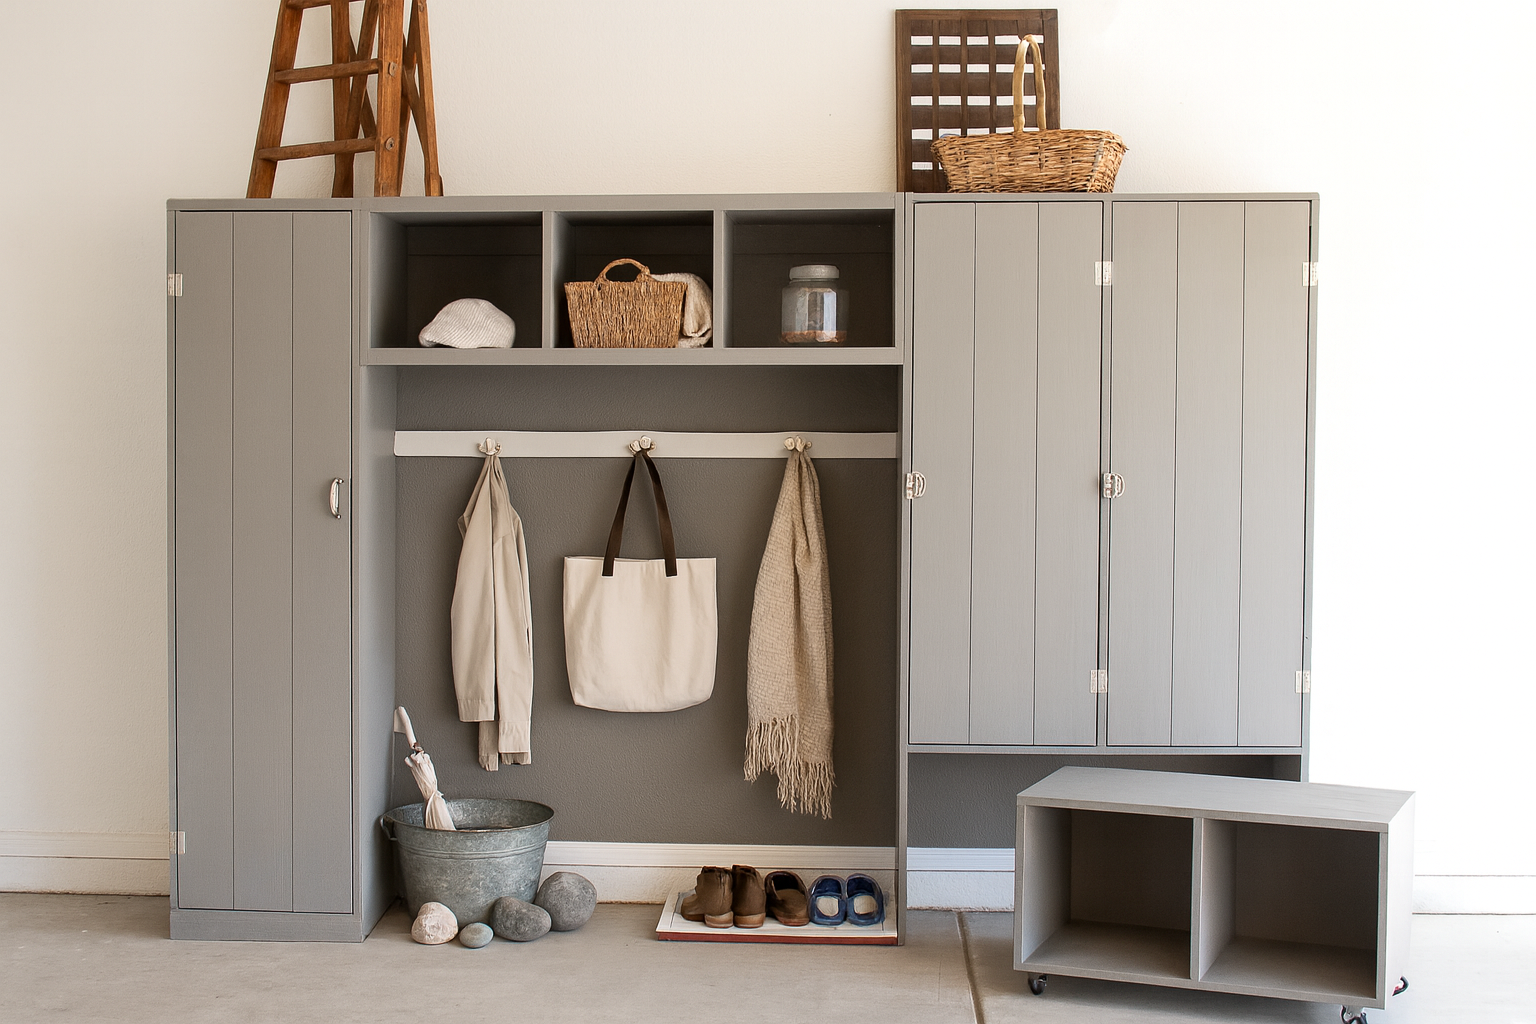
Double Locker Hutch with Pullout Bench Cubby – Keep your mudroom or entryway neat and organized with this double locker hutch featuring a pullout bench cubby. This design combines classic locker-style storage with a clever rolling bench that tucks neatly underneath — perfect for small spaces that need big functionality. Each locker offers upper cubbies, hanging hooks, and lower compartments for shoes or baskets, while the pullout bench provides a sturdy seat for putting on shoes or an extra spot for hidden storage. Built from basic materials, this DIY project delivers the look and function of custom cabinetry at a beginner-friendly skill level. Pair it with matching mudroom components for a full built-in system or use it as a stand-alone storage solution — ideal for families, mudrooms, garages, or entryways.
Specifications
| Project type | Lockers |
|---|---|
| Room | Entryway and Mudroom |
| Style | Farmhouse Furniture |
| Difficulty | Intermediate |
Dimensions
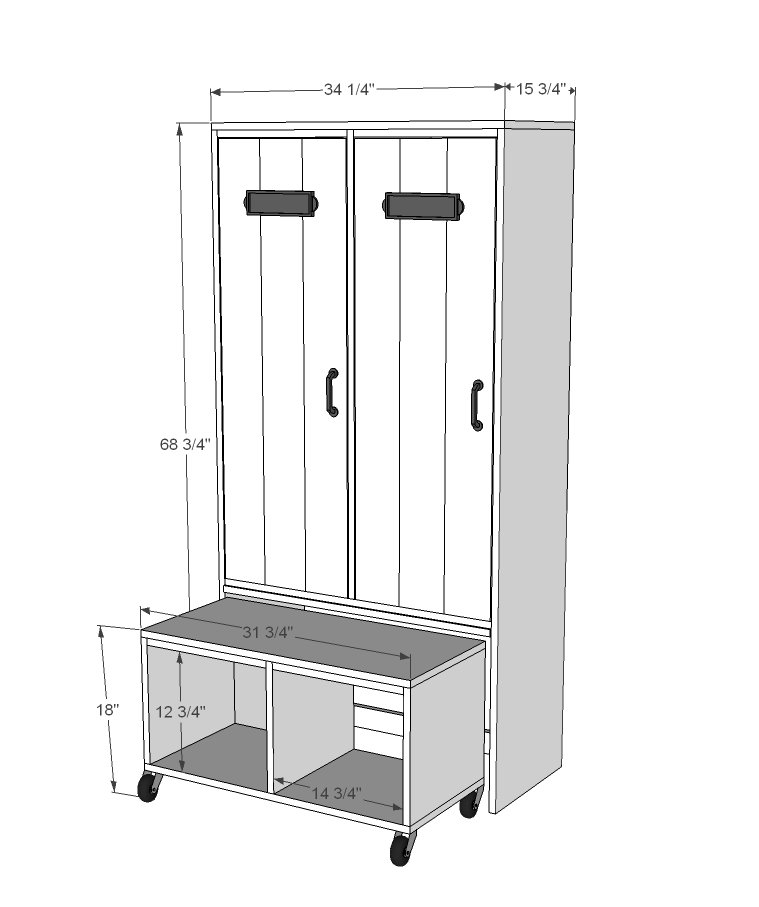
Use the size-specific shopping and cut lists below.
Shopping List
- 1 1/2 - sheets 3/4" plywood cut into strips 15 3/4" wide by 8 feet long
- 1 - 1x2 @ 8 feet long
- 1 - 1x3 @ 8 feet long
- 2 sets hinges and handles
- 1/4" plywood for back
- 1 1/4" pocket hole screws or 2" self tapping wood screws
- 1 1/4" brad nails
- wood glue
Cut List
- 2 - 3/4" plywood 15 3/4" x 68"
- 1 - 3/4" plywood 15 3/4" x 34 1/4"
- 1 - 3/4" plywood 15 3/4" x 48"
- 1 - 3/4" plywood 15 3/4" x 32 3/4"
- 1 - 1x3 @ 32 3/4"
- 2 - 1x2 @ 16"
- 2 - 1x3 @ 16" (for coat hooks and finishing off back side)
- 1 - 1x2 @ 32 3/4"
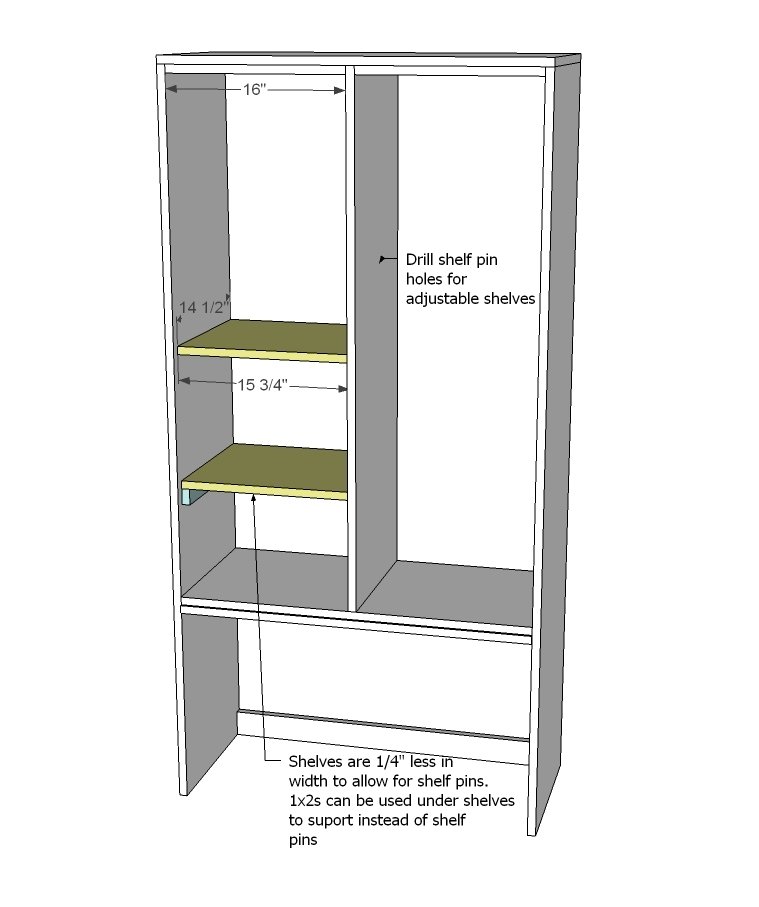
- shelves are 3/4" plywood 15 3/4" x 14 1/2"
- shelf supports if using instead of shelf pins are 1x2 @ 14 1/2" long
- 2 - 3/4" plywood @ 47" (doors - cut grooves 1/8" deep)
Tools
- measuring tape
- square
- pencil
- safety glasses
- hearing protection
- kreg-jig
- drill
- circular saw
- nailer
- countersink drill bit
Step-by-step Instructions
Step 1
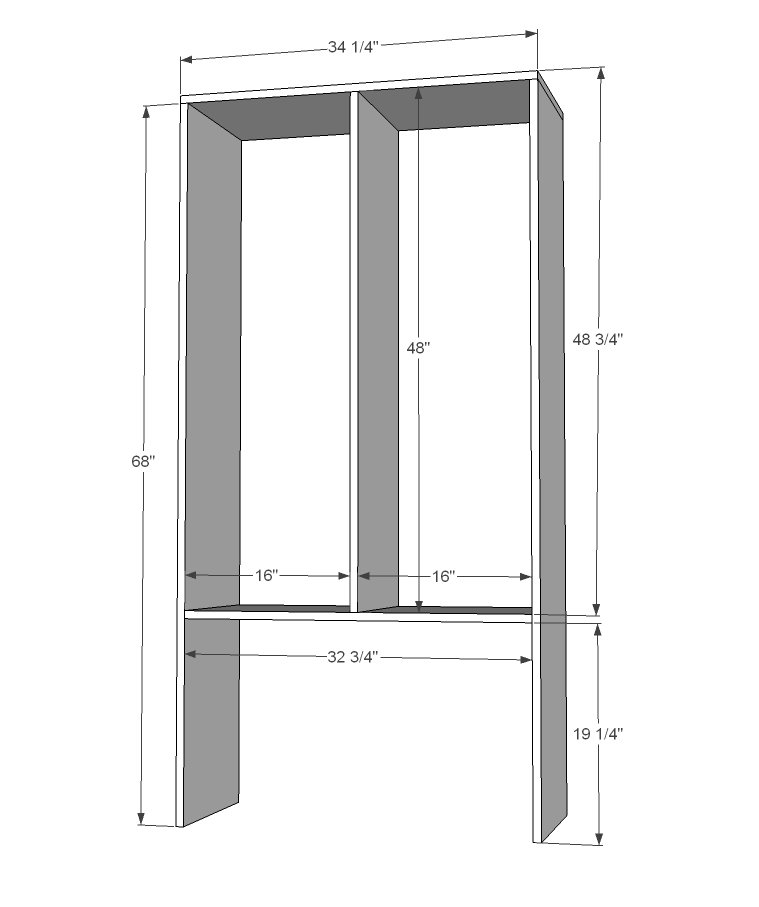
Start by building the main storage box of the mudroom hutch. Mark everything out and drill 3/4" pocket holes if using (recommended). Alternatively, you can use 2" countersunk screws and glue. I don't recommend finish nails as this is frameless.
Step 2
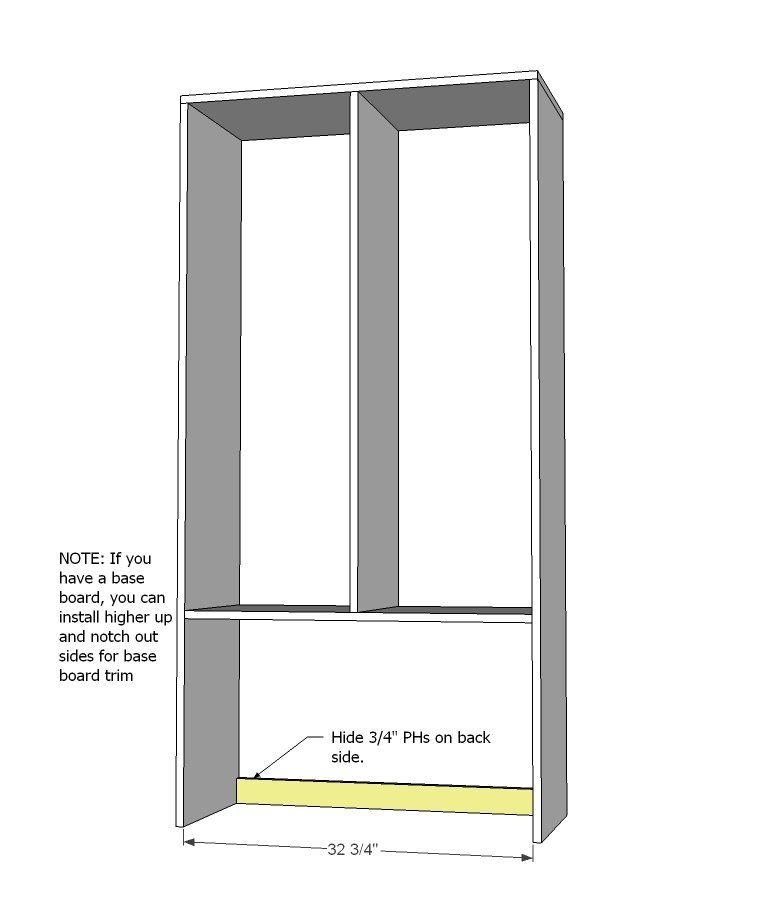
Attach back support, this is to keep everything in line at the bottom.
Step 3
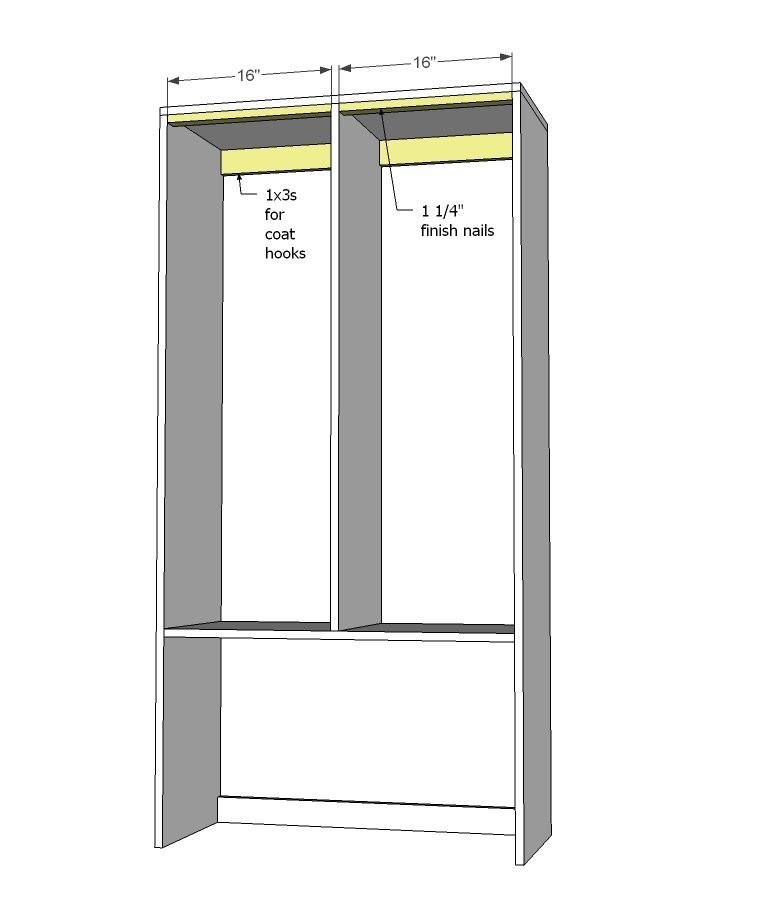
And then top supports.
Step 4
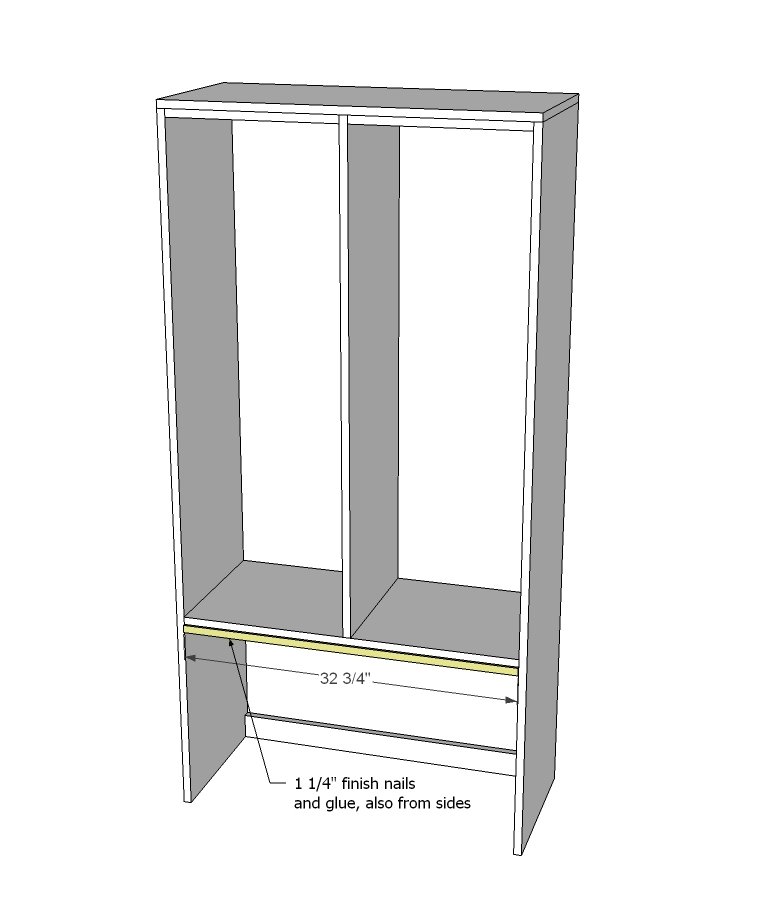
This piece is really just to keep the "look" consistent with the other pieces and top edge. You can nail and glue in place. NOTE: If you wish to add a back, now is a great time. Just tack 1/4" plywood cut to back size to back with finish nails and glue.
Step 5
Step 6
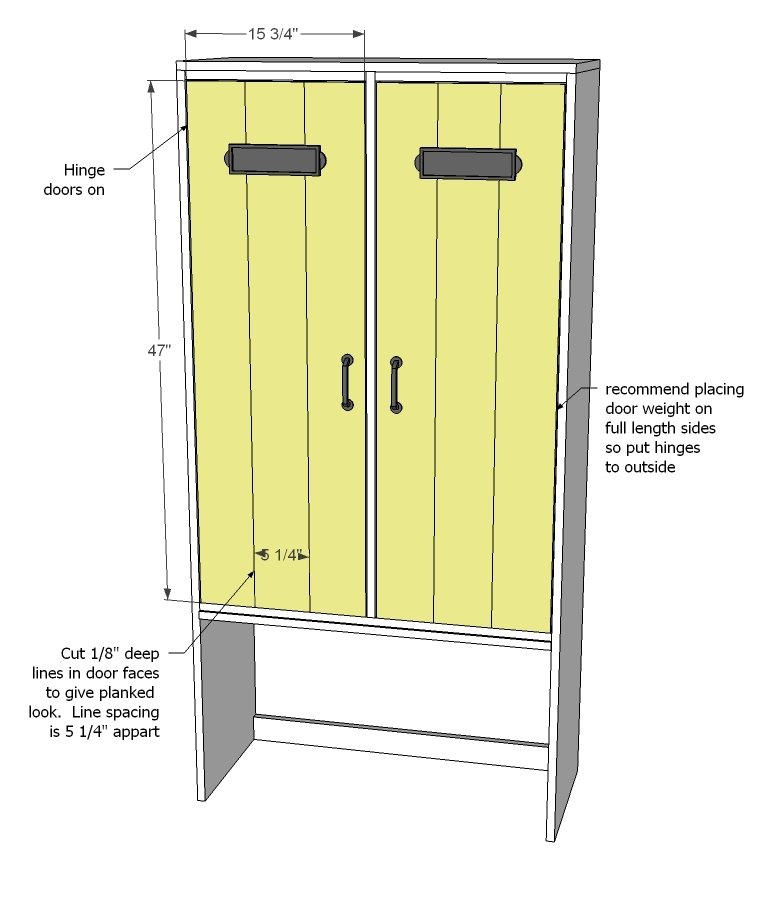
Door faces are simply cut 1/8" deep with circular saw or miter saw to create the look of planks, and then attached with hinges. Doesn't get much easier than that!!!! We'll put the cart plans together in the next few days for you, so stay tuned for that!
Finishing
Sand all surfaces, starting with a medium grit and finishing with fine. Wipe off the dust, fill any holes or gaps with wood filler, and sand smooth once dry. Apply primer if you're painting, then finish with your choice of paint or stain and seal with a durable clear topcoat. For outdoor projects, use exterior-rated primer, paint or stain, and sealer so the piece stands up to the weather.
Source (temporary): https://www.ana-white.com/woodworking-projects/farmhouse-modular-family-mudroom-double-locker-hutch