Farmhouse Play Table
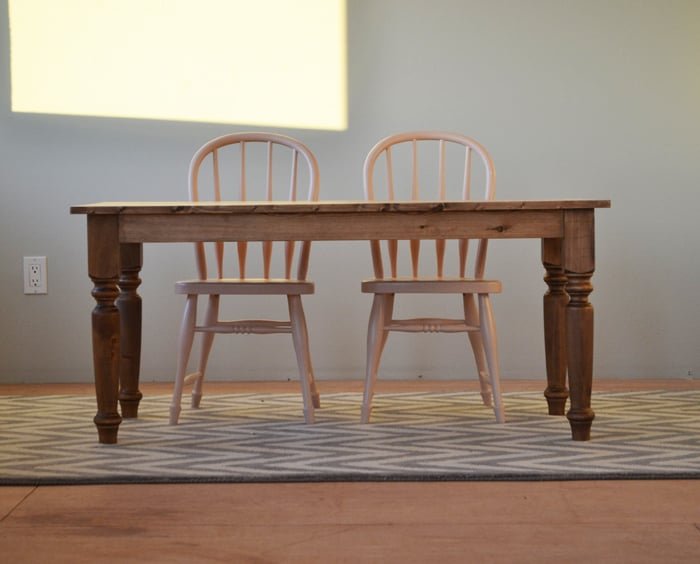
to build a farmhouse style play table from Many years later, we are still using this darling play table. It is beautiful and durable and has held up well.
Specifications
| Project type | Kids Tables and Chairs |
|---|---|
| Room | Kids and Toys |
| Style | Children's and Kid's Room Furniture and Toy Plans |
| Difficulty | Beginner Projects |
| Estimated cost | $50 - $100 |
Dimensions
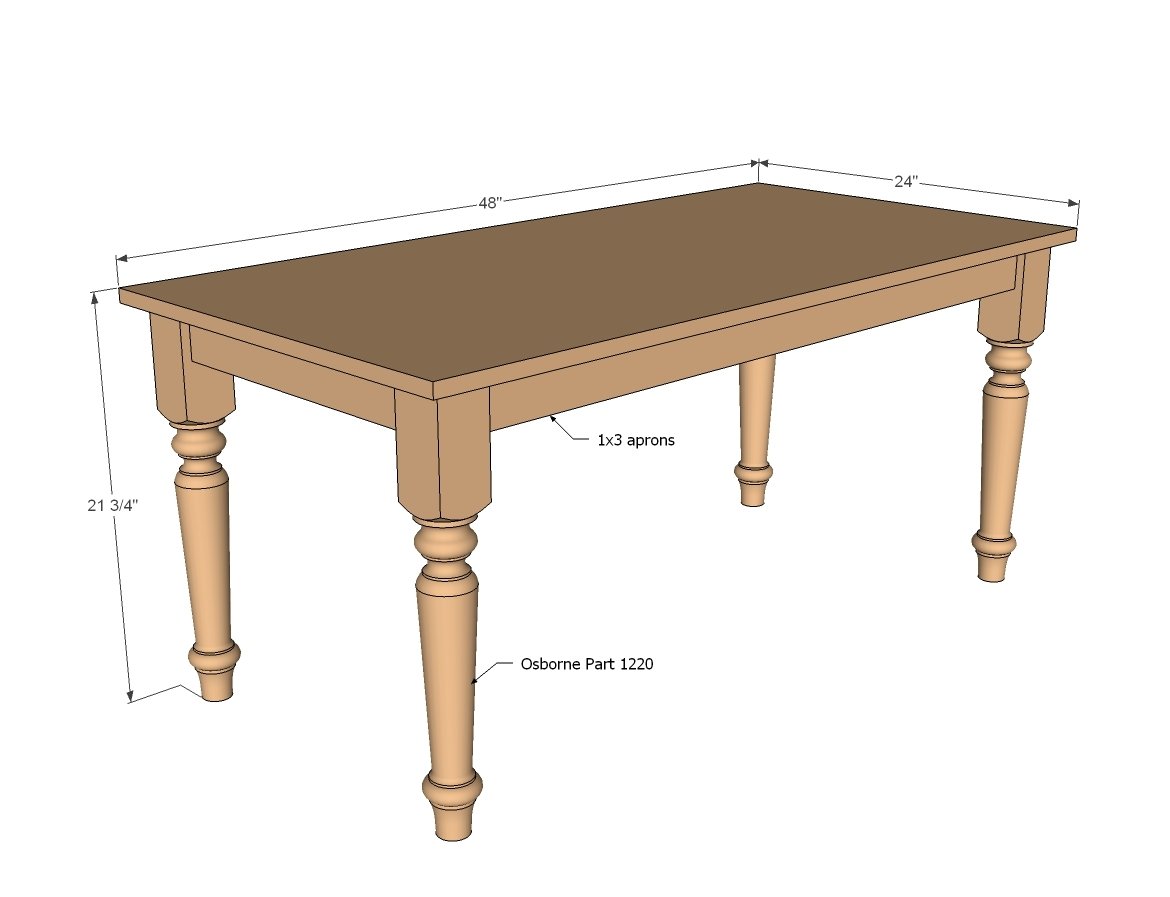
Use the size-specific shopping and cut lists below.
Shopping List
- 4 end table legs (we used these ones from Osborne Wood )
- 2 - 1x3 @ 16-1/2"
- 2 - 1x3 @ 40-1/2"
- 1 - premade project panel 24" x 48"
- 1-1/4" pocket hole screws
Cut List
2 - 1x3 @ 16-1/2" 2 - 1x3 @ 40-1/2"
Tools
- measuring tape
- square
- pencil
- safety glasses
- hearing protection
- kreg-jig
- drill
- circular saw
- sander
Step-by-step Instructions
Step 1
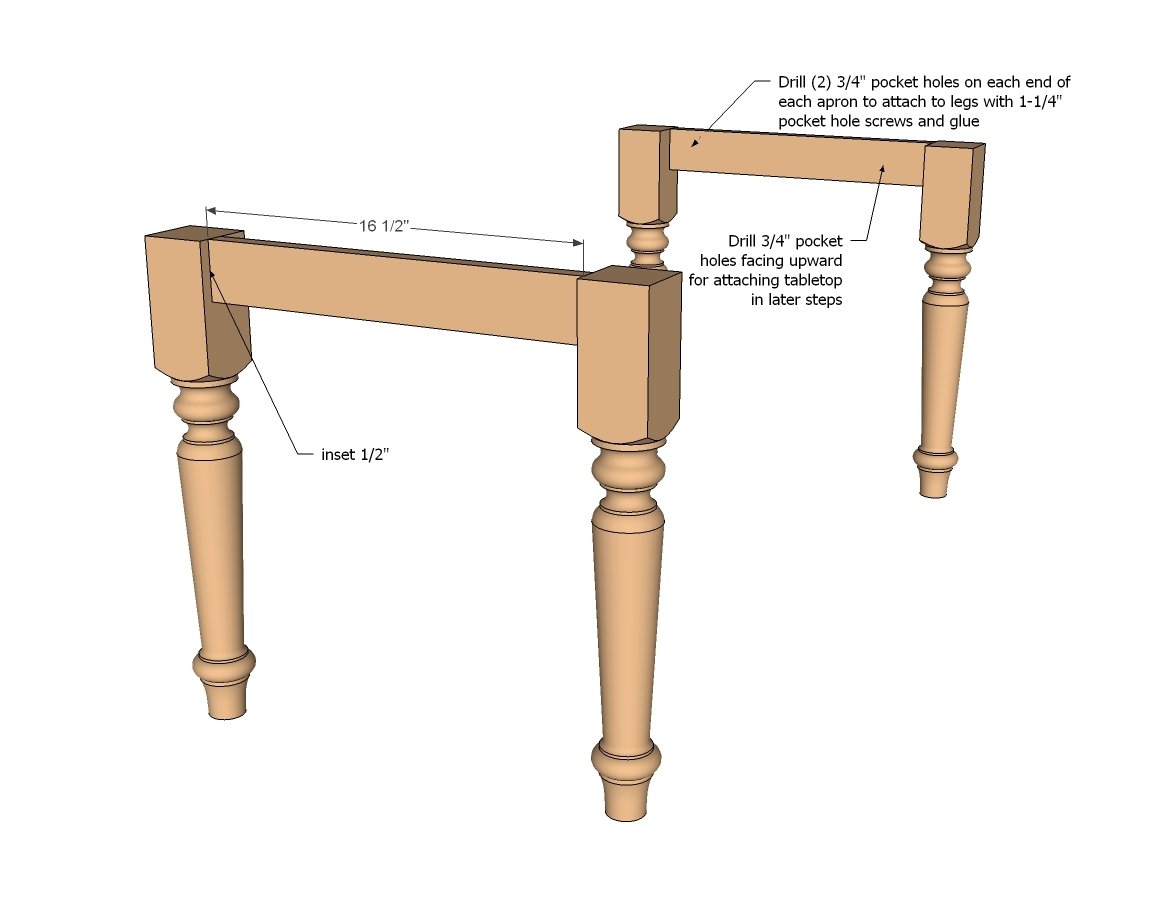
Attach the smaller aprons to two of the legs. Make sure the pocket holes for attaching the tabletop in later steps are facing upward and are on the insides.
Step 2
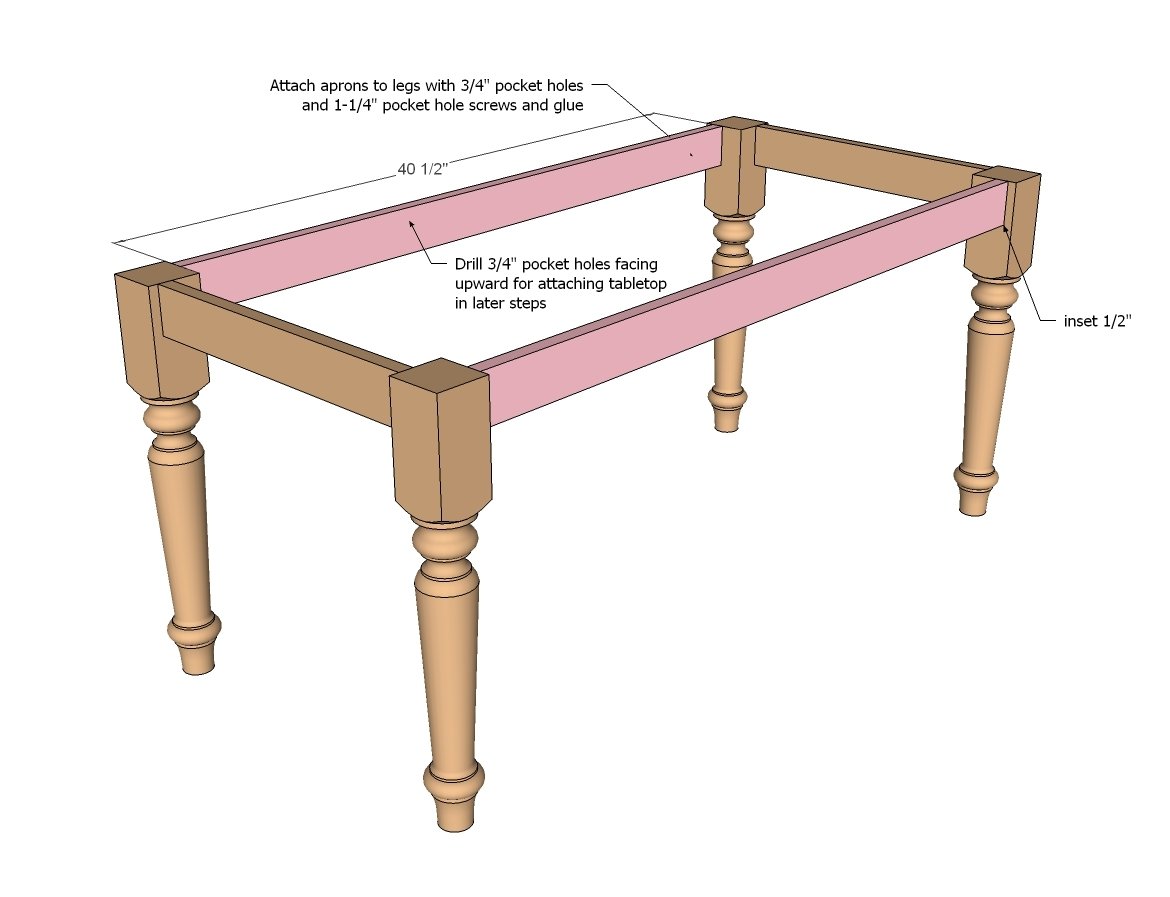
Then attach the longer aprons to the two leg sets.
Step 3
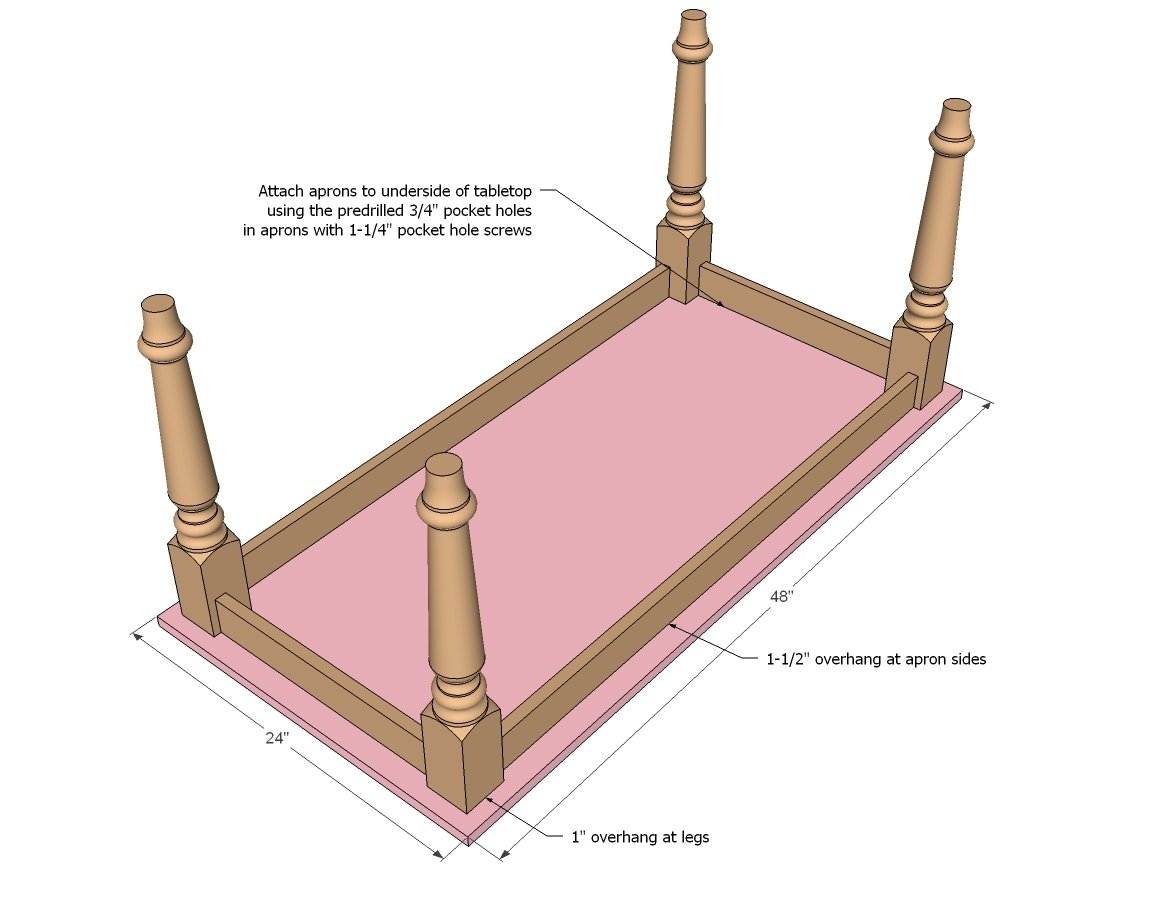
Center the base on the underside of the tabletop and attach from underside.
Finishing
Sand all surfaces, starting with a medium grit and finishing with fine. Wipe off the dust, fill any holes or gaps with wood filler, and sand smooth once dry. Apply primer if you're painting, then finish with your choice of paint or stain and seal with a durable clear topcoat. For outdoor projects, use exterior-rated primer, paint or stain, and sealer so the piece stands up to the weather.
Source (temporary): https://www.ana-white.com/woodworking-projects/farmhouse-play-table