Farmhouse Potting Bench
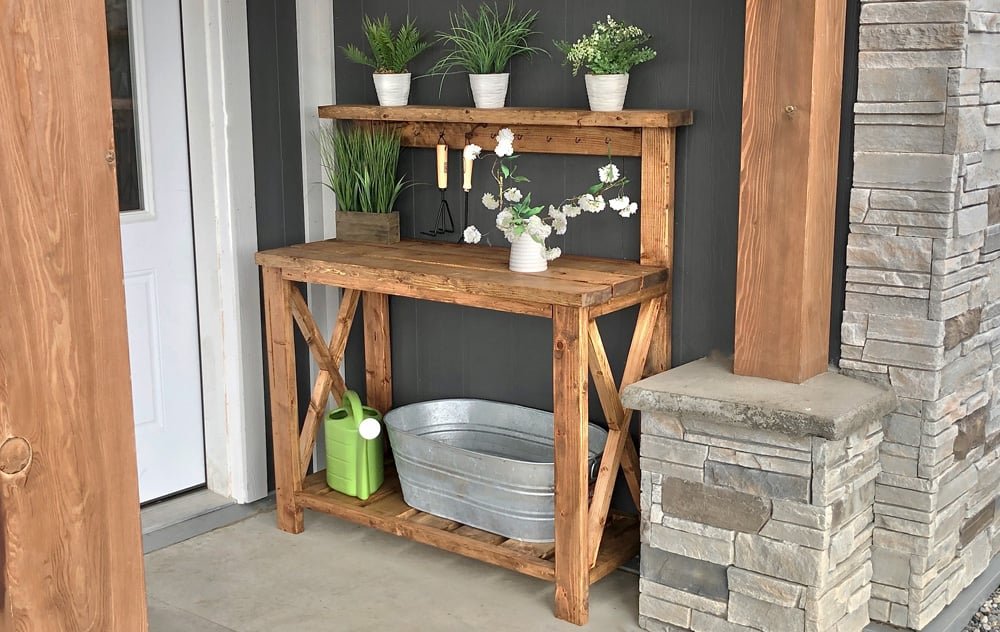
Build your own potting bench for about $50! This farmhouse style potting bench features a slatted bottom shelf, upper shelf with hook bar, and X detailing on the ends. Simple construction uses basic tools and off the shelf materials. Free! This plan was SO popular, I went on to design an entire collection of plans to match! Here's the entire collection: Outdoor Table + Potting Bench Collection 6 matching premium plans • minimal tools • ad-free Get All 6 Plans in this Collection
Specifications
| Project type | Planters, Garden Beds, and Greenhouses |
|---|---|
| Room | Outdoor |
| Style | Farmhouse Furniture |
| Difficulty | Intermediate |
Dimensions
Use the size-specific shopping and cut lists below.
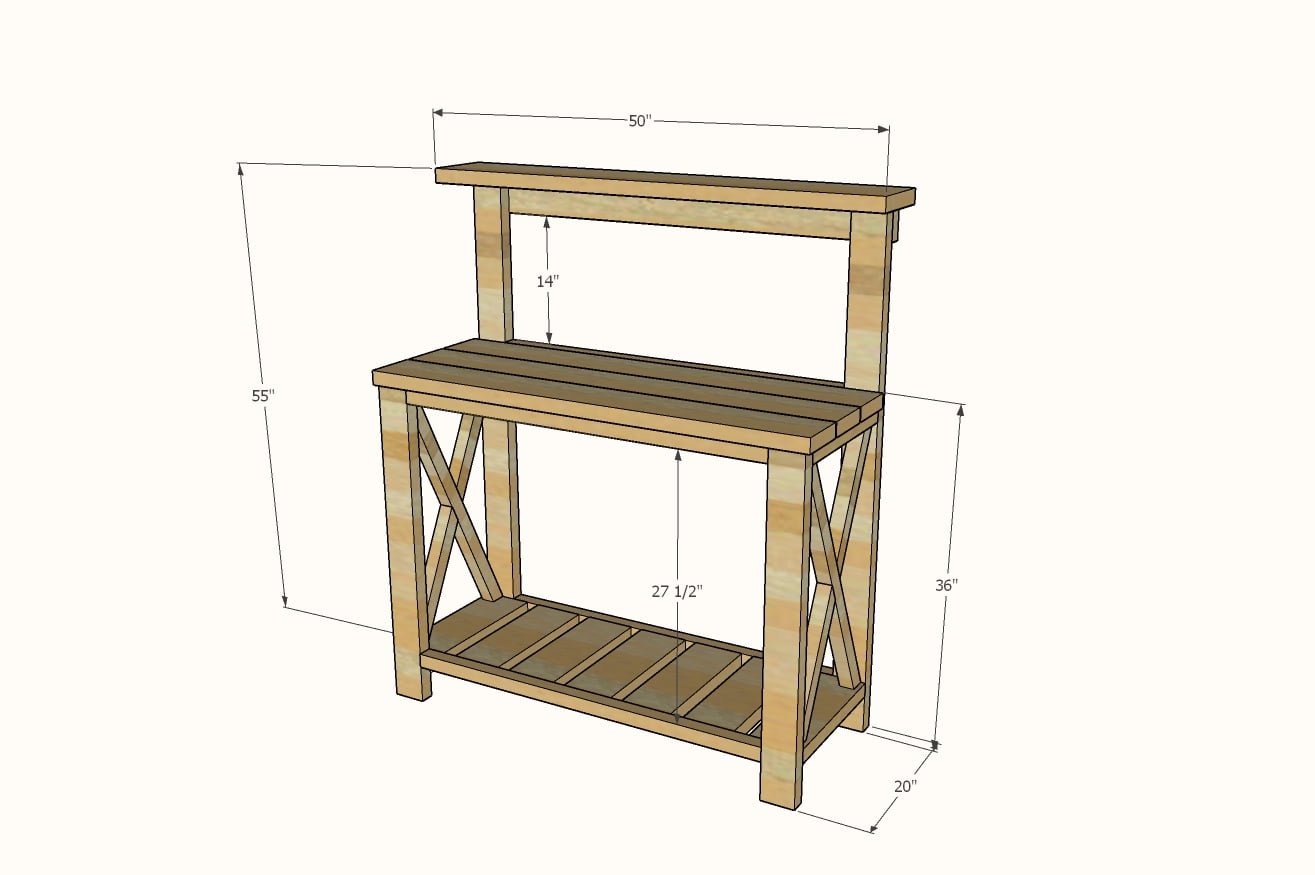
Shopping List
- 3 - 2x2 @ 8 feet long
- 4 - 2x4 @ 8 feet long
- 4 - 2x6 @ 8 feet long
- About 120 - 2-1/2" long #8 self tapping wood screws ( I recommend these from Home Depot )
Exterior appropriate wood glue
Cut List
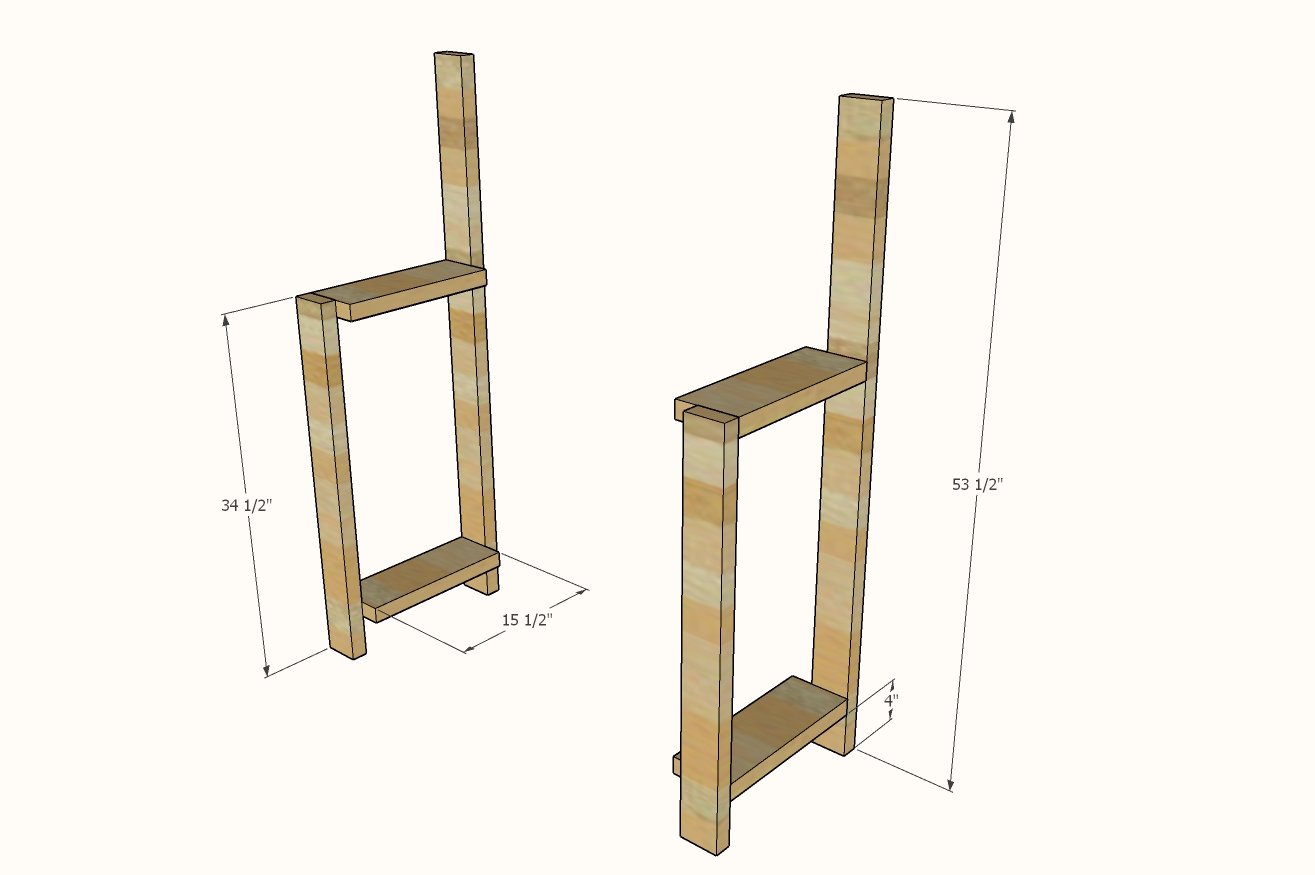
- 2 - 2x4 @ 34-1/2" - front legs
- 2 - 2x4 @ 53-1/2" - back legs
- 10 - 2x6 @ 15-1/2" - slats
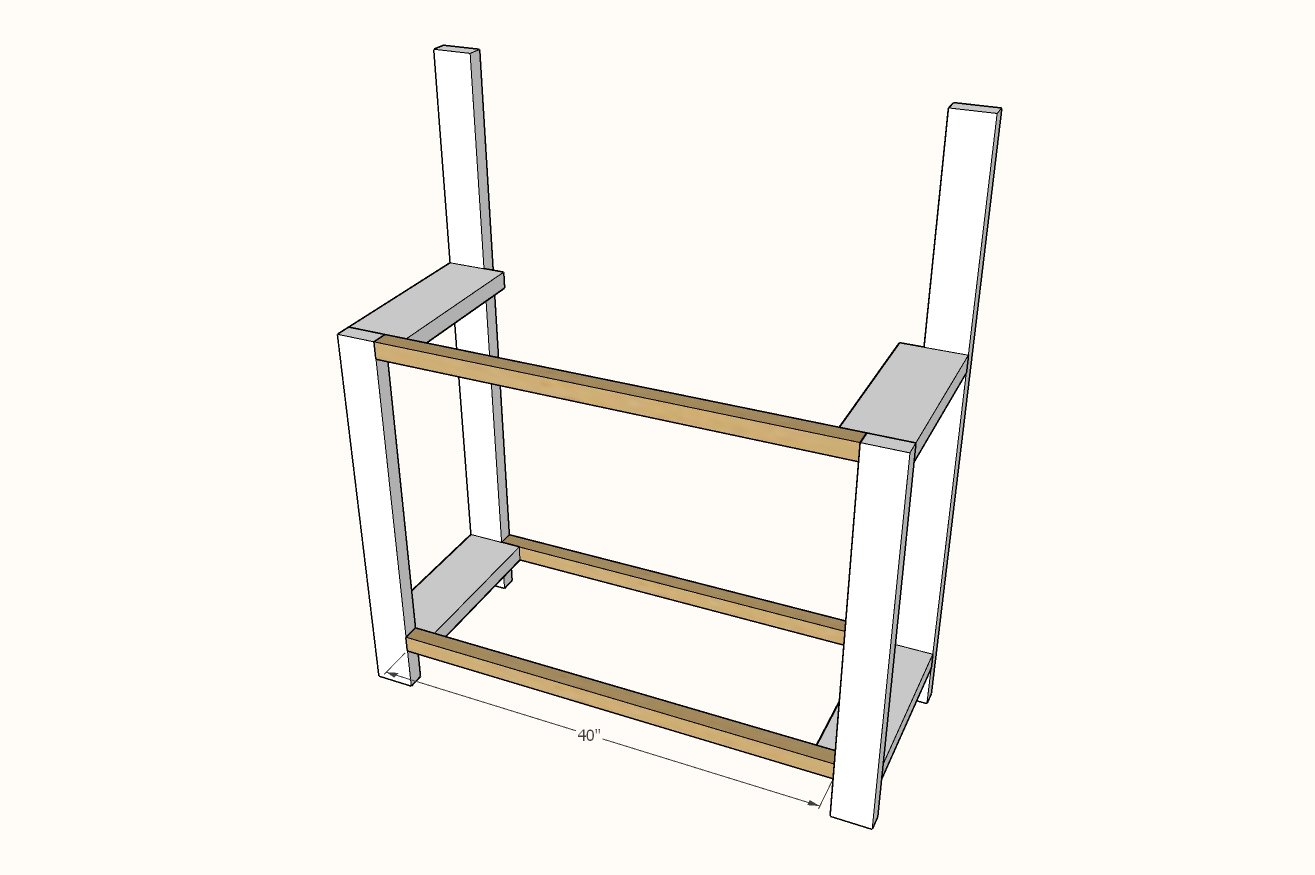
- 3 - 2x2 @ 40" - front/backs
- 1 - 2x4 @ 40" - back
- 1 - 2x4 @ 47" - top back (recommend cutting this board to fit when you get to this step in the build)
- 3 - 2x6 @ 48" - tabletop boards
- 1 - 2x4 @ 50"
NOTE: This cut list has been corrected per user comments for the 3-2x6 tabletop boards
Tools
- measuring tape
- pencil
- safety glasses
- hearing protection
- drill
- compound miter saw
- sander
Step-by-step Instructions
Step 1
Build the two leg sets as shown in the diagram with 2 screws per joint and glue. The two legs need to be built in mirror.
Step 2
Attach the two legs sets together using the 2x2s with screws and glue on a level surface.
Step 3
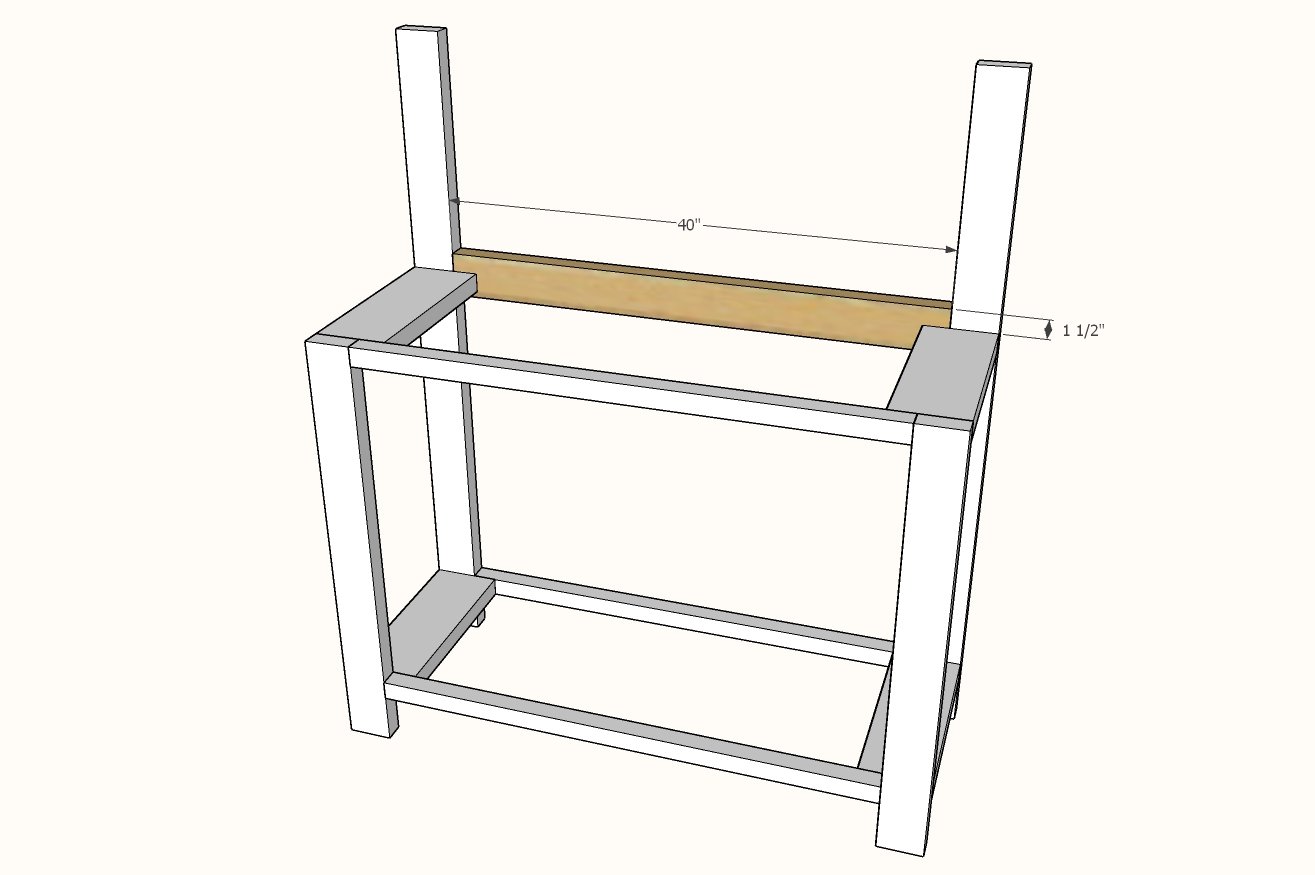
Measure up 1-1/2" on the back legs from the tops of the 2x6s. Attach 2x4 back with screws to the 2x6. Also recommended is a screw at an angle from the top of the 2x4 into the back legs.
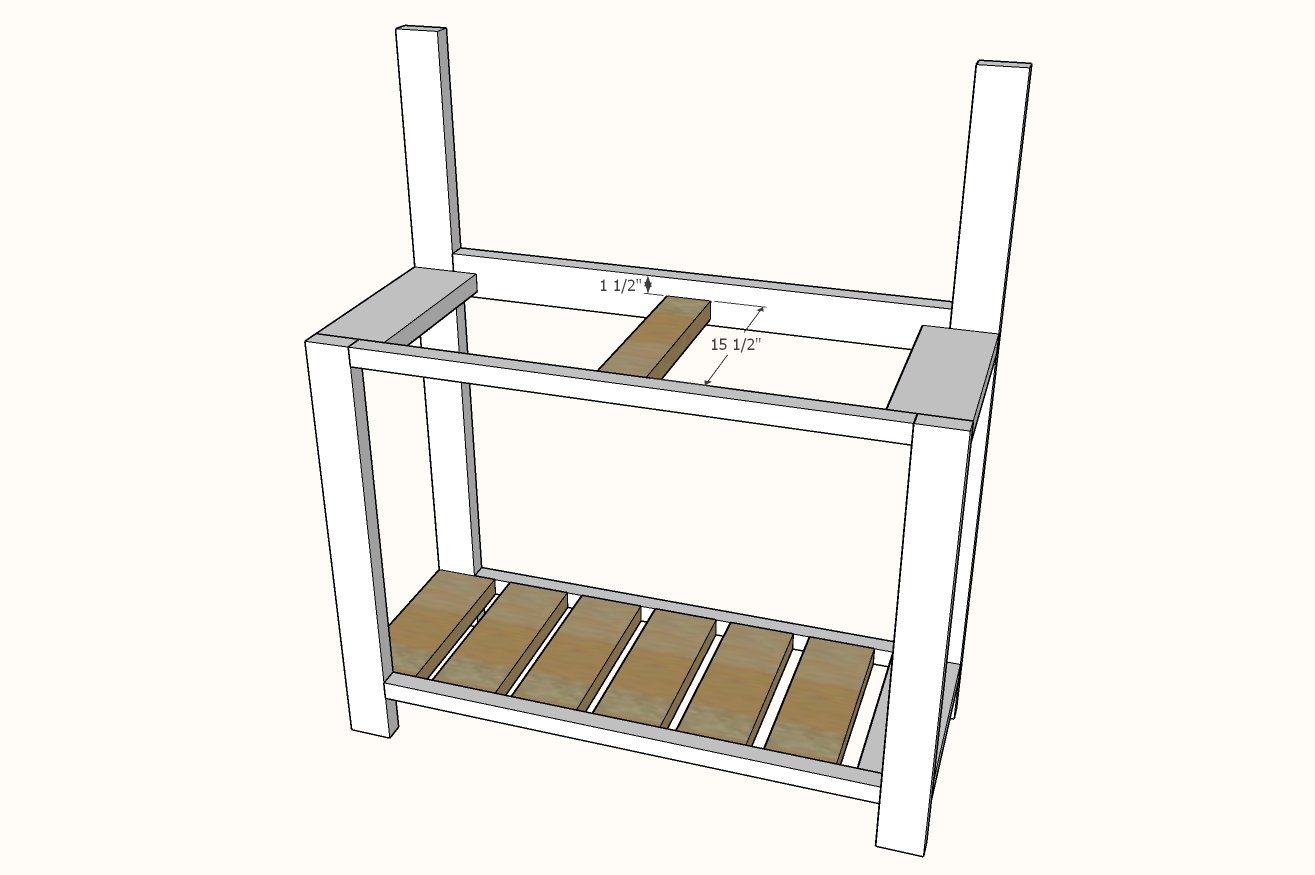
Attach 2x6 slats inside the bottom shelf.
Also recommended in another 2x6 support in the center of the tabletop so you have something to screw your tabletop boards to. It is shown as a 2x4 in the diagram, but you can use a 2x6 as you will have the scraps leftover.
Step 5
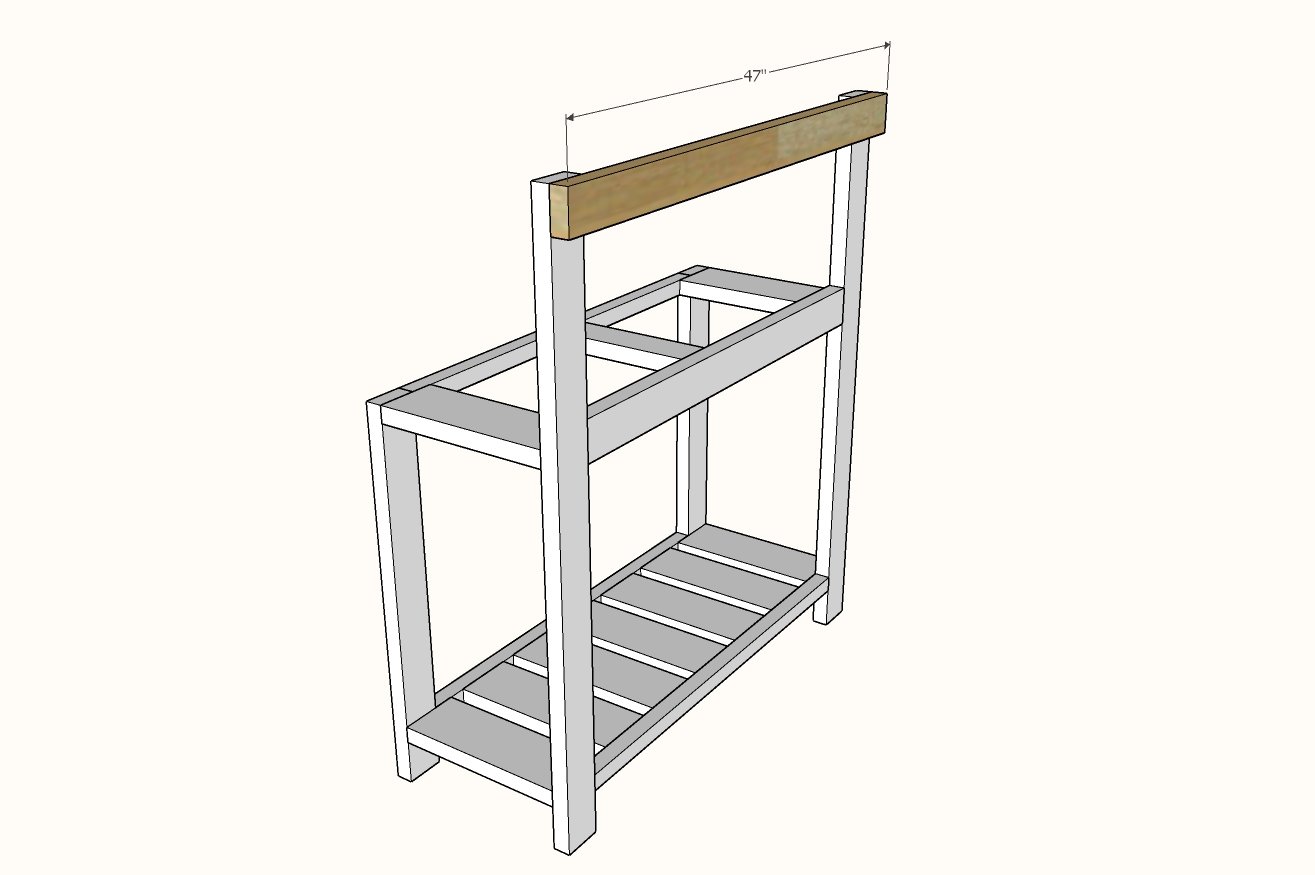
Measure and cut the back from the 2x4. Attach with screws and glue along the top edge.
Step 6
Scribe the 2x2 X detailing and cut on the compound miter saw. This step is shown in detail in the video, so please watch if you are having issues. Use glue to attach the middle X and a screw or a brad nail (if you have a brad nailer).
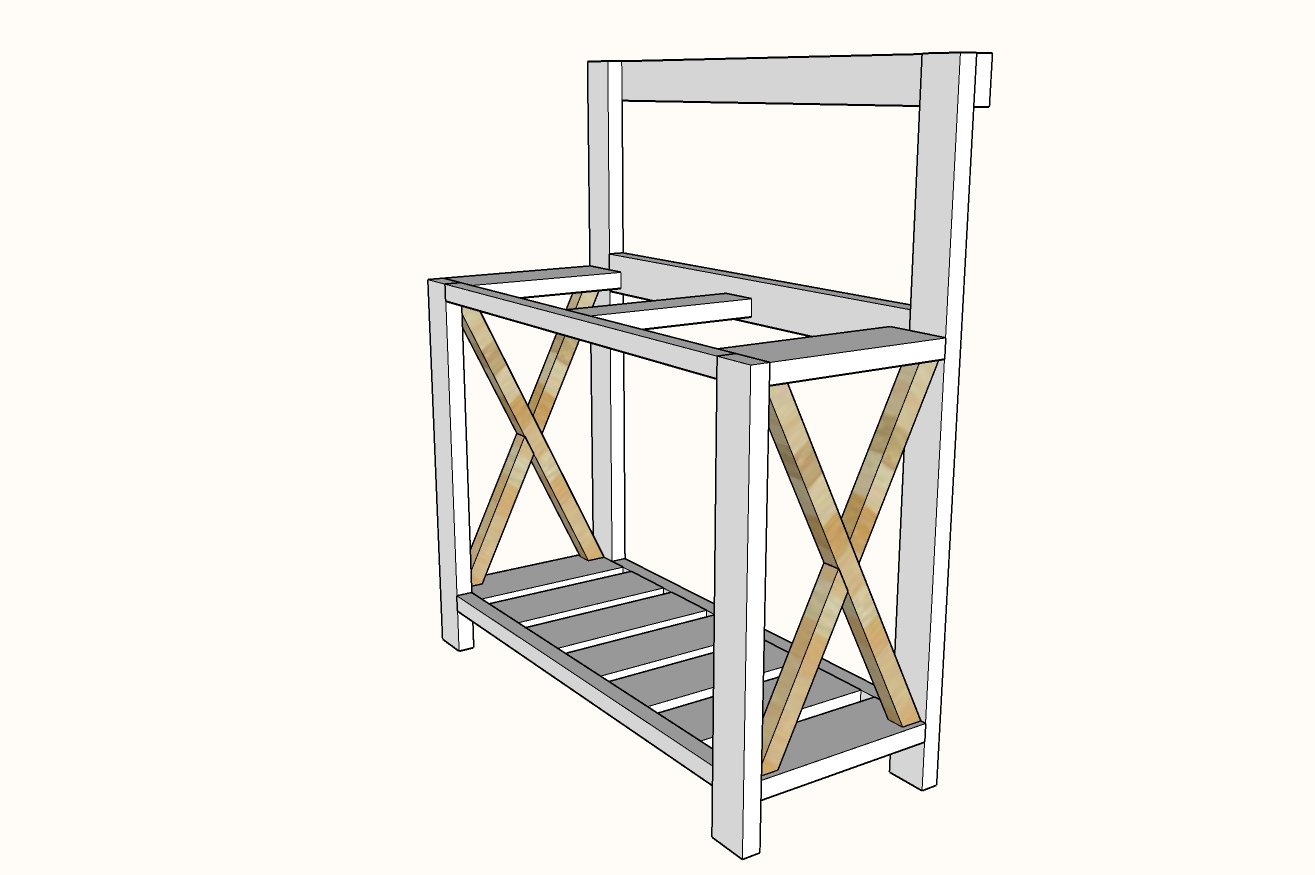
Space out the tabletop boards and attach from underneath.
Attach top shelf to the tops of legs and the back top piece with glue.
Finishing
Sand all surfaces, starting with a medium grit and finishing with fine. Wipe off the dust, fill any holes or gaps with wood filler, and sand smooth once dry. Apply primer if you're painting, then finish with your choice of paint or stain and seal with a durable clear topcoat. For outdoor projects, use exterior-rated primer, paint or stain, and sealer so the piece stands up to the weather.
Source (temporary): https://www.ana-white.com/woodworking-projects/farmhouse-potting-bench