Farmhouse Table
to build a Farmhouse Table. This table has been built tens of thousands of times and is loved the world over for it's basic material composition, simple clean lines, easy to build steps, and sturdy, functional size. Our step by step plans with diagrams make it easy. This plan uses pocket holes and is the updated plan. We also have this plan available to build without pocket holes.
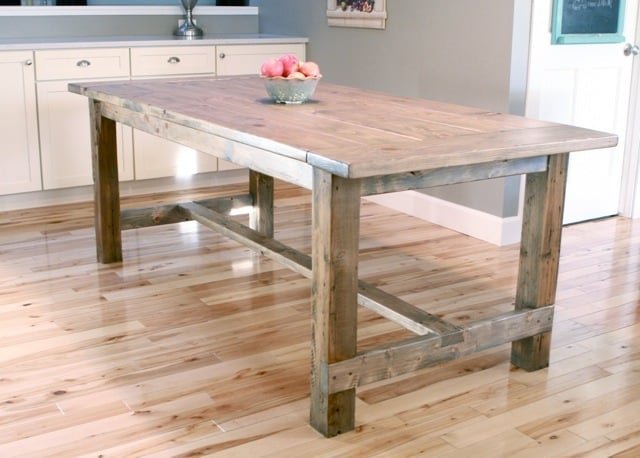
Specifications
| Project type | Dining Table Plans |
|---|---|
| Room | dining room |
| Style | Farmhouse Furniture |
| Difficulty | Intermediate |
Dimensions
Use the size-specific shopping and cut lists below.
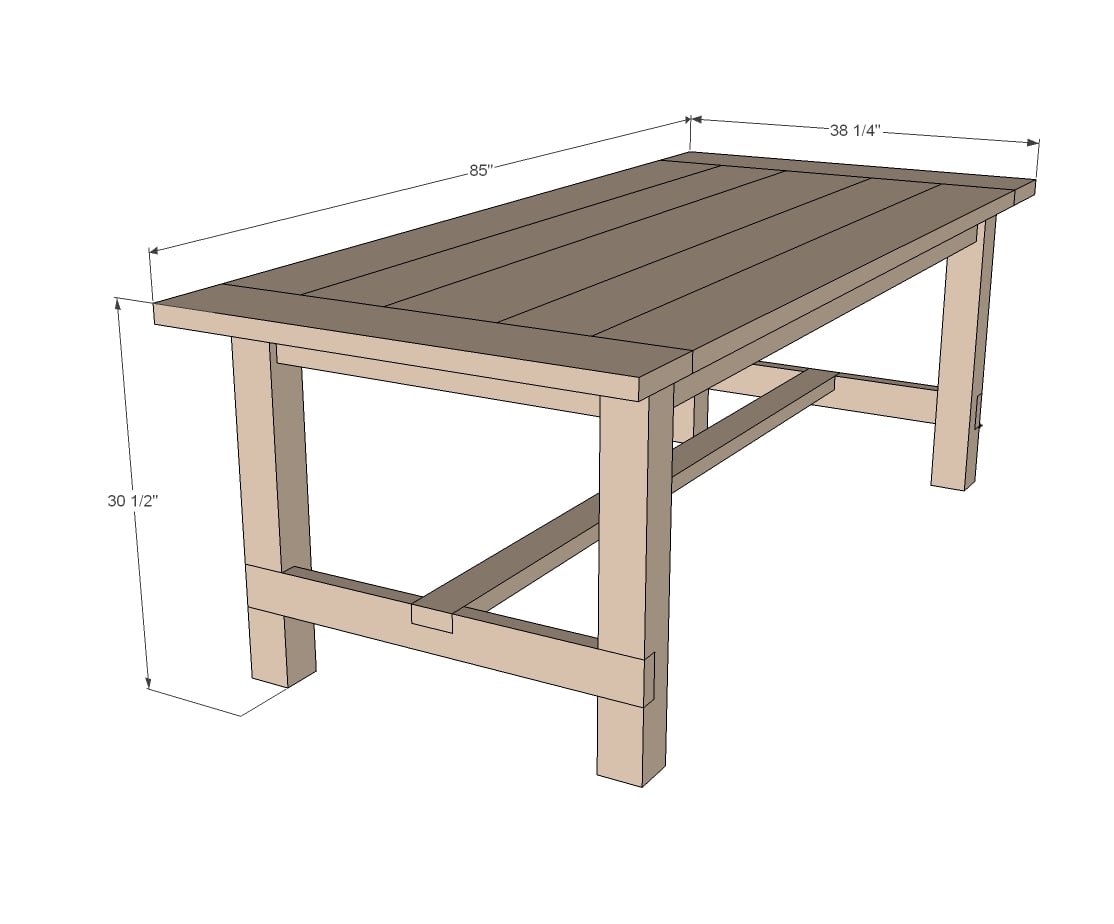
Shopping List
- 4 - 2x4 @ 8 feet long
- 1 - 4x4 @ 10 feet long
- 4 - 2x8 @ 6 feet long
- 1 - 2x8 @ 8 feet long (breadboard ends)
- 1 - 2x10 @ 6 feet long
Cut List
- 4 - 4x4 posts @ 29" (legs)
- 2 - 2x4 @ 67" (long aprons)
- 2 - 2x4 @ 27" (short aprons)
- 1 - 2x4 @ 74" (stretcher)
- 2 - 2x4 @ 34" (stretcher supports)
- 4 - 2x8 @ 70.5" (table top planks)
- 1 - 2x10@ 70-1/2" (center table top plank -- I had to use one 2x10 to get the right overall width)
- 2 - 2x8 ~38" (breadboard ends -- measure your joined tabletop before cutting these)
Tools
- measuring tape
- square
- pencil
- safety glasses
- kreg-jig
- drill
- circular saw
- sander
- level
- countersink drill bit
Step-by-step Instructions
Step 1
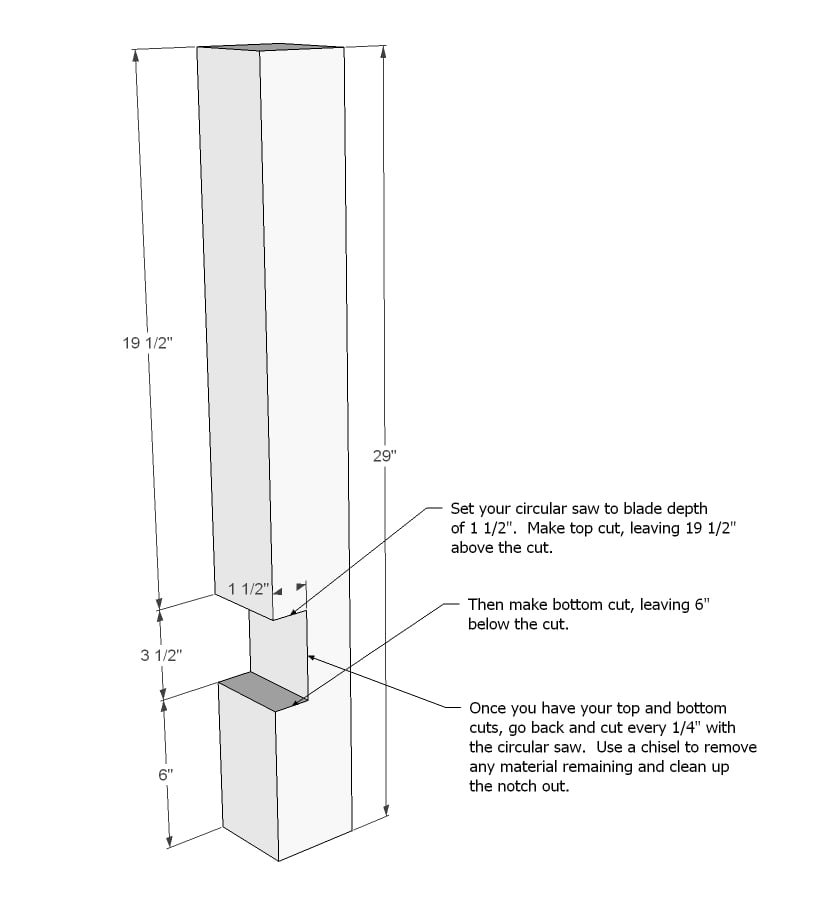
First, cut and notch out the 4x4s. If you can get your home improvement store to make square cuts, ask them to cut your 4x4s. Otherwise, you'll need a 12" (maybe a 10" will work too) miter saw or set your circular saw to the deepest possible cut. Cut one side, flip the 4x4 and finish the cut on the bottom side. Sand until cut is smooth. You'll probably add cork or felt pads under the legs later on to level table up and protect your floor. Then notch out the stretcher joint as shown in diagram. Definitely practice first on a scrap if you can. This is easier to do than it looks - just be sure to get the top and bottom cut right, and it will all work out!
Step 2
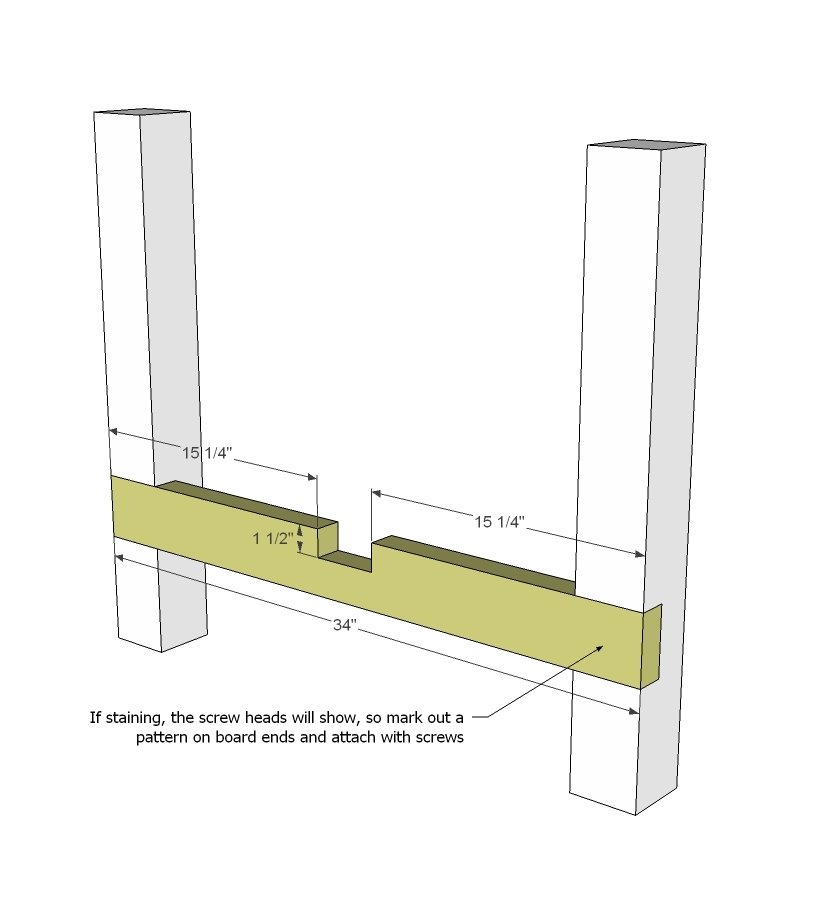
Notch out the stretcher support board first, then attach to the 4x4s. Remember the screws will show here, so drill in pattern. Use 3" screws to attach. Do both ends.
Then add your top aprons with 1 1/2" pocket holes and 2 1/2" pocket hole screws.
NOT SHOWN: Drill 1 1/2" pocket holes on the insides of your aprons facing upward for later attaching the the tabletop too. Drill three holes per end apron.
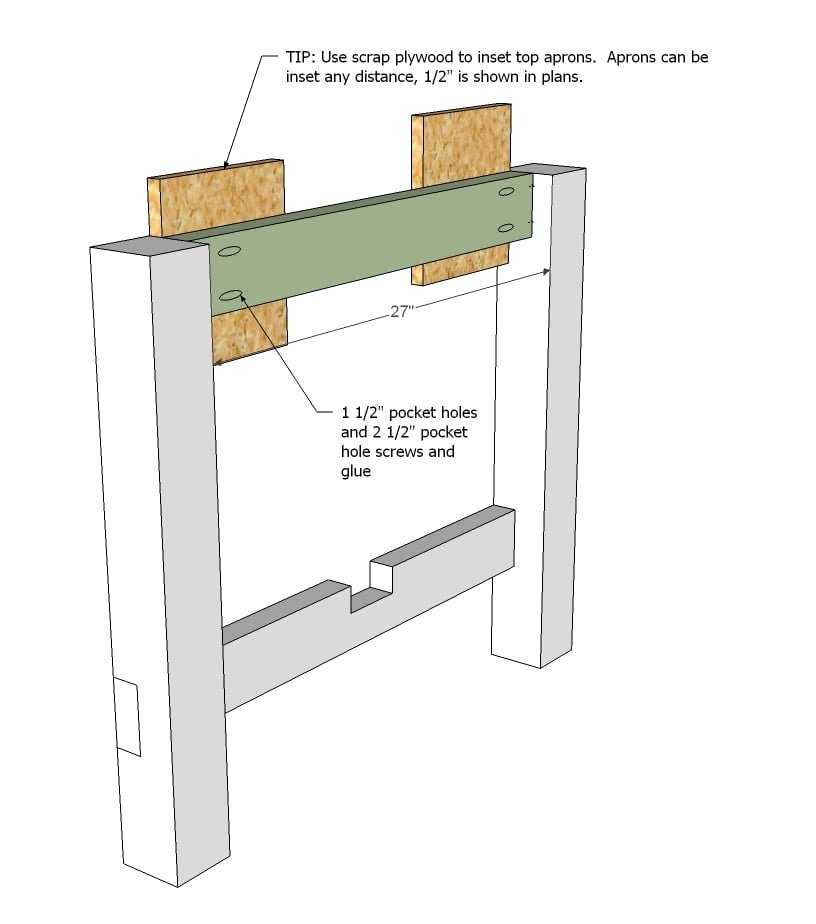
Now attach the two ends together to create your table frame.
NOT SHOWN: Drill 1 1/2" pocket holes on the insides of your aprons facing upward for later attaching the the tabletop too. Drill five holes per side apron.
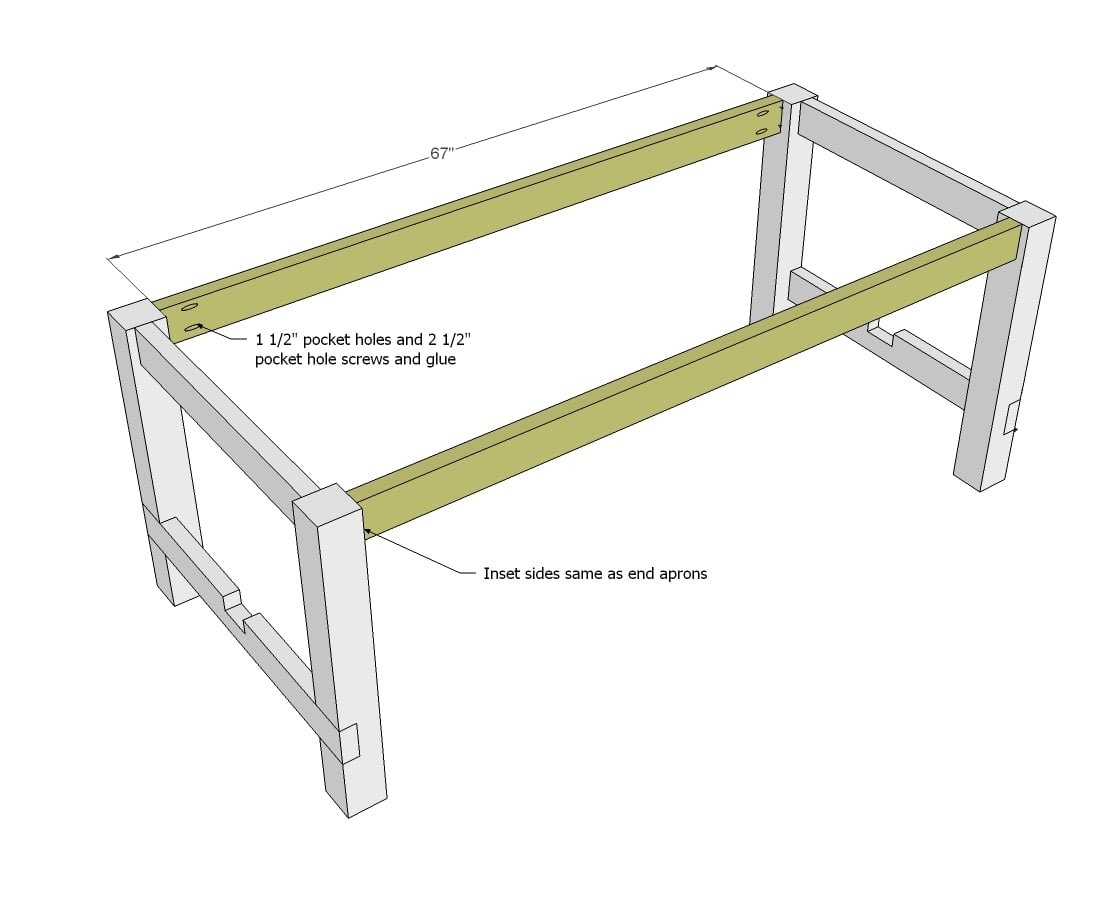
Step 5
Attach base stretcher with pocket holes underneath.
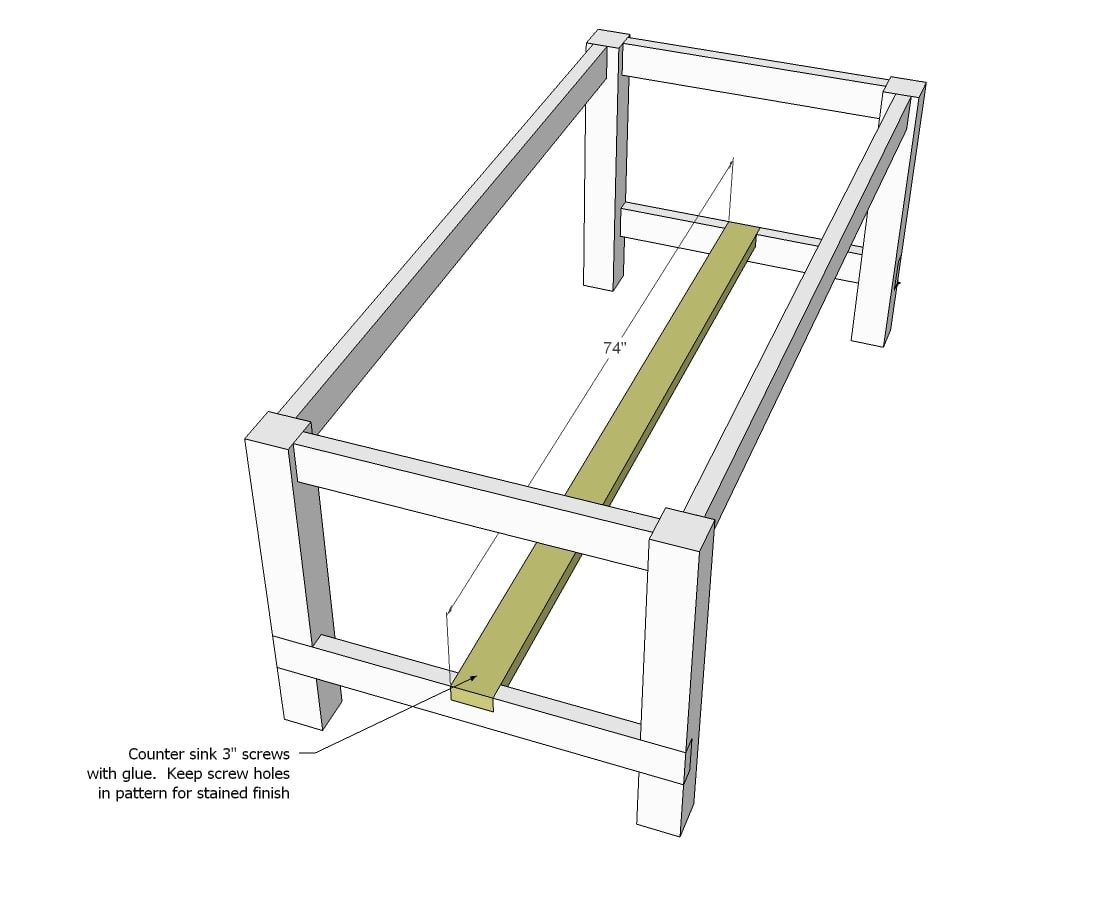
Step 6
Now start building your tabletop.
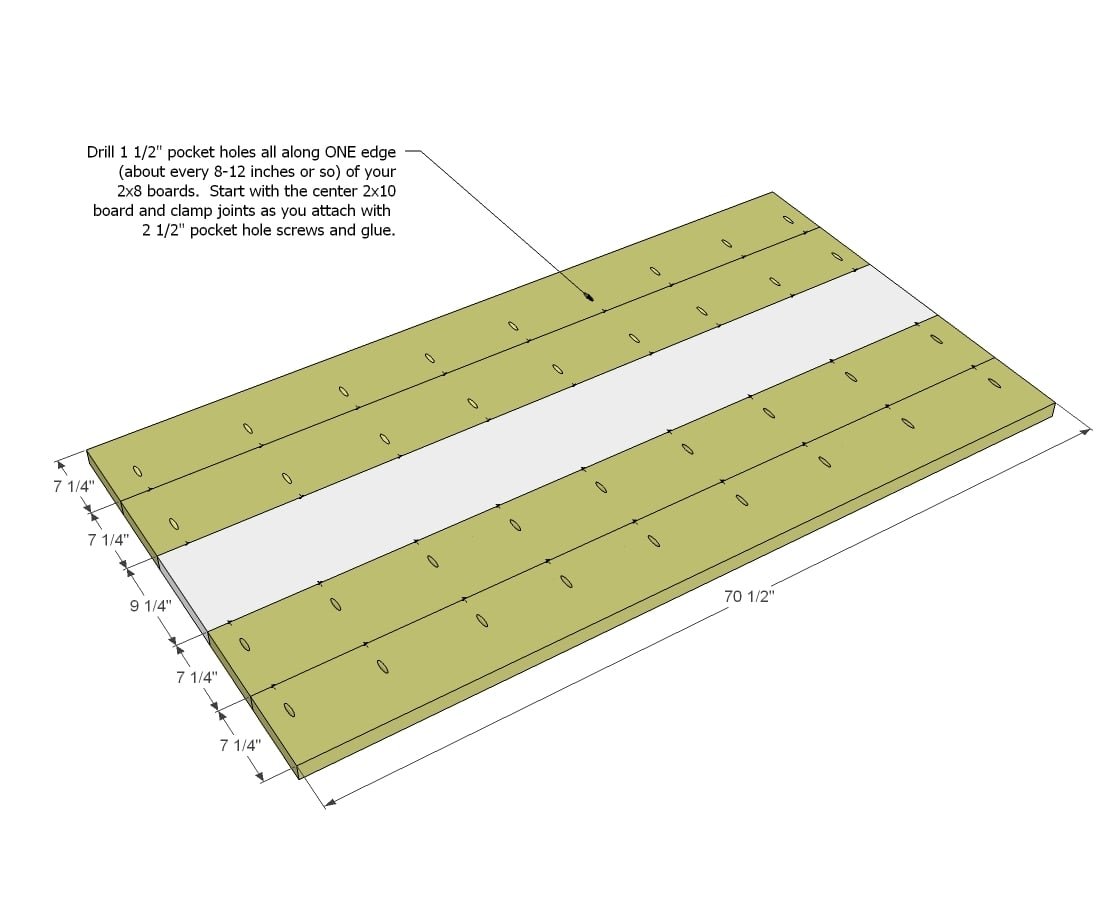
Step 7
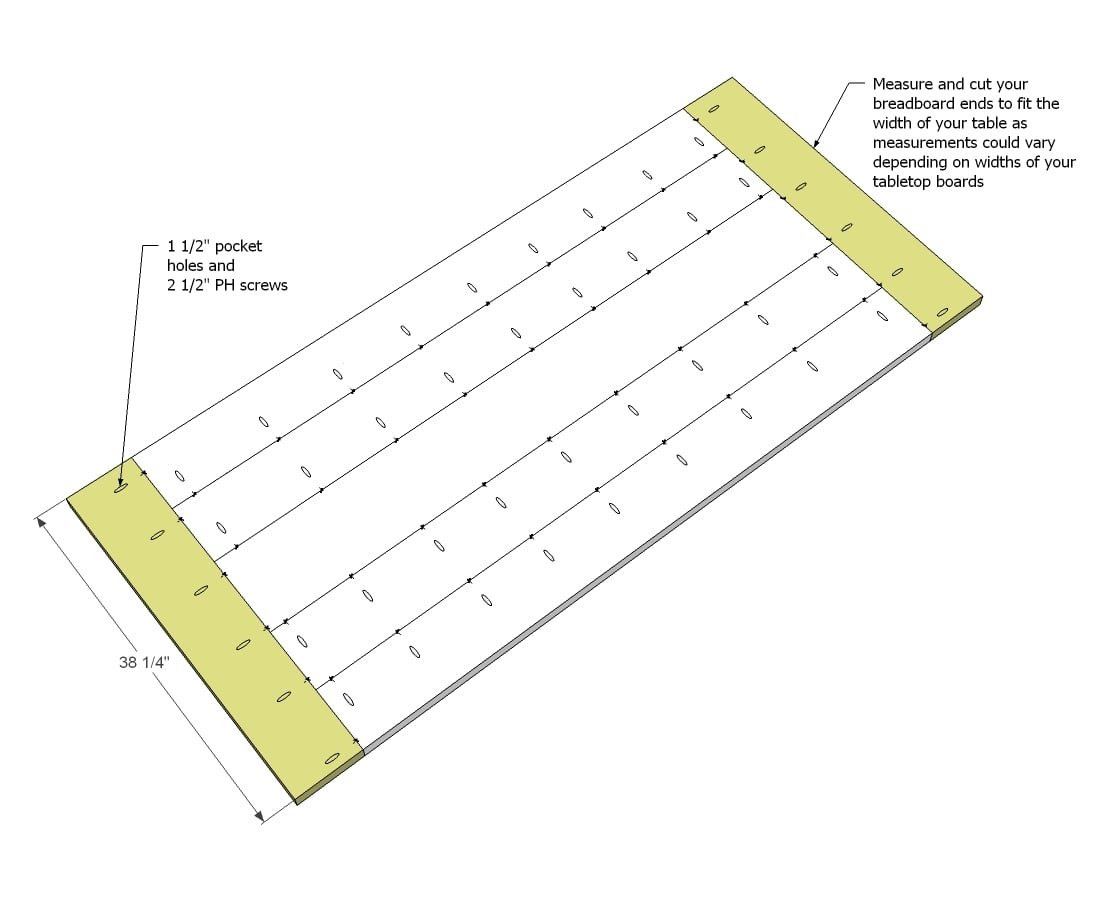
Measure and cut your breadboard ends to fit and attach to tabletop.
Step 8
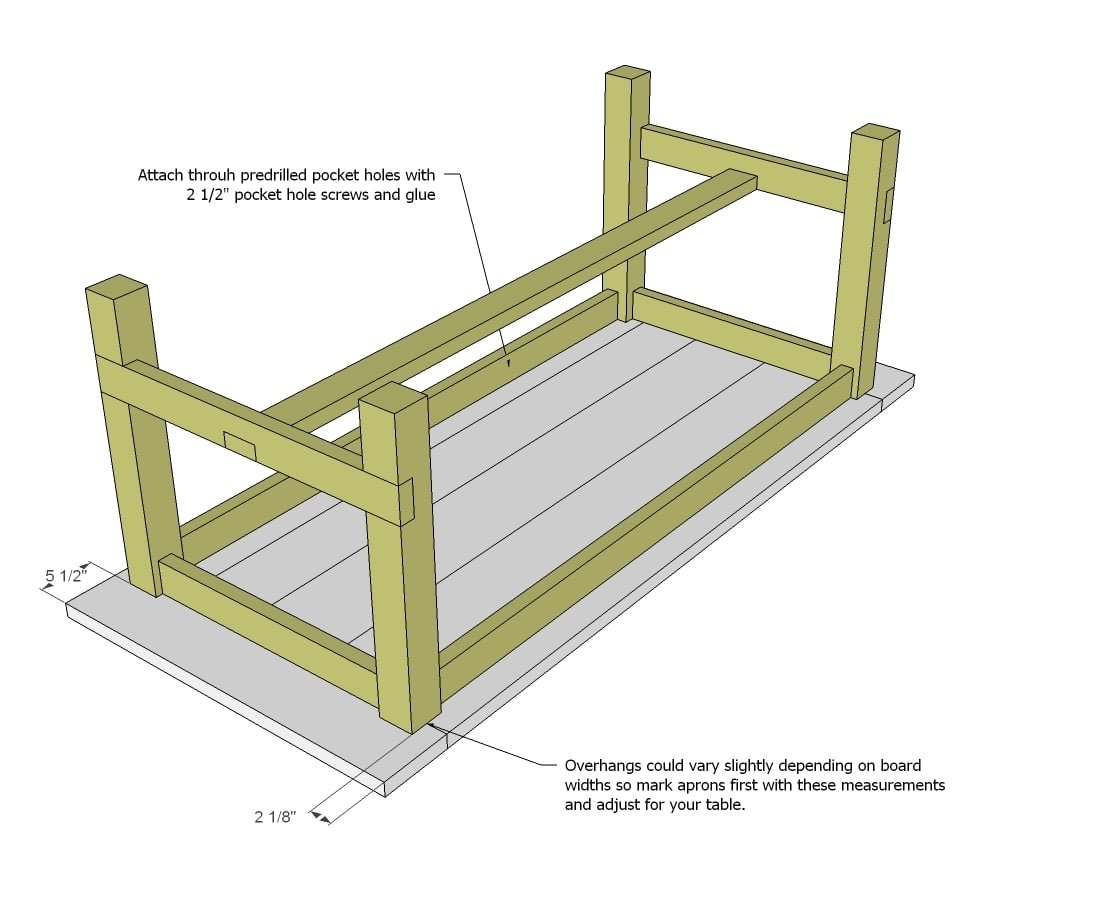
Then attach the base to the tabletop through predrilled 1 1/2" pocket holes with 2 1/2" pocket hole screws.
Finishing
Sand all surfaces, starting with a medium grit and finishing with fine. Wipe off the dust, fill any holes or gaps with wood filler, and sand smooth once dry. Apply primer if you're painting, then finish with your choice of paint or stain and seal with a durable clear topcoat. For outdoor projects, use exterior-rated primer, paint or stain, and sealer so the piece stands up to the weather.
Source (temporary): https://www.ana-white.com/woodworking-projects/farmhouse-table-updated-pocket-hole-plans