Farmhouse Toy Box
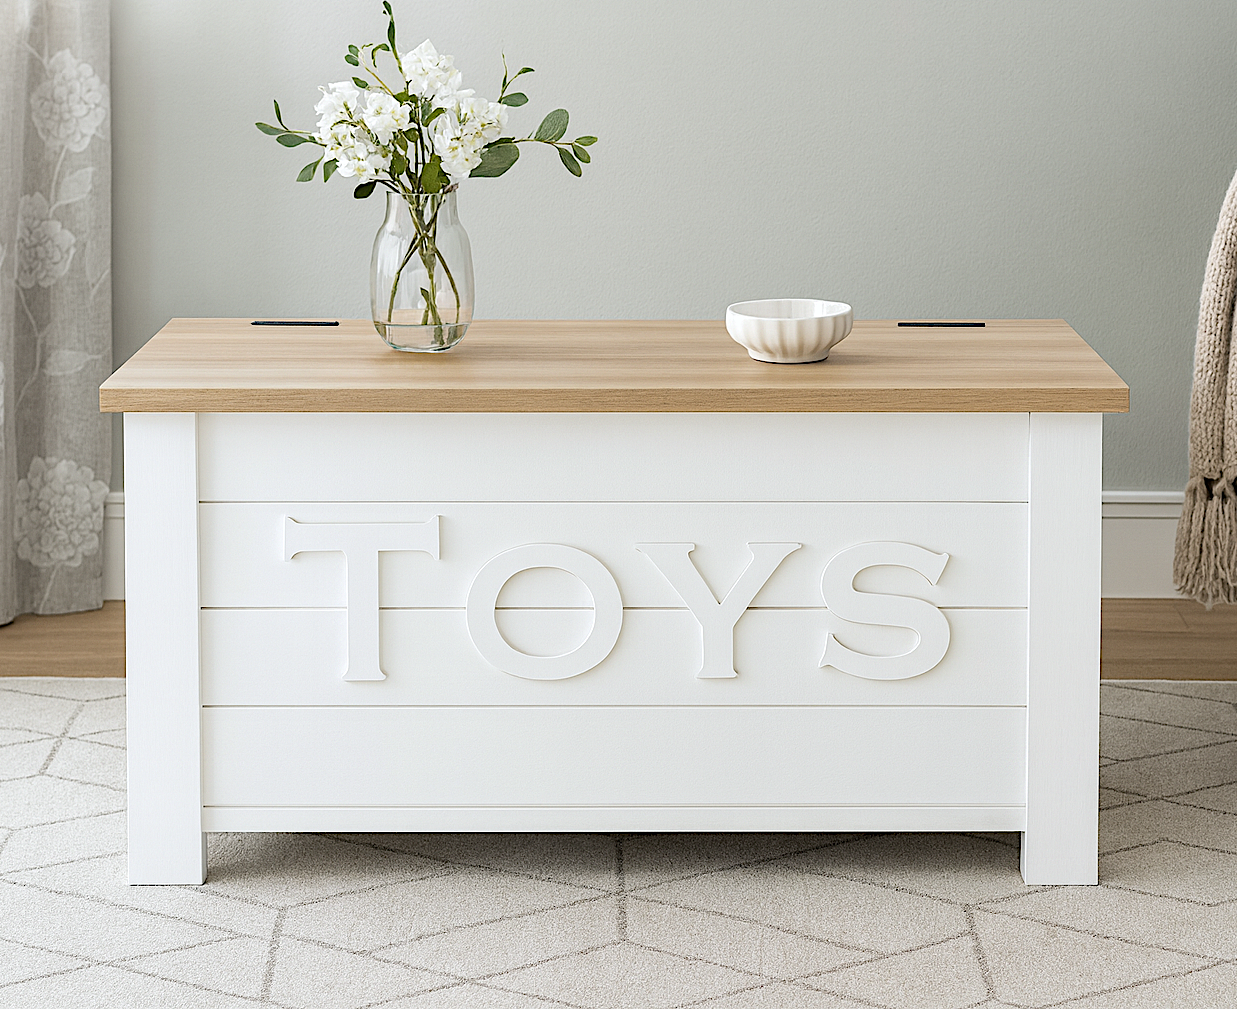
DIY Toy Box –! Build this beautiful toy box using common lumber and simple tools —no table saw or pocket holes required! This easy-to-follow plan is perfect for beginners and a longtime reader favorite. With a classic design and optional “TOYS” lettering, it's a stylish and practical storage solution for any child’s room or play space. The toy box is fully customizable— paint or stain it any color to match your decor. We’ll walk you through every step with detailed instructions and diagrams. Best of all? The plans are completely free.
Specifications
| Project type | Storage Woodworking Plans |
|---|---|
| Room | Storage Solutions |
| Style | Farmhouse Furniture |
| Difficulty | Beginner Projects |
Dimensions
Use the size-specific shopping and cut lists below.
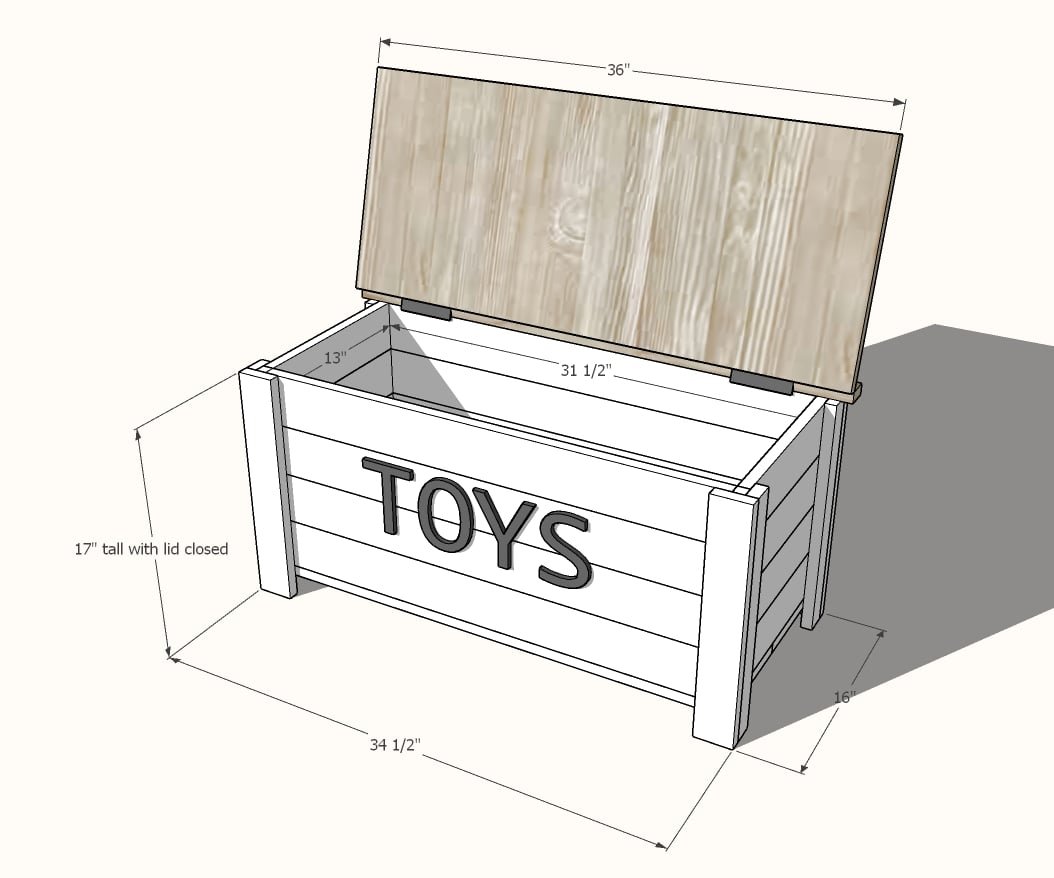
Shopping List
- 4 - 1x4 @ 8 feet long (from each board, cut two 33" pieces and two 13" pieces)
- 2 - 1x2 @ 6 feet long
- 1 - 1x3 @ 6 feet long
- 1 - 1x8 @ 6 feet long
- 1 - Project Panel with actual measurements 36" x 15-1/4" ( available off the shelf at Lowes)
- 1 set of 3" hinges
- Toy box lid support (recommended)
- Felt pads or cushion
- 20 - 1-1/2" to 2" long #8 self tapping wood screws (SPAX or similar) can be cabinet screws, trim screws, or construction screws (needs to be at least 1-1/2" long, but can be up to 2" long)
- 1-1/4" brad nails
- Wood Glue
Cut List
- 4 - 1x3 @ 16-1/4"
- 4 - 1x2 @ 16-1/4"
- 8 - 1x4 @ 33"
- 8 - 1x4 @ 13"
- 2 - 1x8 @ 33"
- 1 - 1x2 @ 36"
- 1 - Project Panel @ 15-1/4" x 36"
Tools
- measuring tape
- square
- pencil
- safety glasses
- hearing protection
- drill
- circular saw
- nailer
- sander
Step-by-step Instructions
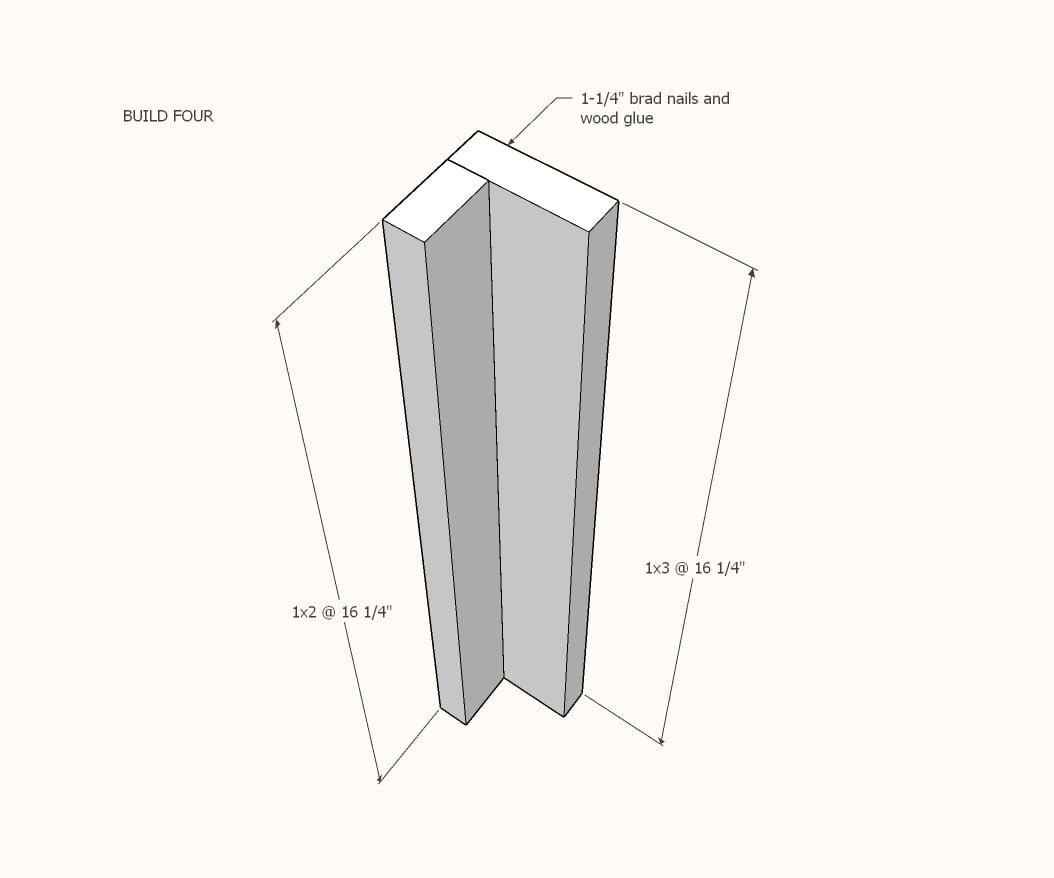
Glue and nail 1x3 leg pieces to 1x2 leg pieces so outside edges are flush.
Nail about every 6". Build four.
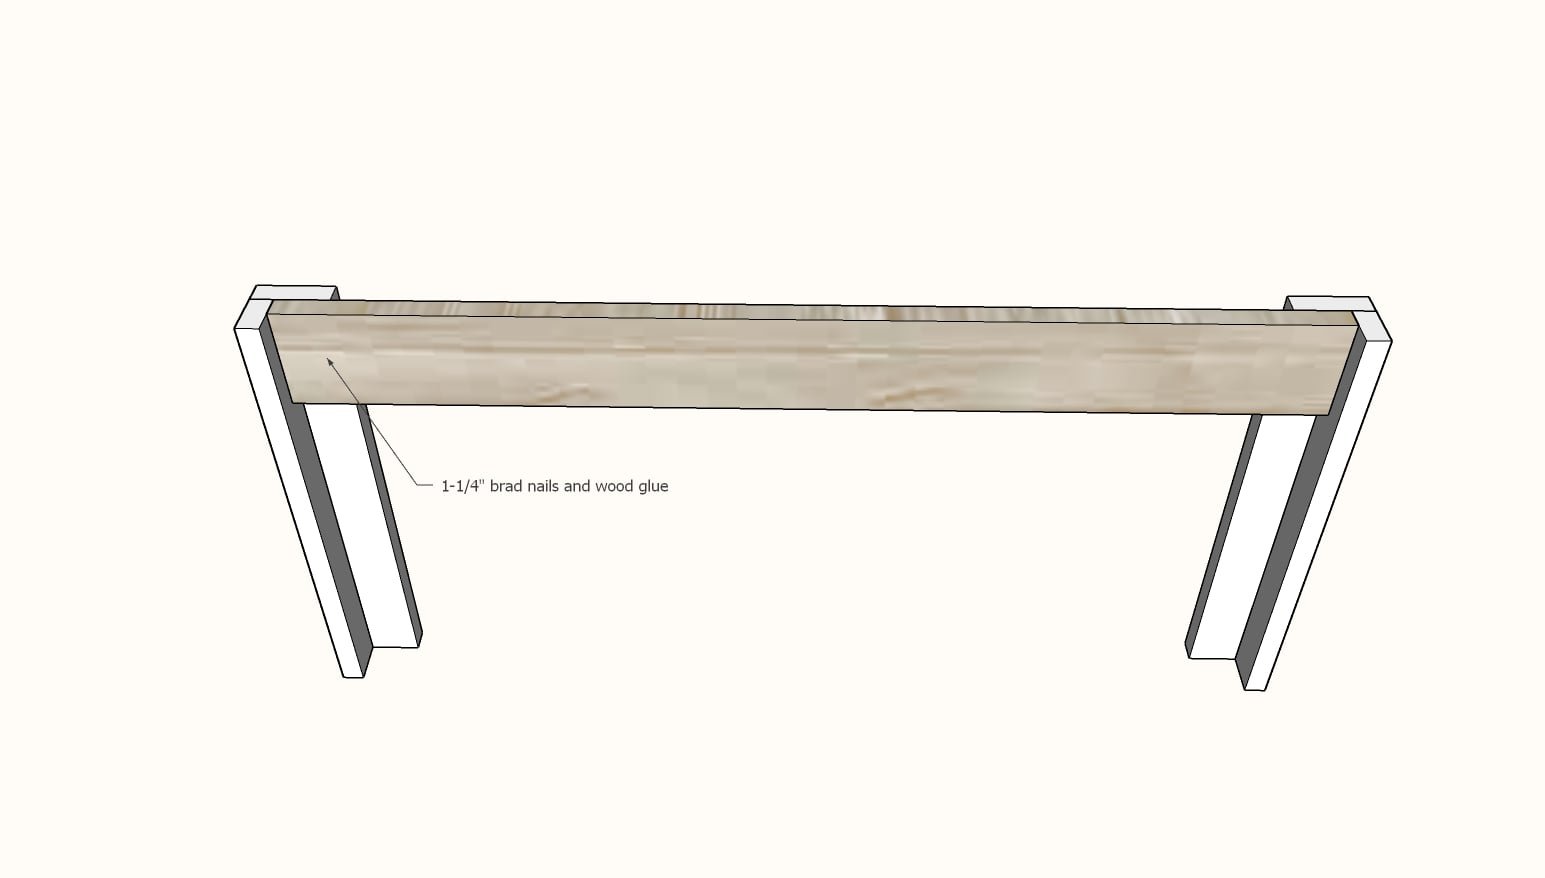
Glue and nail one longer 1x4 to the top of two legs.
Make sure the 1x3 leg part is on the front, and the 1x2 leg part is on the ends. Keep top and outside edges flush.
Add additional longer 1x4 boards between legs, using glue in the long seam between 1x4s too.
Attach to legs with 1-1/4" brad nails and wood glue.
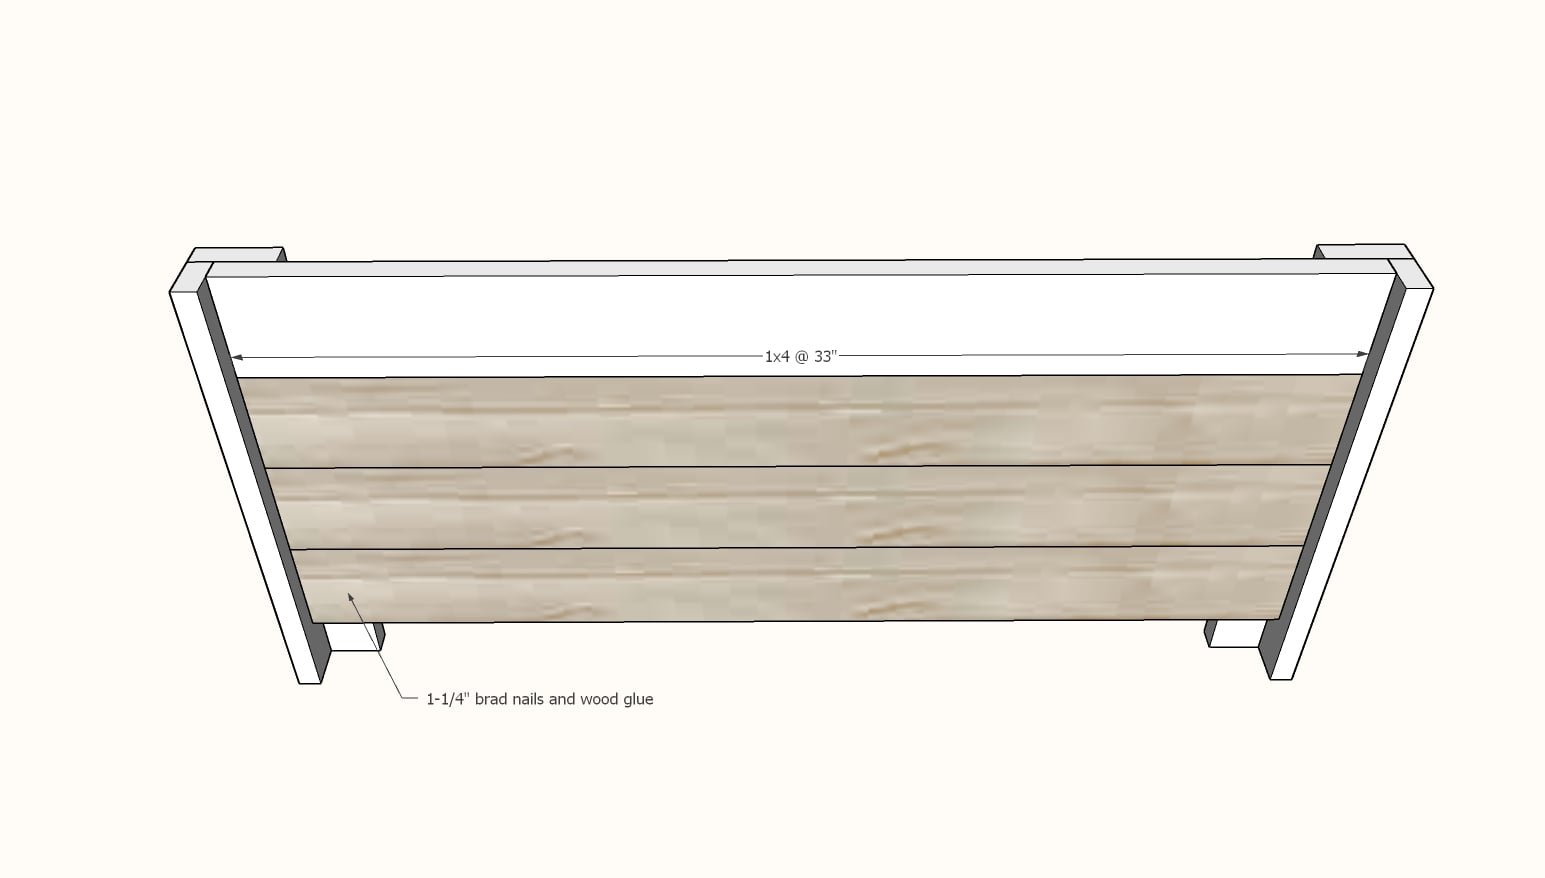
Step 4
Attach shorter 1x4 boards to ends of toybox with glue and 1-1/4" brad nails. Start at the top and work downward.
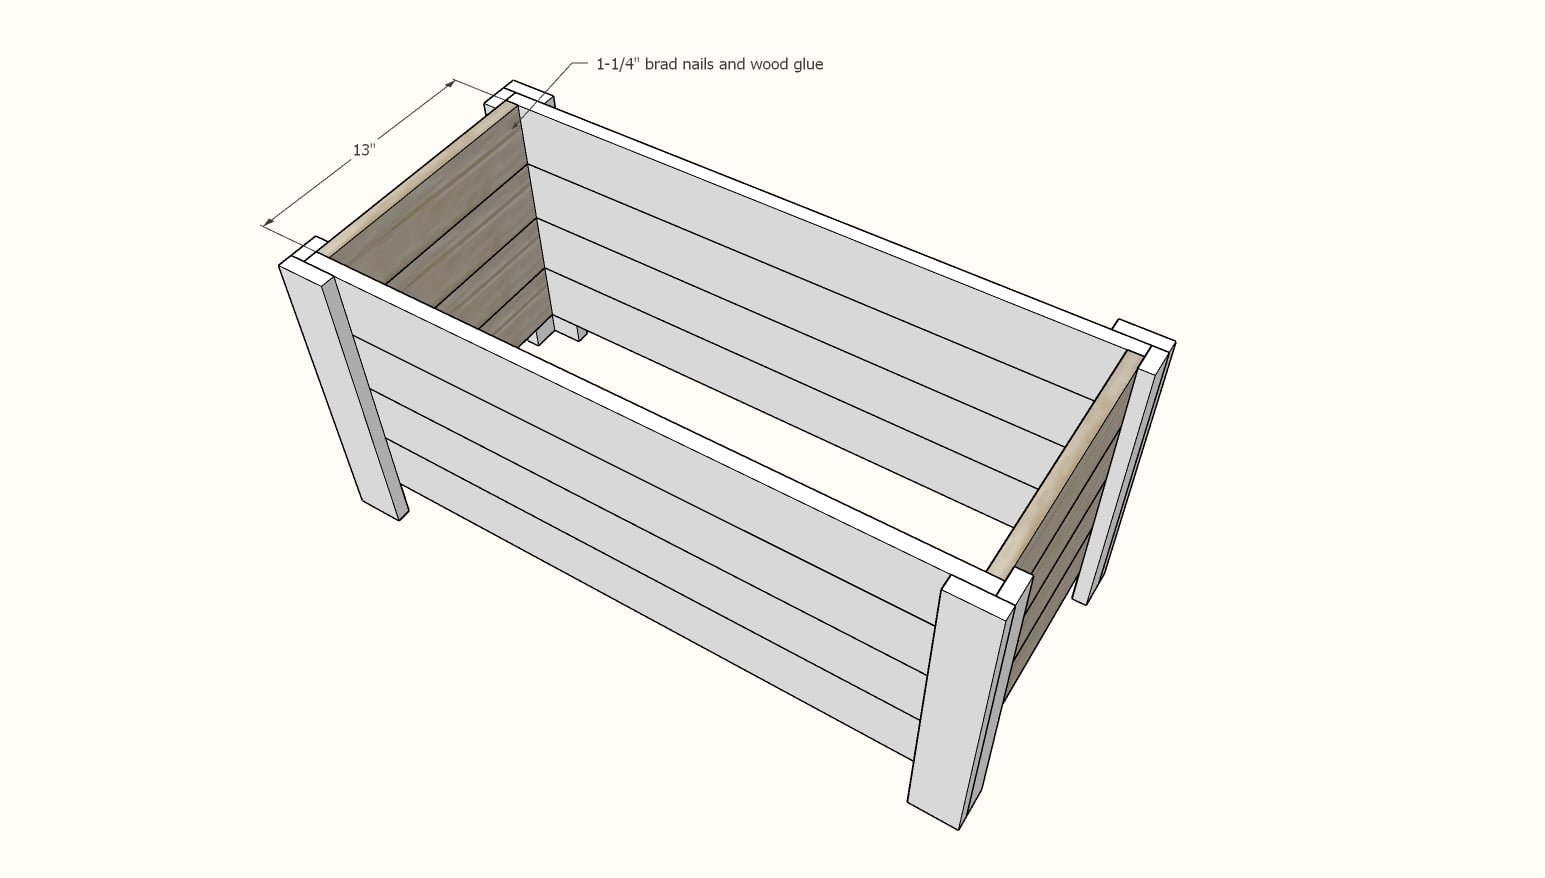
Step 5
Check the toybox bottom for square by taking opposite diagonal measurements, and making sure the measurements match. If they don't match, push the longer diagonal corners together until they do. Use the 2" self tapping screws to attach the bottom on the toy box. For added strength, also nail and glue from the outsides of the legs into the edges of the 1x8 bottom.
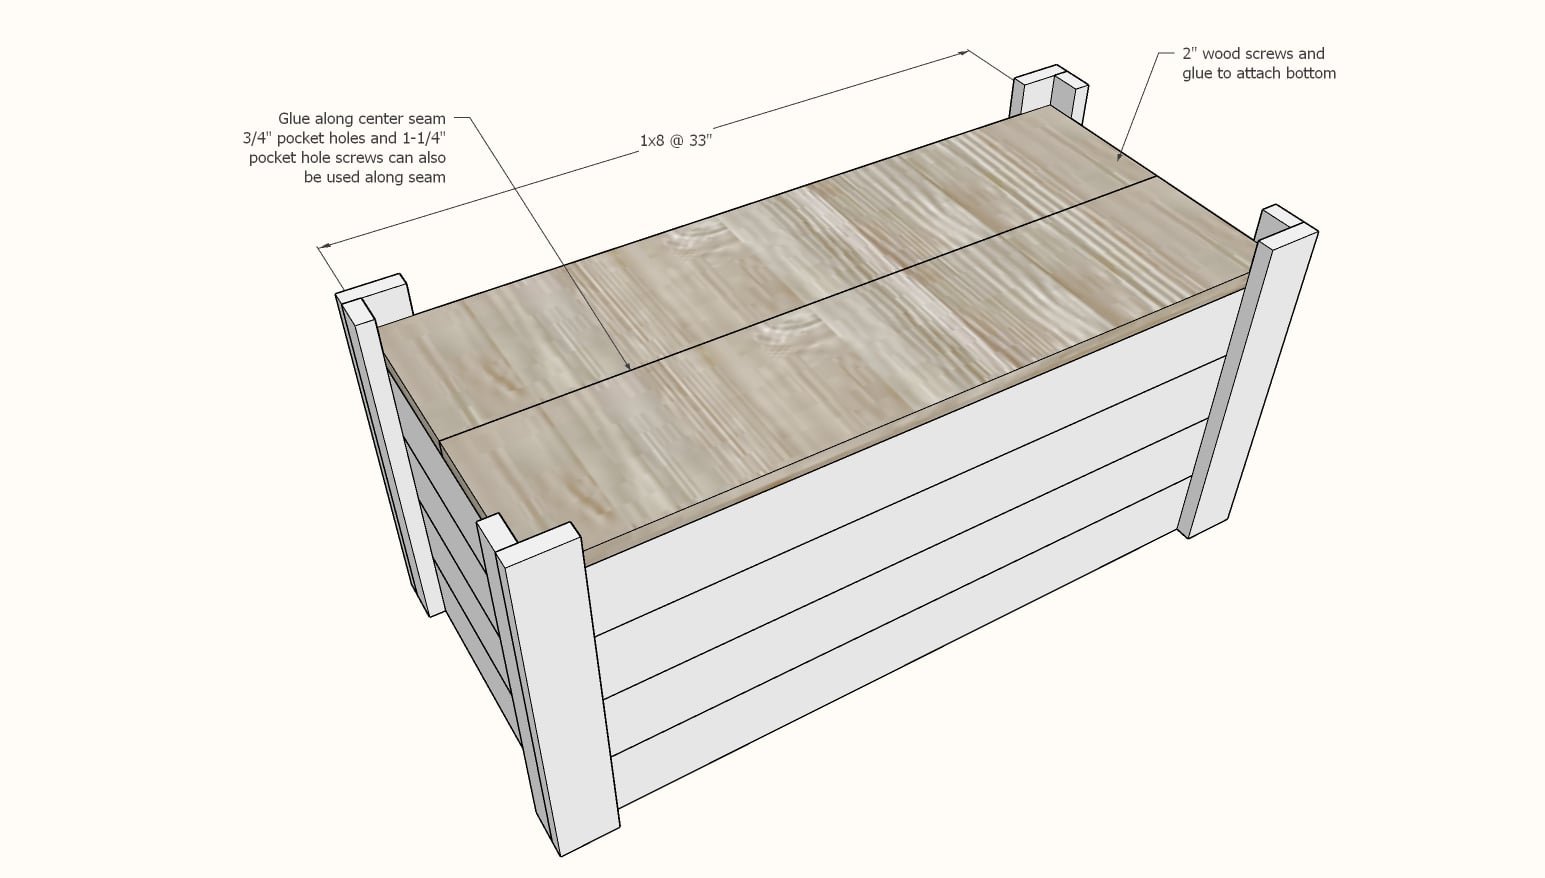
Step 6
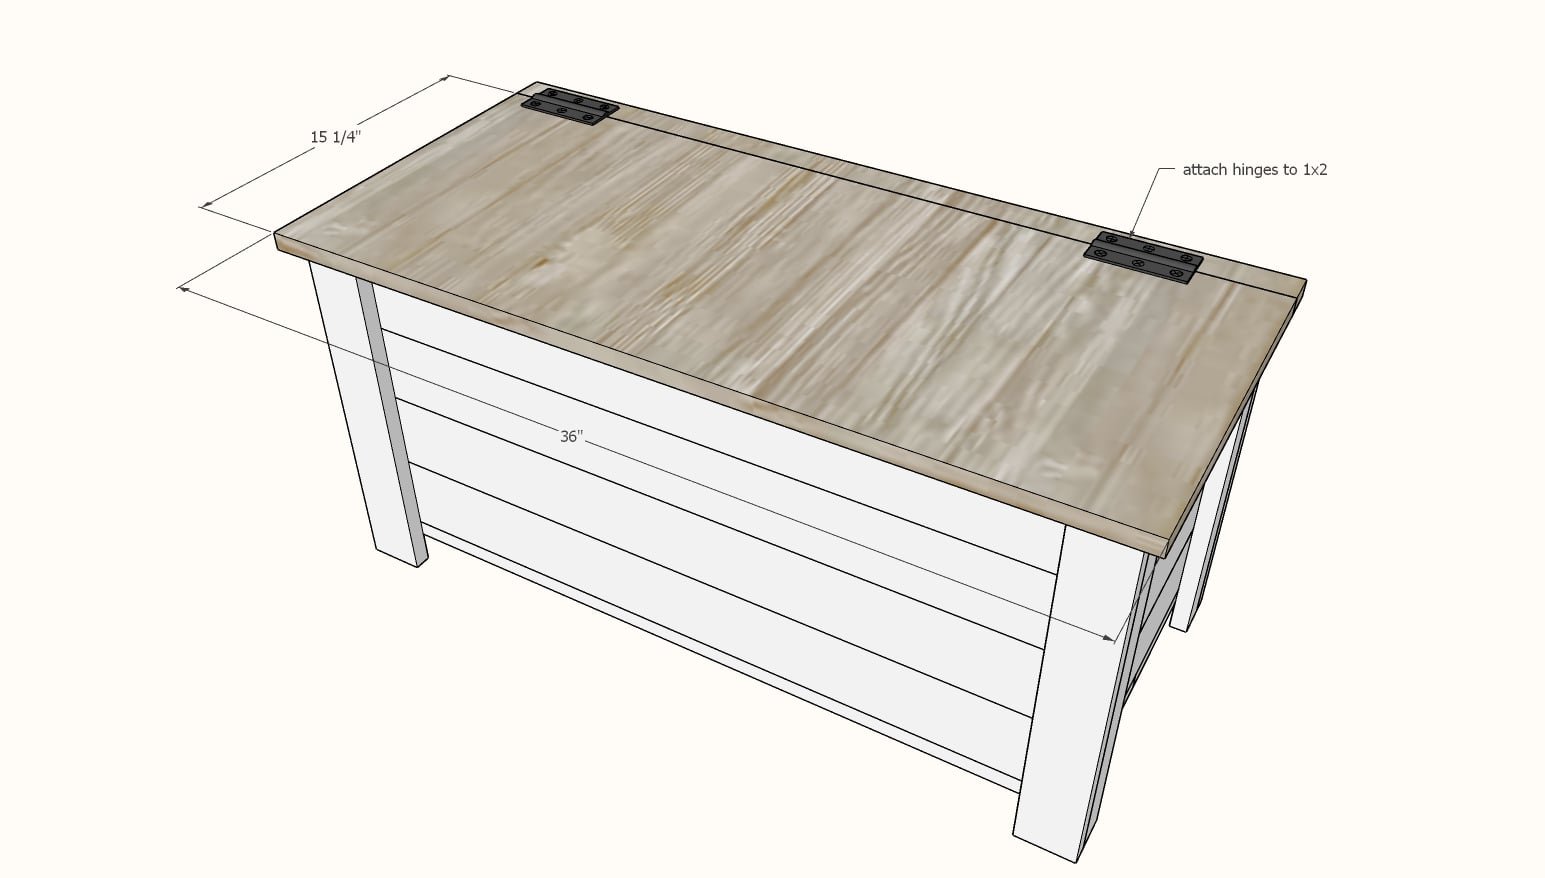
Nail and glue 1x2 to the top.
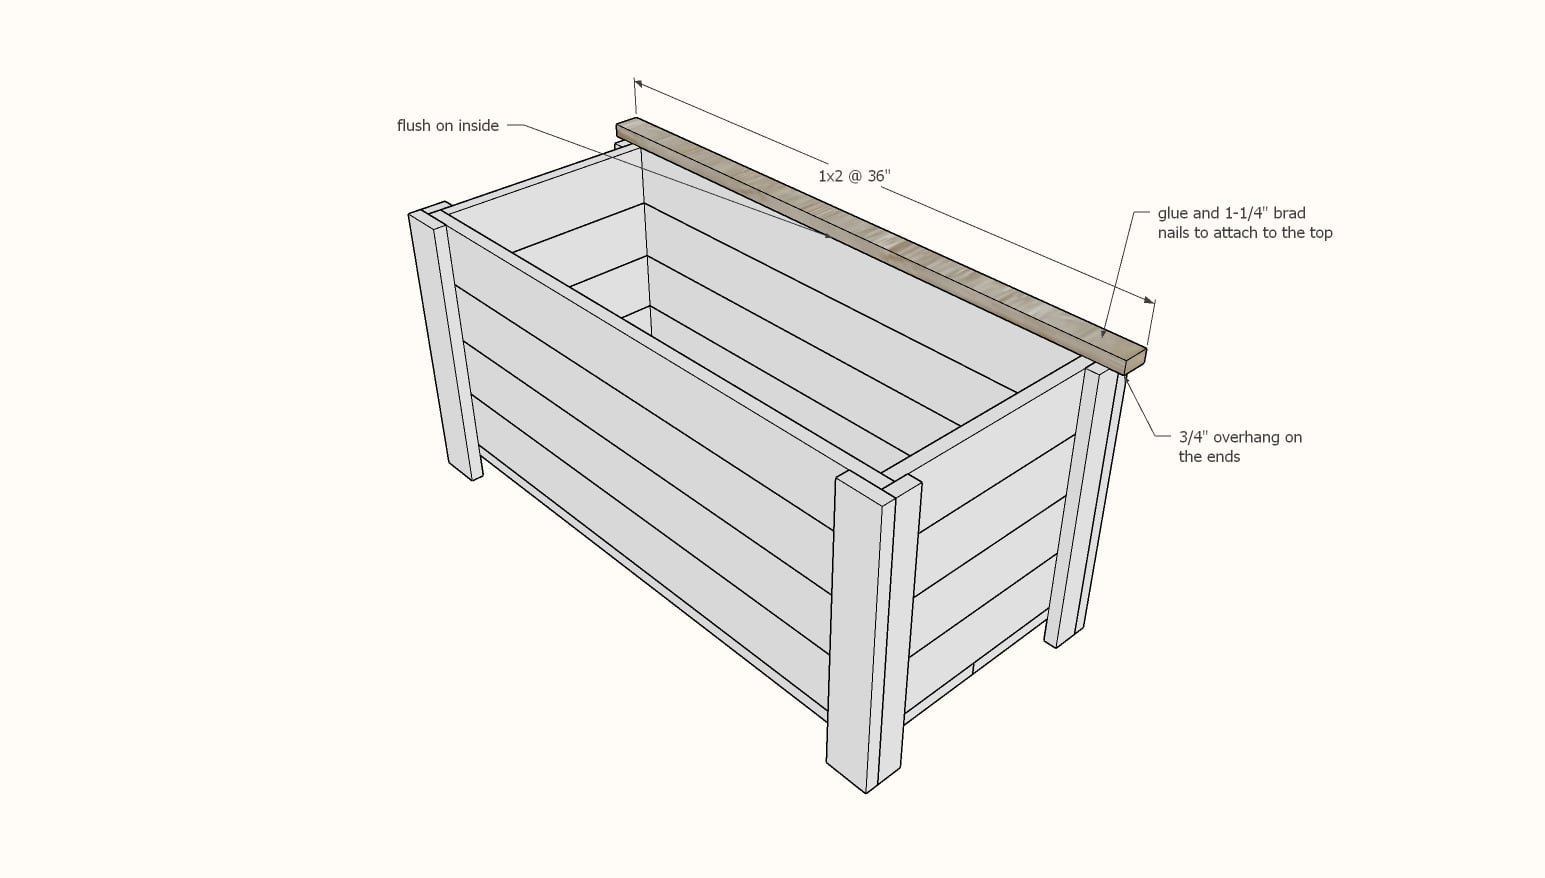
Attach toybox lid with the hinges.
We recommend a toybox hinge support to keep the top from slamming closed. We also recommend felt pads or bumpers to soften the close.
Finishing
Sand all surfaces, starting with a medium grit and finishing with fine. Wipe off the dust, fill any holes or gaps with wood filler, and sand smooth once dry. Apply primer if you're painting, then finish with your choice of paint or stain and seal with a durable clear topcoat. For outdoor projects, use exterior-rated primer, paint or stain, and sealer so the piece stands up to the weather.
Source (temporary): https://www.ana-white.com/woodworking-projects/farmhouse-toy-box