Fence Picket Bench Planter
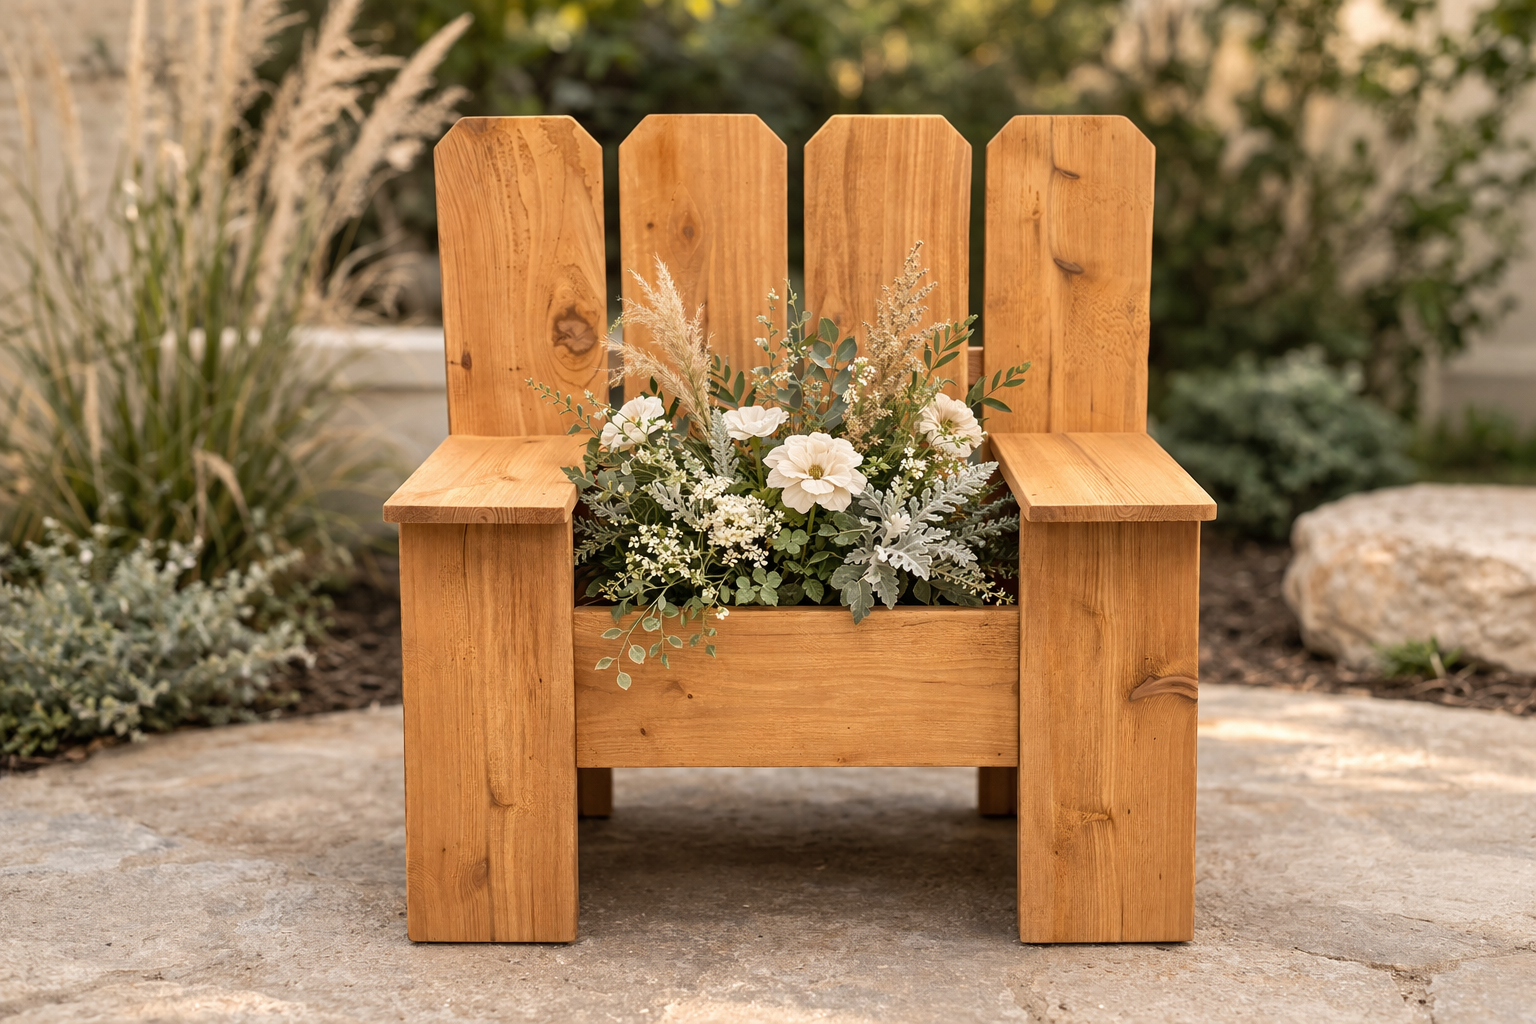
Turn a few cedar fence pickets into a charming outdoor feature with this DIY Fence Picket Bench Planter. This beginner-friendly project combines a decorative bench design with a built-in flower box, perfect for adding color and character to a porch, patio, or garden path. Made entirely from affordable fence pickets, it’s an easy and budget-friendly build that creates a beautiful place to showcase your favorite flowers or plants. Enjoy the!
Specifications
| Project type | Planters, Garden Beds, and Greenhouses |
|---|---|
| Room | Outdoor |
| Difficulty | Beginner Projects |
| Estimated cost | $20 - $50 |
Dimensions
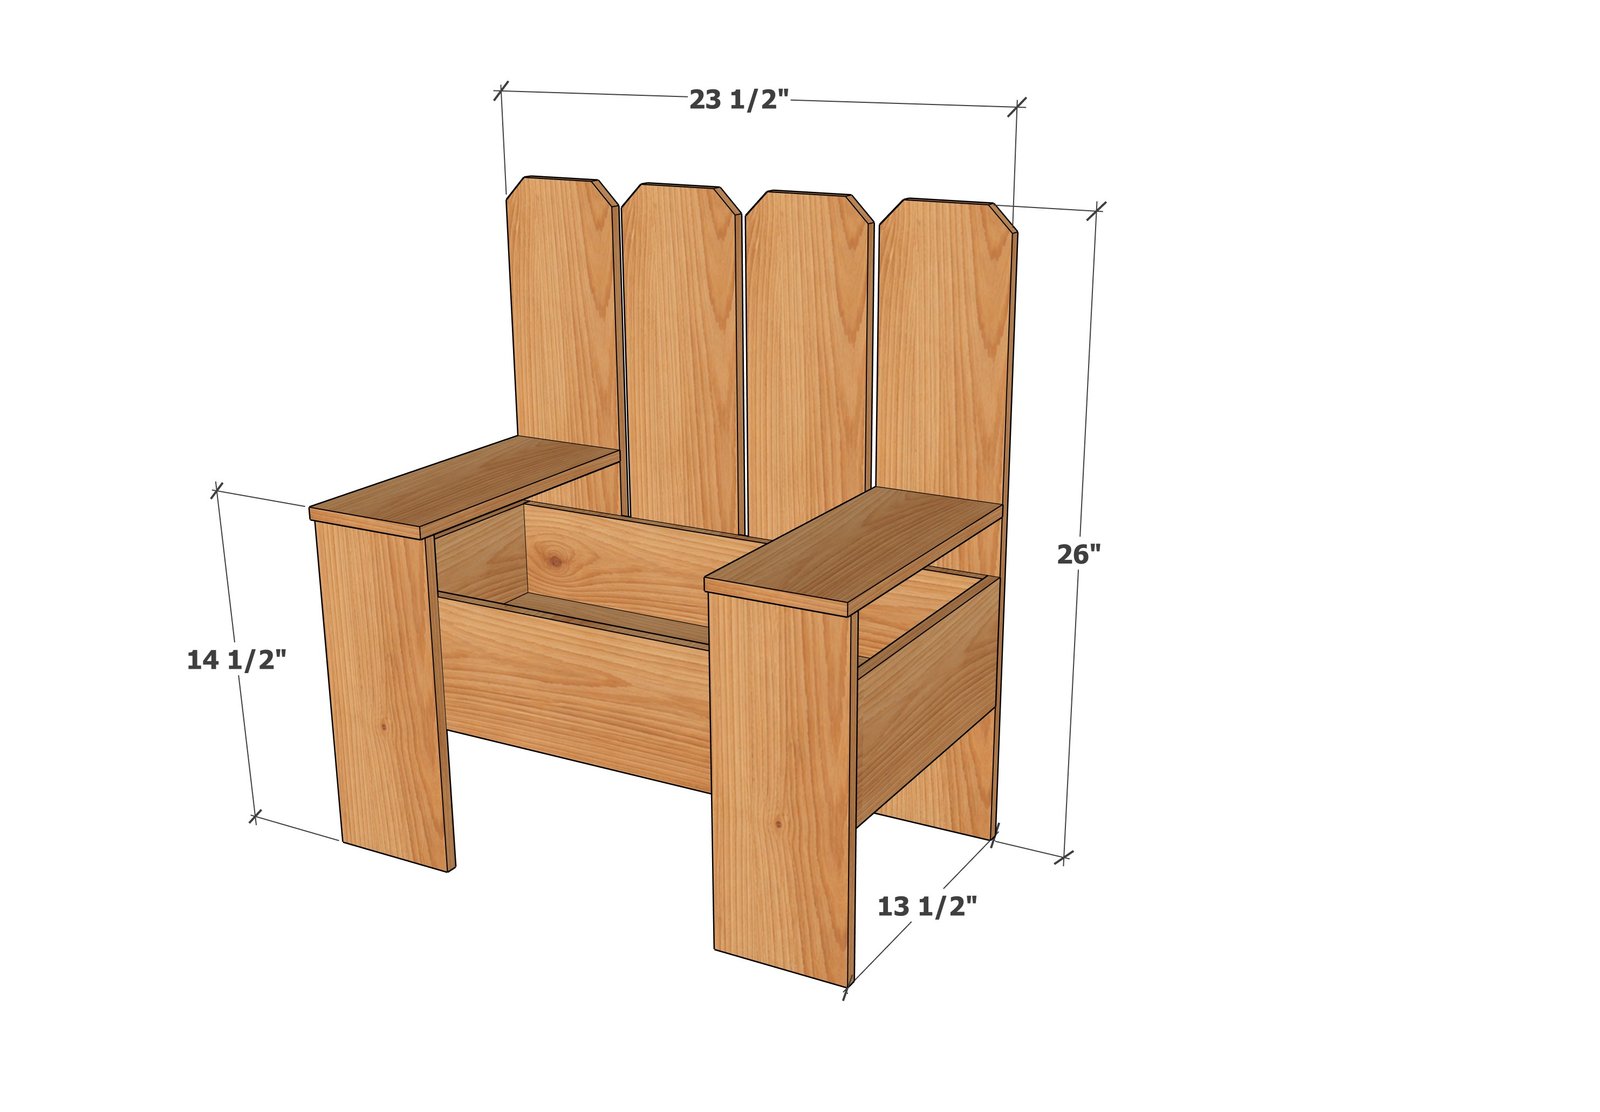
Use the size-specific shopping and cut lists below.
Shopping List
- 4 - Fence Pickets, dog-eared and 72" long x 5-1/2" wide
- 48" of 1x2 or rip fence picket in half with what is left after all cuts have been made
- 3/4" and 1-1/4" brad nails (galvanized)
Cut List
I recommend cutting all of the back pieces with dog ear sections first and then make your straight cuts once those are done.
- 2 - 26" dog eared (outside back legs)
- 2 - 20" dog eared (inside back)
- 4 - 22.5" bottom and front and back of box
- 2 - 12.5" ends of box
- 2 - 14" front legs
- 2 - 14" arms
- bottom of box support - 2 - 1x2 - about 11.5" ( I ripped the scraps of a fence picket)
- back of vertical slats support 1-1x2 @ 20" ( I used a scrap 1x2) can use ripped fence picket here too
Tools
- measuring tape
- square
- pencil
- safety glasses
- hearing protection
- circular saw
- compound miter saw
- nailer
- sander
- level
Step-by-step Instructions
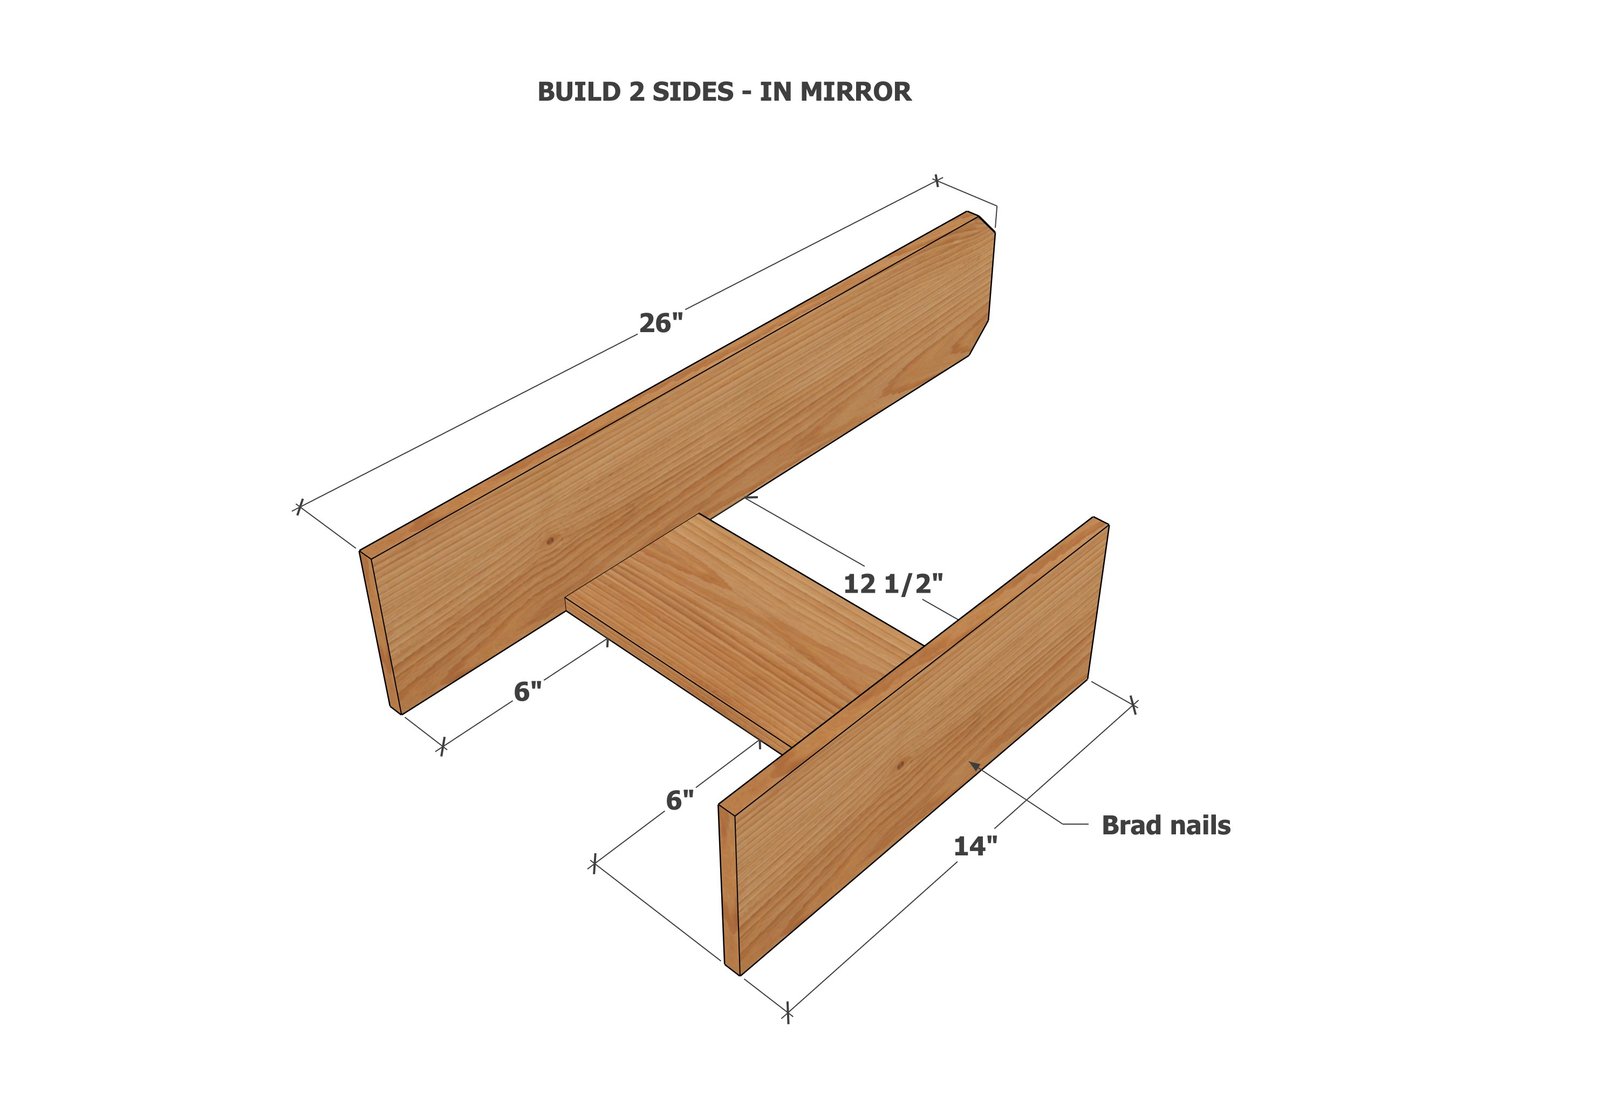
Start by building the arms by attaching the front leg and back legs to the side support.
You will build two legs, but they must be in MIRROR to each other.
Step 2
Attach the top of the arm rest to the back leg and front leg.
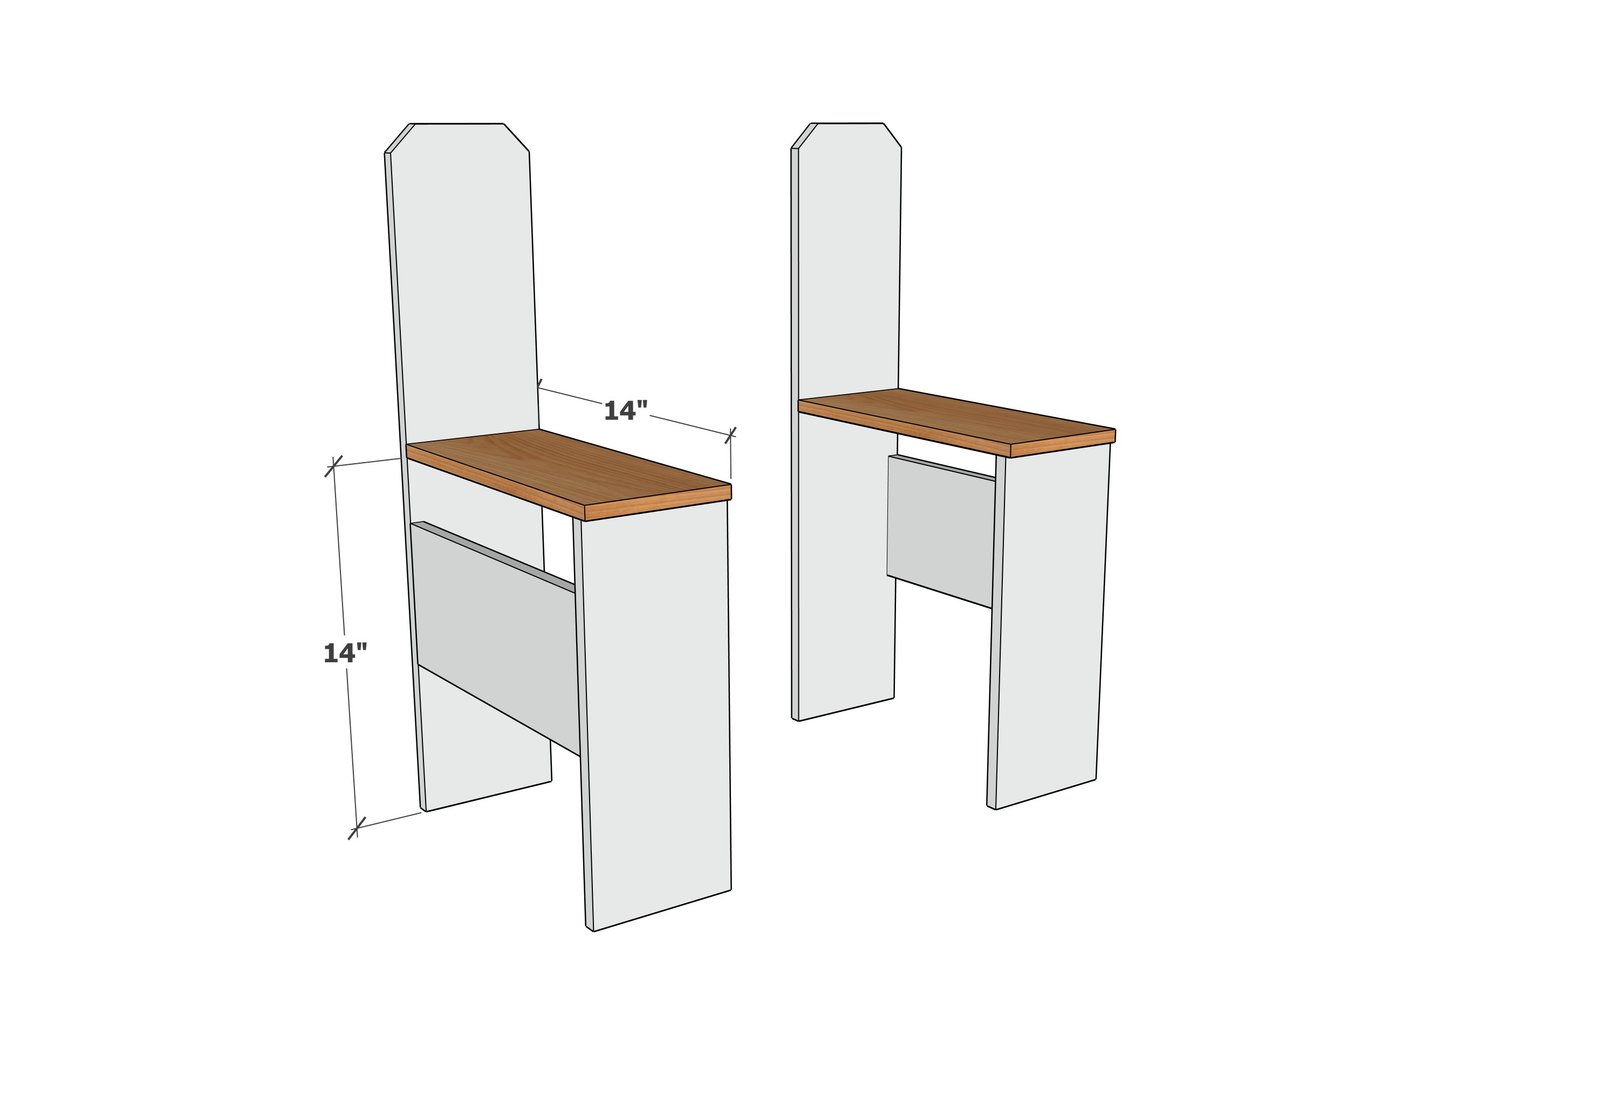
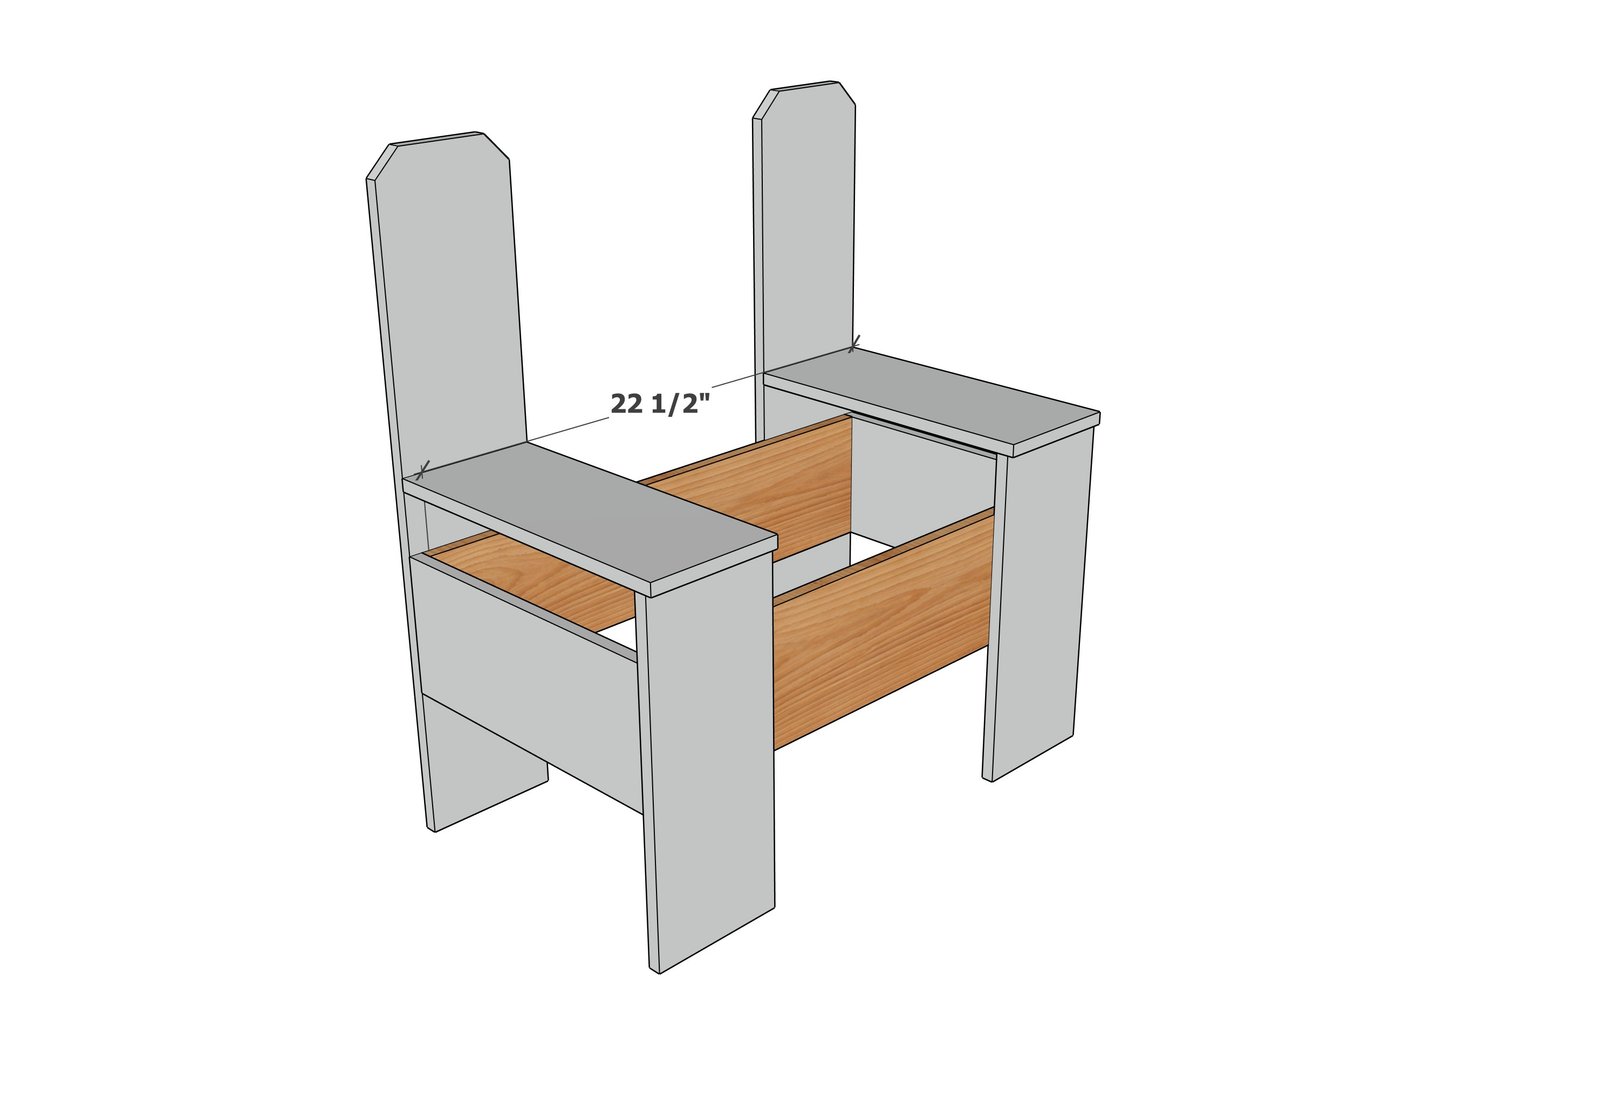
Attach the side supports to the front and back pieces with the nails.
If you have shorter nails (3/4"), attach the legs to the front and back pieces as well.
Step 4
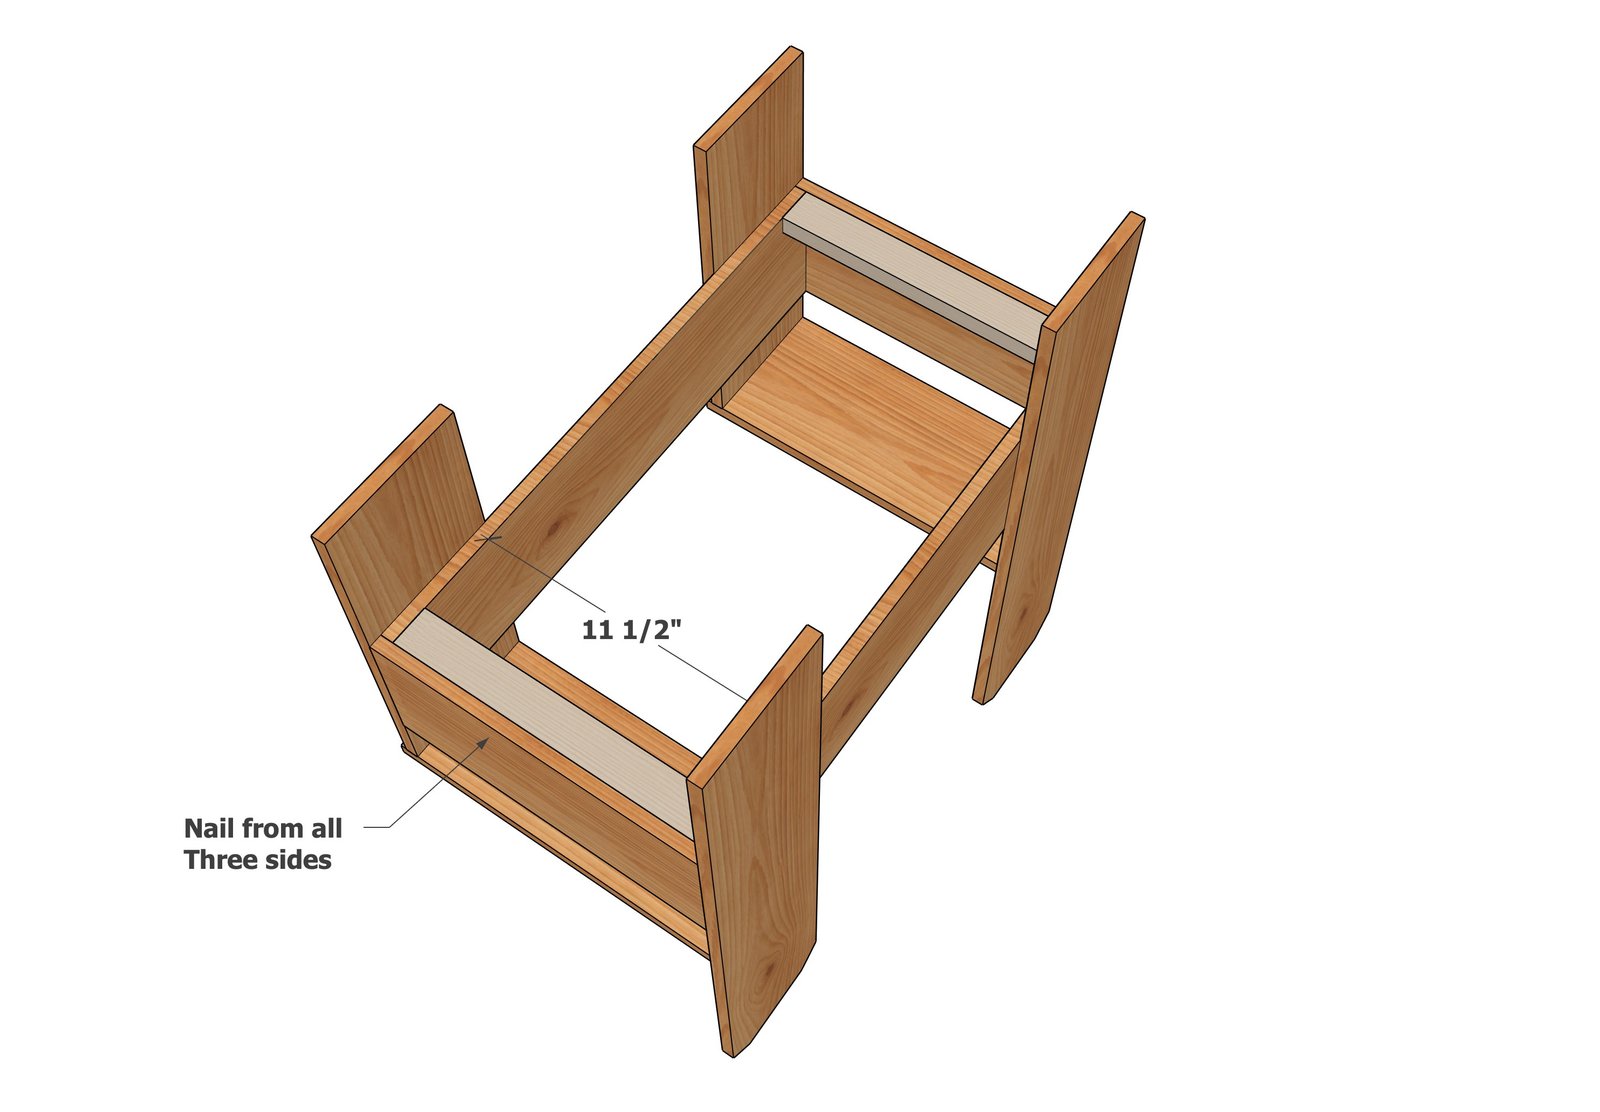
Place the 1x2 pieces at the bottom of the planter and attach from all sides with the 1-1/4" nails.
Step 5
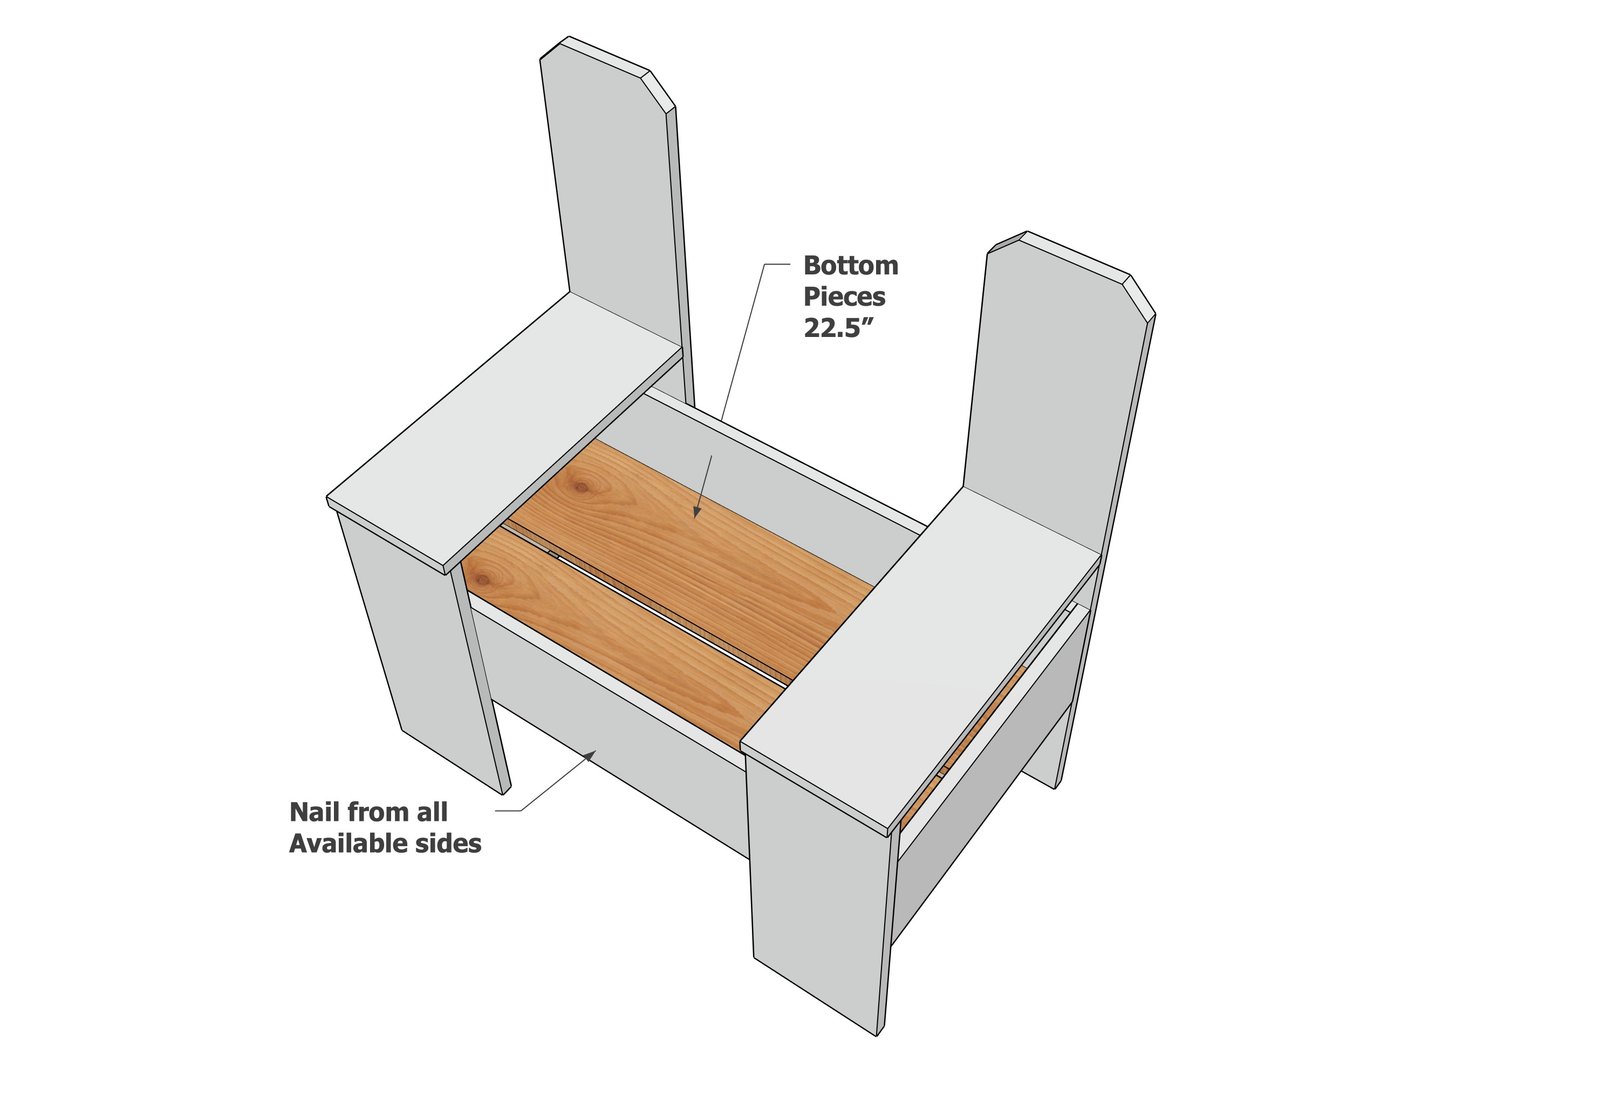
Place the floor pieces inside the planter. You can nail from outsides if desired, with the 1-1/4" nails.
Step 6
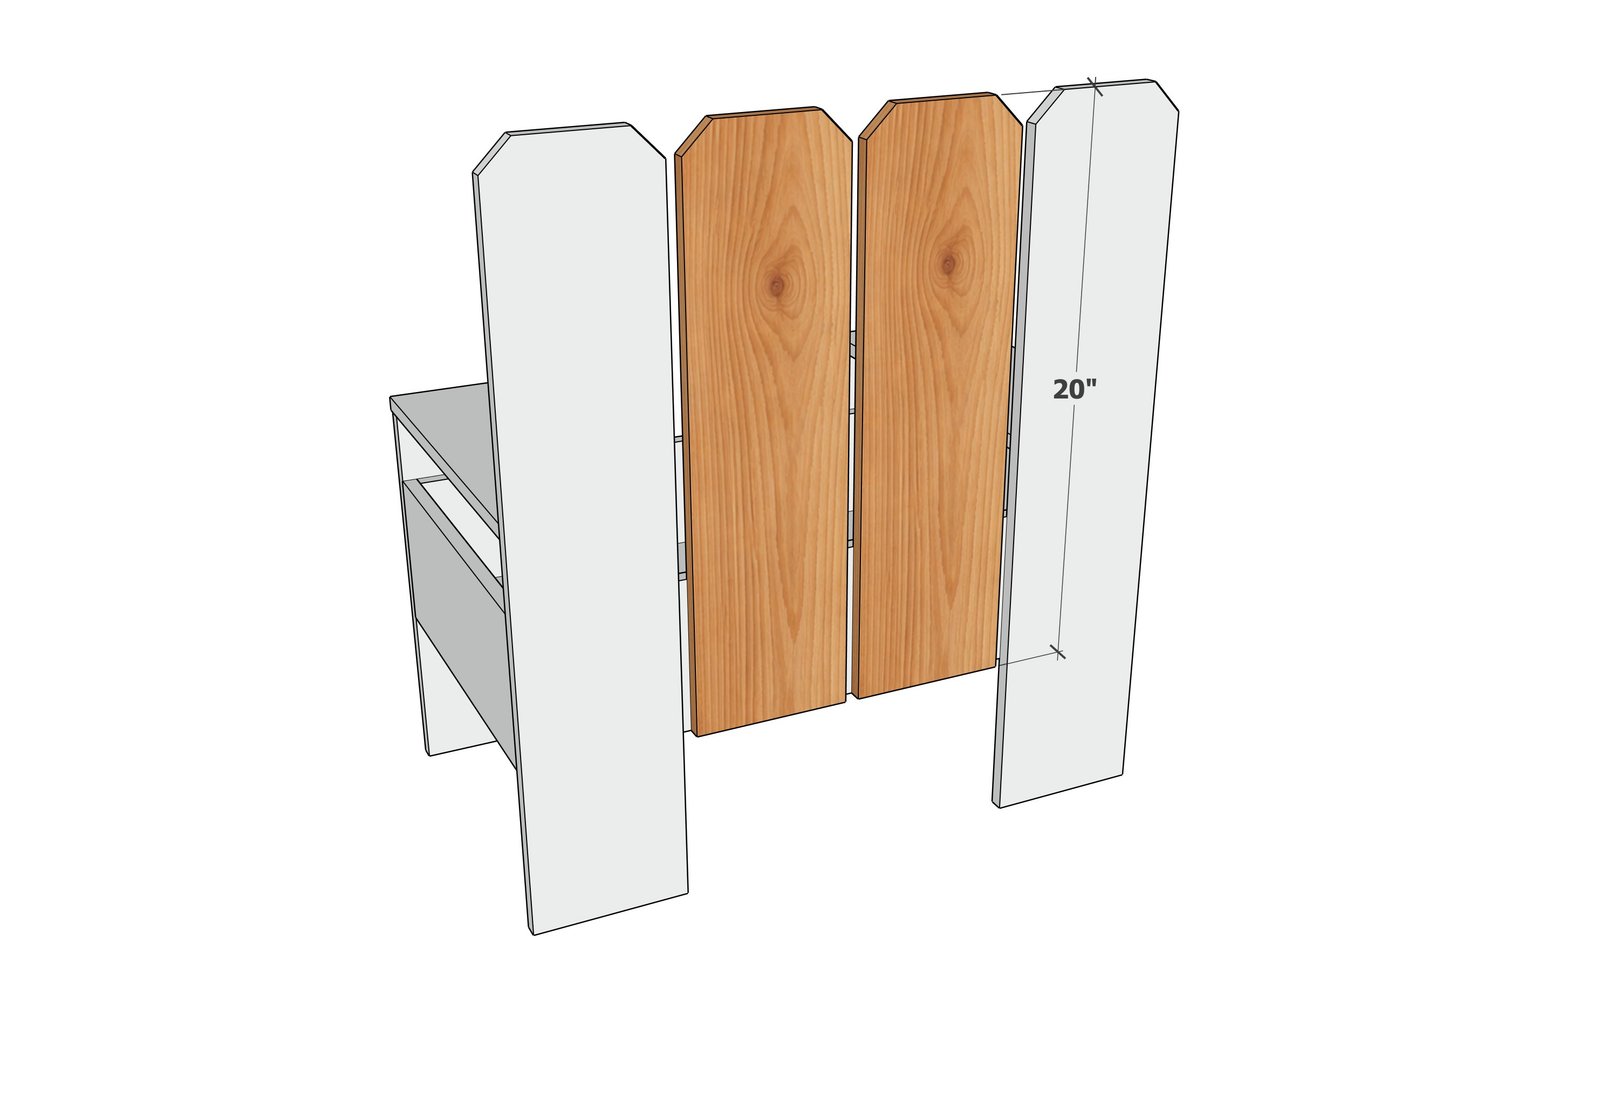
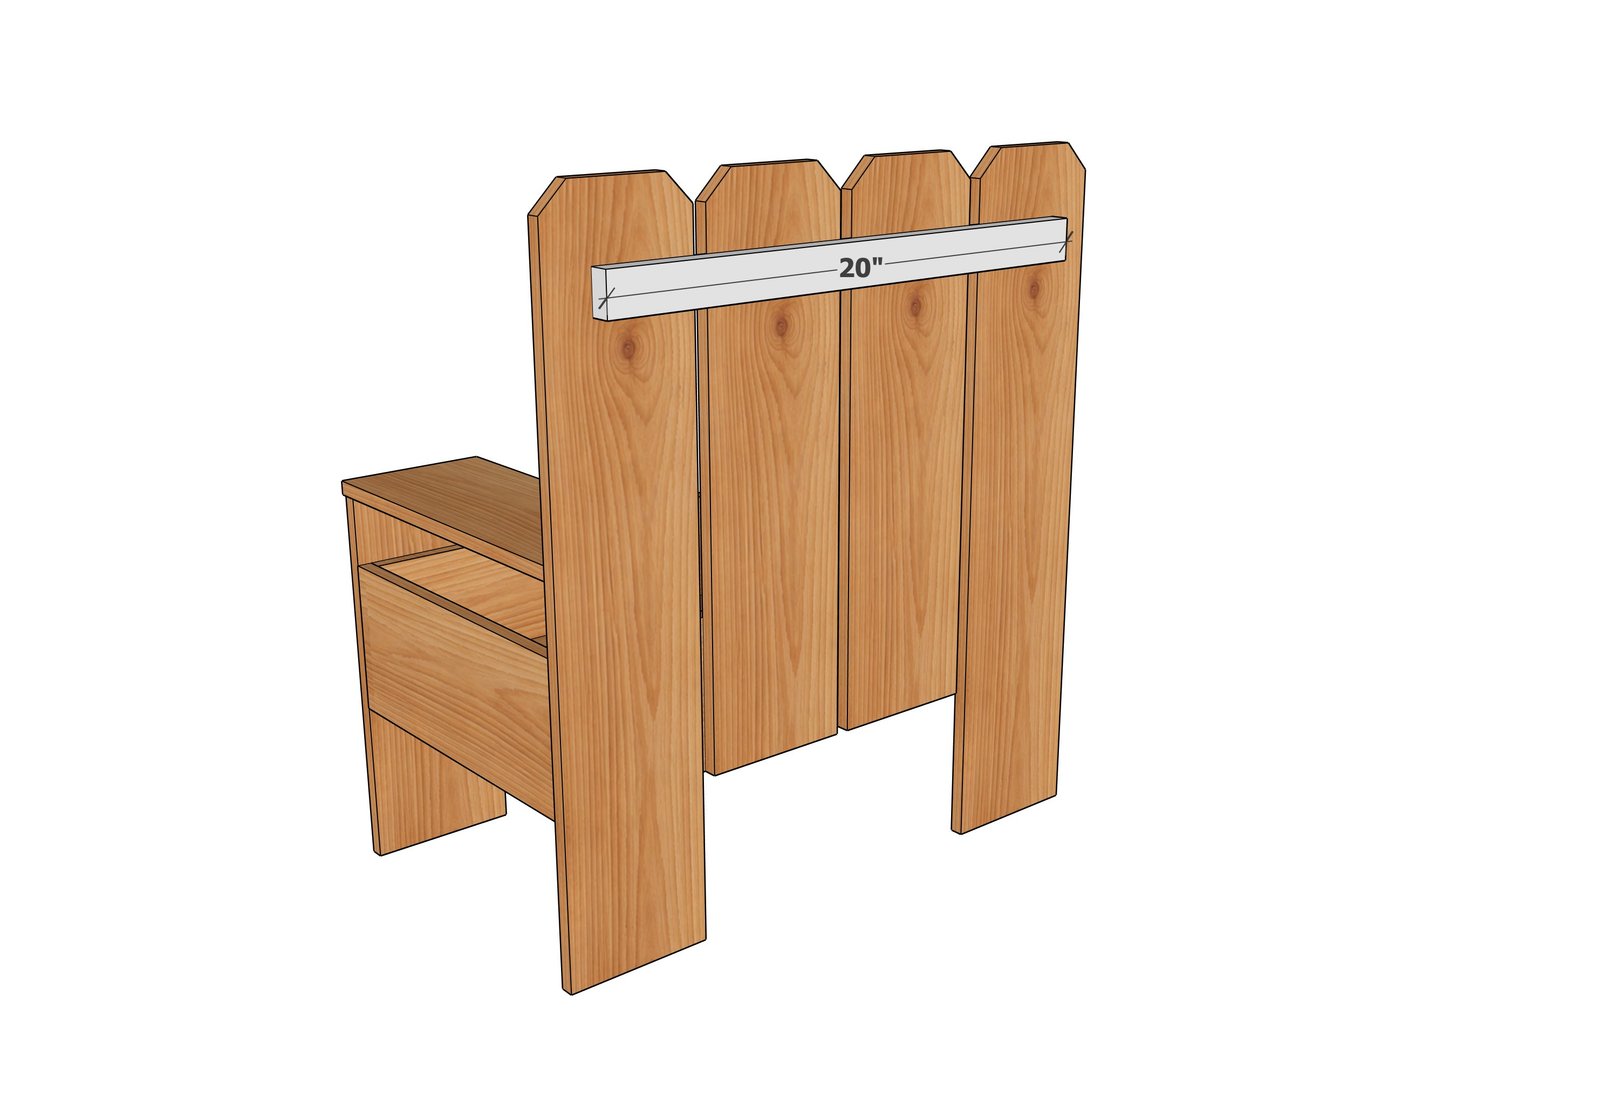
Place back pieces between back legs, with even gaps in between. Attach to the back with the 3/4" nails.
Step 7
Attach the 1x2 back support to the back with the 1-1/4" nails, nail from the front.
Finishing
Sand all surfaces, starting with a medium grit and finishing with fine. Wipe off the dust, fill any holes or gaps with wood filler, and sand smooth once dry. Apply primer if you're painting, then finish with your choice of paint or stain and seal with a durable clear topcoat. For outdoor projects, use exterior-rated primer, paint or stain, and sealer so the piece stands up to the weather.
Source (temporary): https://www.ana-white.com/woodworking-projects/fence-picket-bench-planter