Fillman Platform Headboard
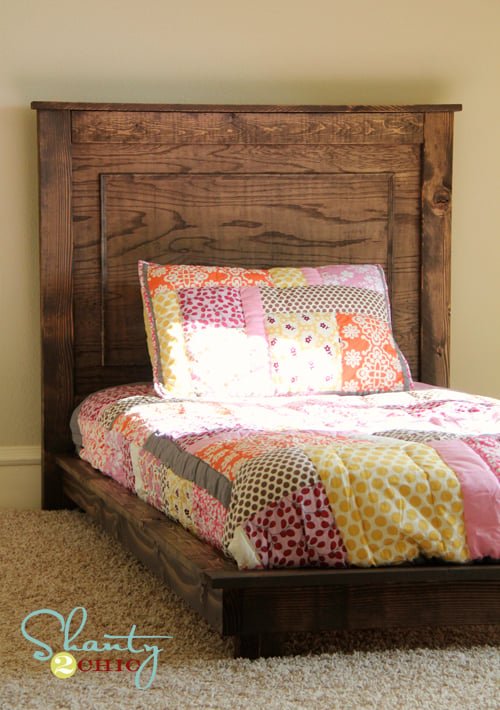
Build a beautiful headboard to match our twin platform bed plans. Features panel style with beautiful detailing. with full diagrams from
Specifications
| Project type | Headboard |
|---|---|
| Room | Bedroom |
| Style | Children's and Kid's Room Furniture and Toy Plans |
| Difficulty | Intermediate |
Dimensions
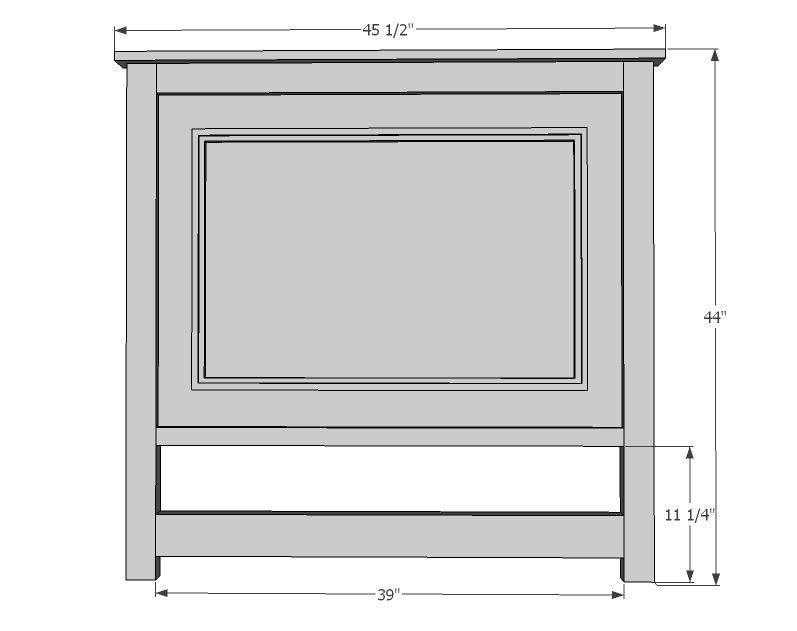
Use the size-specific shopping and cut lists below.
Shopping List
- 4' x 4' sheet 3/4" plywood or MDF
- 1 – 1x2 @ 4 feet long
- 1 – 1x3 @ 8 feet long
- 1 – 2x3 @ 8 feet long
- 1 – 2x4 @ 4 feet long
- 1 – small moulding @ 10 feet long
- 1 1/4" and 2 1/2" pocket hole screws
- 1 1/4" and 3/4" finish nails
Cut List
- 1 – 3/4” plywood @ 39” x 32”
- 1 – 1x2 @ 39”
- 1 – 1x3 @ 39”
- 2 – 2x3 @ 43 1/4"
- 1 – 1x3 @ 45 1/2"
- 1 – 2x4 @ 39”
- MOULDING
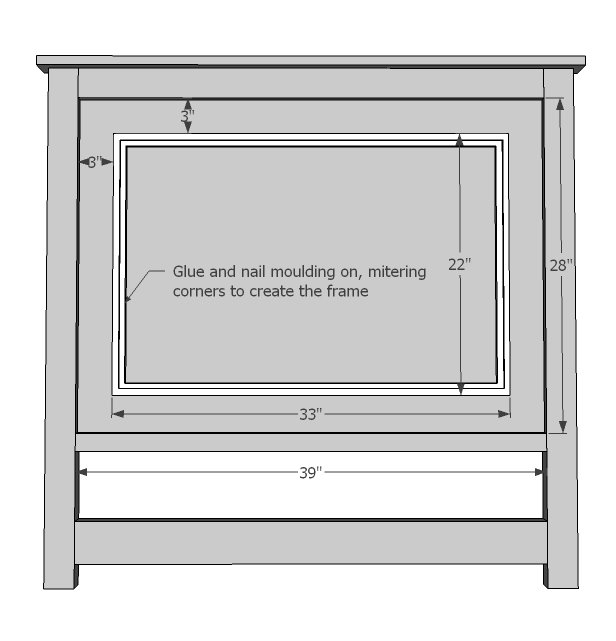
- 2 – 3/4" wide moulding @ 22” (long point to long point, both ends mitered at 45 degrees off square, ends are NOT parallel)
- 2 – 3/4" wide moulding @ 33” (long point to long point, both ends mitered at 45 degrees off square, ends are NOT parallel)
Tools
- measuring tape
- square
- pencil
- safety glasses
- hearing protection
- kreg-jig
- drill
- circular saw
- compound miter saw
- nailer
- sander
Step-by-step Instructions
Step 1
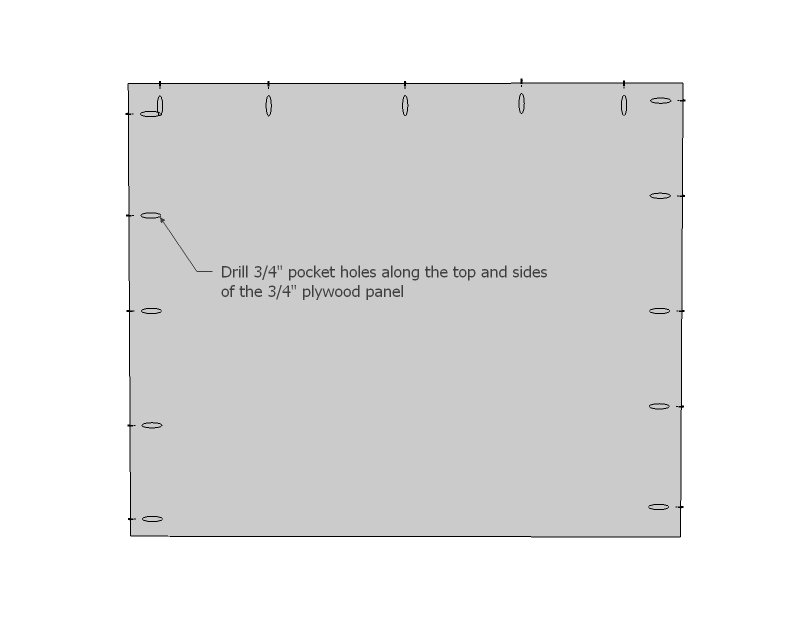
On the back side of your plywood panels, drill 3/4" pocket holes around side and top edges. This is for attaching in later steps the legs and the header.
Step 2
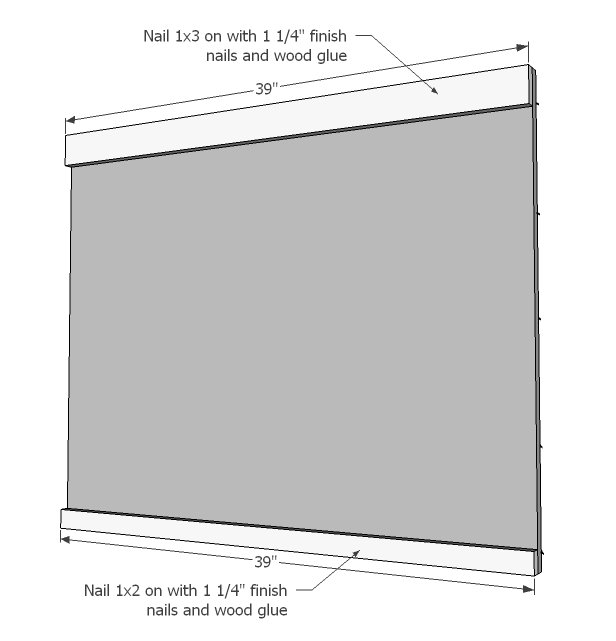
On the front side of the bed, attach with 1 1/4" finish nails and glue your panel trim. TIP: you can actually clamp trim in place, and then nail from back to hide nail holes and avoid pocket hole locations.
Step 3
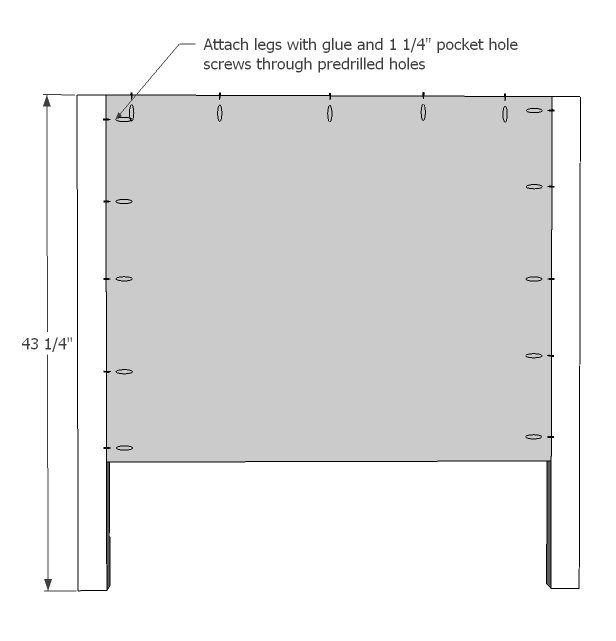
Next, add the legs with glue and 1 1/4" pocket hole screws. Legs are flush to top of top panel trim and should match the thickness of the panel + trim.
Step 4
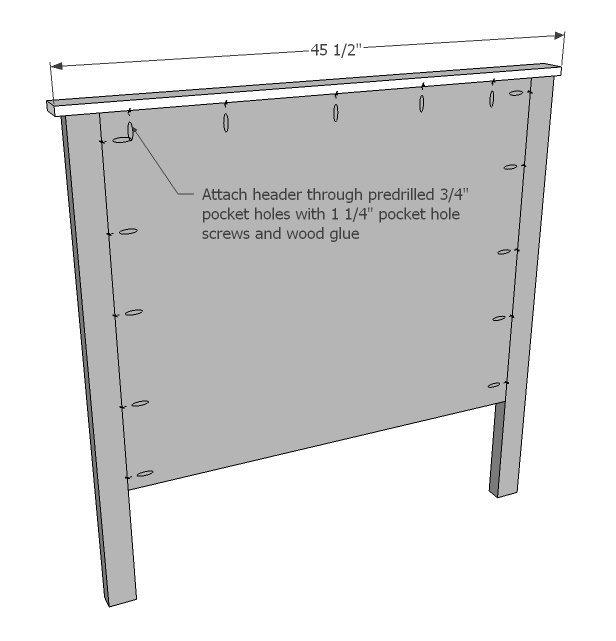
Keep the header flush to the back, with even overhangs on ends, and attach with 1 1/4" pocket holes and wood glue.
Step 5
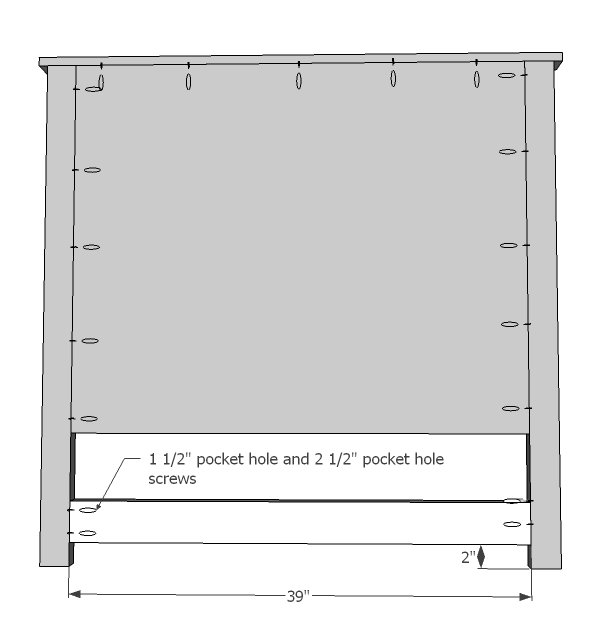
Attach headboard panel to the legs with pocket hole screws (3/4" setting and 1-1/4" pocket hole screws for 3/4" thick material) Attach base with 1-1/2" pocket holes and 2-1/2" pocket hole screws.
Step 6
Now the final step! Cut out trim pieces and carefully position. It's a great idea to measure and mark out trim. Attach with glue and 3/4" finish nails. We will also post plans for the twin platform bed part later this week. It is designed to work with this bed as well.
Finishing
Sand all surfaces, starting with a medium grit and finishing with fine. Wipe off the dust, fill any holes or gaps with wood filler, and sand smooth once dry. Apply primer if you're painting, then finish with your choice of paint or stain and seal with a durable clear topcoat. For outdoor projects, use exterior-rated primer, paint or stain, and sealer so the piece stands up to the weather.
Source (temporary): https://www.ana-white.com/woodworking-projects/fillman-platform-headboard