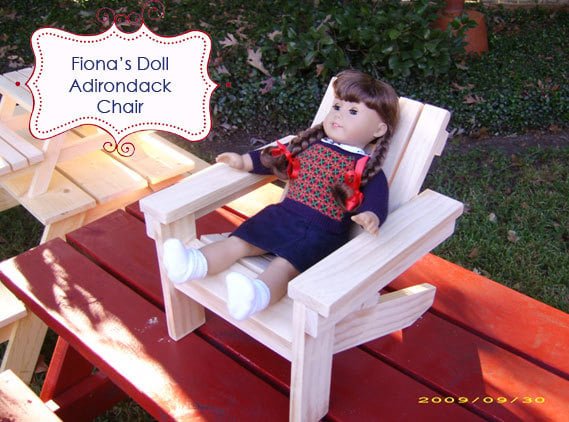
Fiona's Doll Adirondack Chair
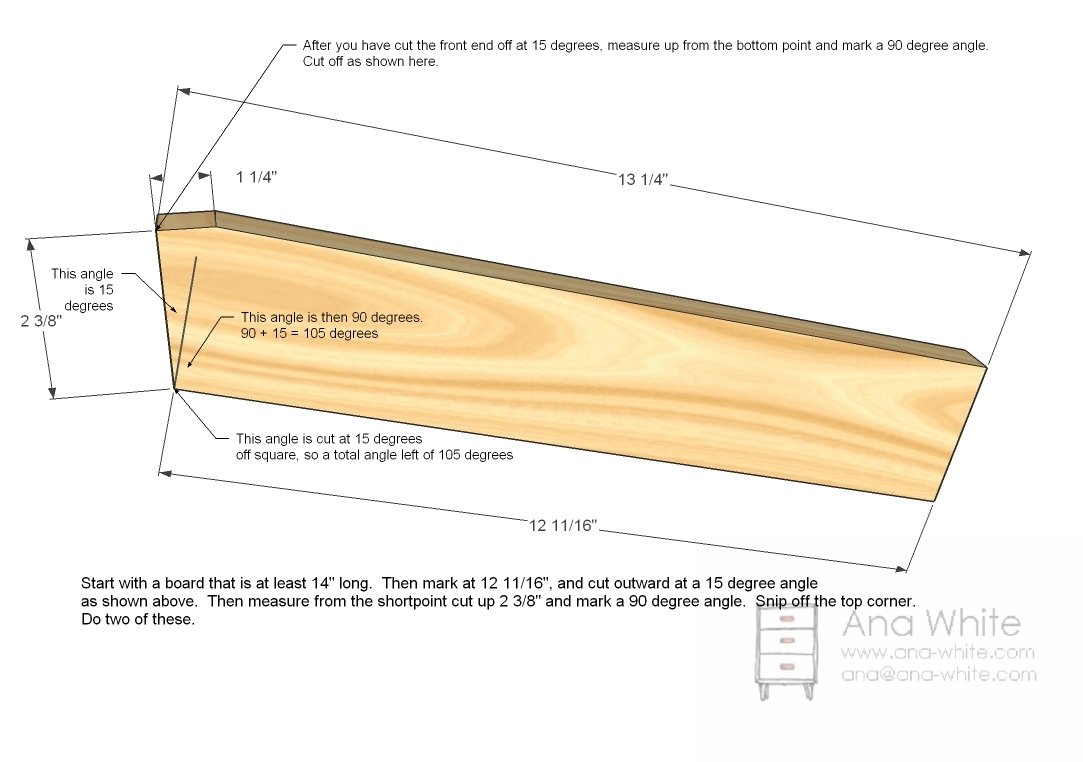
This is going to be the most difficult part – getting this cut right. Just follow the directions above, and measure carefully, and you should be able to tackle this one with easy.
Specifications
| Project type | Doll Furniture |
|---|---|
| Room | Kids and Toys |
| Style | Children's and Kid's Room Furniture and Toy Plans |
| Difficulty | Intermediate |
| Estimated cost | Under $20 |
Dimensions
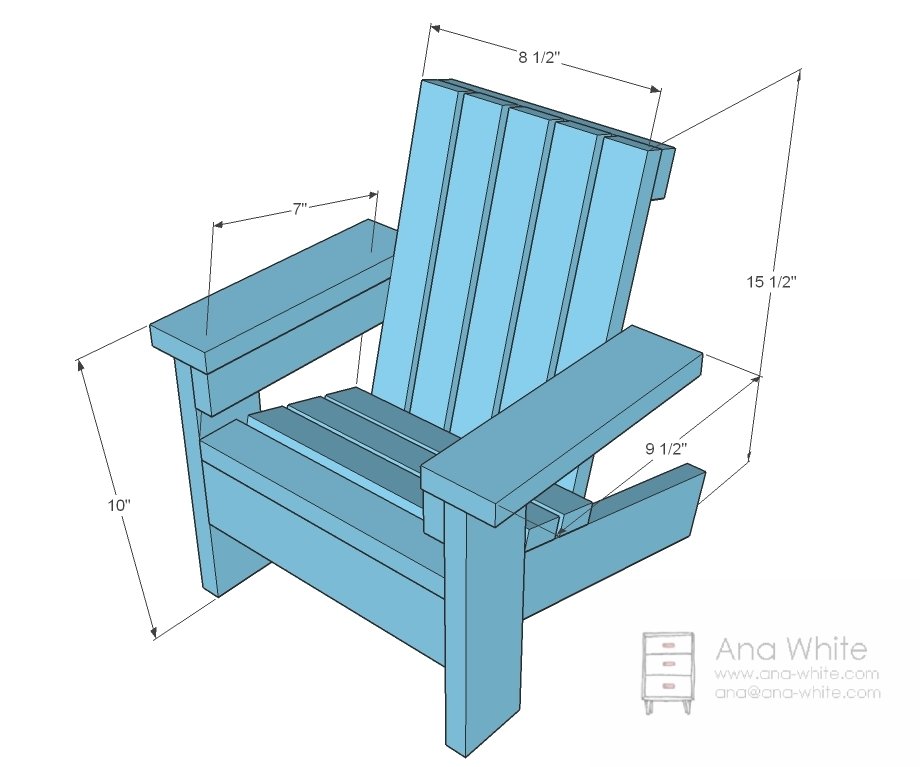
Use the size-specific shopping and cut lists below.
Shopping List
1 – 1×3, 8 feet long (whitewood or furring strips should be about $1.50)
2 – 1×2, 8 feet long (whitewood or furring strips should be about $1.00 each)
1 1/4″ screws or nails
wood glue
finishing supplies
Cut List
2 – 1×3 @ 13 1/2″ (Stringers, one end cut in step 1)
1 – 1×3 @ 10″ (Front Apron)
4 – 1×2 @ 10″ (Seat Slats)
5 – 1×2 @ 14″ (Back Slats)
3 – 1×2 @ 8 1/2″ (Back Supports)
2 – 1×3 @ 9″ (Front Legs)
2 – 1×2 @ 9 1/2″ (Arm Supports)
2 – 1×2 @ 9 1/2″ (Arms)
Tools
- measuring tape
- square
- pencil
- safety glasses
- hearing protection
- drill
- compound miter saw
- sander
- countersink drill bit
Step-by-step Instructions
Stringers
This is going to be the most difficult part – getting this cut right. Just follow the directions above, and measure carefully, and you should be able to tackle this one with easy.
Front Apron
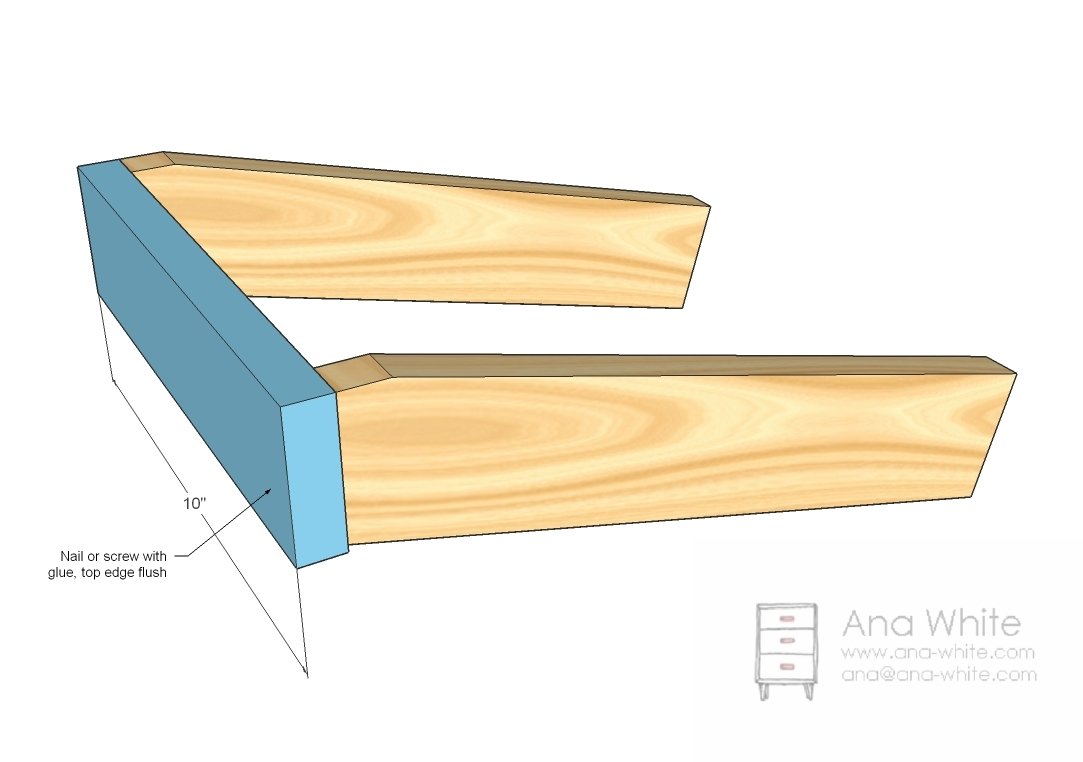
Now this is an easy step. Just screw the front apron to the stringers.
Seat Slats
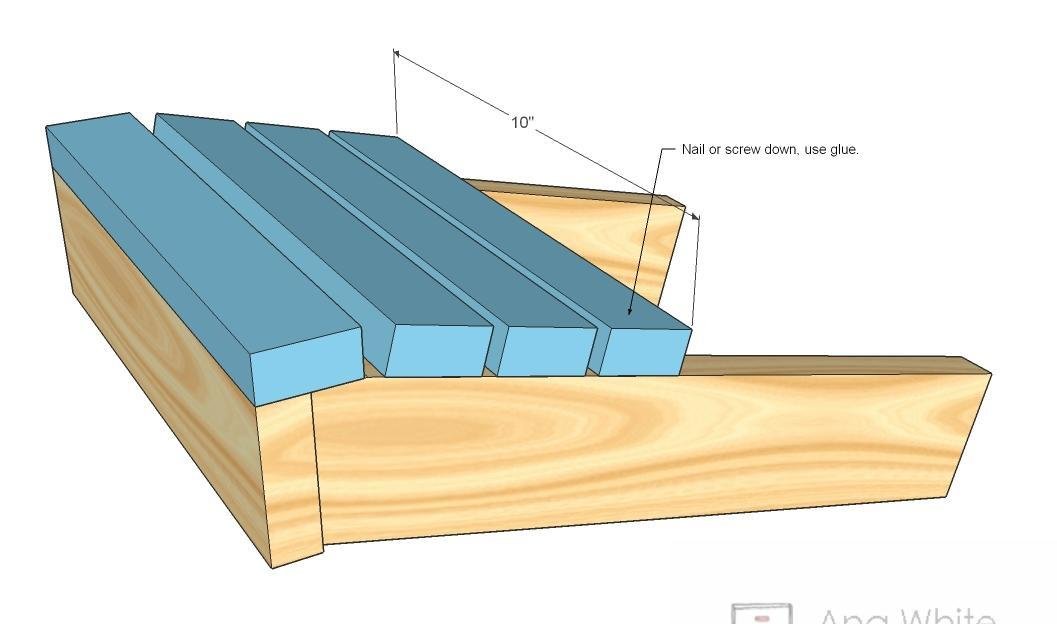
Now simply screw the seat slats down. You can also use nail and glue – it’s a doll chair
Back
Now build the back as shown above.
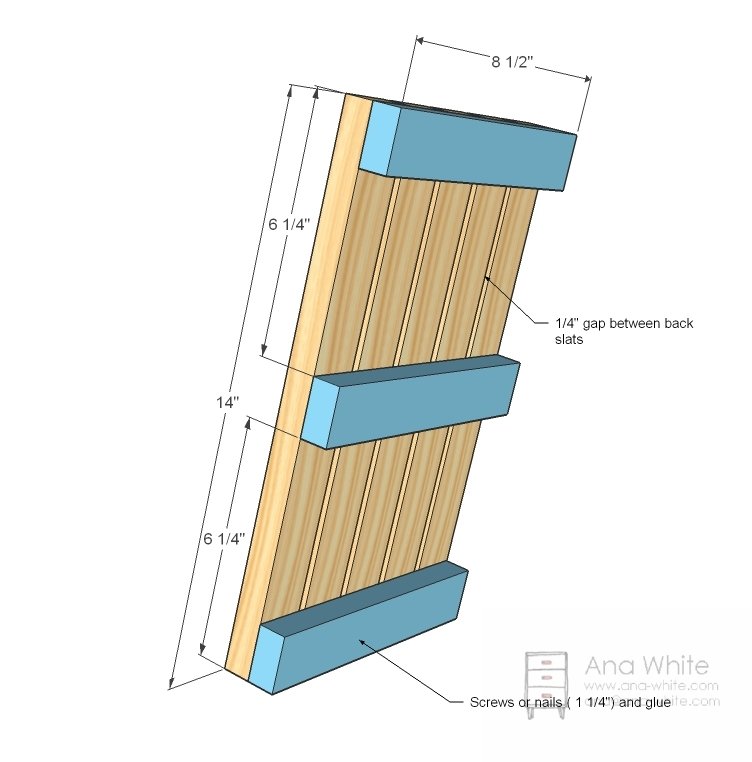
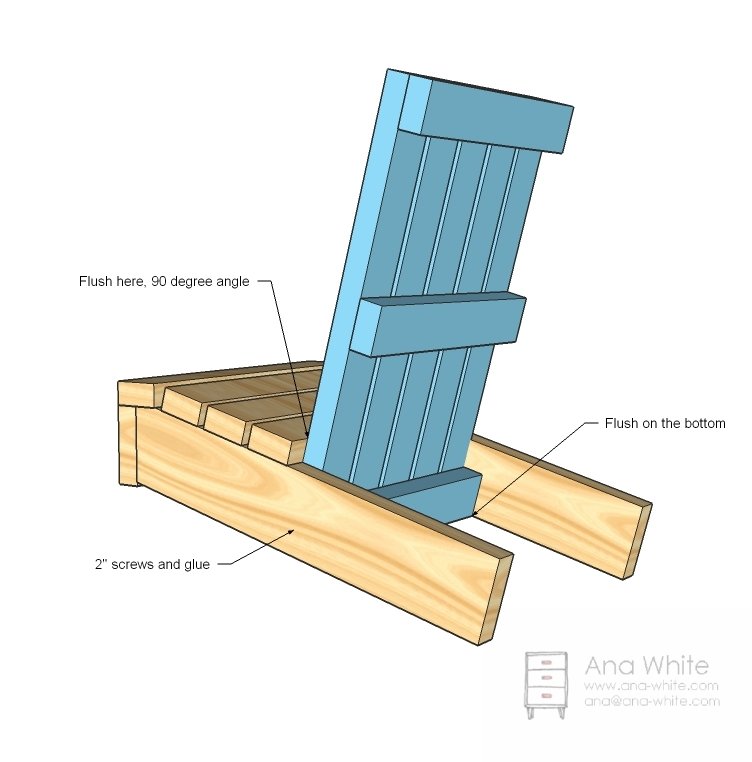
Step 5
Front Legs
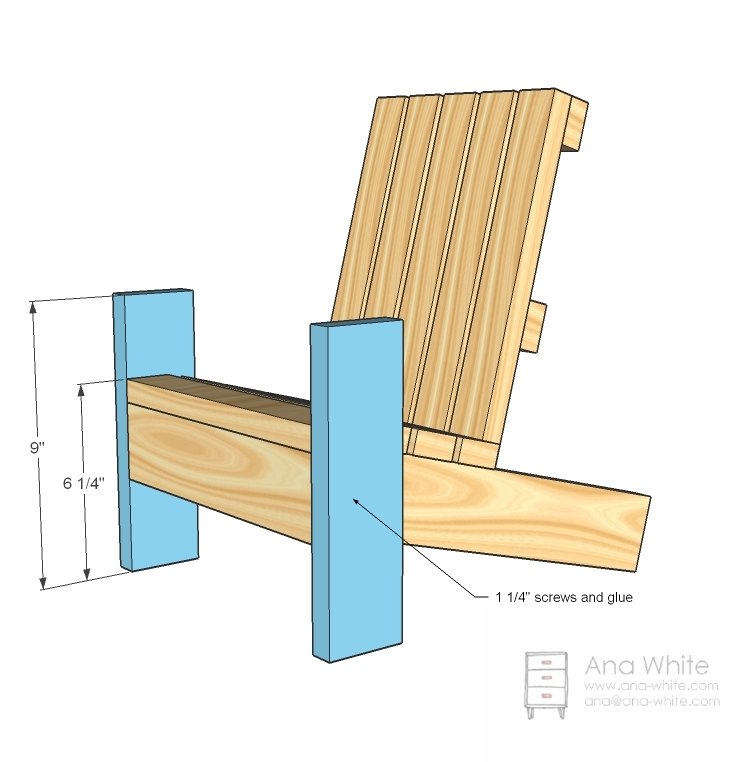
And then mark the front legs and attach to the chair front as shown in the diagram.
Arm Supports
Now attach the arm supports to the front legs, and then to the seat back.
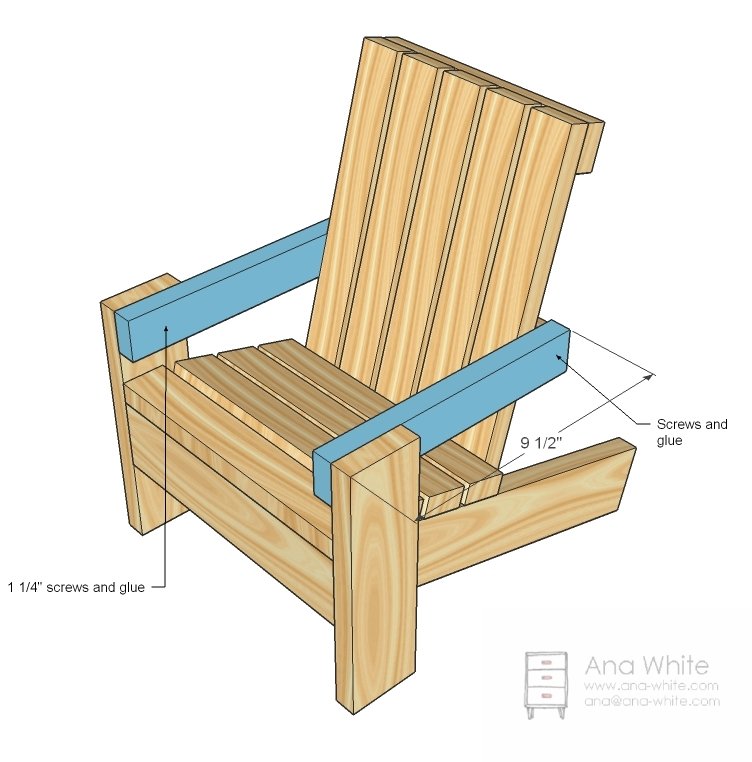
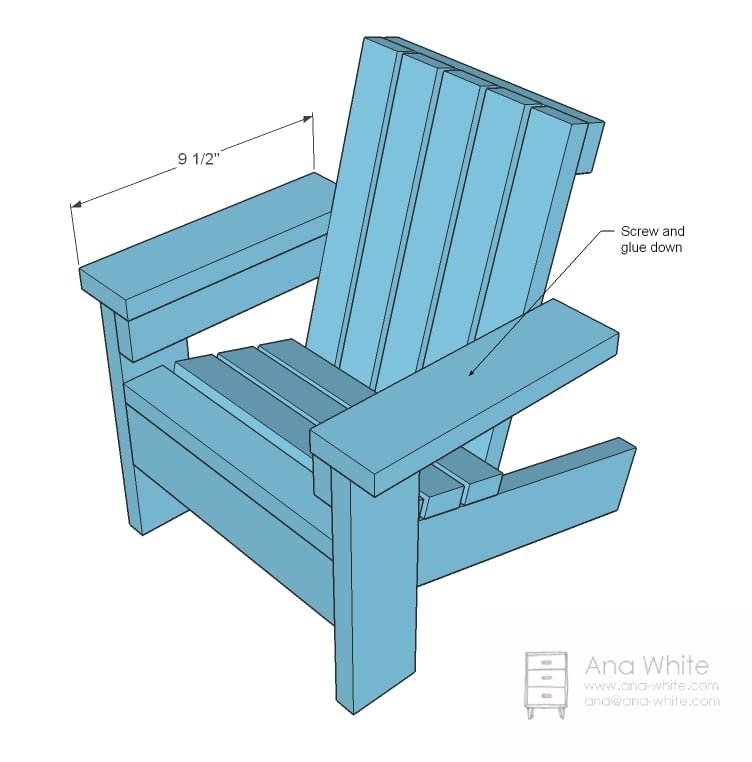
Arms
And then just attach the arms to the arm supports. If you have any apprehension about building an Adirondack Chair, this would be a fabulous project to start with. And I have to tell you, the Adirondack Chairs are amazing, some of my absolute favorite pieces in my own home. Thanks again to Fiona for sharing her plans and photos!
Finishing
Sand all surfaces, starting with a medium grit and finishing with fine. Wipe off the dust, fill any holes or gaps with wood filler, and sand smooth once dry. Apply primer if you're painting, then finish with your choice of paint or stain and seal with a durable clear topcoat. For outdoor projects, use exterior-rated primer, paint or stain, and sealer so the piece stands up to the weather.
Source (temporary): https://www.ana-white.com/woodworking-projects/fionas-doll-adirondack-chair