Firehouse Playset
Build a solid wood firehouse playset with these free simple easy plans! Made of solid wood, this sturdy playset will last and last!
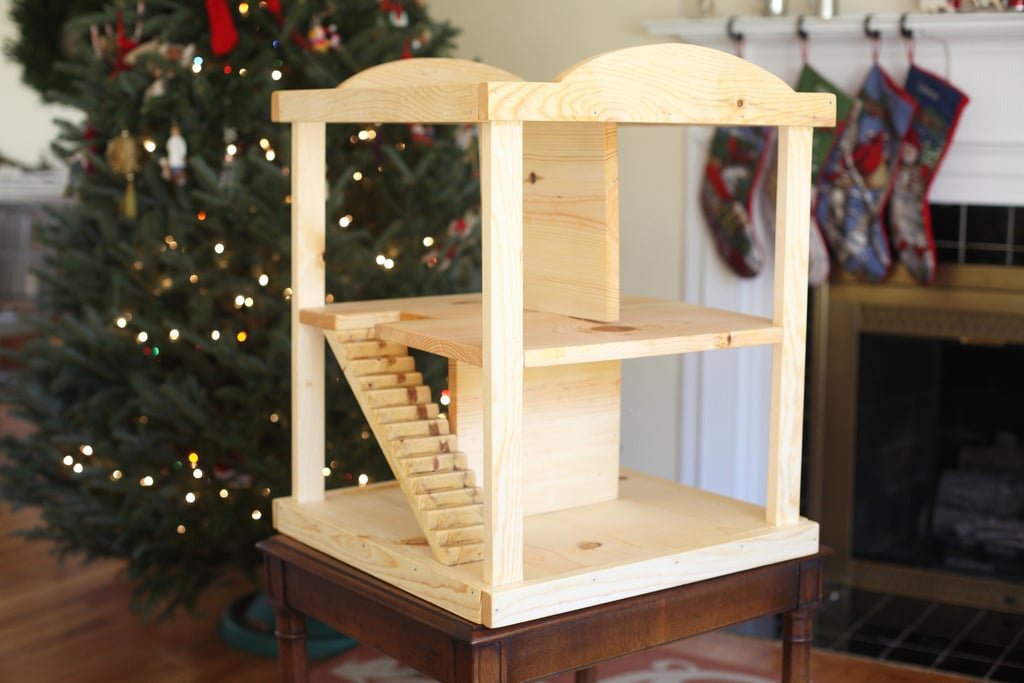
Specifications
| Project type | Toys |
|---|---|
| Room | Kids and Toys |
| Style | Children's and Kid's Room Furniture and Toy Plans |
| Difficulty | Beginner Projects |
| Estimated cost | $20 - $50 |
Dimensions
Use the size-specific shopping and cut lists below.
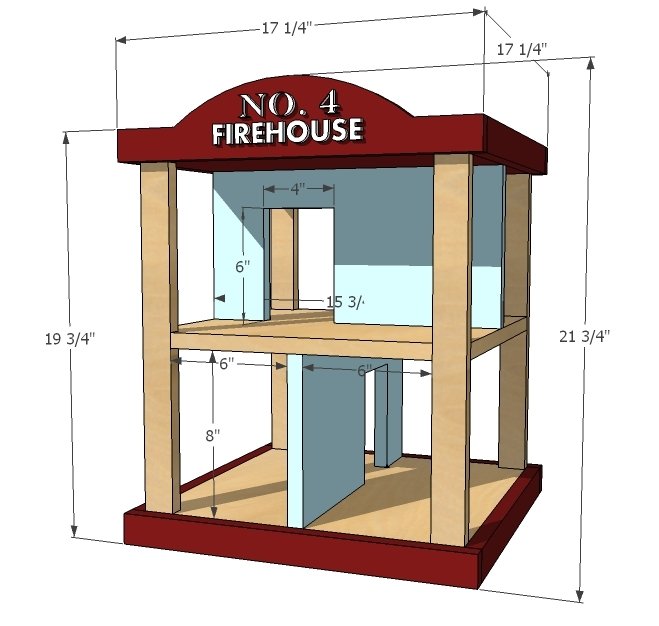
Shopping List
1 - 1/4 sheet of 3/4" hardwood plywood (shown in PureBond Formaldehyde Free Birch Plywood )
2 - 1x2 @ 8 feet long
1 - 1x4 @ 4 feet long
Cut List
- 3 - 3/4" plywood @ 15 3/4" x 15 3/4"
- 2 - 3/4" plywood @ 15 3/4" x 8"
- 4 - 1x2 @ 18 1/4" (legs)
- 4 - 1x2 @ 15 3/4" (side trim)
- 2 - 1x4 @ 17 1/4" (front trim)
- 2 - 1x2 @ 17 1/4" (Bottom trim)
Tools
- measuring tape
- square
- pencil
- safety glasses
- hearing protection
- drill
- jigsaw
- nailer
- sander
- countersink drill bit
Step-by-step Instructions
Step 1
Have your hardware store cut the plywood into strips 8" and 15 3/4" wide, by four feet long as shown in the diagram. If they are really nice, they might even do your crosscuts:) Remember that the saw blade takes up space, so measure, cut, measure cut and so on to get the most accurate cuts.
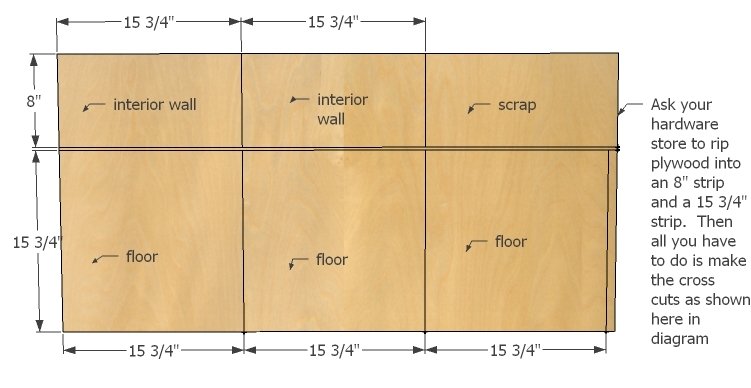
Step 2
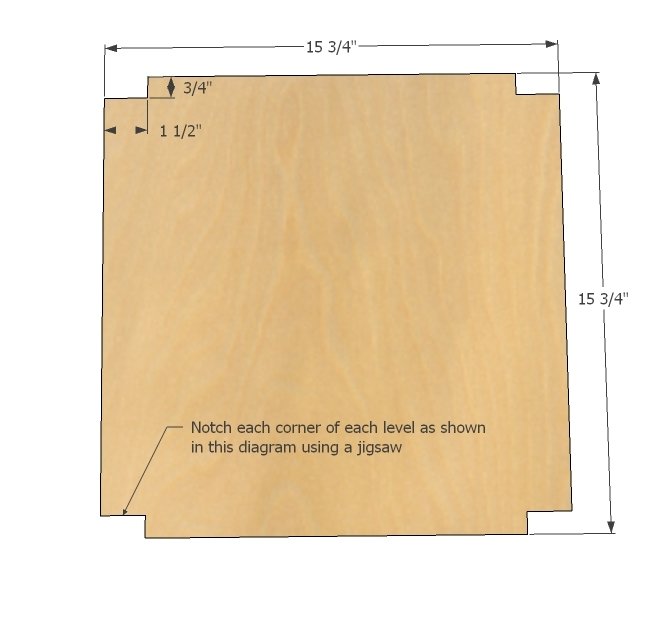
From all of the shelves, notch out the corners as shown above with a jigsaw. Sand any rough edges. TIP: Cut holes out with a hole saw kit on the top and middle story to add a fireman's pole:) just make sure you place the holes so they don't conflict with your interior wall placement.
Step 3
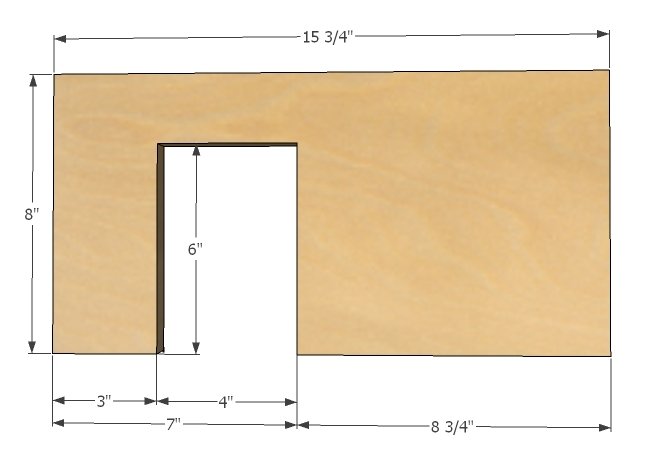
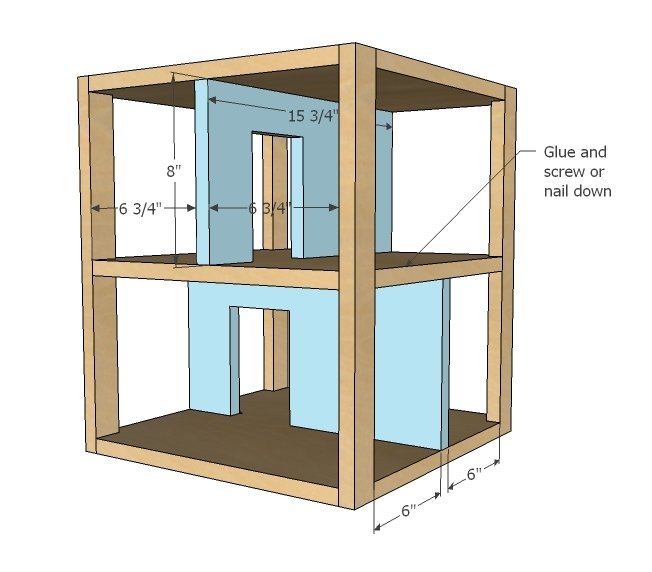
Now cut the doorways out of the interior walls. You can make doorways larger or smaller to fit your child's needs.
Step 4
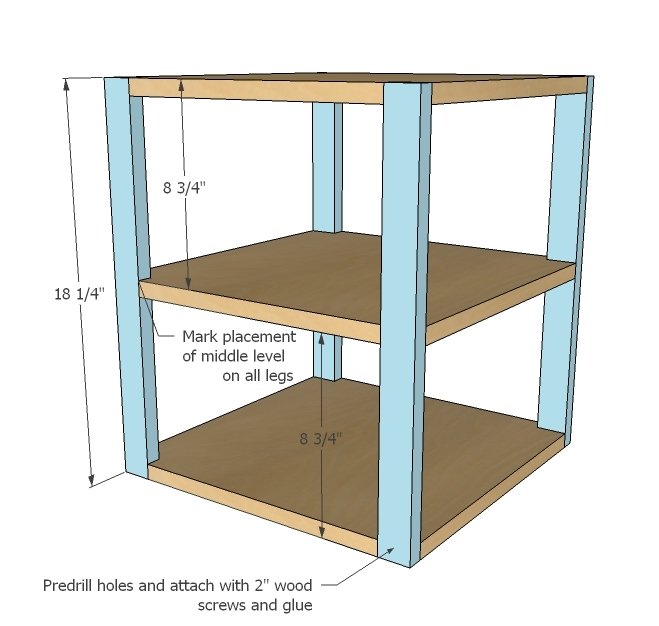
Mark on all of the legs the placement of the middle story. Attach legs as shown in diagram.
Step 5
Step 6
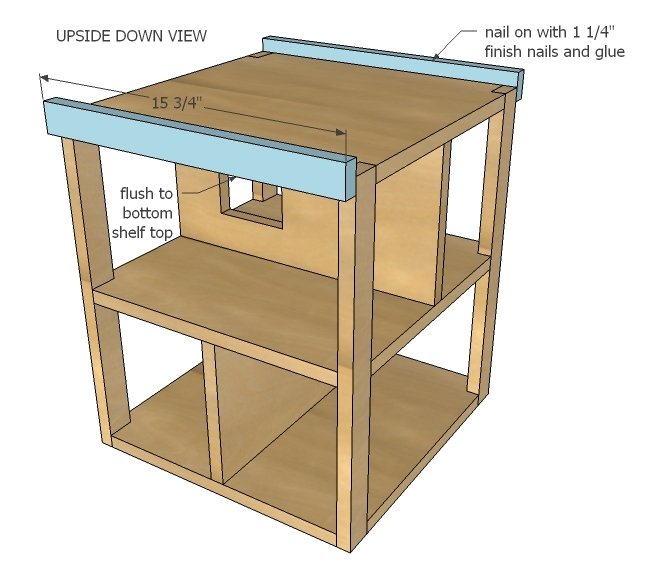
Flip the whole project upside down and nail bottom trim on starting with smaller pieces.
Step 7
Now add the longer trim pieces to finish out the bottom. You can also add wheels underneath to make the playset mobile.
Step 8
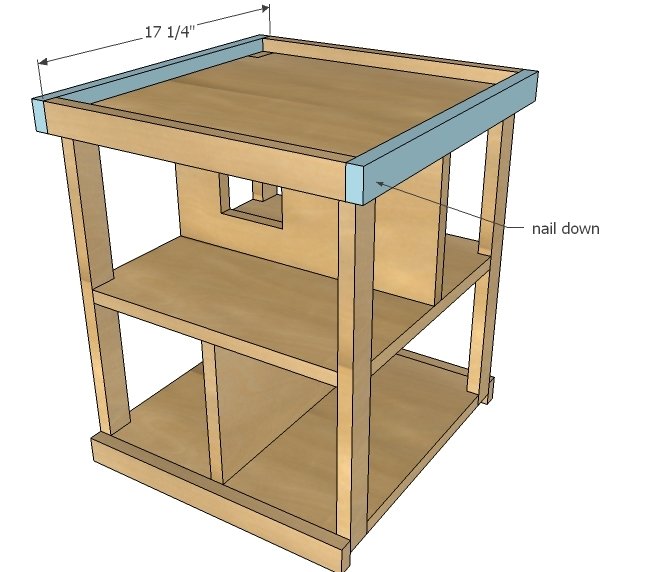
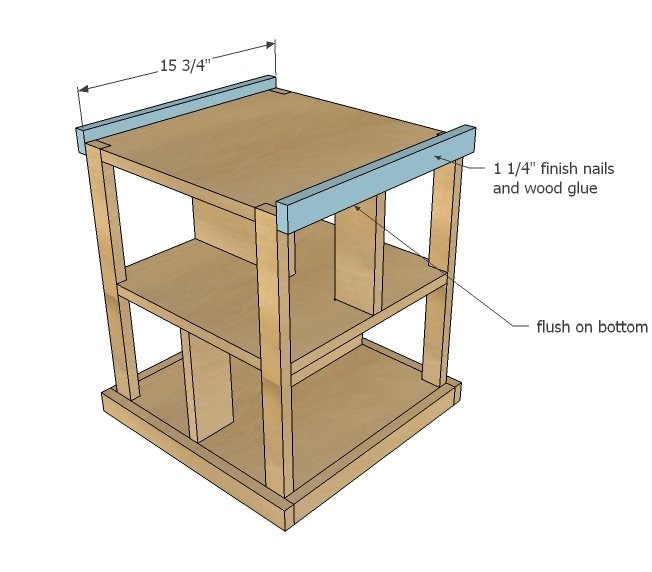
Now flip the playset back over and attach top trim as shown above, flush to bottom of top story.
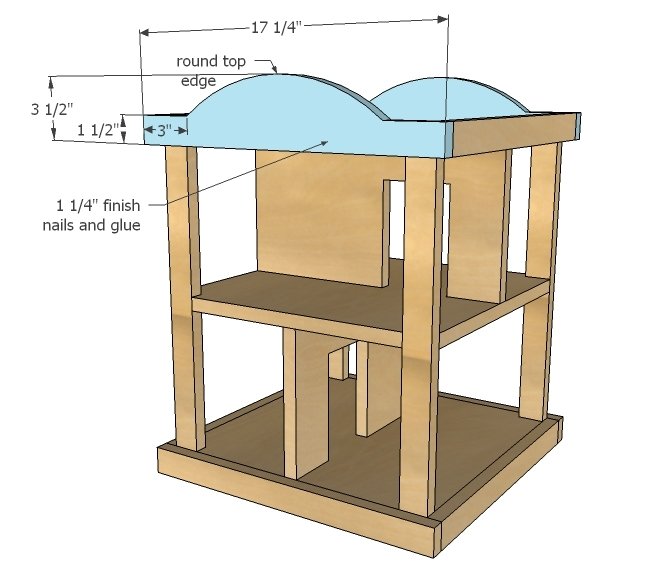
Cut desired shape out of 1x4 front/backs and attach with finish nails and glue.
Now it's time to paint and accessorize!!!
Finishing
Sand all surfaces, starting with a medium grit and finishing with fine. Wipe off the dust, fill any holes or gaps with wood filler, and sand smooth once dry. Apply primer if you're painting, then finish with your choice of paint or stain and seal with a durable clear topcoat. For outdoor projects, use exterior-rated primer, paint or stain, and sealer so the piece stands up to the weather.
Source (temporary): https://www.ana-white.com/woodworking-projects/firehouse-playset