Flat Wall Book Shelves
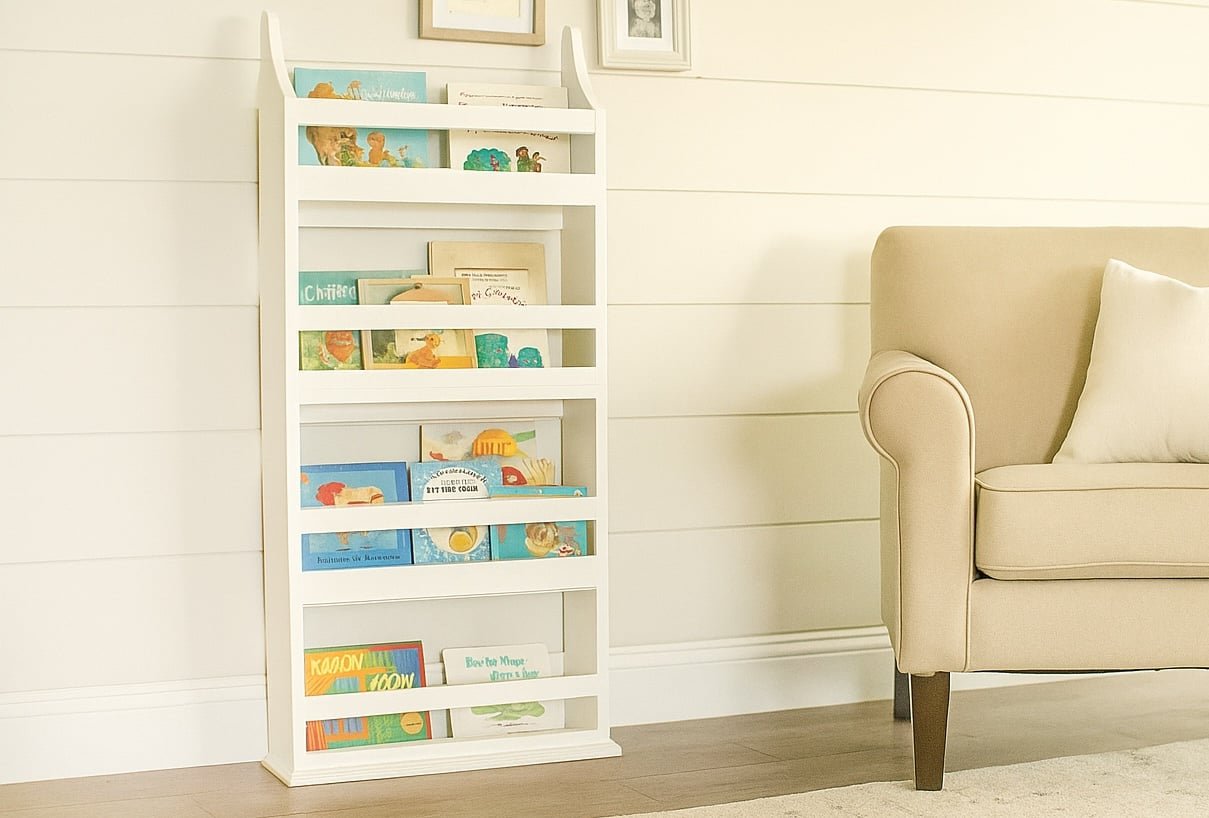
In a children's room, it just makes sense to store books facing flat. Then children can put their own books away. Also, flat bookshelves take up less floor space, a bonus for often tiny secondary bedrooms. This is a to build your own wall bookrack that sits on the floor and holds books forward facing. This plan using basic materials and simple joinery techniques, includes step by step diagrams, shopping and cut lists and lots of reader submitted photos. Build your wall book shelves today!
Specifications
| Project type | Bookshelf and Bookcase Plans |
|---|---|
| Room | Storage Solutions |
| Style | Children's and Kid's Room Furniture and Toy Plans |
| Difficulty | Beginner Projects |
| Estimated cost | $20 - $50 |
Dimensions
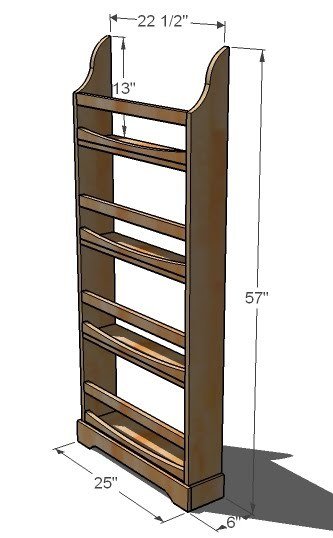
Use the size-specific shopping and cut lists below.
Shopping List
- 1 – 12′ 1×6 Board (cut sides out of this board)
- 1 – 8′ 1×6 Board (cut shelves out of this board)
- 3 – 1×2 Boards
- 40″ of 3 1/4″ Base Moulding, between 1/2″ and 1″ thick
- 2″ Screws
- Wood Glue
- Wood Filler
Cut List
- 2 – 1×6 @ 57″ (Sides, Top Cut out in step 1)
- 4 – 1×6 @ 22 1/2″ (Shelves)
- 11 – 1×2 @ 22 1/2″ (Back Supports and Front Rails)
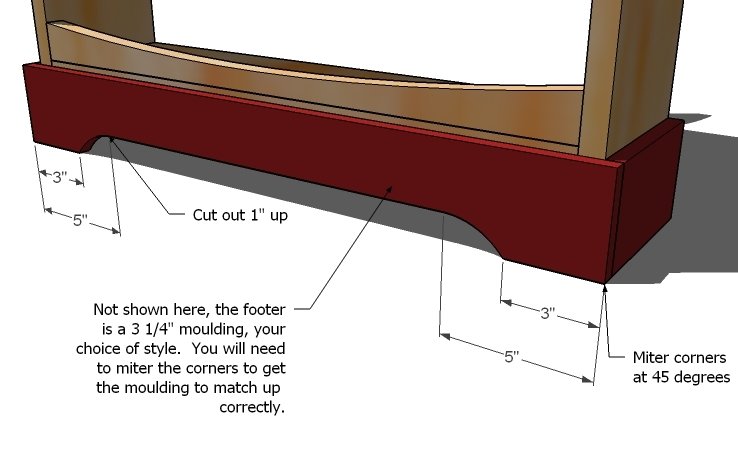
- 3 1/4″ Base Moulding, mitered for footer
Tools
- measuring tape
- square
- pencil
- hammer
- safety glasses
- hearing protection
- kreg-jig
- drill
- sander
- level
Step-by-step Instructions
Step 1
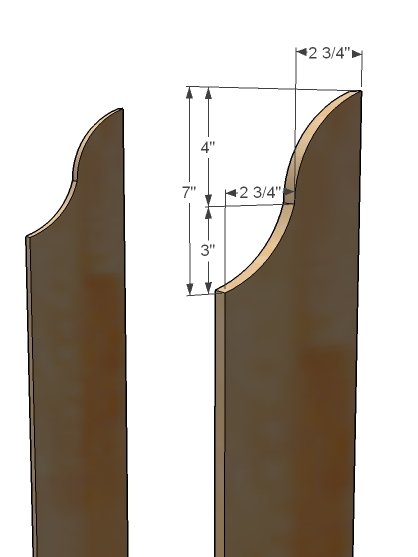
Side Cutouts. Using the measurements above to guide you, cut out the sides at the top as shown above. Once one side is cutout to your satisfaction, use it as a pattern for the other side. This will keep the side the same. Use either a bandsaw or a jigsaw.
Step 2
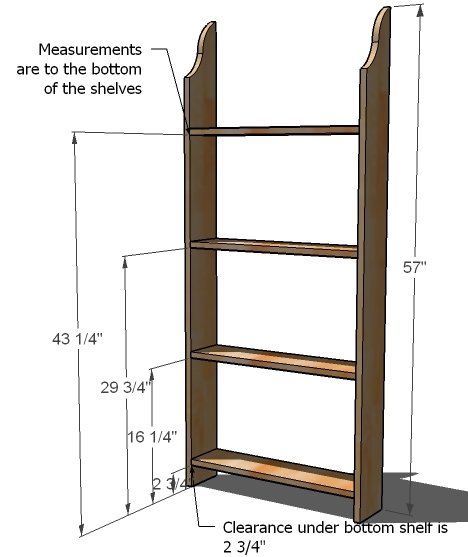
Box. Build the box by using 2″ screws and fastening the shelves to the sides, as shown above. Measurements above are to the bottoms of the shelves.
Step 3
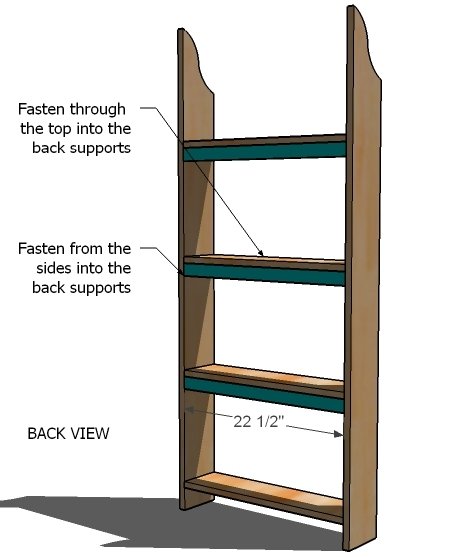
Back Supports. Fasten the back supports to the sides and the shelves. Make sure the bookrack is square before this step. Use 2″ screws and glue.
Step 4
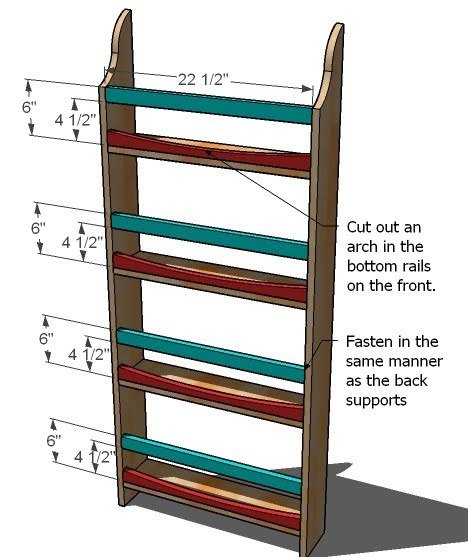
Front Rails. Cut out 4 of the front rails (1×2 @ 22 1/2″) in a simple arch shape above as shown in red. Then, as you did the back supports, fasten the front rails in place. Make sure you bookrack is square before fastening the rails, as this step will set the bookrack.
Step 5
Step 6
Finishing. Fill any holes with wood filler and sand and finish as desired. Screw through the back supports into a stud in the wall to keep the bookrack in place. You could alternatively use a picture hanging kit to fasten the bookrack to the wall.
Finishing
Sand all surfaces, starting with a medium grit and finishing with fine. Wipe off the dust, fill any holes or gaps with wood filler, and sand smooth once dry. Apply primer if you're painting, then finish with your choice of paint or stain and seal with a durable clear topcoat. For outdoor projects, use exterior-rated primer, paint or stain, and sealer so the piece stands up to the weather.
Source (temporary): https://www.ana-white.com/woodworking-projects/flat-wall-book-shelves