Flip Top Storage Bench with Cubbies
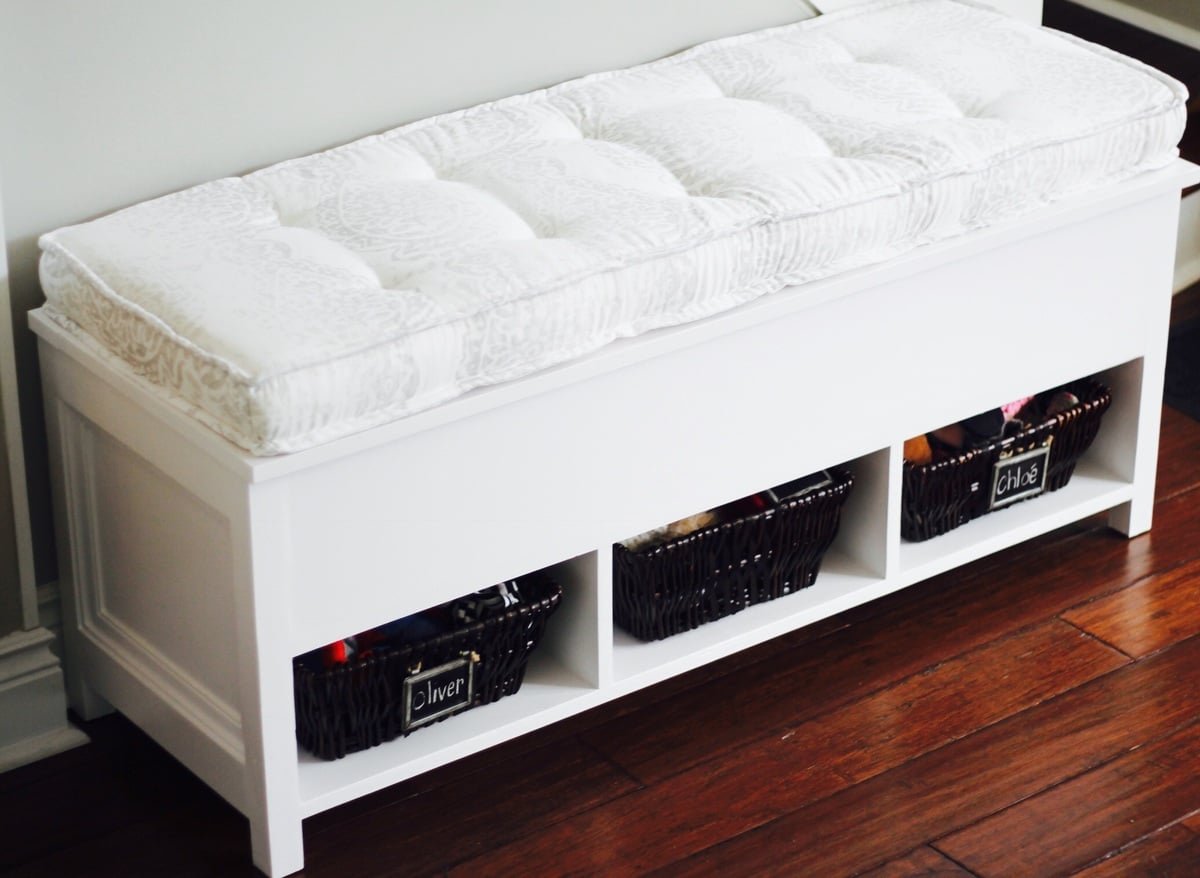
I was looking for a storage bench for our playroom that had a flip top lid, but wasn't going to be a bottomless pit for tiny pieces of toys...been there done that! Then I saw just what I was looking for! The top flips up, but the bottom is storage shelves - perfect for baskets or shoes. Step by step woodworking plans with diagrams, shopping and cut lists.
Specifications
| Project type | Bench |
|---|---|
| Room | Storage Solutions |
| Style | Modern Style Furniture Plans |
| Difficulty | Intermediate |
Dimensions
Use the size-specific shopping and cut lists below.
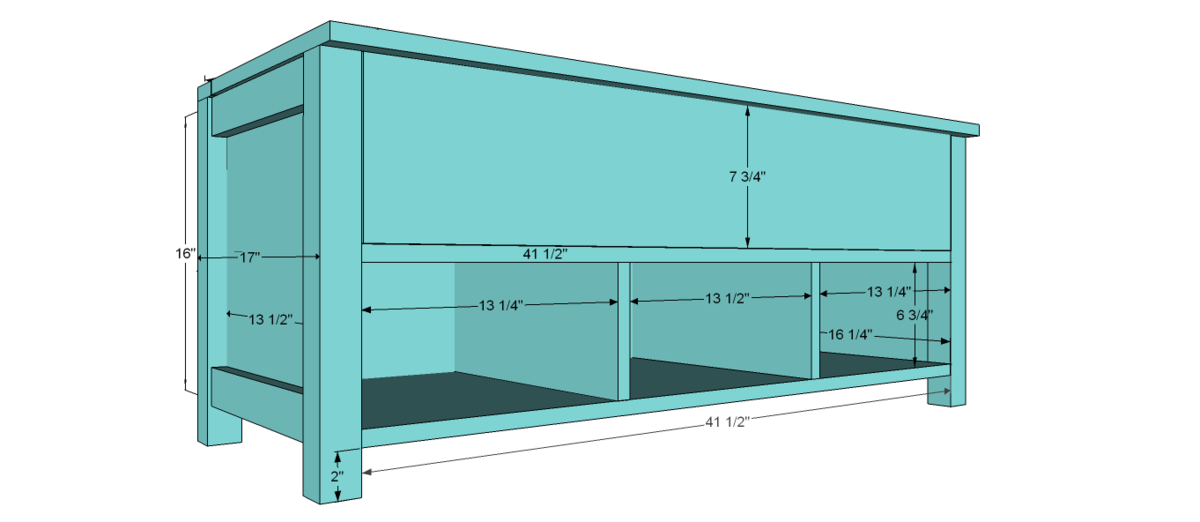
Shopping List
- 1- 2x2, 6ft
- 1- 1x3, 8ft
- 1- 4x8 plywood - this plan was designed for plywood that actually measures 3/4in
- hinges for lid
Cut List
Sides
2 - 3/4" plywood @- 13.5" x 16"
4 - 2x2 @ 18"
4 - 1x3 @ 13.5"
Back
1 - 3/4" plywood @ 41.5" x 16"
Bottom and Shelf
2 - 3/4" plywood @ 41.5" x 16.25"
Front
1 - 3/4" plywood @ 41 1/2 x 7 3/4
Divider (you could do 1 or 2)
1 - 3/4" plywood @ 16.25" x 6.75"
Lid
1 -1x3 @ 45" (measure to fit)
1 - 3/4" plywood @ 45" x 14.75" (you might want to cut this last to measure for perfect fit)
Tools
- measuring tape
- square
- pencil
- safety glasses
- hearing protection
- circular saw
- compound miter saw
- nailer
- sander
- level
Step-by-step Instructions
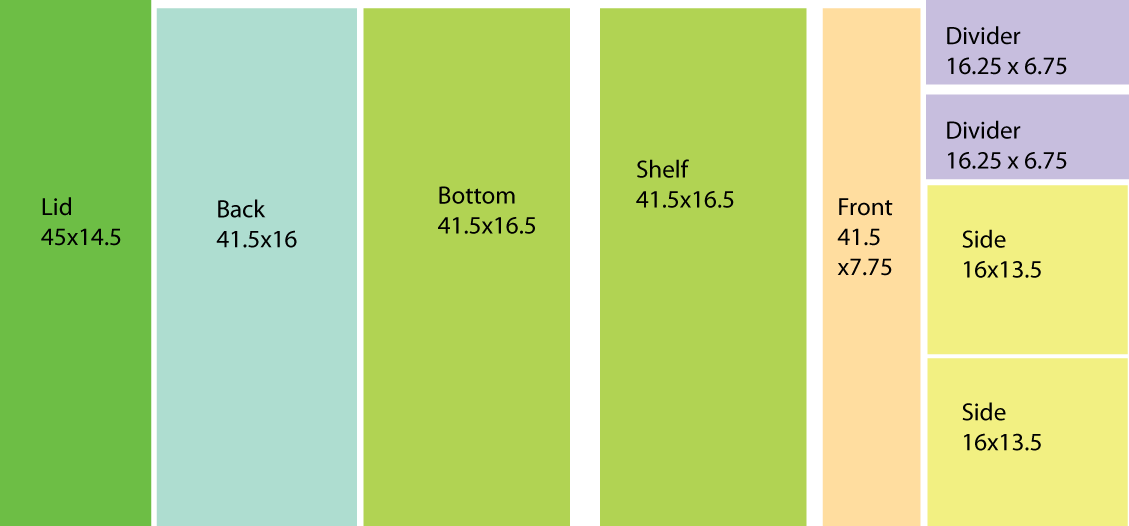
Make all your plywood cuts (see diagram)
I'm planning to get my plywood cut in-store into 2 4'x4' pieces.
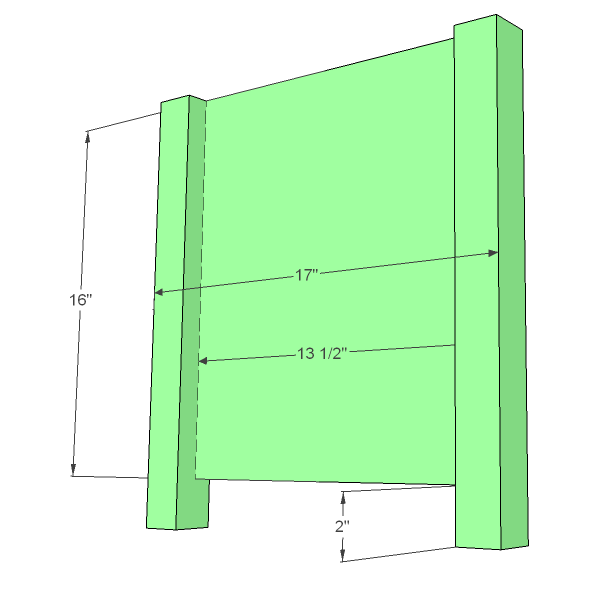
Assemble Sides using glue and 2" nails
Step 3
Add the 1x3 trim at top and bottom. Secure with glue and 1 1/4" finishing nails
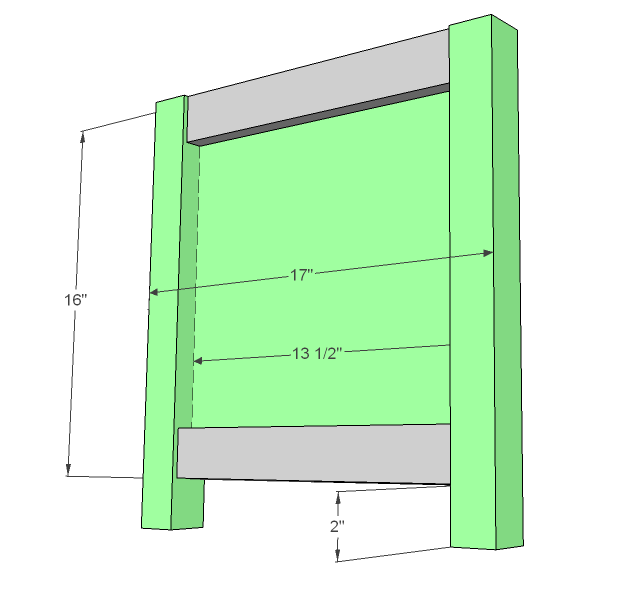
Once you have completed both sides, attach the back piece with glue and 2" nails
Make sure top edges are flush and check for square
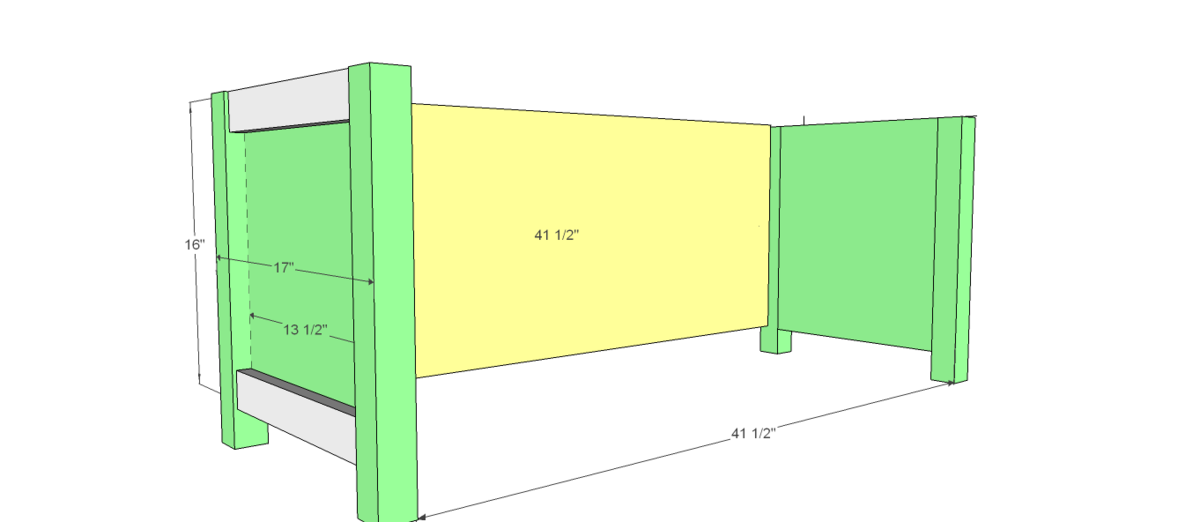
Step 5
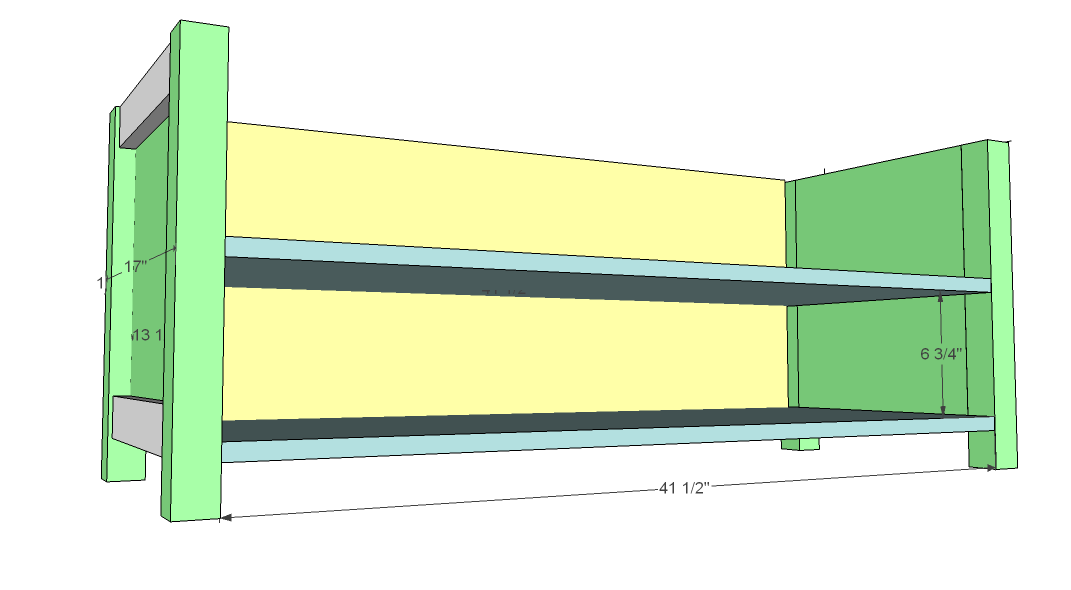
Step 6
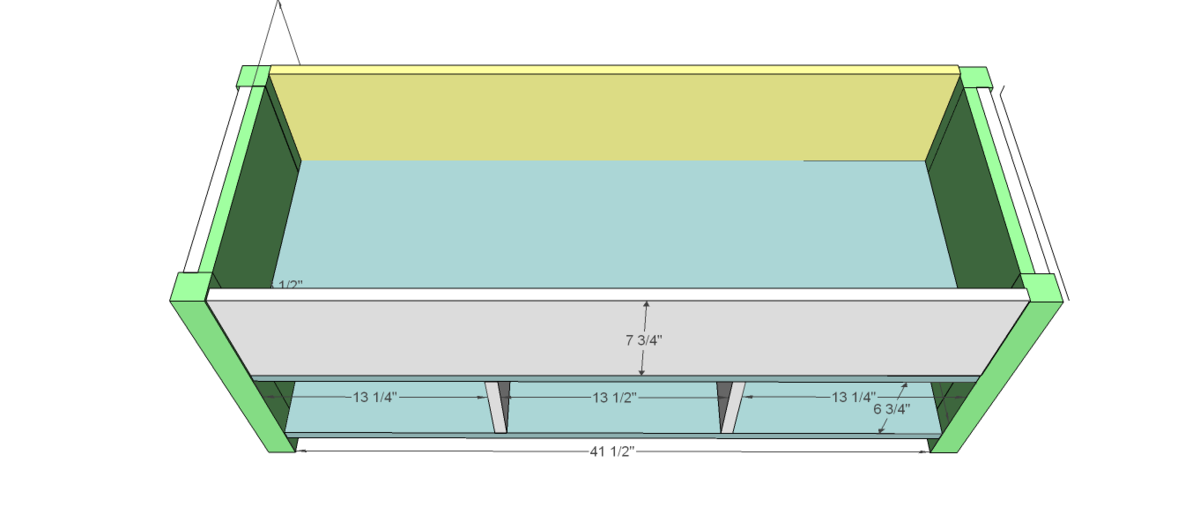
Add the dividers
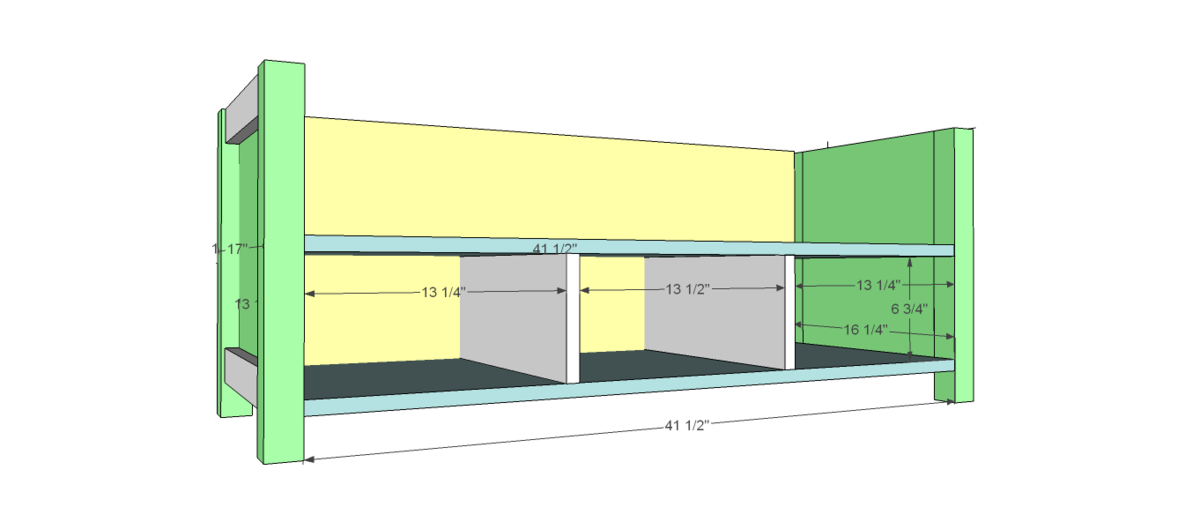
add the front
Don't forget to nail from the underside of that shelf!
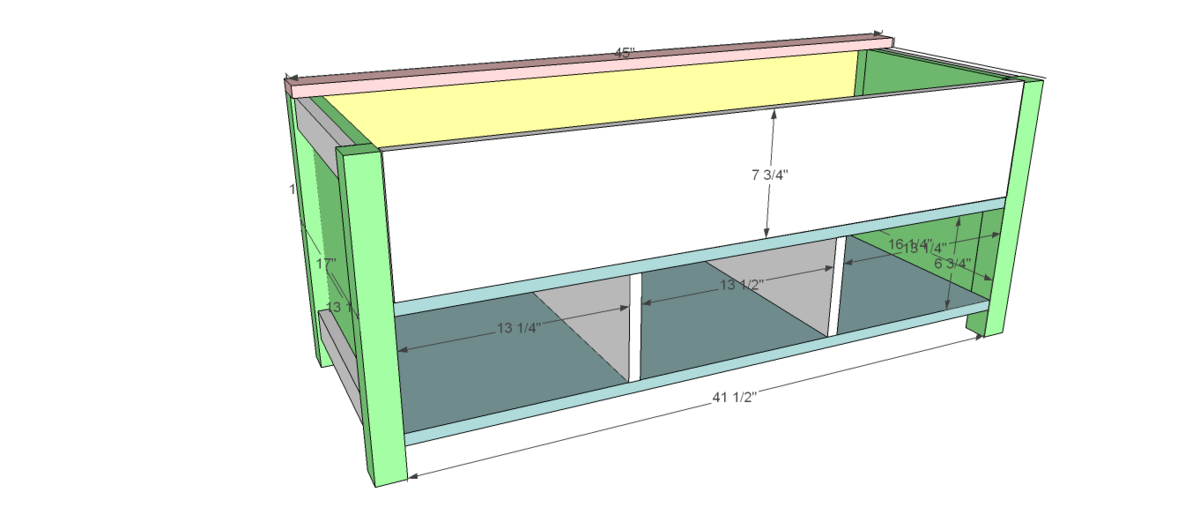
Now add that 45" 1x3
Measure to fit
Step 9
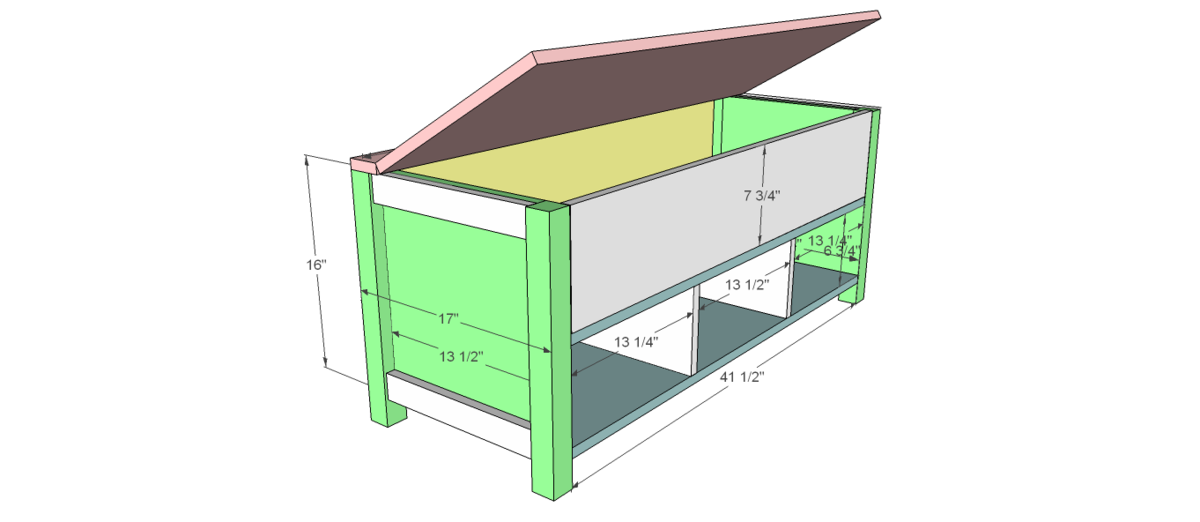
ok so i think my graphic shows the lid as 14.5 wide, that was before it dawned on me that you need a little overhang to lift the lid...duh. So it should be 14 3/4 or 15 Add the lid using whatever hinge hardware you decide upon.
Finishing
Sand all surfaces, starting with a medium grit and finishing with fine. Wipe off the dust, fill any holes or gaps with wood filler, and sand smooth once dry. Apply primer if you're painting, then finish with your choice of paint or stain and seal with a durable clear topcoat. For outdoor projects, use exterior-rated primer, paint or stain, and sealer so the piece stands up to the weather.
Source (temporary): https://www.ana-white.com/woodworking-projects/flip-top-storage-bench-cubbies