Floating Bench for Nook, Alclove or Closet
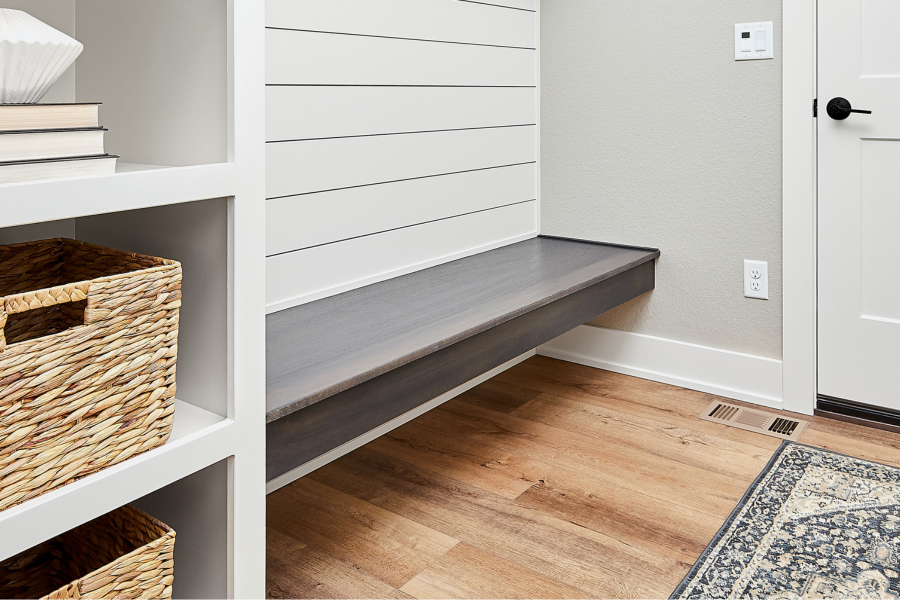
A floating bench is easy to build, inexpensive, sturdy, and very functional since dirty shoes stay on the floor, and its easy to clean underneath. Our free tutorial with lots of reader success photos make it easy! From
Specifications
| Project type | Bench |
|---|---|
| Room | Entryway and Mudroom |
| Difficulty | Intermediate |
Shopping List
- 2x3 or 2x4s for framing the bench*
- 1x4s for front trim and optional side and back trim
- 1x6 boards for seat top, can also use 3/4" plywood or other 1x thick material (ie 1x12s)
- 3" self tapping wood screws with star bit (SPAX, GRK or similar)
- 1-1/4" brad nails or trim screws
- Wood filler and desired finishing products
*Recommended is 2x3 (for more space underneath) but 2x4 framing is stronger and should be used if the span is greater than 4 feet
Tools
- measuring tape
- square
- pencil
- safety glasses
- drill
- circular saw
- nailer
- sander
- level
Step-by-step Instructions
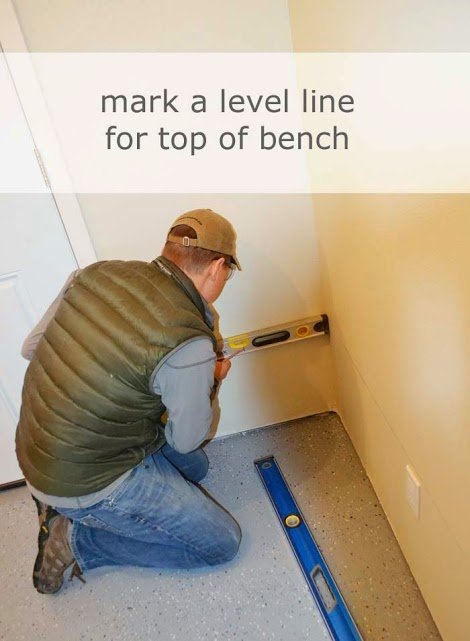
Mark a level line at 17-1/4" off the floor around the desired bench area using a level.
Also mark studs in the wall just above the level line.
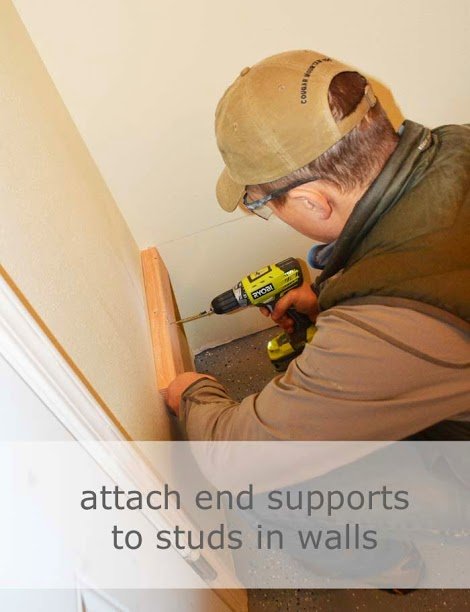
Cut two 2x3 or 2x4 pieces to the desired finished depth of your floating bench, minus 2-1/4".
Attach the 2x3 or 2x4 pieces to the side walls of your nook area, keeping top edge flush to the pencil line. Use 3" self tapping screws (spax or GRK brand or similar, with a star bit head recommended)
Step 3
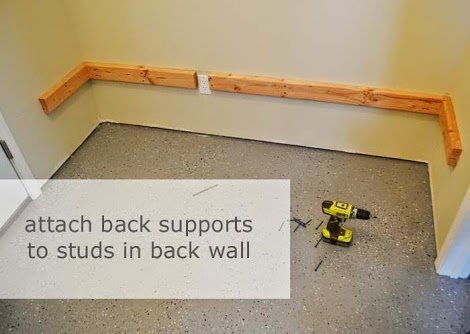
Measure and cut a 2x3 or 2x4 for the back wall and attach to studs in the wall, top edge on your pencil lines. You can cut around electrical outlets as shown, just make sure each piece of the 2x3 or 2x4 is attached to at least two different studs.
Step 4
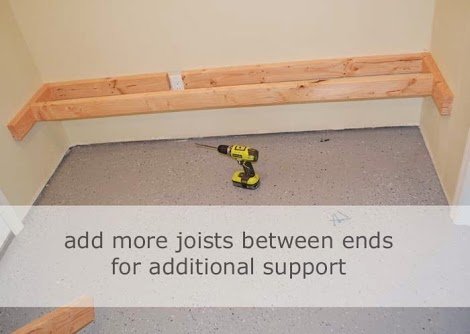
For seat depths greater than 16" I recommend measuring and cutting a center for extra support. Attach with pocket holes or use the 3" screws at an angle to secure to the end boards.
Step 5
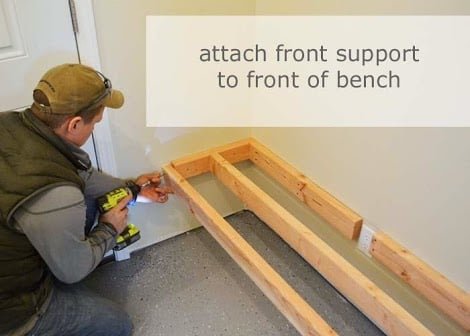
Measure and cut the front 2x3 or 2x4 to fit and attach to the front edges of the end 2x3s or 2x4s with two 3" screws.
Step 6
Test the bench in the center. If it needs additional strength, you can add a center "leg" to the middle 2x3 or 2x4, or on the front as part of the trim out.

Step 7
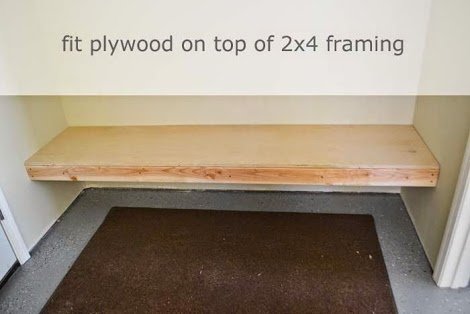
Cut to fit the 1x6 boards to fit on top - you can have the top overhang the front, if adding additional front trimming, consider before ripping the width of the last 1x6 board (see step 9) TIP: Attach the 1x6 boards together edge to edge before installing. You can use any 1x thick material here, 1x12s, 1x10s, 3/4" plywood etc.
Step 8
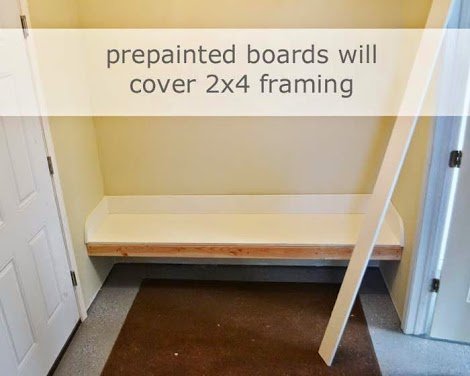
OPTIONAL: Trim out the back and side edges. This trim will help conceal gaps between the plywood and the wall and help protect your wall from scuffing, but is not essential. For a more modern "floating shelf" look, no trim is needed. Attach trim with 1-1/2" brad nails to studs in walls. I used 1x4 trim boards. TIP: If using the trim, prefinish it before attaching.
Step 9
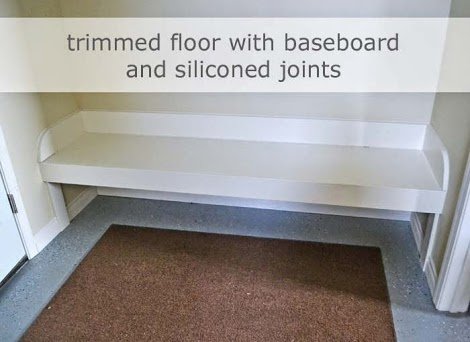
Trim front edge of the floating bench with a 1x4 board.
Step 10
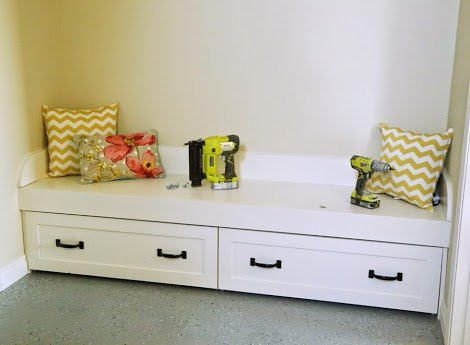
Optional trundle drawers (boxes on wheels) can be added underneath. We have a free tutorial here for the trundle drawers.
Finishing
Sand all surfaces, starting with a medium grit and finishing with fine. Wipe off the dust, fill any holes or gaps with wood filler, and sand smooth once dry. Apply primer if you're painting, then finish with your choice of paint or stain and seal with a durable clear topcoat. For outdoor projects, use exterior-rated primer, paint or stain, and sealer so the piece stands up to the weather.
Source (temporary): https://www.ana-white.com/woodworking-projects/floating-bench-nook-alclove-or-closet