Floating Boxes Nightstand by More Like Home
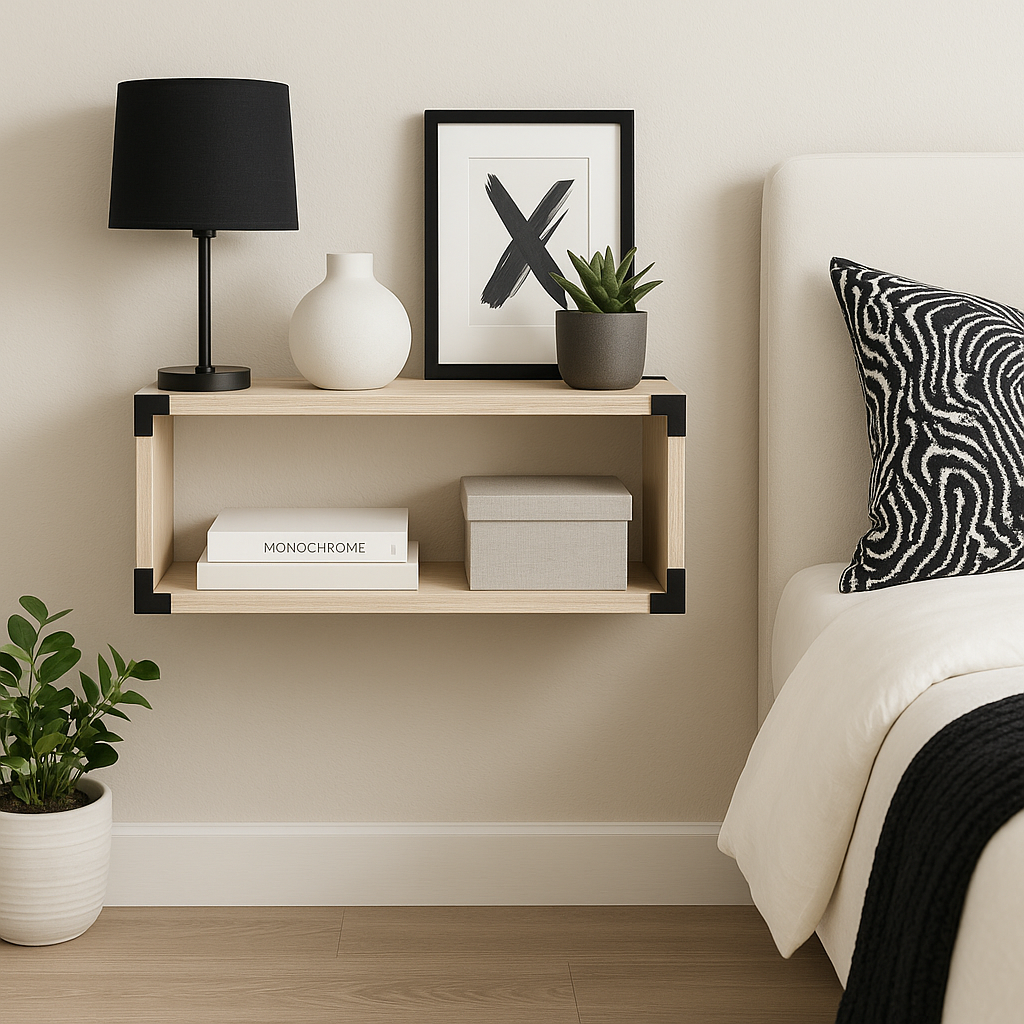
These floating boxes attach right to the wall. It's easy to adjust them to any size you need. You can tuck a basket underneath, or better yet leave it wide open for an uncluttered look. Get the full plans at More Like Home - And check out the rest of my DIY Nightstand series:
Specifications
| Project type | Nightstands |
|---|---|
| Room | Bedroom |
| Difficulty | Starter Projects |
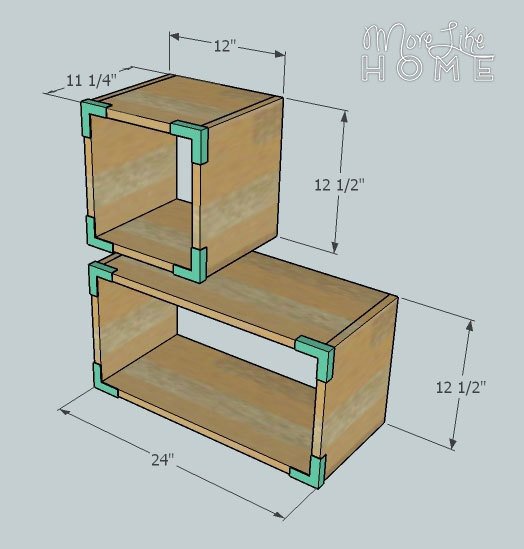
Dimensions
Use the size-specific shopping and cut lists below.
Shopping List
1 - 1x12 @ 10'
1 - 1x4 @ 4'
wood filler
wood glue
1 1/4" screws
2 1/2" screws
Kreg jig with 1 1/4" pocket screws (optional)
Cut List
(A) 4 - 1x12 @ 12 1/2" (sides)
(B) 2 - 1x12 @ 10 1/2" (small box top & bottom)
(C) 2 - 1x12 @ 22 1/2" (large box top & bottom)
(D) 1 - 1x4 @ 10 1/2" (small box support)
(E) 1 - 1x4 @ 22 1/2" (large box support)
Step-by-step Instructions
Step 1
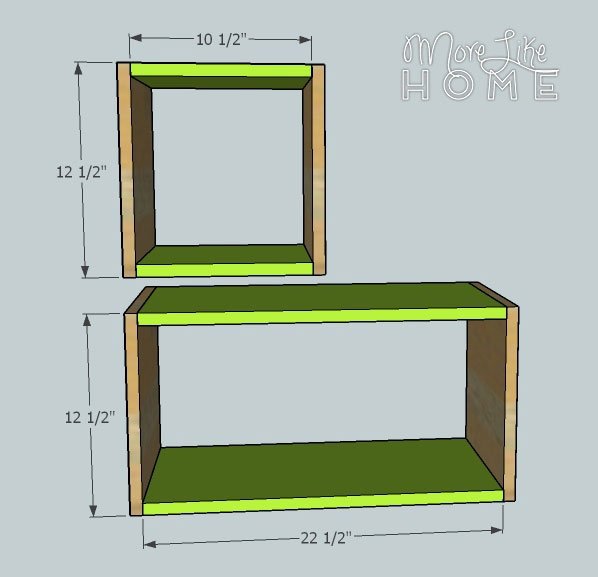
Start by using two sides (A) to connect the small top & bottom (B). Keep all the edges flush and use glue. You can use a Kreg Jig or drill through the sides into the top & bottom boards. Do the same to build the large box, connecting two sides with the large top & bottom (C). These are super easy to customize! You can make any number and size of boxes you want. Cut the boards longer or shorter to try different sizes of boxes.
Step 2
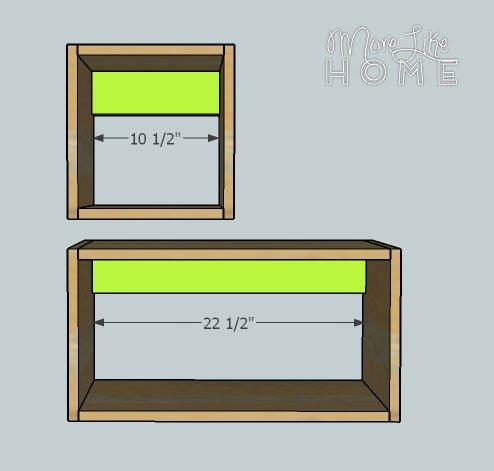
To mount the boxes to the wall (paint or stain before mounting) attach the support boards (D & E) to the boxes. The supports should sit under the top of the box and be flush with the back. Drill through the top & sides of the boxes to attach them to the supports (or use a Kreg Jig). Then attach the boxes to the wall by drilling through the support boards with 2 1/2" or longer screws (depending on your drywall thickness). Make sure they are level, and that you hit a stud! You're guaranteed at least one stud with the longer box, if the small box doesn't hit one you'll need to anchor it with proper hardware for your wall type and how much weight you expect it to hold. If you want your supports to be more "invisible" try painting them the same color as your walls so they blend in.
Finishing
Sand all surfaces, starting with a medium grit and finishing with fine. Wipe off the dust, fill any holes or gaps with wood filler, and sand smooth once dry. Apply primer if you're painting, then finish with your choice of paint or stain and seal with a durable clear topcoat. For outdoor projects, use exterior-rated primer, paint or stain, and sealer so the piece stands up to the weather.
Source (temporary): https://www.ana-white.com/woodworking-projects/floating-boxes-nightstand-more-home