Floating Shelves Pull Out Drying Racks and Hanging Rods
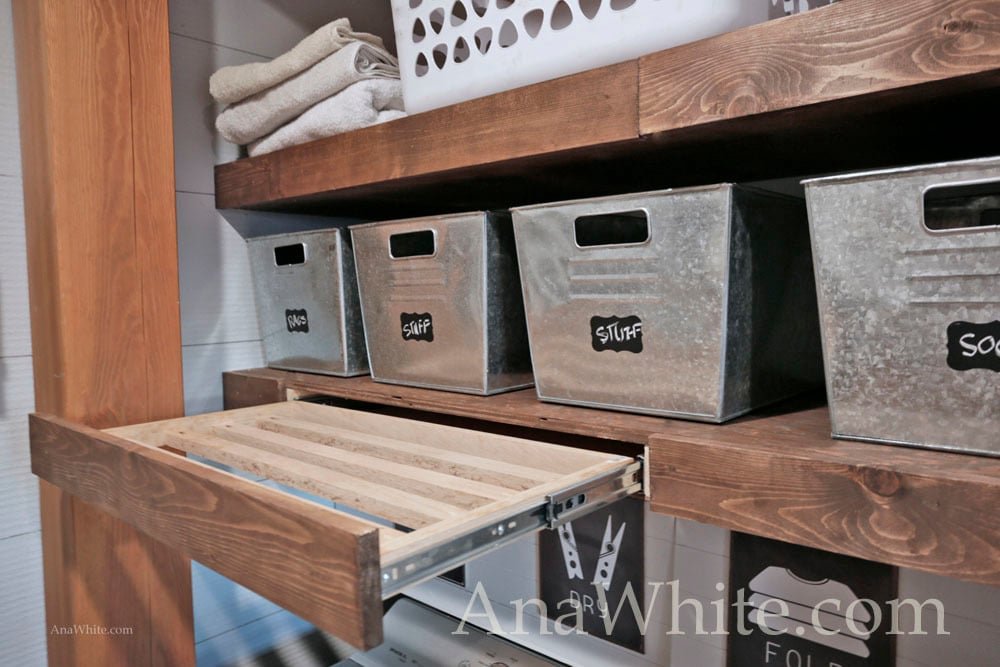
These floating shelves have a secret! They hide drying racks and closet hanging rods! Build your own with free tutorial by
Specifications
| Project type | shelves |
|---|---|
| Room | Storage Solutions |
| Style | Farmhouse Furniture |
| Difficulty | Intermediate |
Shopping List
Liberty 16" Full Extension Drawer Slides (one set per drawer)
2x3s for shelf framing
1x4s for shelf fronts
3/4" plywood for shelf top
1/4" plywood for shelf bottom
1x2s for pull out racks
2-1/2" Kreg Jig screws (we used the HDs)
1- 1/4" Kreg Jig screws for building the racks
3" screws for attaching to wall
1-1/4" and 3/4" brad nails for attaching plywood to framing
The stain I used is Varathane Dark Walnut
Tools
- measuring tape
- square
- pencil
- safety glasses
- hearing protection
- kreg-jig
- drill
- circular saw
- compound miter saw
- nailer
- sander
- level
- countersink drill bit
Step-by-step Instructions
Step 1
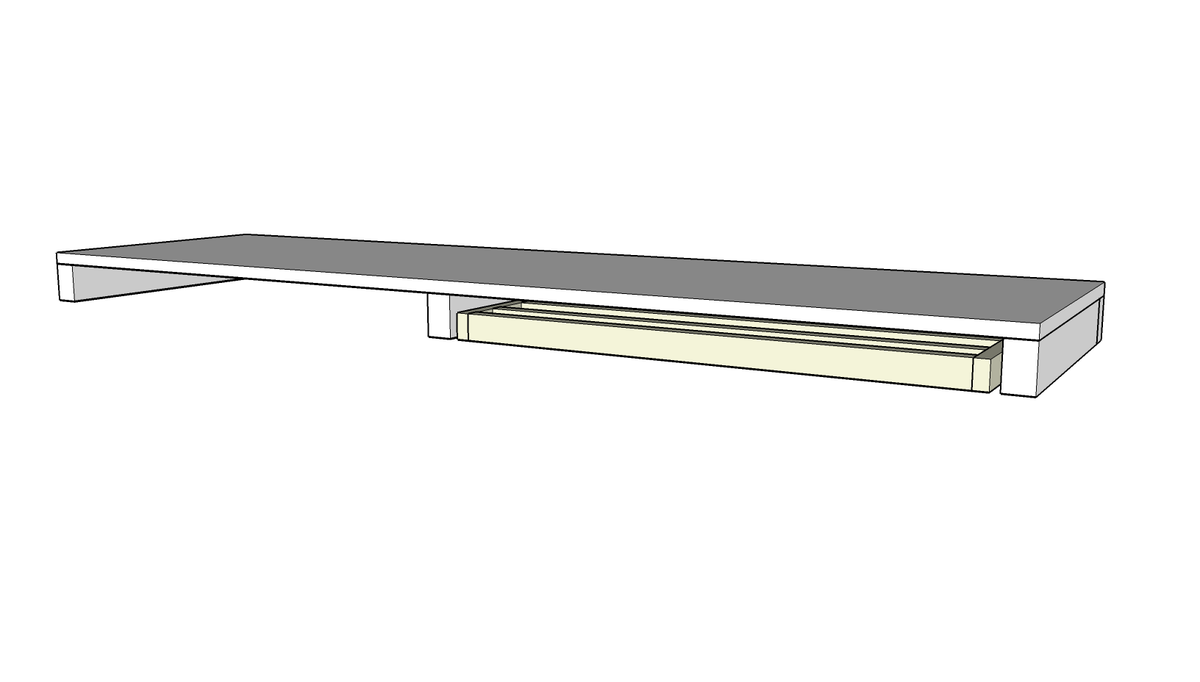
NOTE: If you can do steps 1-5 first on a workbench, and then install the completed shelf, and add the bottom in place, it will be much easier. Due to our alclove installation, we had to build in place which was much more difficult. If building in alclove, attach back 2x3 to wall with screws suitable for your wall type. For a standard framed wall, 3" self tapping wood screws should suffice. Mark studs and attach securely to studs, two screws per stud. You want to place your screws toward the top and bottom edges of the 2x3s to maximize shelf strength.
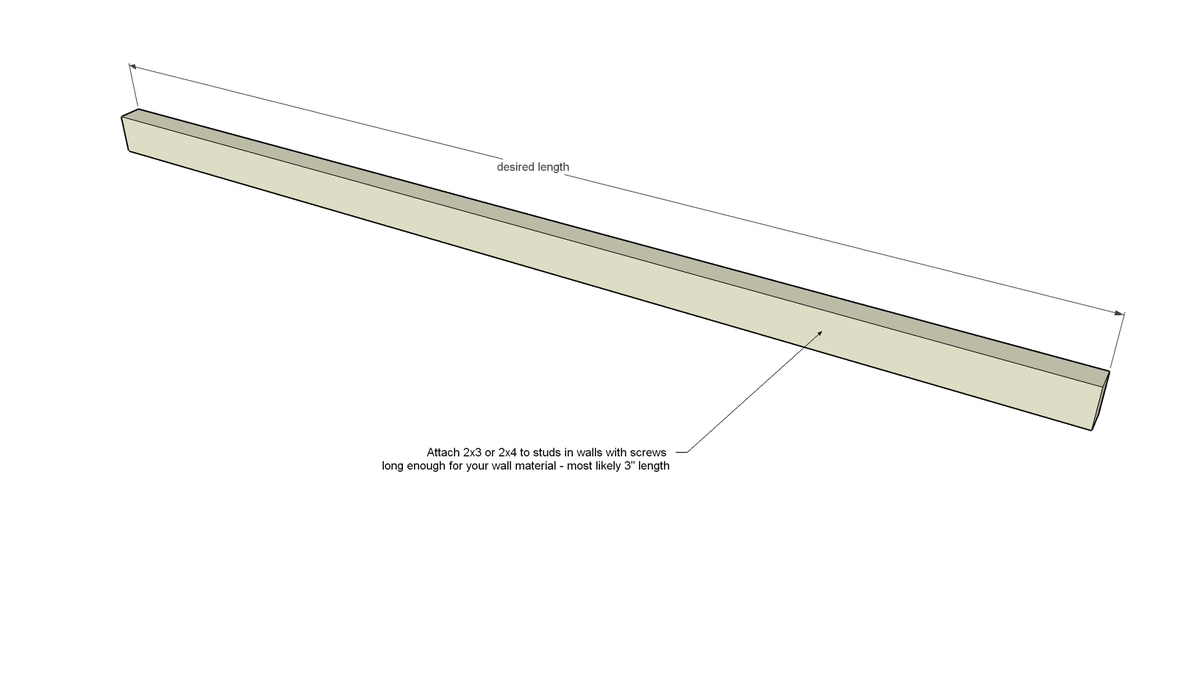
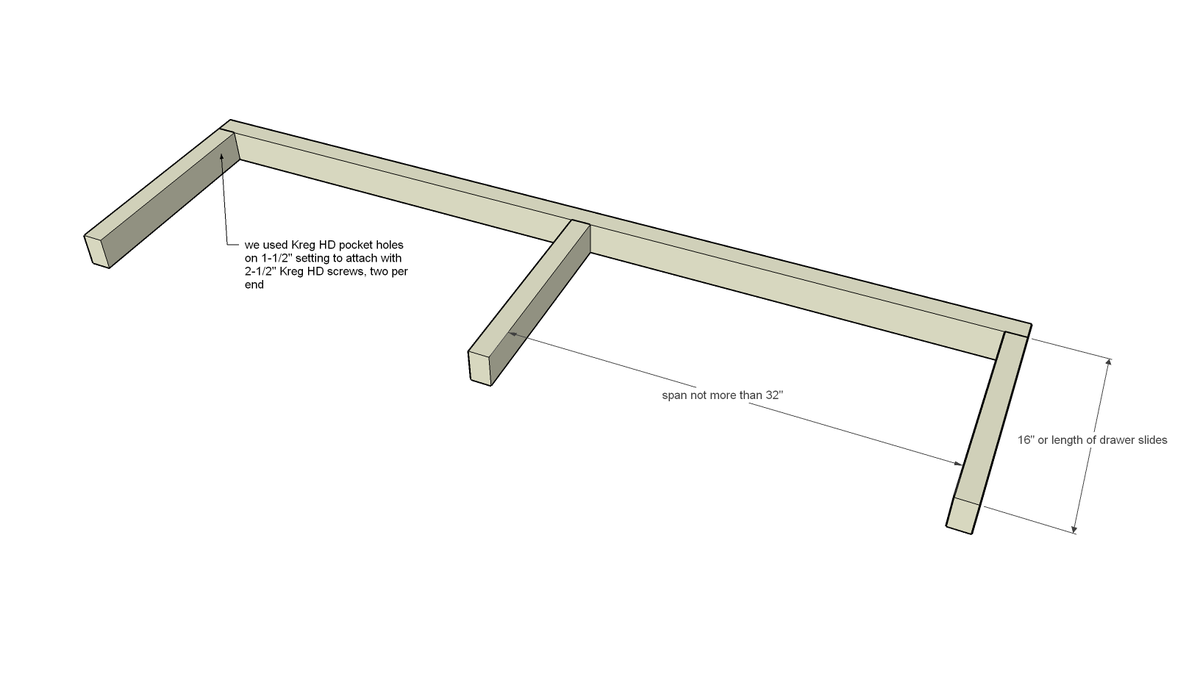
The top plywood should not span more than about 32" - so you'll need dividers about every 32".
If you can attach the supports from the back with 3" self tapping screws, that works. We had to build in place so used the Kreg HD screws to attach supports to the back. Do not attach to any side walls until after step 3.
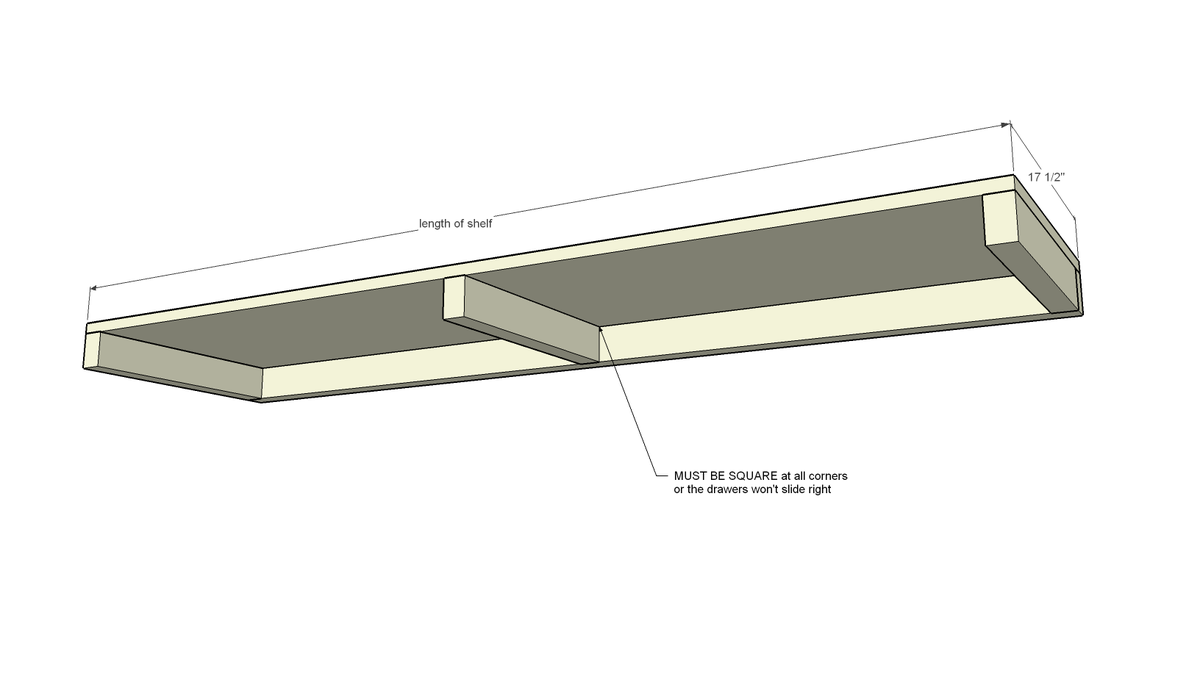
Place 3/4" plywood on top of 2x3 framing and attach with 1-1/4" brad nails and wood glue.
Make sure everything is square - if not, the drawers will not slide right. After the plywood is attached to top and glue dried, you can attach 2x3s to side walls, just shim if needed to make sure you keep the 2x3 framing square. NOTE: we prestained the 3/4" plywood before installing.
Step 4
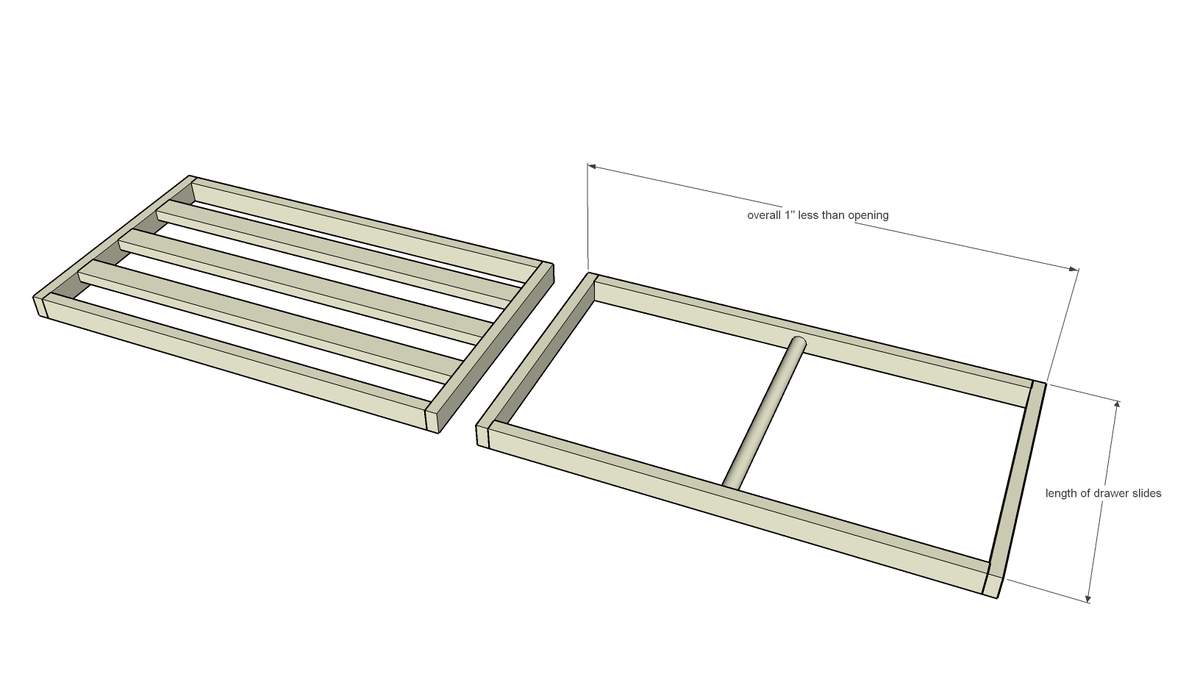
Measure the insides of the 2x3 framing. Build racks 1" less overall in width for Liberty drawer slides linked in shopping list or to suit your drawer slides. Rack depth should match your drawer slide length. I used hardwood 1x2s and closet rod dowels to build, using Kreg Jig on 3/4" setting with 1-1/4" pocket hole screws.
Step 5
Step 6
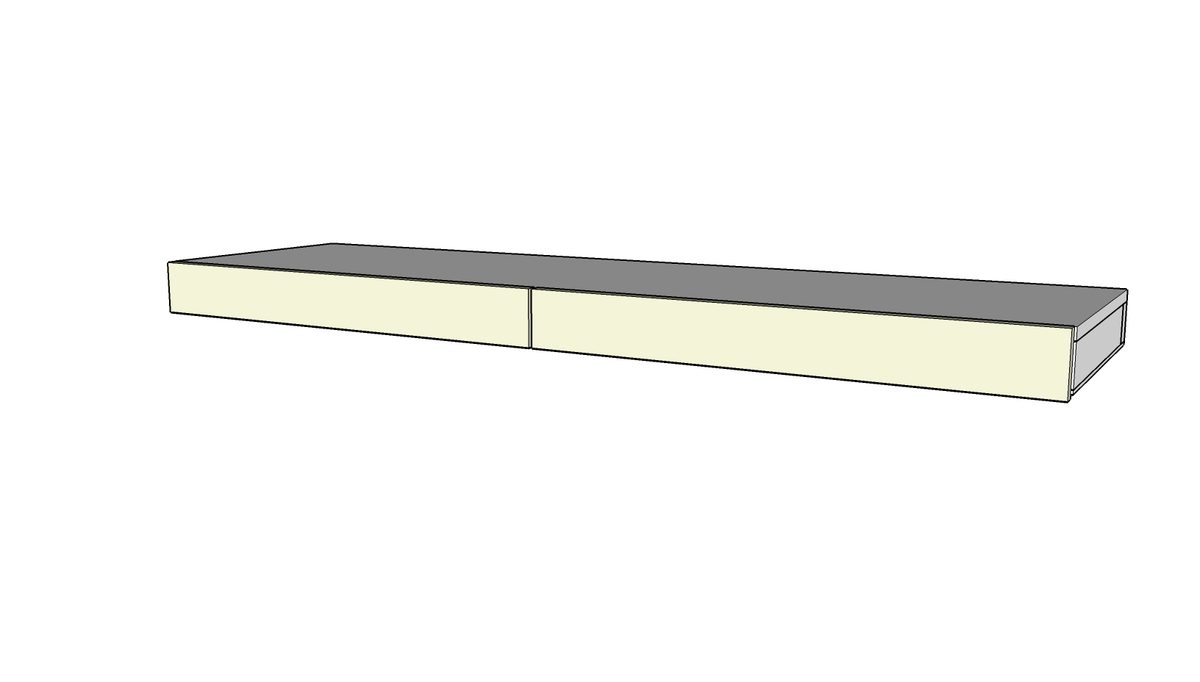
Nail 1/4" plywood to bottom of 2x3s using 3/4' brad nails. Nail 1x4s to front of slide out trays with 1-1/4" brad nails and wood glue. NOTE: We prestained the 1/4" plywood and 1x4s before installing.
Finishing
Sand all surfaces, starting with a medium grit and finishing with fine. Wipe off the dust, fill any holes or gaps with wood filler, and sand smooth once dry. Apply primer if you're painting, then finish with your choice of paint or stain and seal with a durable clear topcoat. For outdoor projects, use exterior-rated primer, paint or stain, and sealer so the piece stands up to the weather.
Source (temporary): https://www.ana-white.com/woodworking-projects/floating-shelves-pull-out-drying-racks-and-hanging-rods