Floating Shoe Display Rack
Easy to build floating shoe rack with angled shelves for more compact shoe placement. Easy to build!
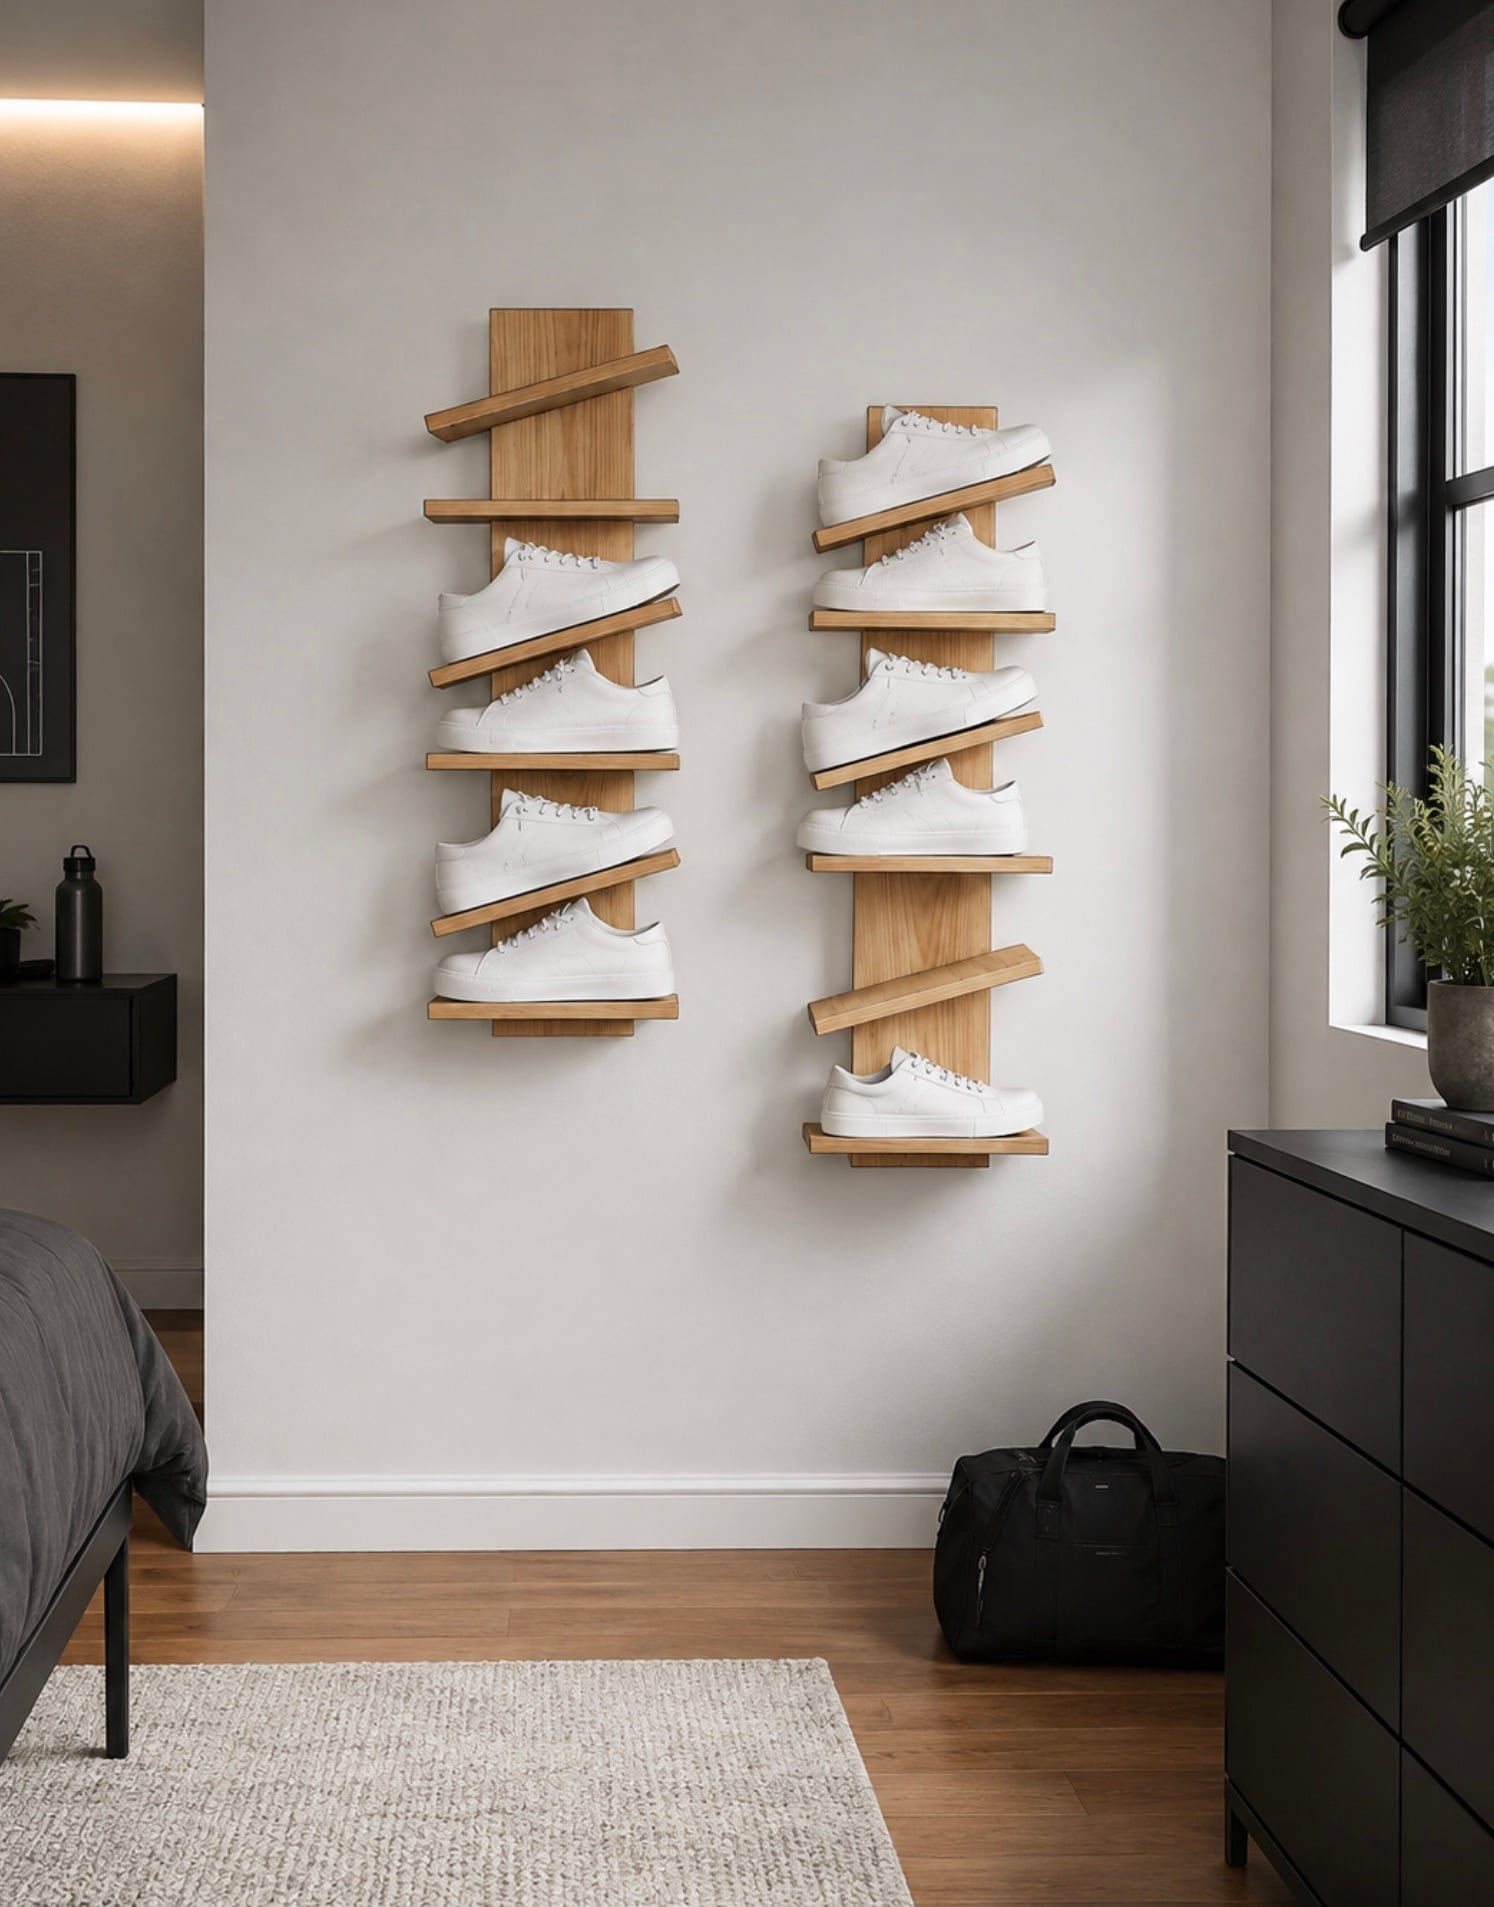
Specifications
| Project type | shelves |
|---|---|
| Room | Bedroom |
| Difficulty | Beginner Projects |
Dimensions
Use the size-specific shopping and cut lists below.
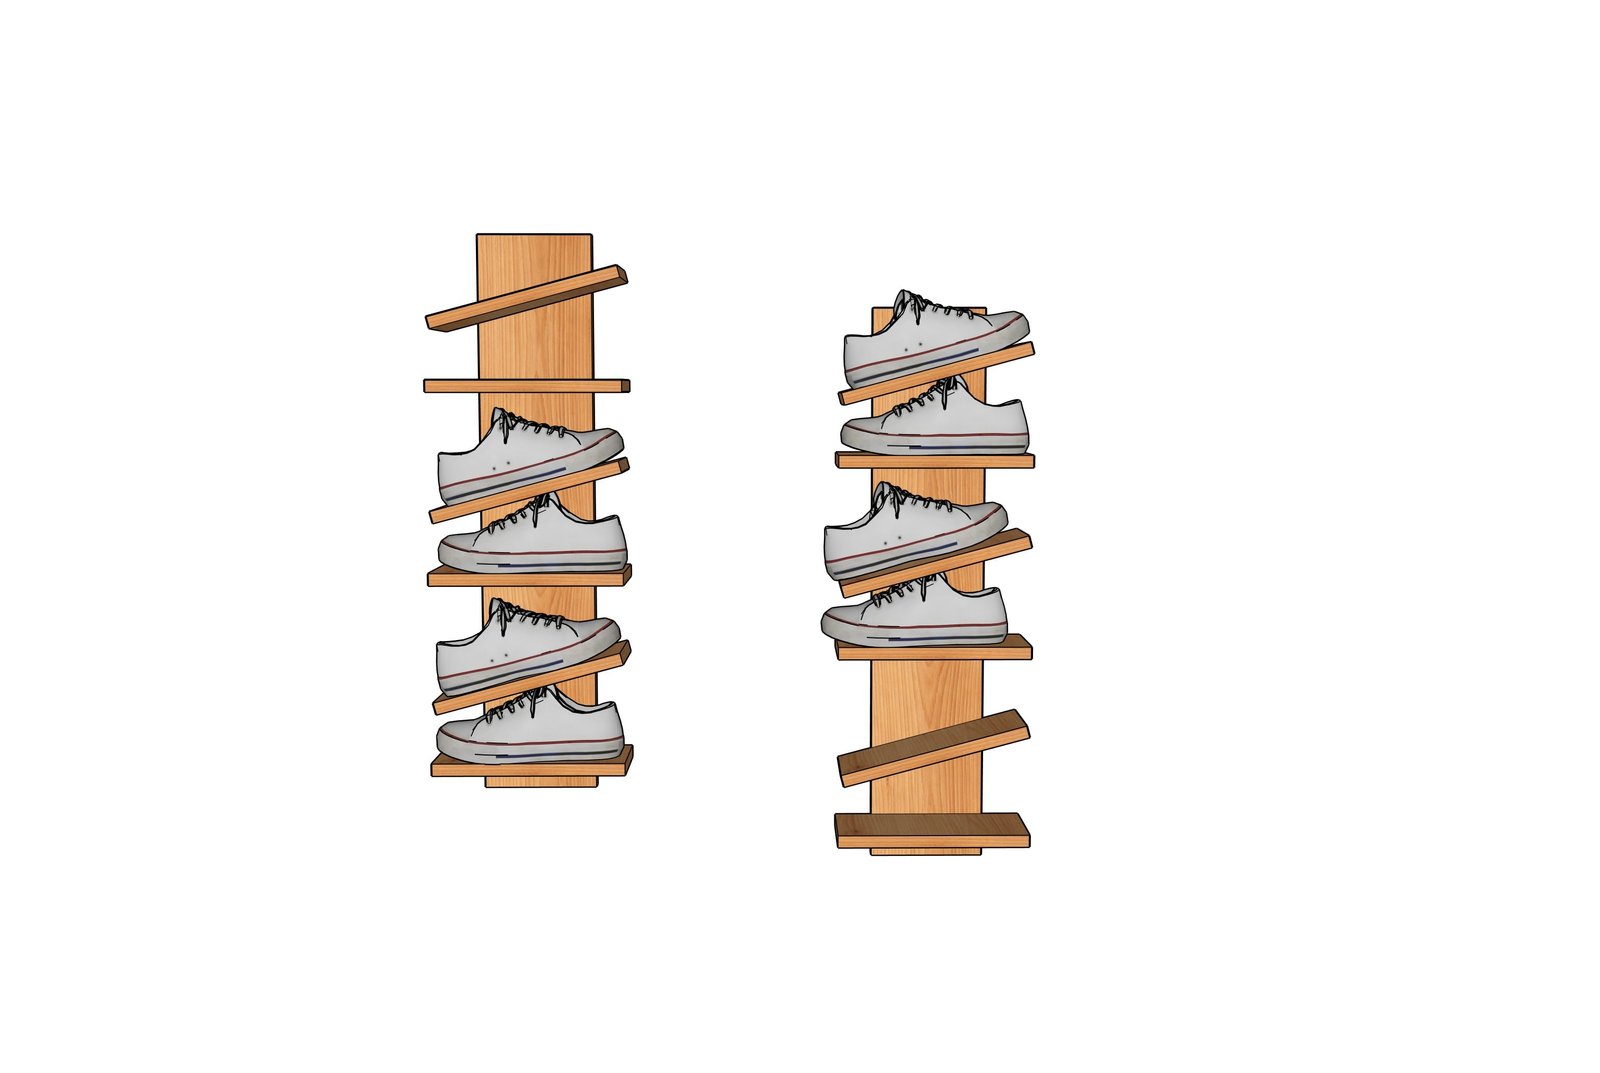
Shopping List
Per Shoe Rack:
- 1 - 1x8 @ 3 feet long
- 1 - 1x6 @ 6 feet long
- 12 - 1-1/4" pocket hole screws
- pocket hole screw plugs
- sandpaper
- wood finishing supplies
- 2-3/4" self tapping screws for hanging or heavy duty hanging hardware
For Two Shoe Racks
- 1 - 1x8 @ 6 feet long
- 2 - 1x6 @ 6 feet long
- 12 - 1-1/4" pocket hole screws
- pocket hole screw plugs
- sandpaper
- wood finishing supplies
- 2-3/4" self tapping screws for hanging or heavy duty hanging hardware
Cut List
For One Shoe Rack:
- 1 - 1x8 @ 35-3/4" - back
- 6 - 1x6 @ 11-3/4" - shelves
For Two Shoe Racks:
- 1 - 1x8 @ 35-3/4" - back
- 12 - 1x6 @ 11-3/4" - shelves
Tools
- measuring tape
- square
- pencil
- safety glasses
- kreg-jig
- drill
- circular saw
- sander
Step-by-step Instructions
Step 1
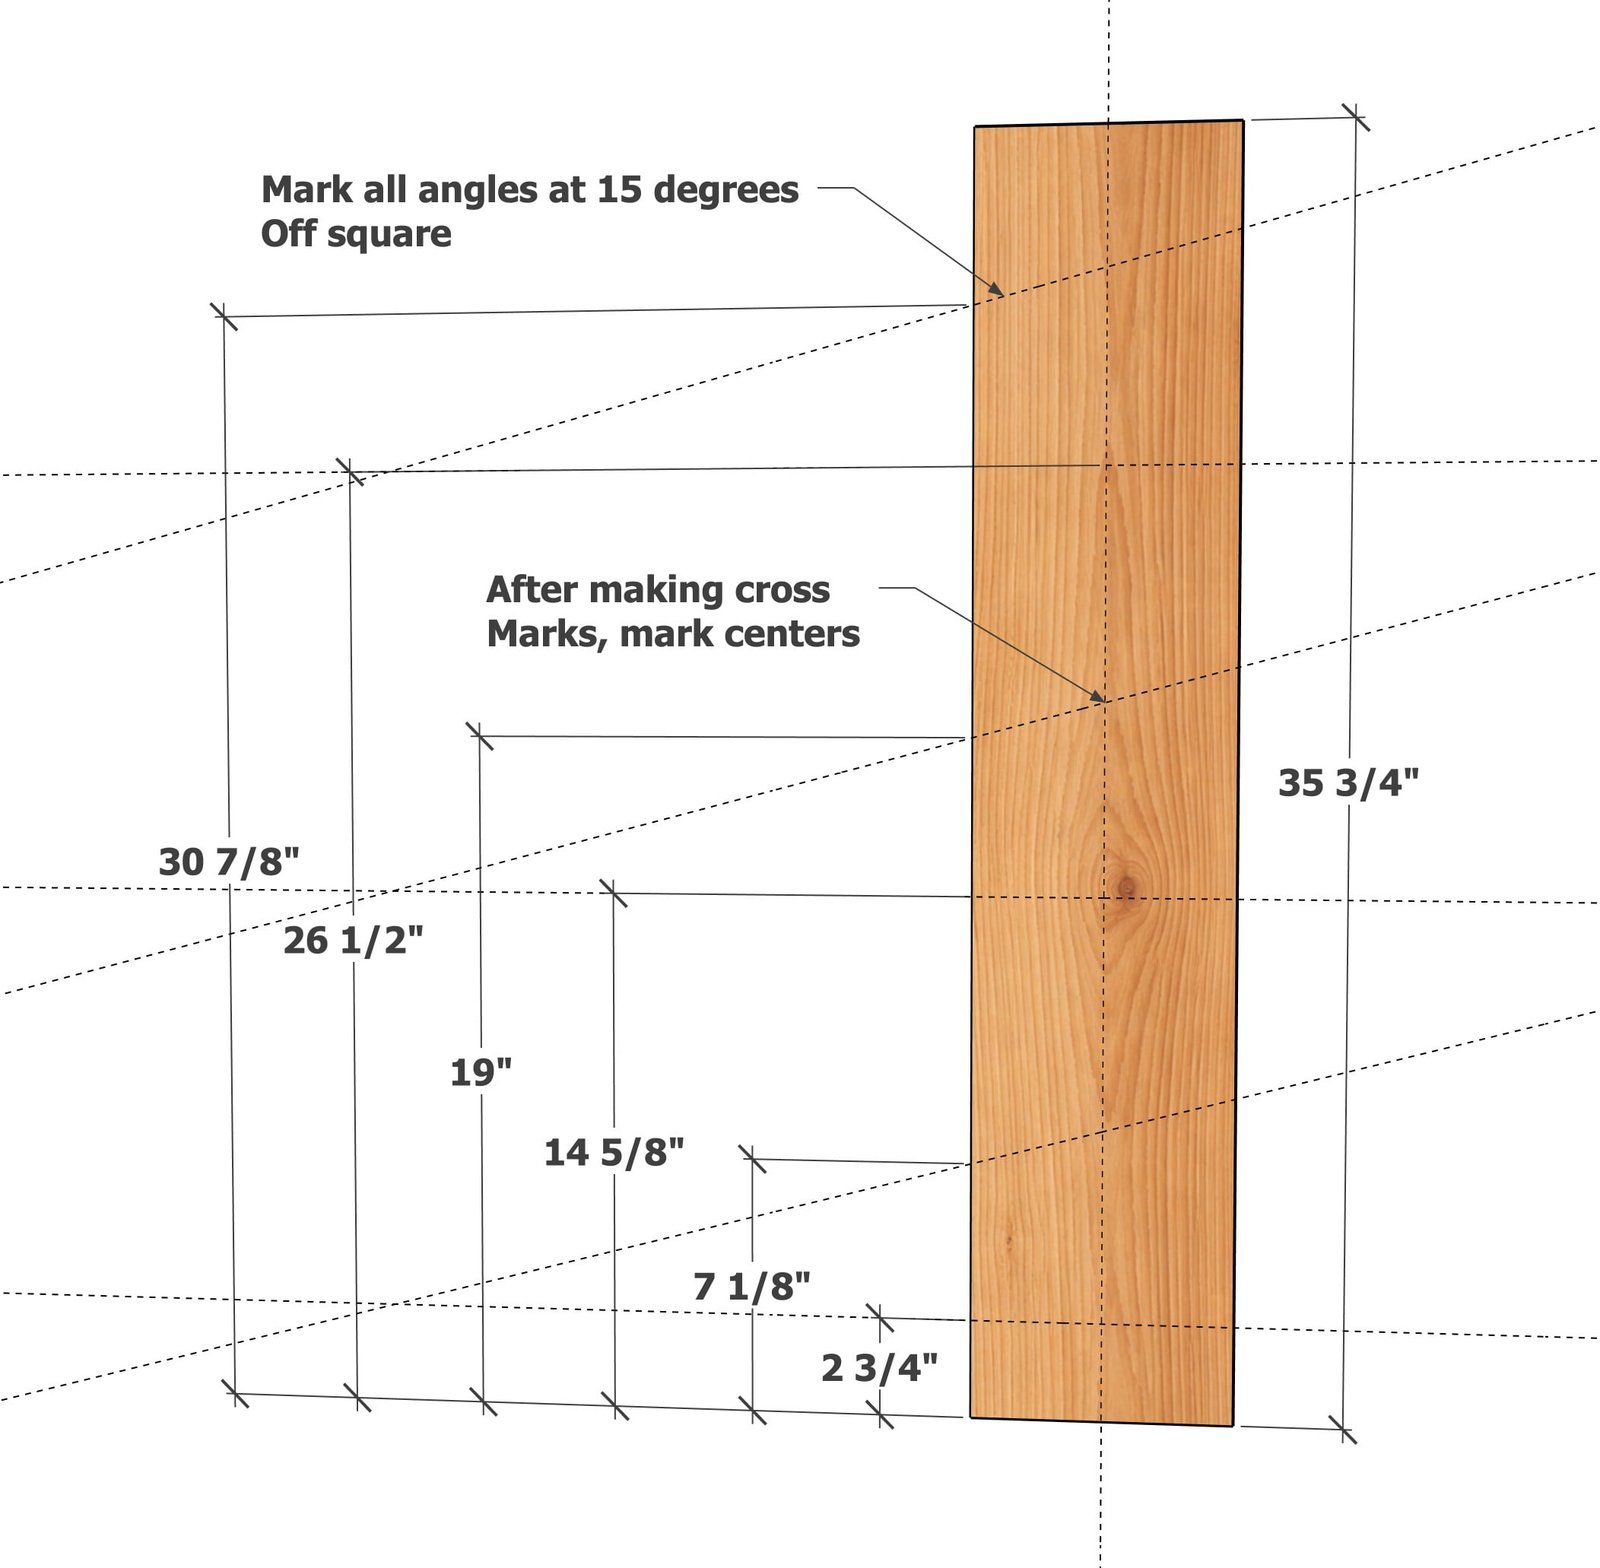
Step 2
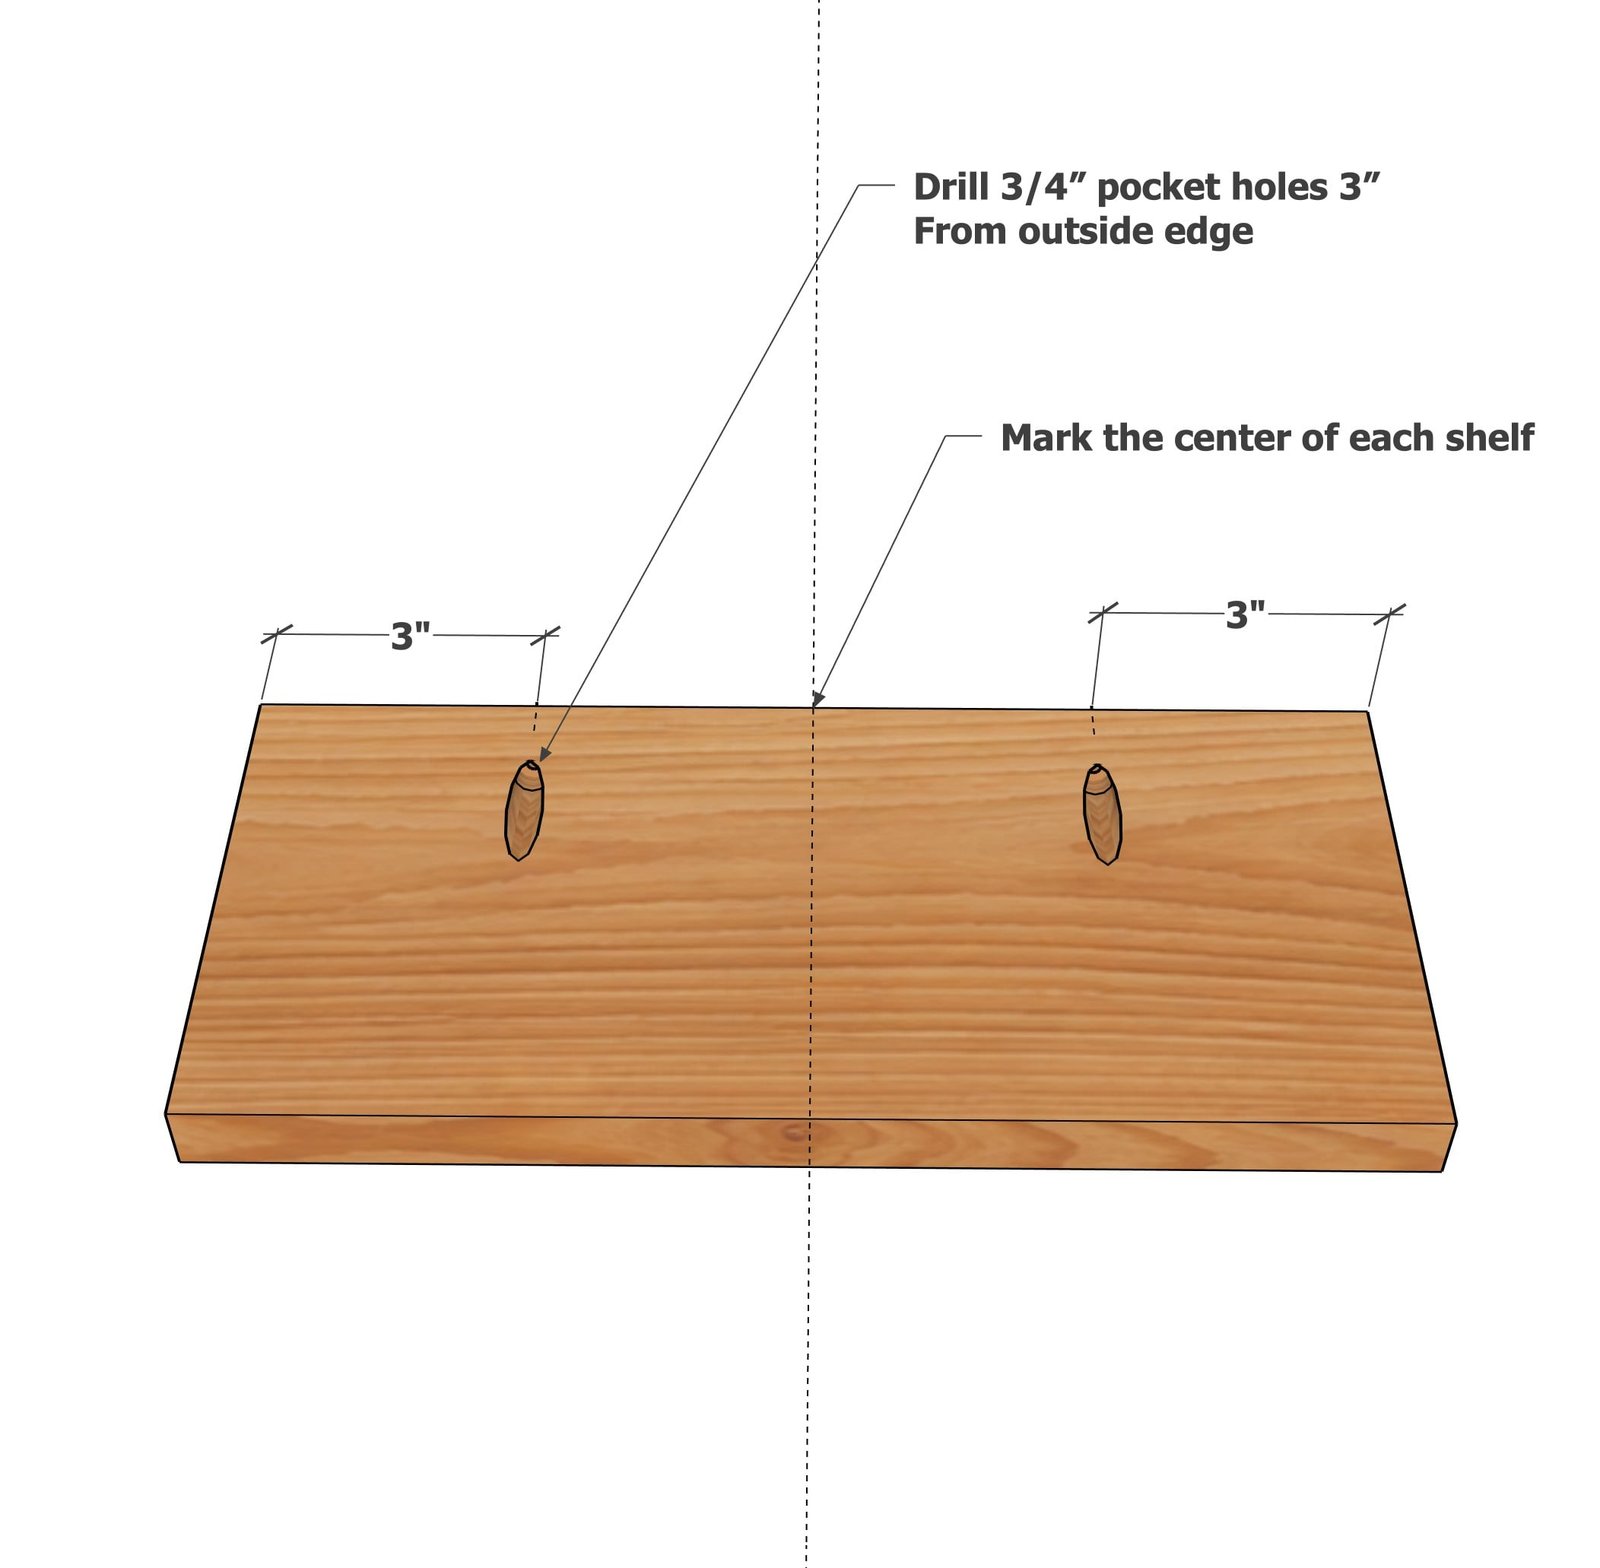
Step 3
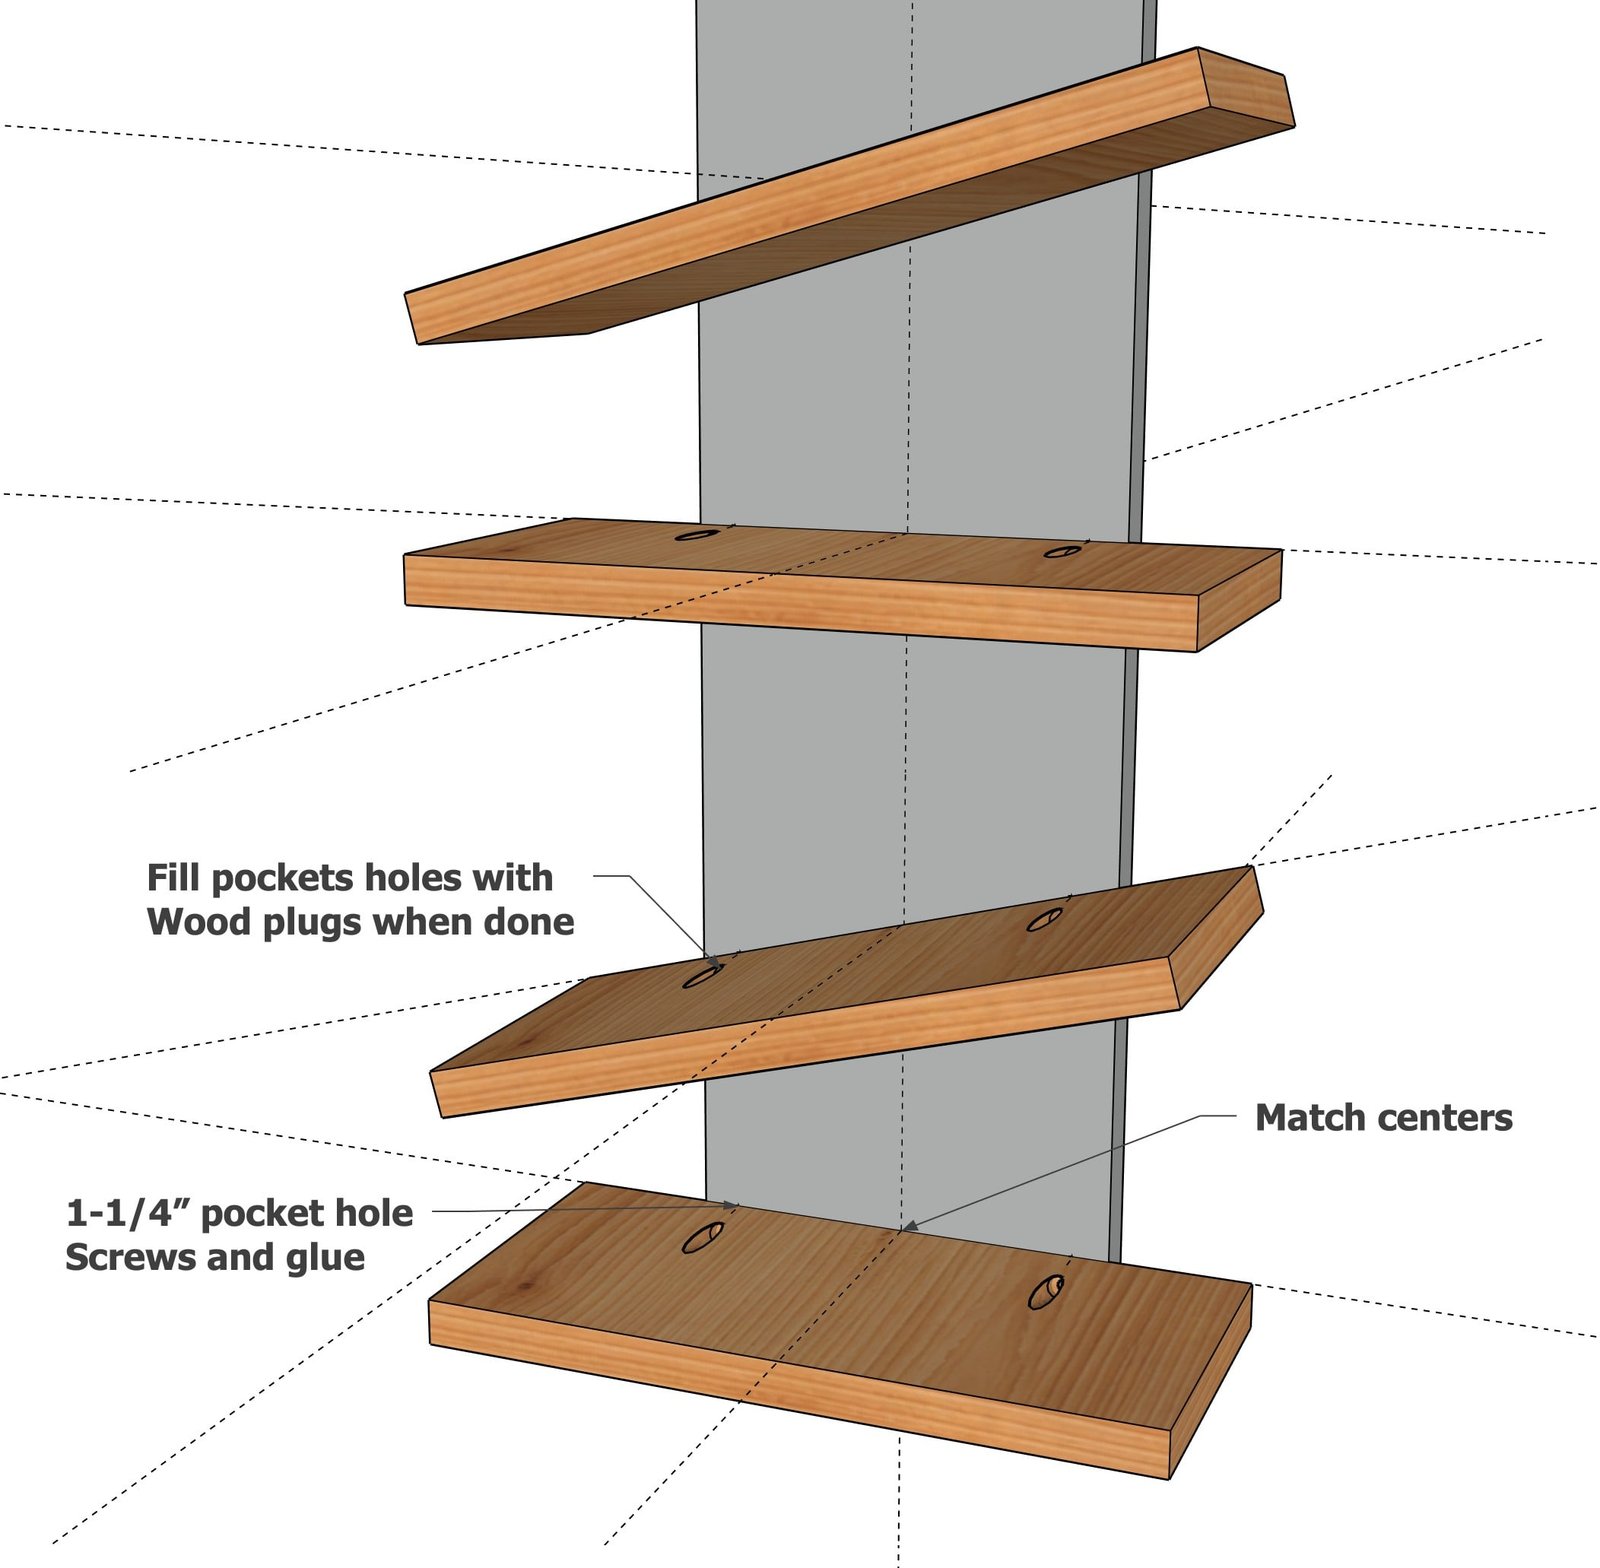
Step 4
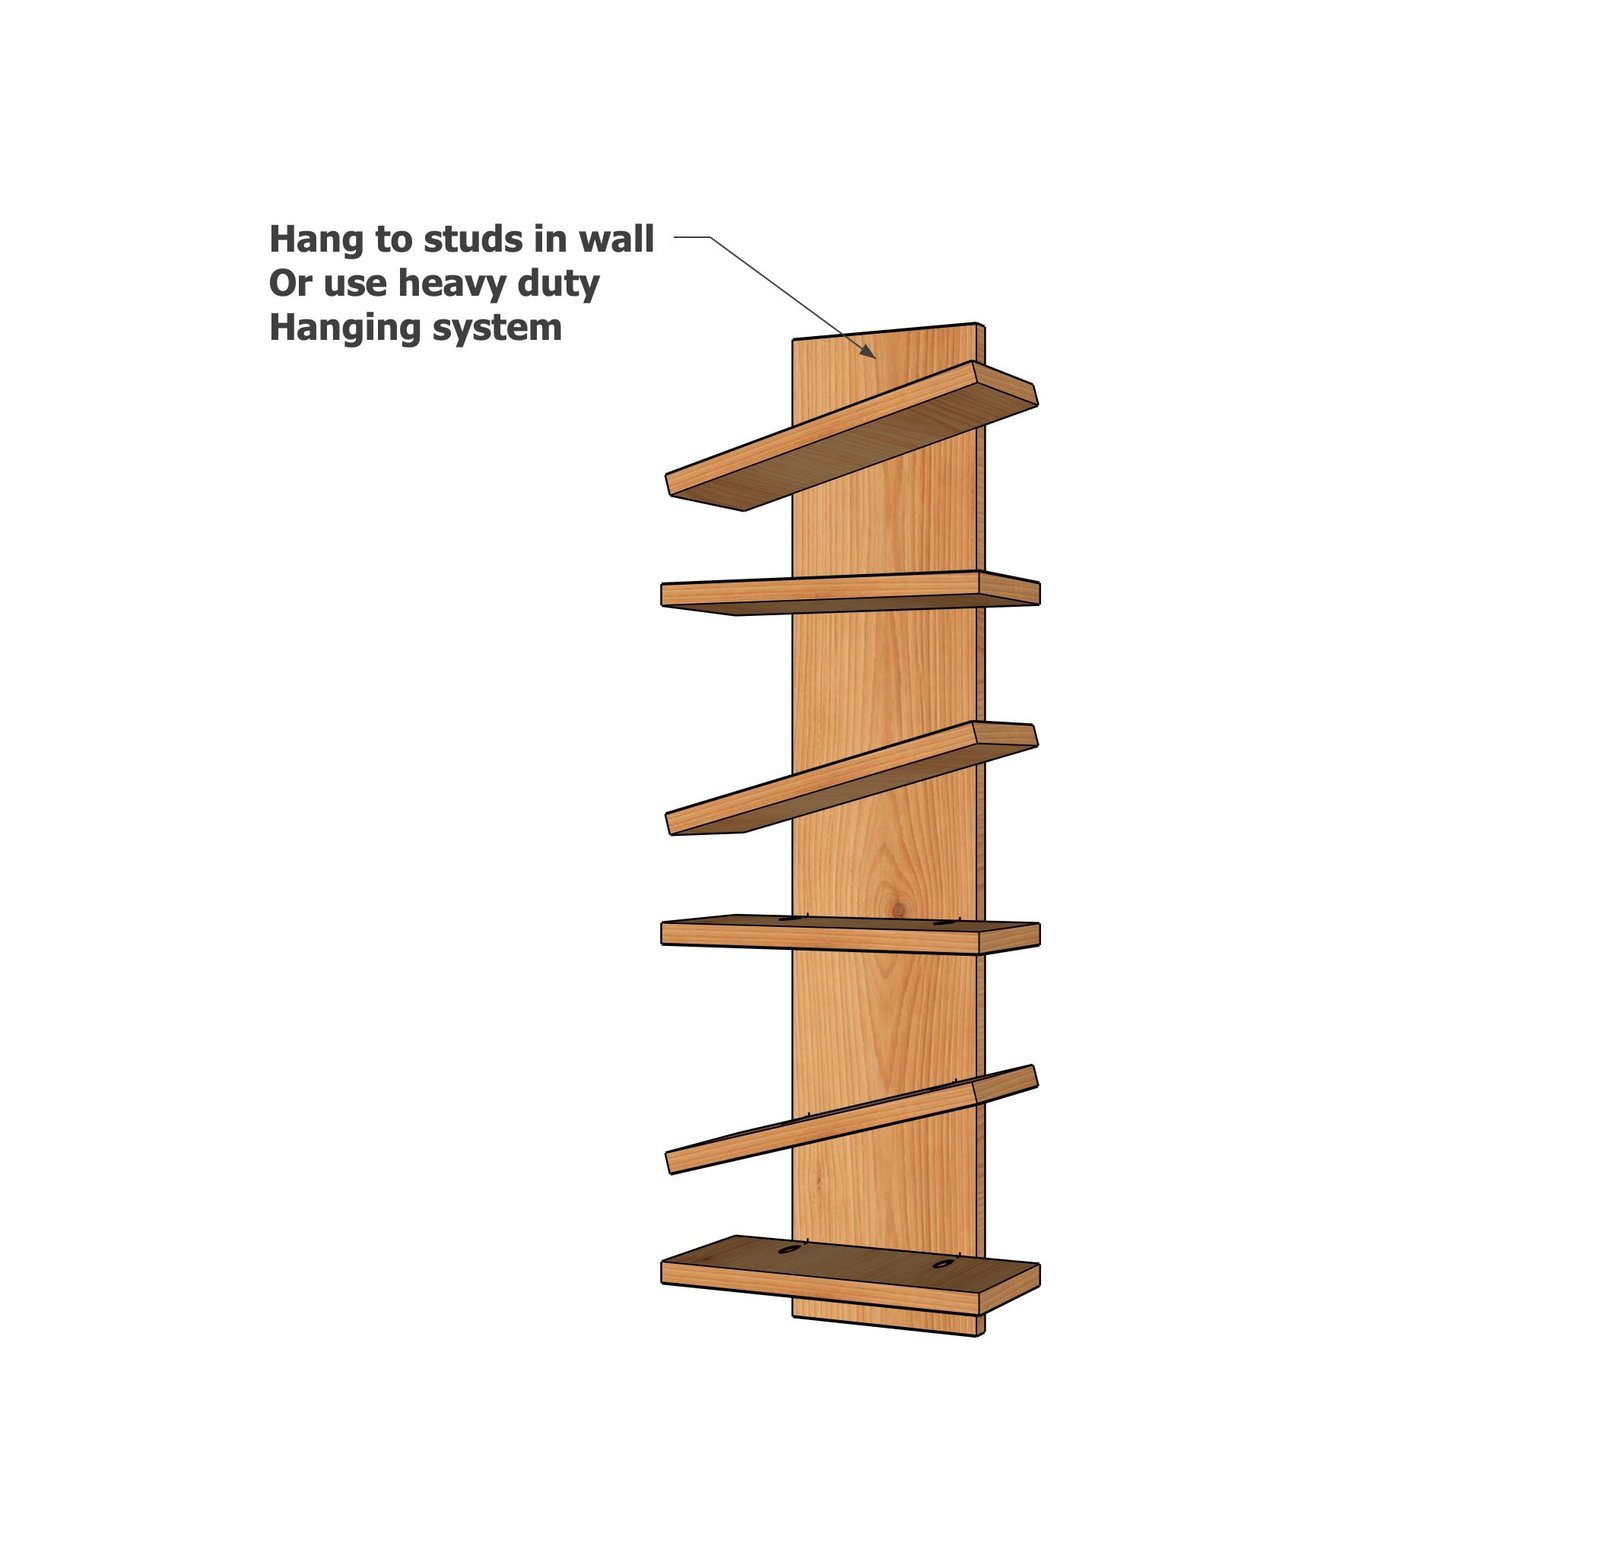
Finishing
Sand all surfaces, starting with a medium grit and finishing with fine. Wipe off the dust, fill any holes or gaps with wood filler, and sand smooth once dry. Apply primer if you're painting, then finish with your choice of paint or stain and seal with a durable clear topcoat. For outdoor projects, use exterior-rated primer, paint or stain, and sealer so the piece stands up to the weather.
Source (temporary): https://www.ana-white.com/woodworking-projects/floating-shoe-display-rack-free-plans