Flower Shaped Storage Play Table
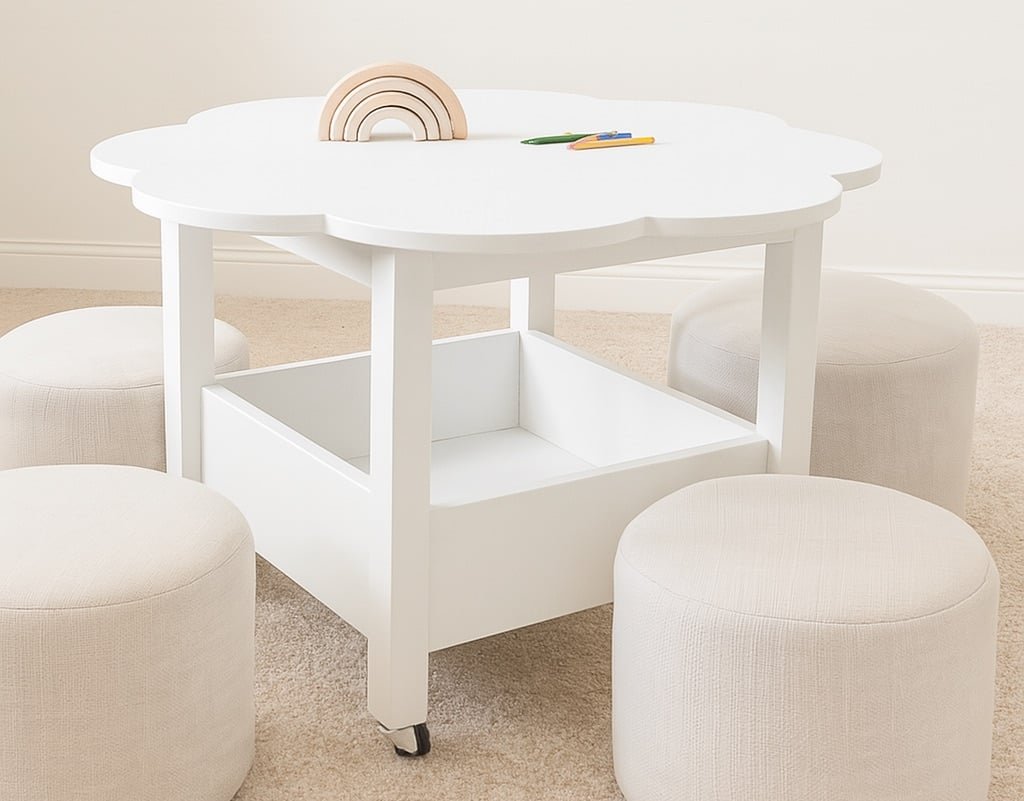
This adorable flower-shaped play table is as functional as it is fun! Built from just half a sheet of plywood, this DIY project includes built-in storage underneath—perfect for keeping toys, books, or art supplies tidy and close at hand. Add optional caster wheels to make the table easy to move around the room., step-by-step instructions, and a cheerful design, this table is the perfect weekend build for a child’s playroom or creative space.
Specifications
| Project type | Kids Tables and Chairs |
|---|---|
| Room | Kids and Toys |
| Style | Cottage Style Furniture Plans |
| Difficulty | Intermediate |
| Estimated cost | $20 - $50 |
Dimensions
Use the size-specific shopping and cut lists below.
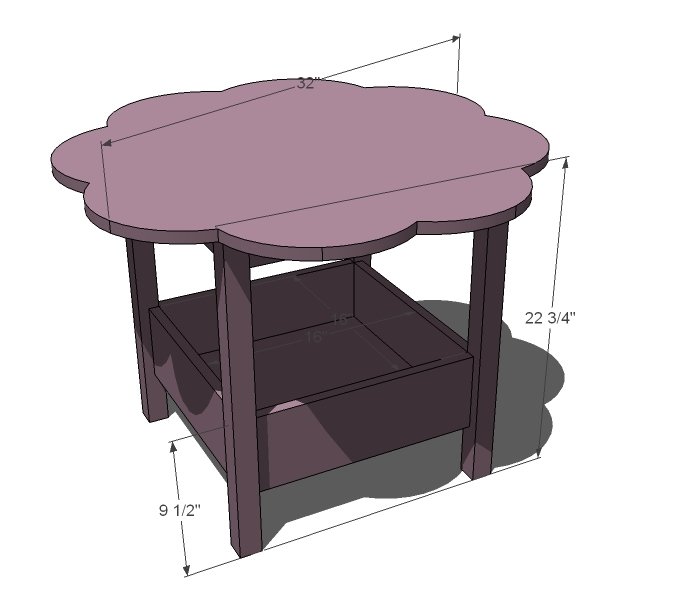
Shopping List
- 1 - 2x2 @ 8 feet long
- 1/2 sheet of 3/4" thick Interior Plywood
- 1-1/4" pocket hole screws (about 50)
- 1x3 and 1x6 if not using plywood scraps for the aprons and storage box sides, 6 feet of each
- Finishing supplies
Cut List
- 1 - 3/4" plywood 31 1/2" x 31 1/2" (Used for tabletop)
- 4 - 1x3 @ 15 3/4" (Aprons)
- 4 - 1x6 @ 15 3/4" (Storage Sides)
- 1 - 3/4" plywood @ 15 3/4" x 15 3/4" (Bottom of storage compartment)
- 4 - 2x2 @ 20" (Legs)
Tools
- measuring tape
- square
- pencil
- safety glasses
- hearing protection
- kreg-jig
- drill
- circular saw
- jigsaw
- sander
Step-by-step Instructions
Step 1
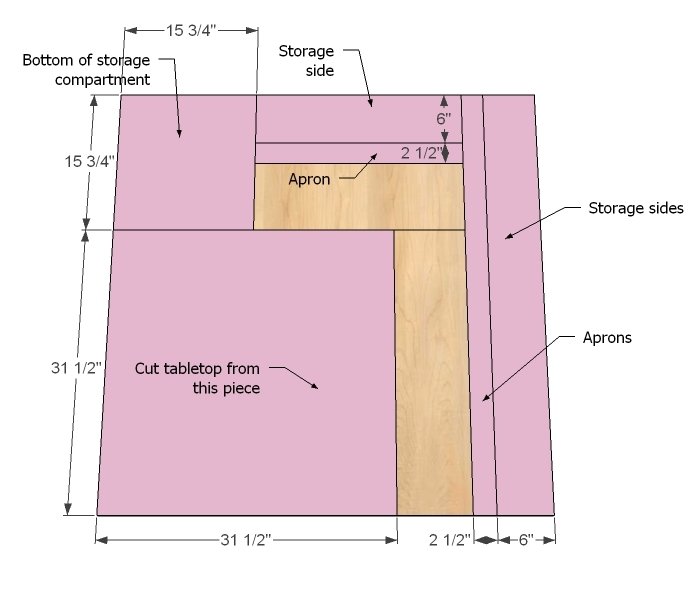
This plan can be made using plywood pieces for the storage box (instead of 1x3 and 1x6. The diagram below shows how to do this. When cutting plywood, it's best to make long, straight full cuts to conserve plywood and get your straightest cuts. First things first - cut with the grain of the plywood a strip 6" wide and 48" long. Then cut another strip with the grain of the plywood 2 1/2 wide by 48" long. Now from the remainder, cut crosswise for the tabletop, 31 1/2" long by approximately 40" wide. Cut your tabletop from this piece. Then from the remaining pieces, cut your storage bottom and the remaining pieces for the side and apron. Use the cut list for exact dimensions. The above diagram does not take into account saw blade widths - so measure, cut, measure, cut and so on.
Step 2
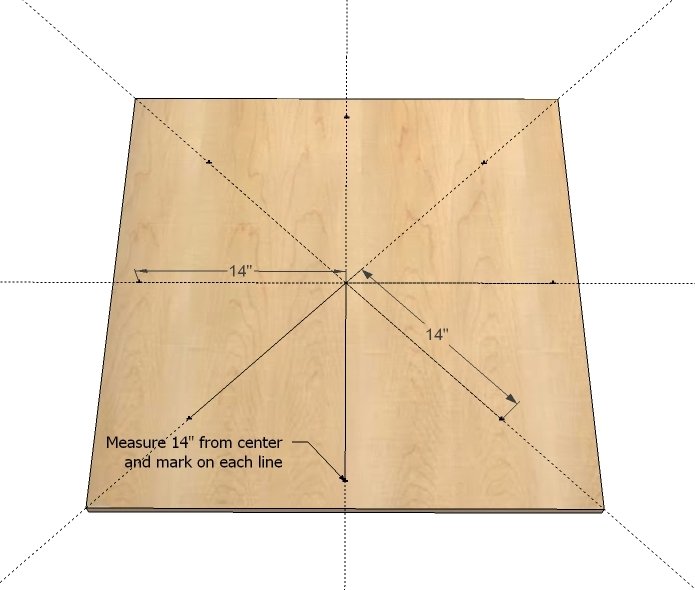
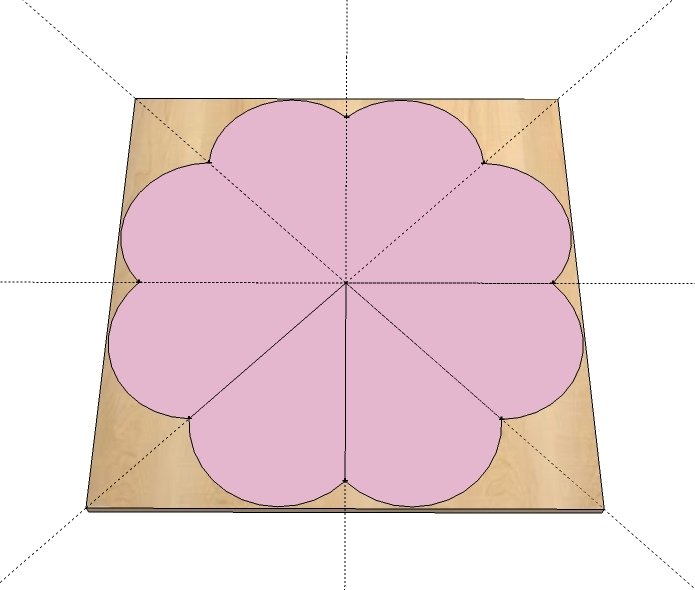
From the tabletop board, mark as shown above. I used a string line, but any long straight edge would work. Find the center and measure out 14" along each line and mark as shown in diagram above.
Step 3
Now simply draw arch shapes between each point, replicating the arch shape. I actually created pattern and used it to draw all of my petals. Once completed, carefully cut out with a jigsaw. Set aside.
Step 4
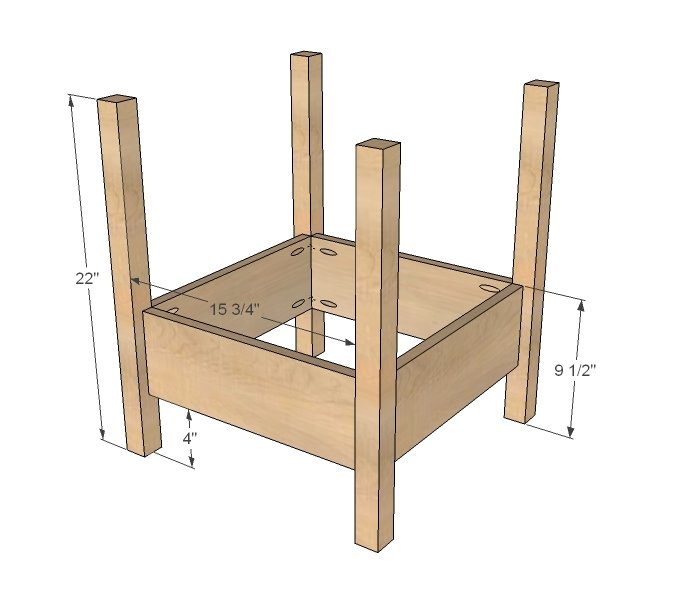
Now let's build the table base. Drill two 3/4" pocket holes on each end of each storage side, and attach to legs, flush to insides, with 1 1/4" pocket hole screws. What I like to do is build two leg sets made up of one side and two legs. Then it's a cinch adding the two final sides to create the base. NOTE - 2" gap underneath, not 4"
Step 5
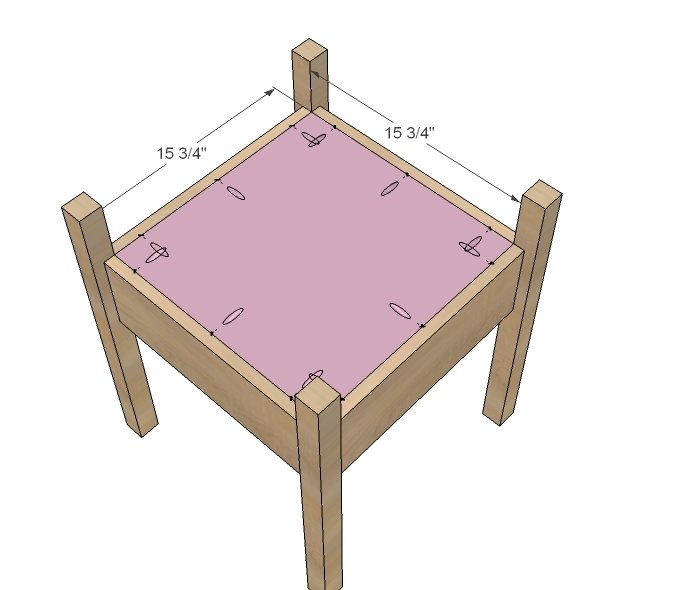
Attach at the plywood base inside the box as shown.
Step 6
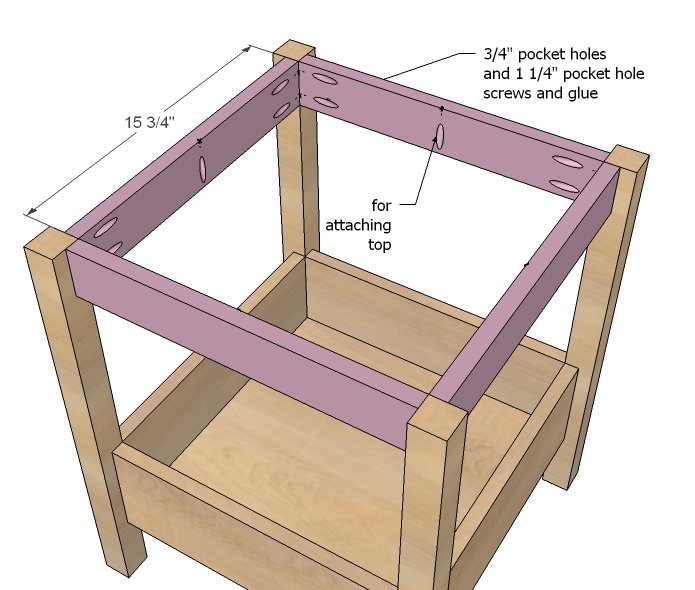
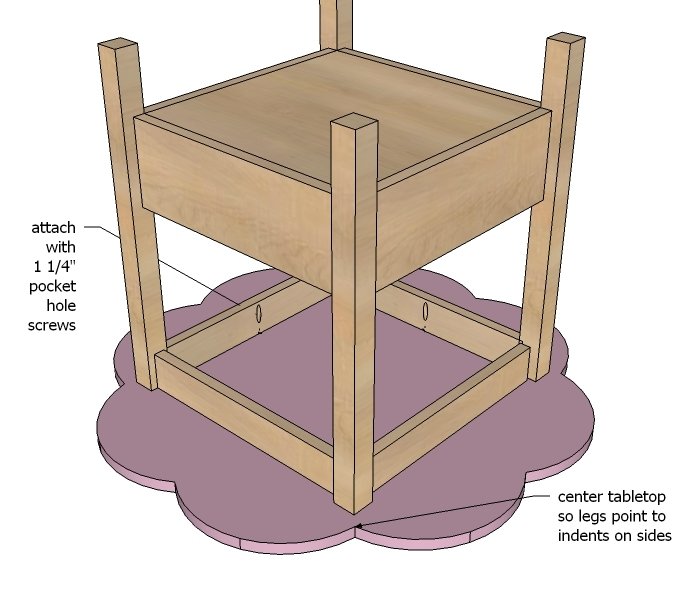
The aprons are a piece of cake! Just remember to drill a pocket hole facing upward in centers for attaching top in next step.
Step 7
The top will attach perfectly to the base. Line leg outside corners up with a inside point on flower top, center so all points are equal distance from leg corners, and screw base to tabletop.
Finishing
Sand all surfaces, starting with a medium grit and finishing with fine. Wipe off the dust, fill any holes or gaps with wood filler, and sand smooth once dry. Apply primer if you're painting, then finish with your choice of paint or stain and seal with a durable clear topcoat. For outdoor projects, use exterior-rated primer, paint or stain, and sealer so the piece stands up to the weather.
Source (temporary): https://www.ana-white.com/woodworking-projects/flower-shaped-storage-play-table