Folding Plant Stand
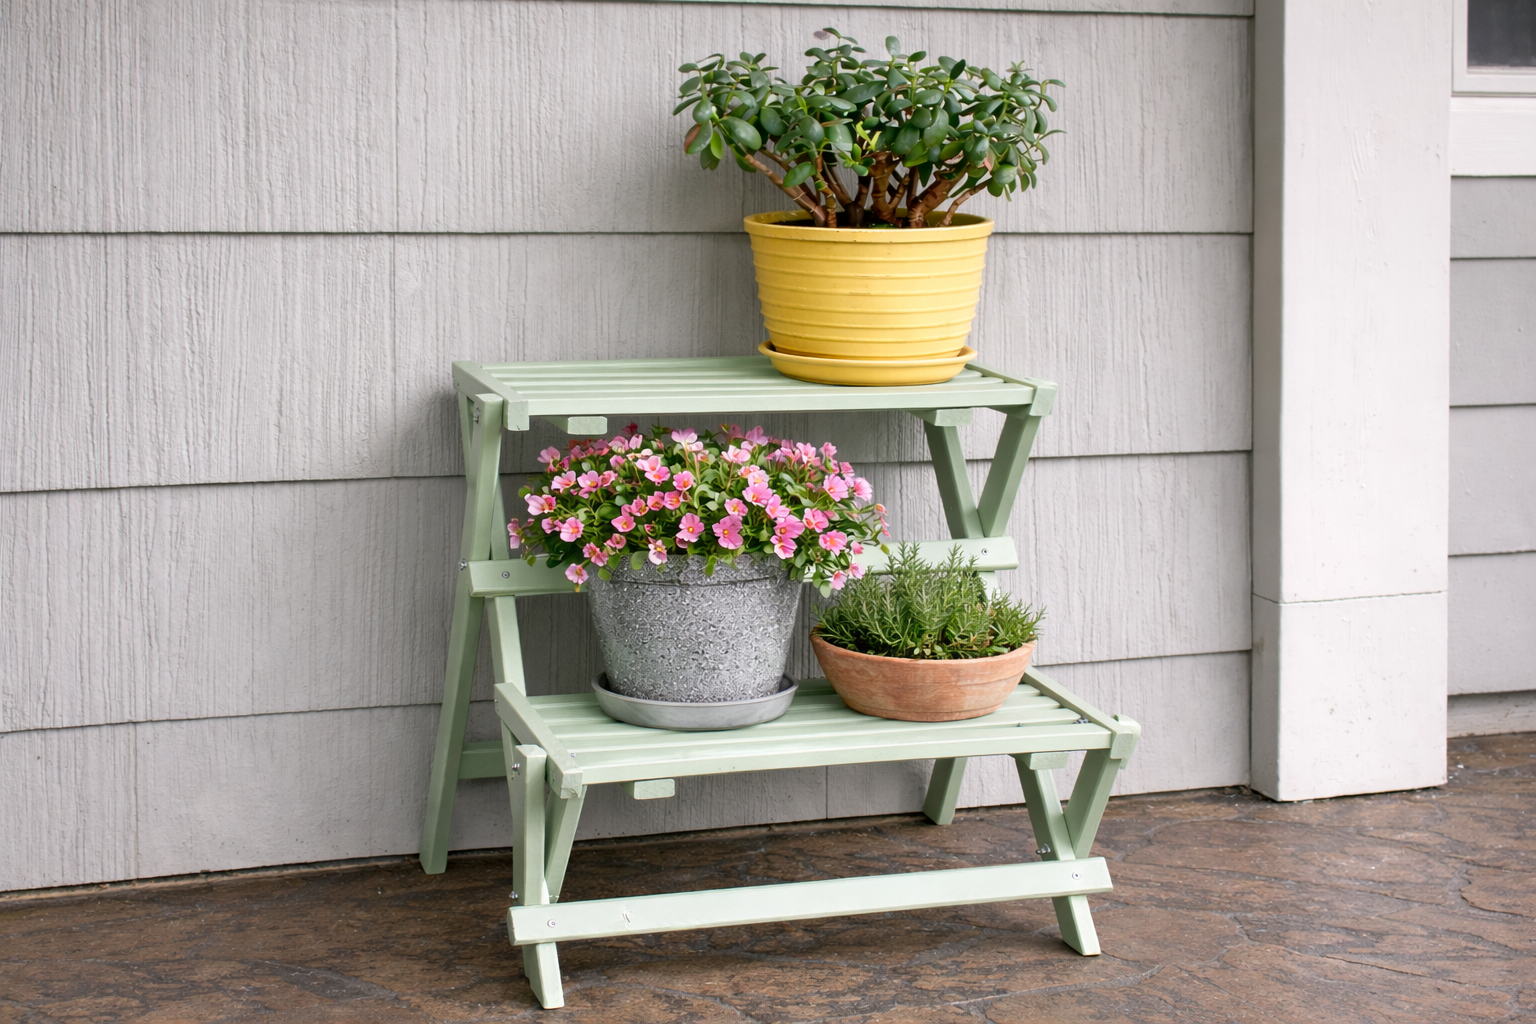
Folding, compact plant stand perfect for putting your plants in their best light. Features folding design, so you can stash in the shed for winter, two slatted shelves, and modern styling.
Specifications
| Project type | Side and End Table Plans |
|---|---|
| Room | Outdoor |
| Style | Modern Style Furniture Plans |
| Difficulty | Advanced |
| Estimated cost | Under $20 |
Dimensions
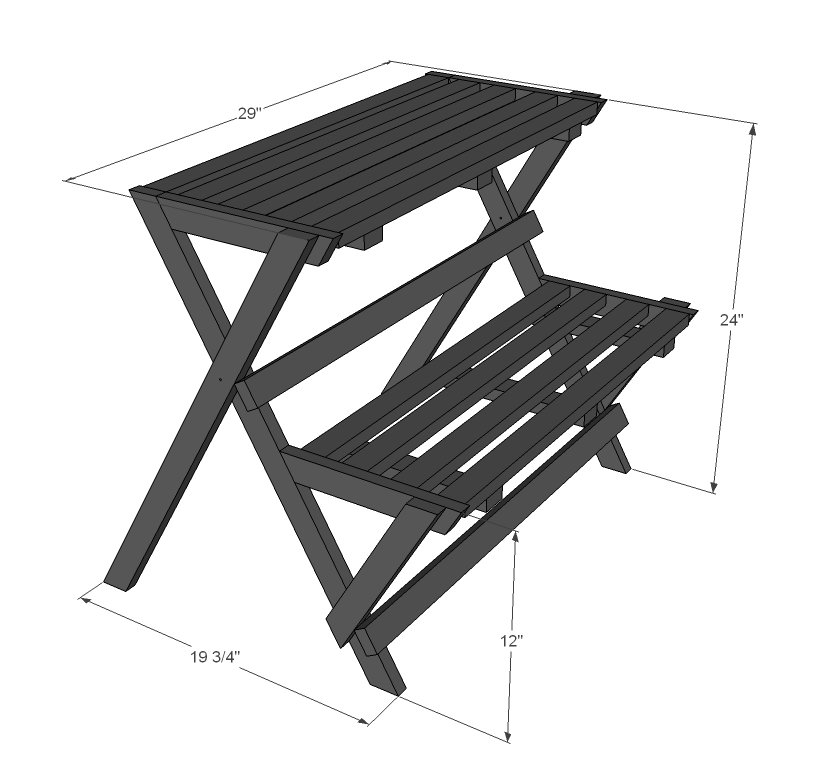
Use the size-specific shopping and cut lists below.
Shopping List
- 8 2" 1/4 diameter bolts
- 24" washer to fit bolts
- 8 nuts to fit bolts
- 6 - 1x2 boards, 8 feet long
Cut List
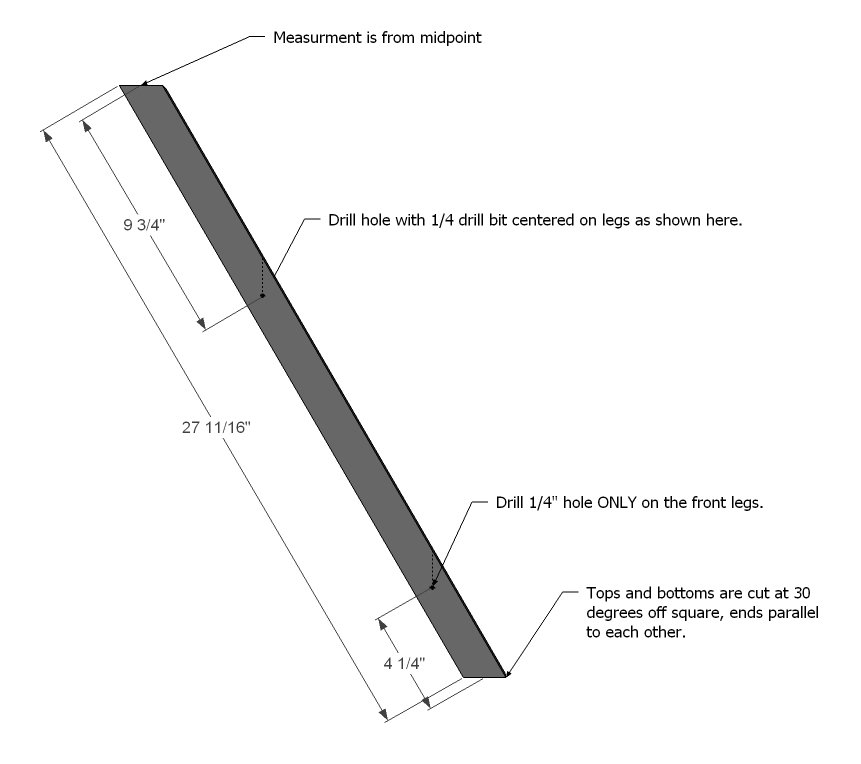
- 4 - 1x2 @ 27 11/16" (Both ends cut at 30 degrees off square, ends are parallel)
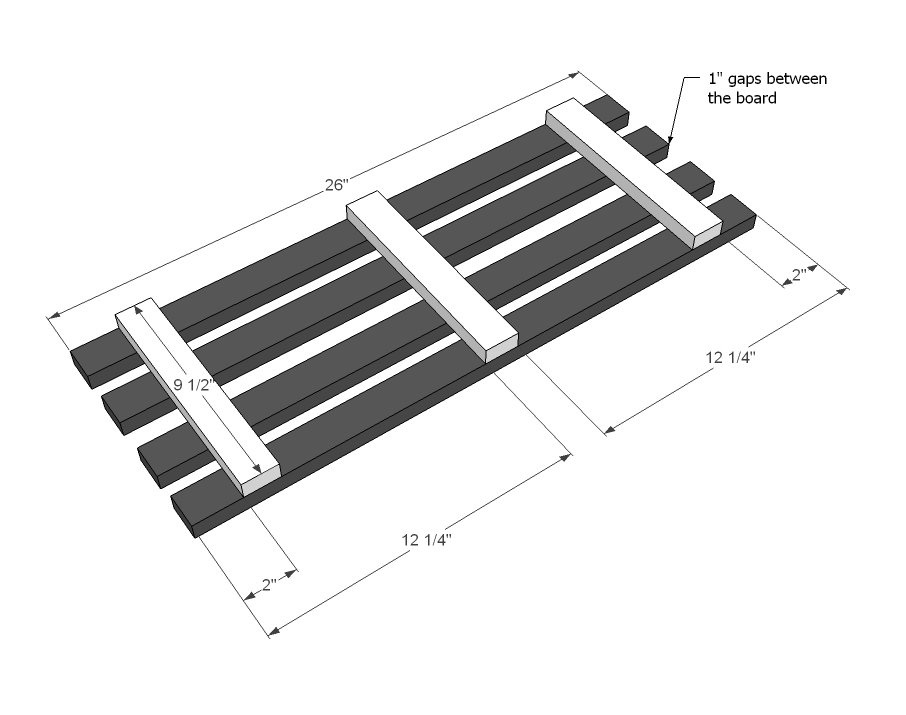
- 9 - 1x2 @ 26"
- 2 - 1x2 @ 29"
- 2 - 1x2 @ 9 3/4" (Short point to short point, both ends cut at 30 degrees off square, NOT parallel to each other)
- 6 - 1x2 @ 9"
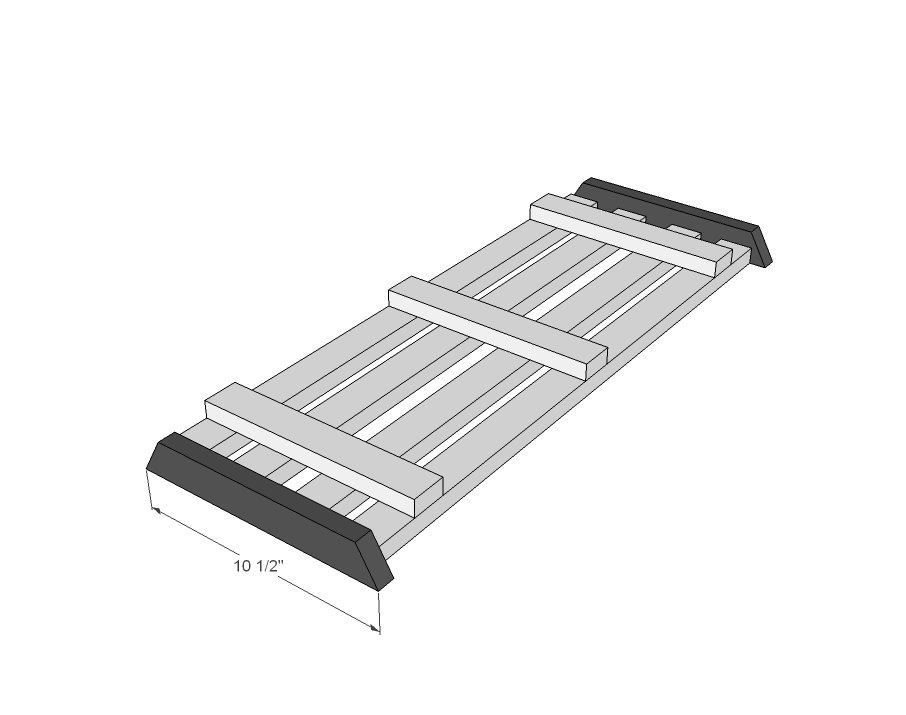
- 4 - 1x2 @ 10 1/2" (Long point to long point, both ends cut at 30 degrees off square, NOT parallel to each other)
Tools
- measuring tape
- square
- pencil
- safety glasses
- hearing protection
- drill
- compound miter saw
- nailer
- sander
- level
- countersink drill bit
Step-by-step Instructions
Step 1
Begin by cutting all of your boards. The leg boards need to be cut as shown above. Drill holes in leg boards as shown above in the diagram. Remember that you will only need the bottom holes on two of the leg boards.
Step 2
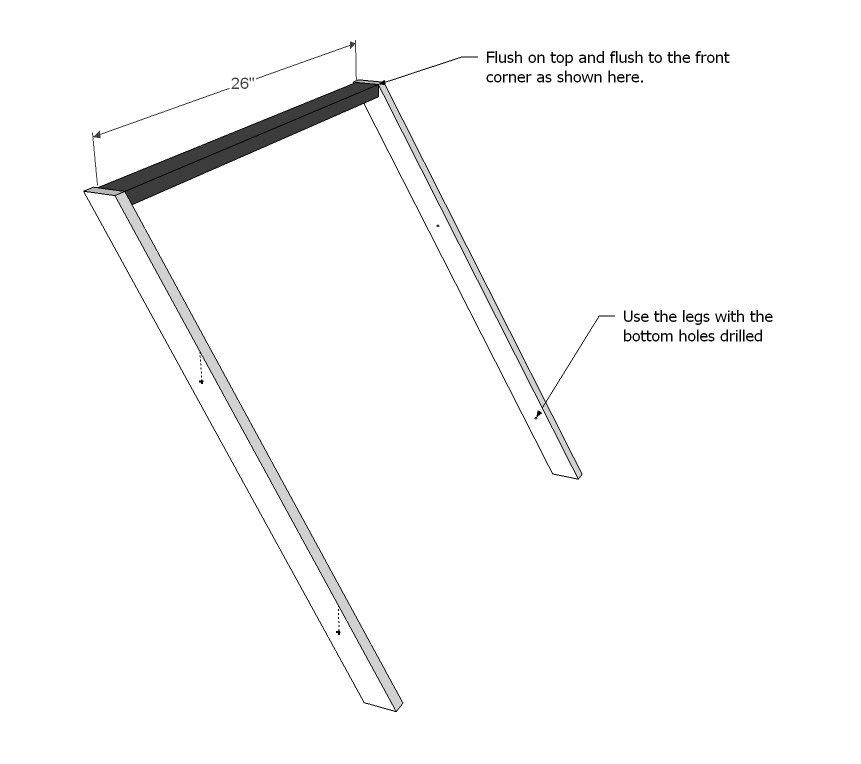
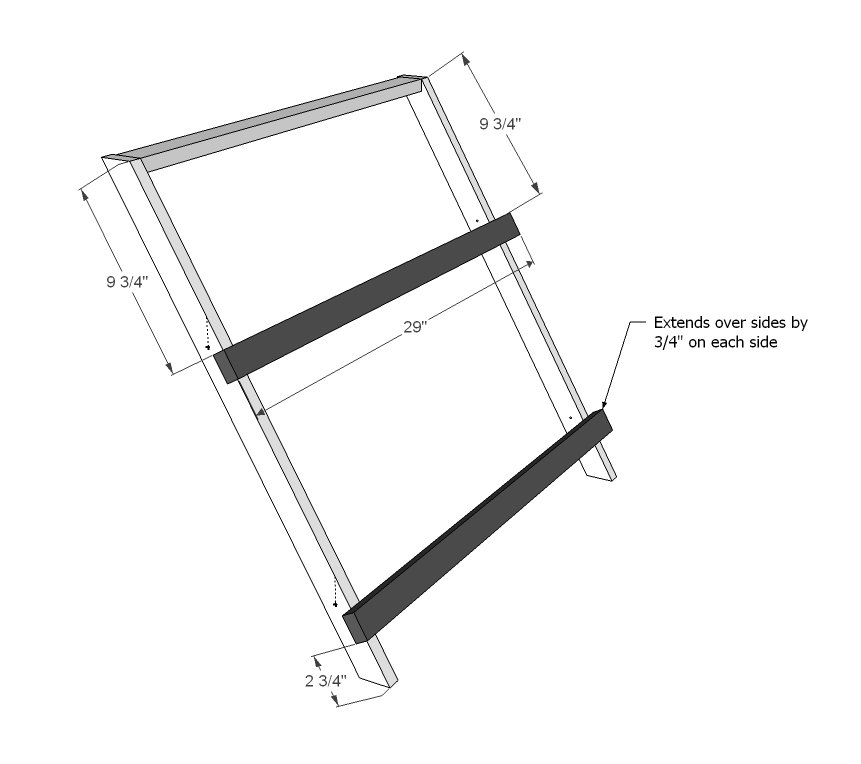
Attach the two leg boards together, with 2" fasteners. If you are screwing, predrill holes carefully. For nails, use ample glue suitable for exterior applications.
Step 3
Carefully measure back as shown above and attach the supports with 2" screws. The supports overhang 3/4" from the legs on each side.
Step 4
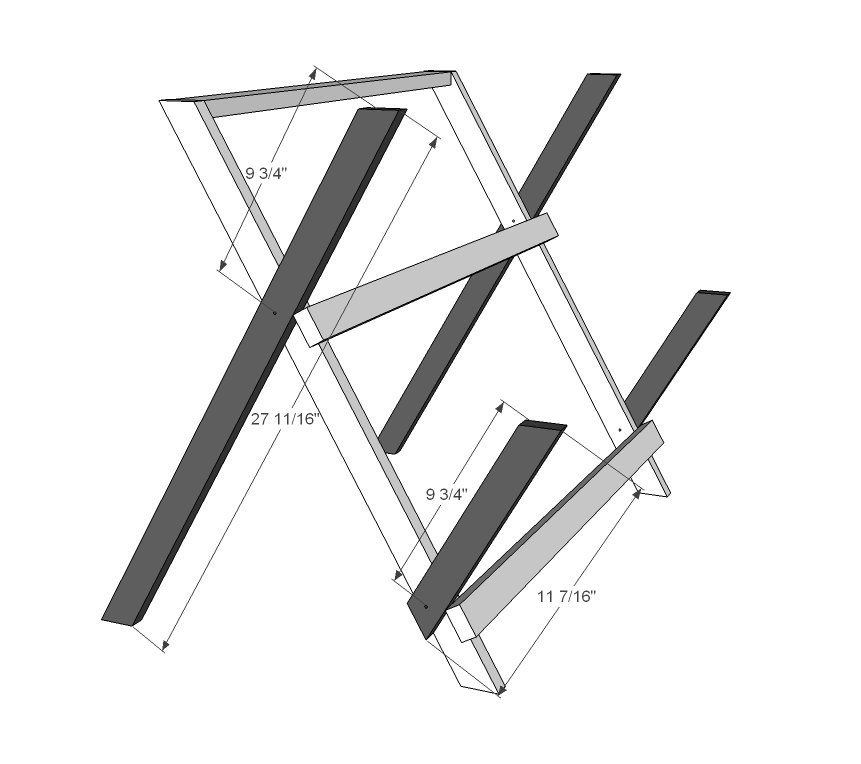
Drill holes in the bottom shelf support board as shown in diagram, 1/4" diameter. Attach back leg and bottom shelf support with bolts, using three washers per bolt, one on each end, and one between boards to protect wood finish. Set aside.
Step 5
Step 6
Then attach ends as shown above. I used 2" screws and glue.
Step 7
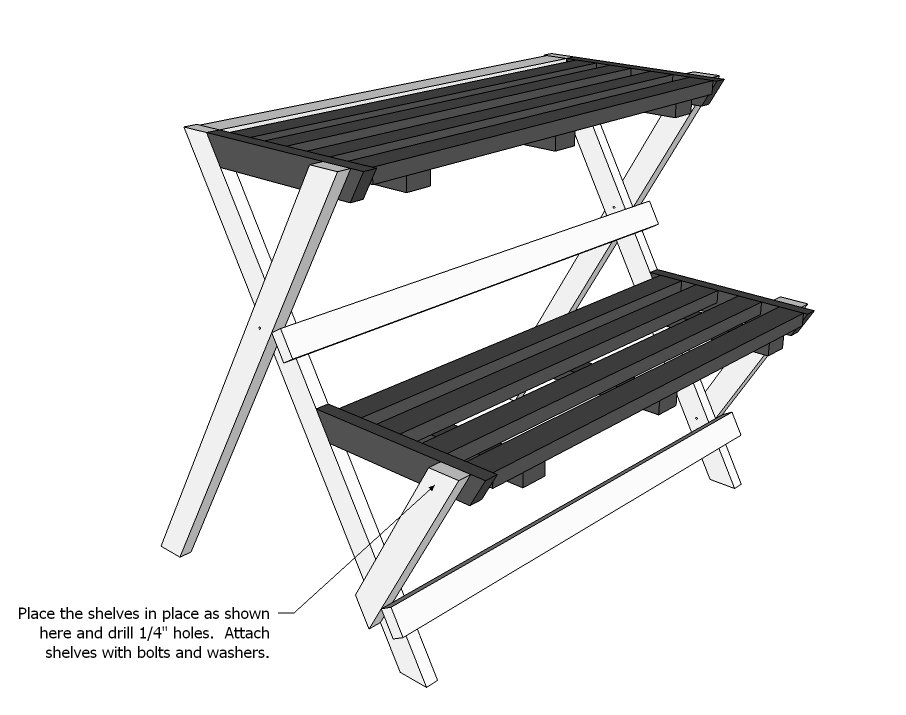
With a level on top of the shelves, set on the frame. Clamp in place and drill 1/4" holes in the tops of the legs/bottom support. Attach with bolts so shelves can flip up. Ensure that tops of shelves are level.
Step 8
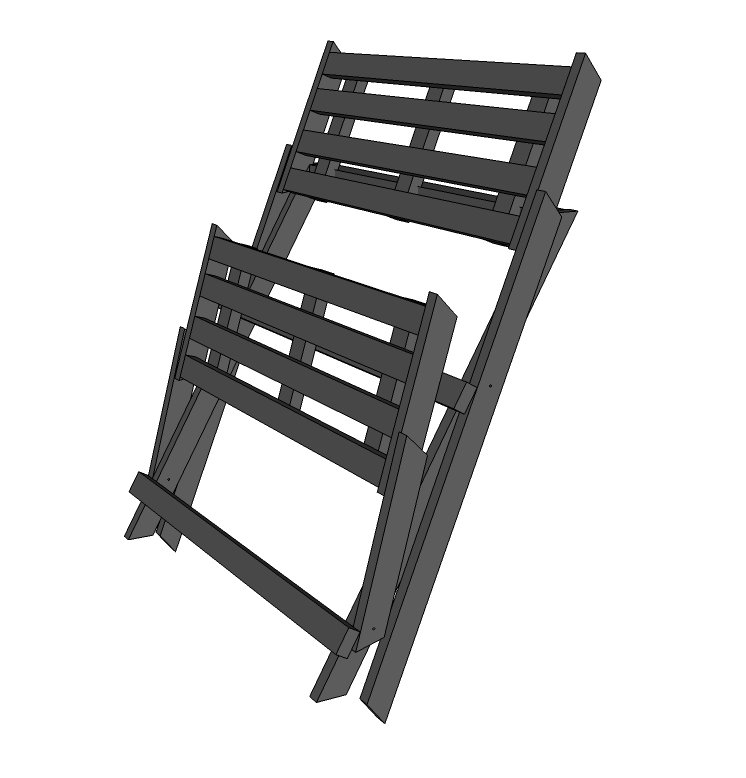
The plant shelf will fold up as shown above.
Finishing
Sand all surfaces, starting with a medium grit and finishing with fine. Wipe off the dust, fill any holes or gaps with wood filler, and sand smooth once dry. Apply primer if you're painting, then finish with your choice of paint or stain and seal with a durable clear topcoat. For outdoor projects, use exterior-rated primer, paint or stain, and sealer so the piece stands up to the weather.
Source (temporary): https://www.ana-white.com/woodworking-projects/folding-plant-stand