Folding Tray or Lap Desk
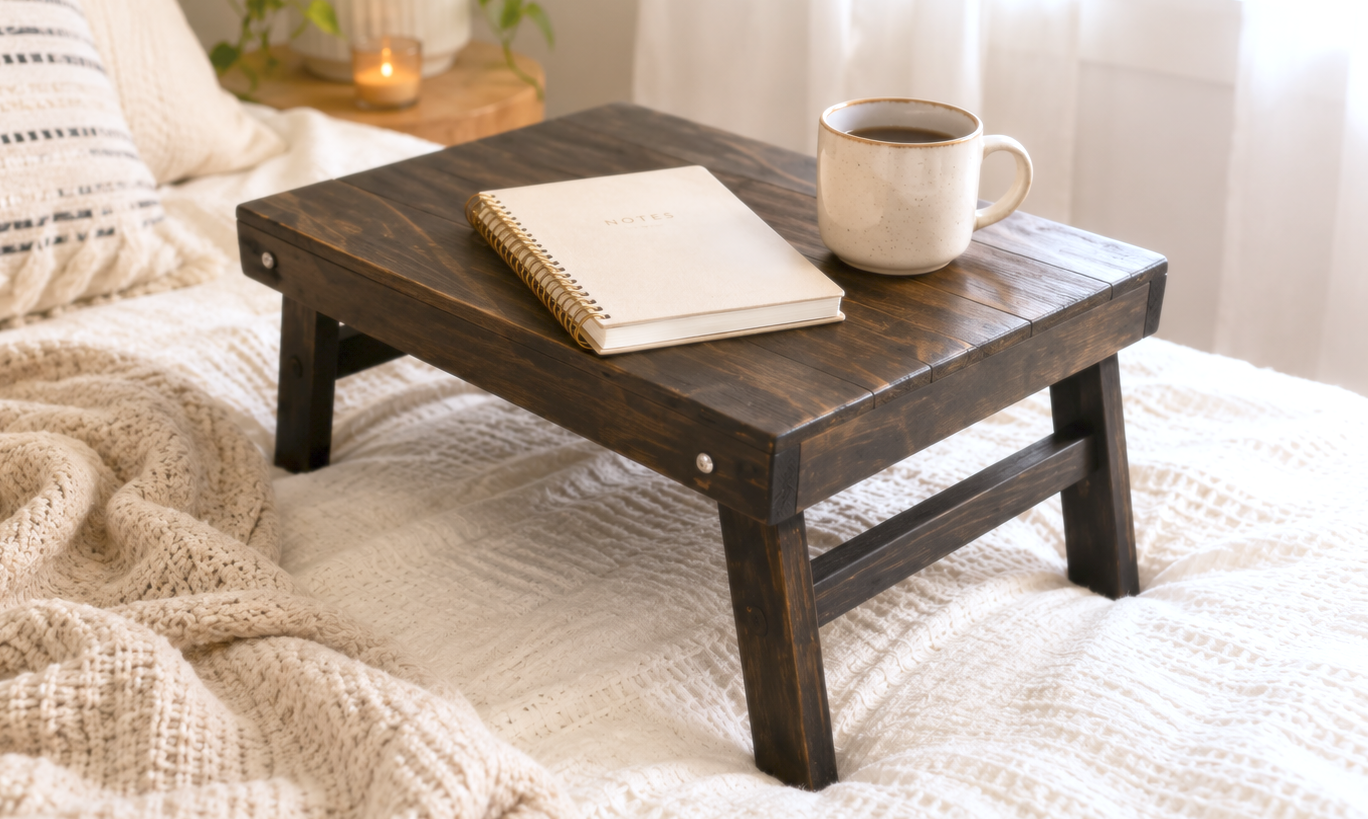
Build your own folding desk with! This lightweight, portable table is perfect for breakfast in bed, working on a laptop, TV dinners, or kids’ crafts. This is a beginning woodworking plan with full diagrams, shopping list, build photos, and uses minimal tools and materials. Easy, practical, and beginner-friendly! Photo shows modification to top using thin wood pieces.
Specifications
| Project type | Kids Tables and Chairs |
|---|---|
| Room | Teens |
| Style | Children's and Kid's Room Furniture and Toy Plans |
| Difficulty | Beginner Projects |
| Estimated cost | Under $20 |
Dimensions
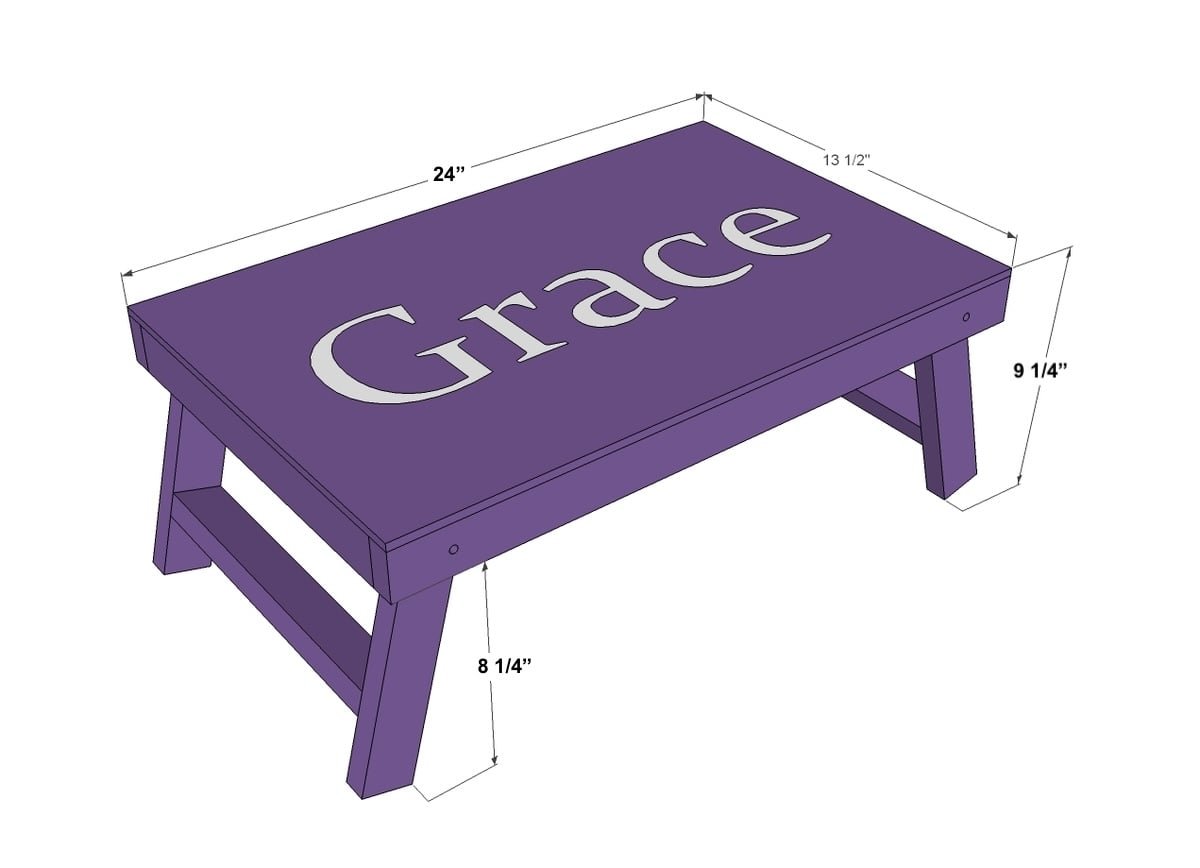
Use the size-specific shopping and cut lists below.
Shopping List
- 12 feet of 1x2s
- 1/4" thick sande plywood for top, 24" x 13-1/2"
- 4 bolts, 2 1/2” length, with washers and nuts
- 1-1/4" brad nails
- wood glue
- wood filler
- paint or stain
- clear top coat
Cut List
- 2 - 1x2 @ 24”
- 2 - 1x2 @ 12”
- 2 - 1x2 @ 10 1/2”
- 4 - 1x2 @ 9 3/4” (top end is cut to point 45 degrees angle and bottom cut at 15 degree angle - see in plans)
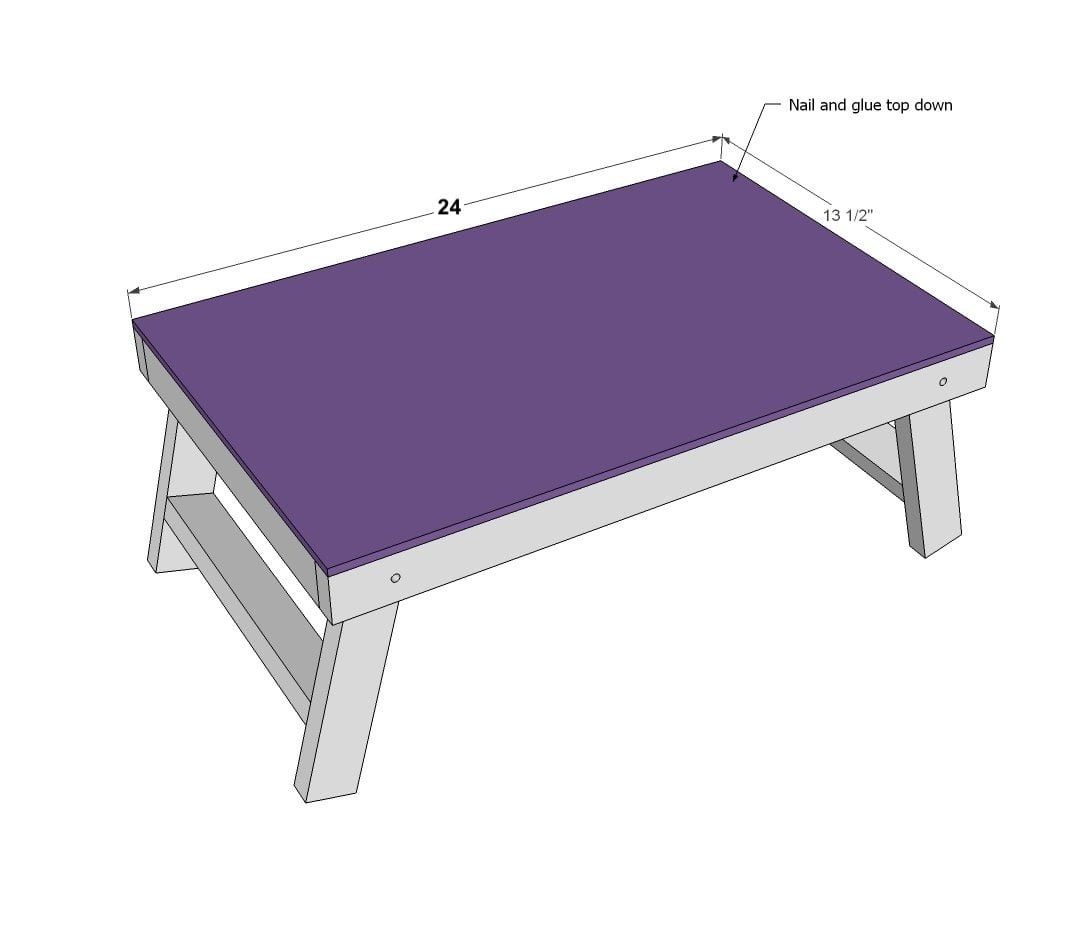
- Top is 13 1/2” x 24”
Tools
- measuring tape
- square
- pencil
- safety glasses
- hearing protection
- compound miter saw
Step-by-step Instructions
Step 1
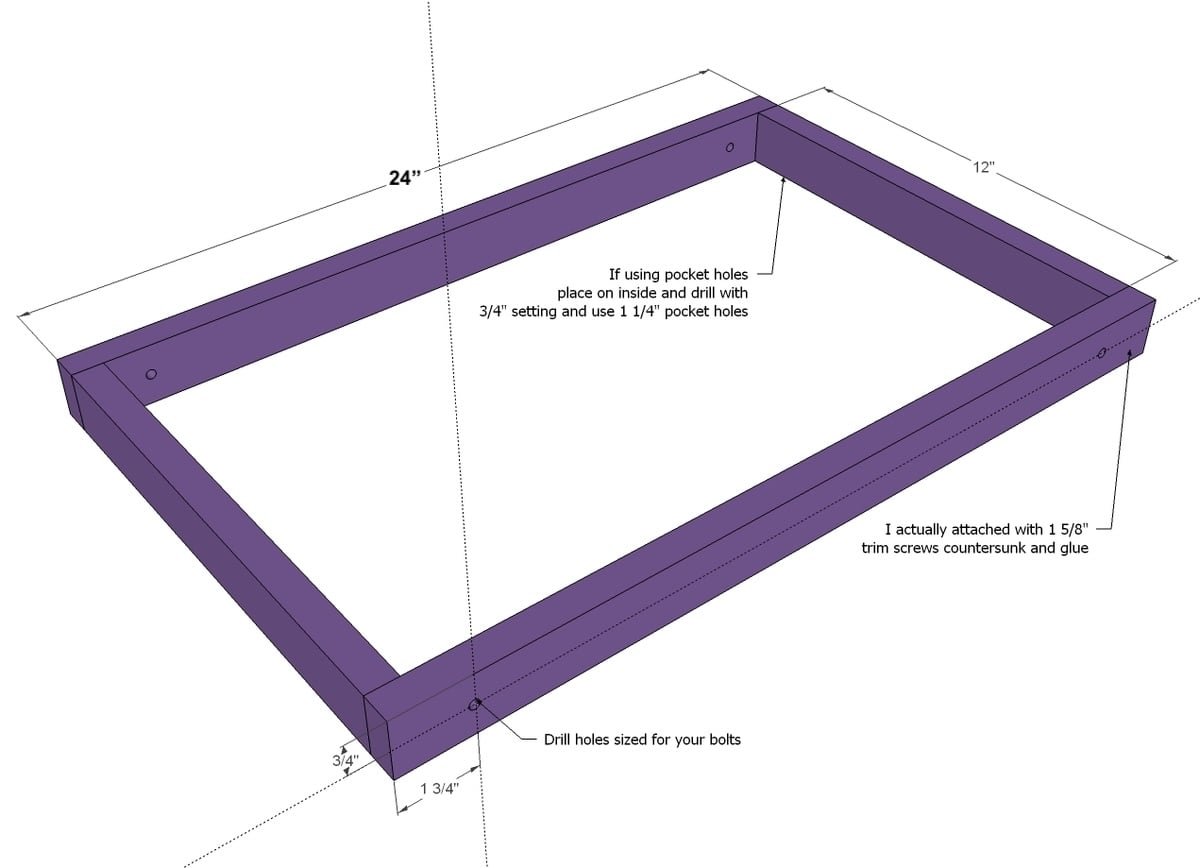
First, mark the location of your bolt holes on the 1x2s that are 24" long. Drill the holes sized for your bolts. Take the 1x2 frame boards, and build your frame. The frame can be nailed and glued, screwed, pocket holed - it's your choice. The top plywood piece will really help hold everything together.
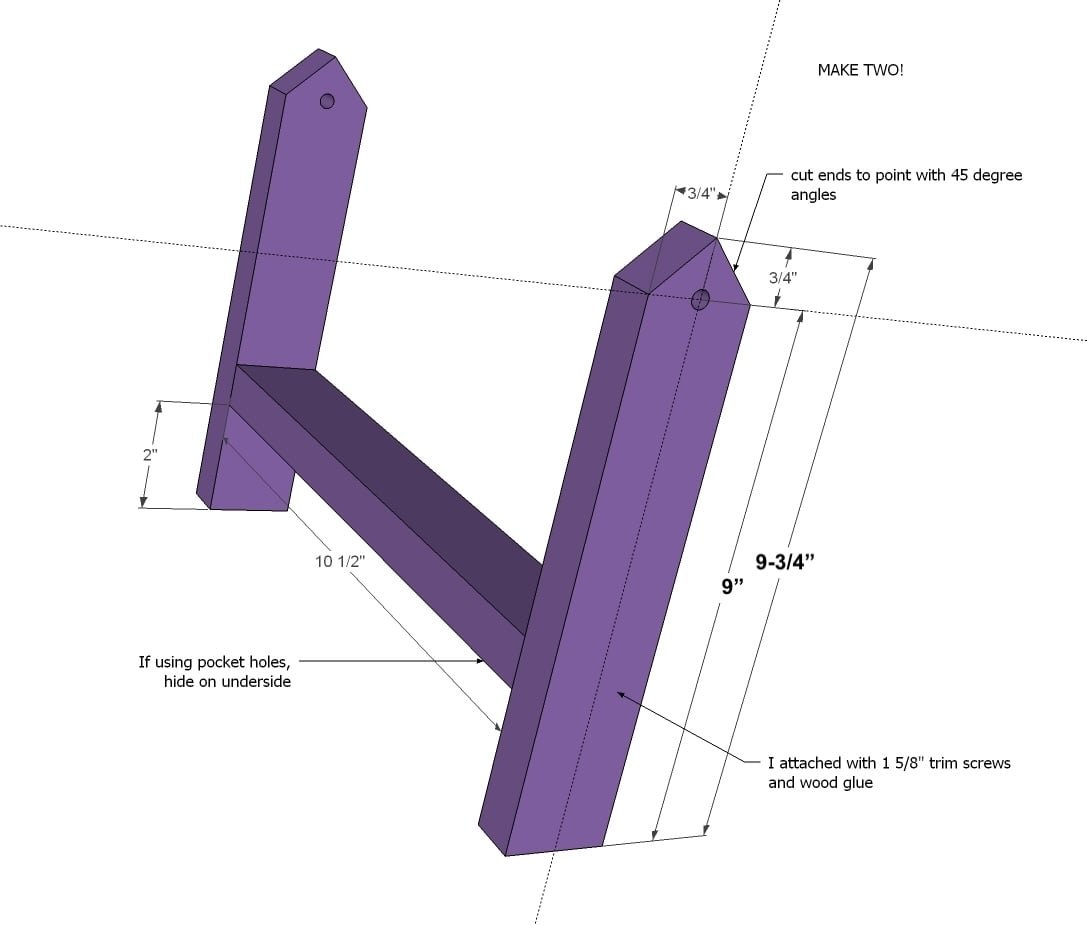
Next, build your two leg sets and drill matching holes for bolts in the tops of the legs.
NOTE: Jaime recommends mitering the bottom corner at 15 degrees too to help the table stand better when open - And also act as a finger pull for opening the table.
Step 3
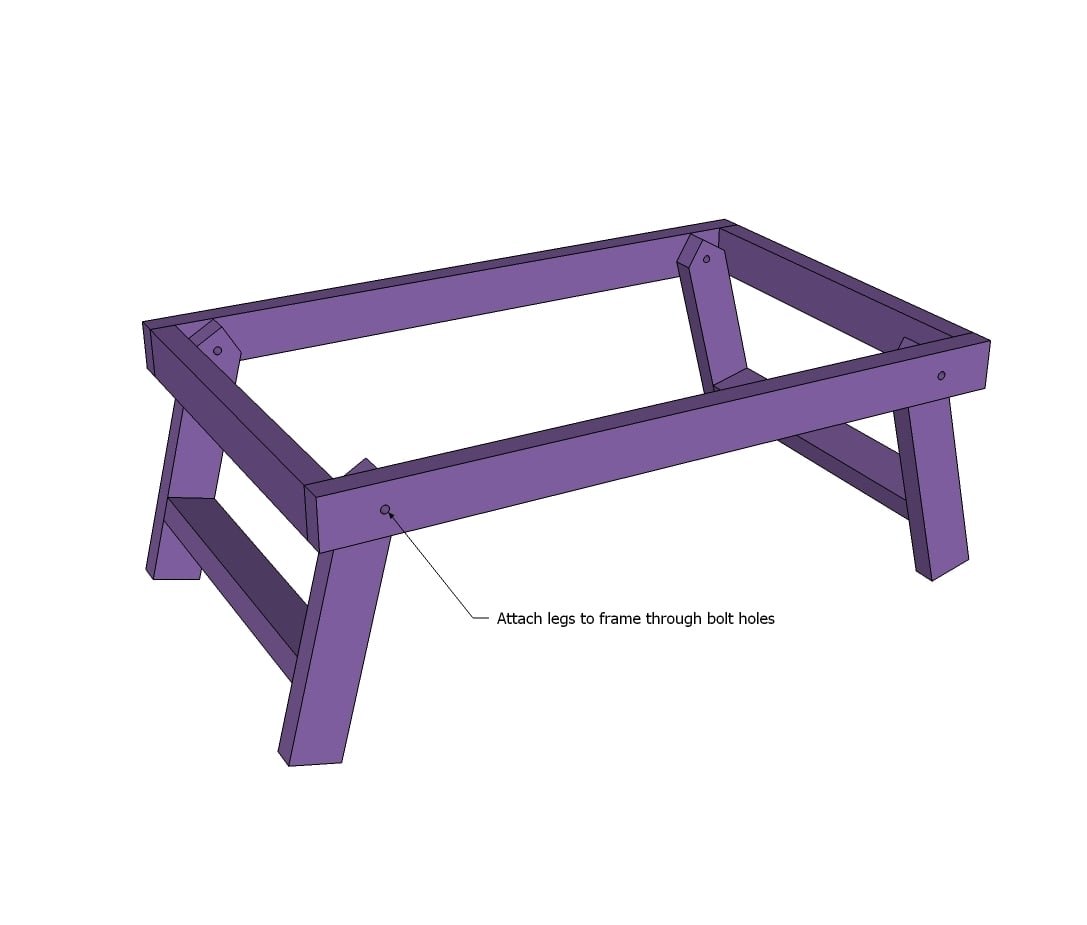
Then use the bolts to attach the legs to the frame.
Step 4
Glue and nail smooth plywood or other material to the top. Add a handle and personalize as desired! PS - Don't forget the pretty bow!
Finishing
Sand all surfaces, starting with a medium grit and finishing with fine. Wipe off the dust, fill any holes or gaps with wood filler, and sand smooth once dry. Apply primer if you're painting, then finish with your choice of paint or stain and seal with a durable clear topcoat. For outdoor projects, use exterior-rated primer, paint or stain, and sealer so the piece stands up to the weather.
Source (temporary): https://www.ana-white.com/woodworking-projects/folding-tray-or-lap-desk-free-woodworking-plan