Four Cubby Hutch for the Modular Playroom Storage Wall Collection
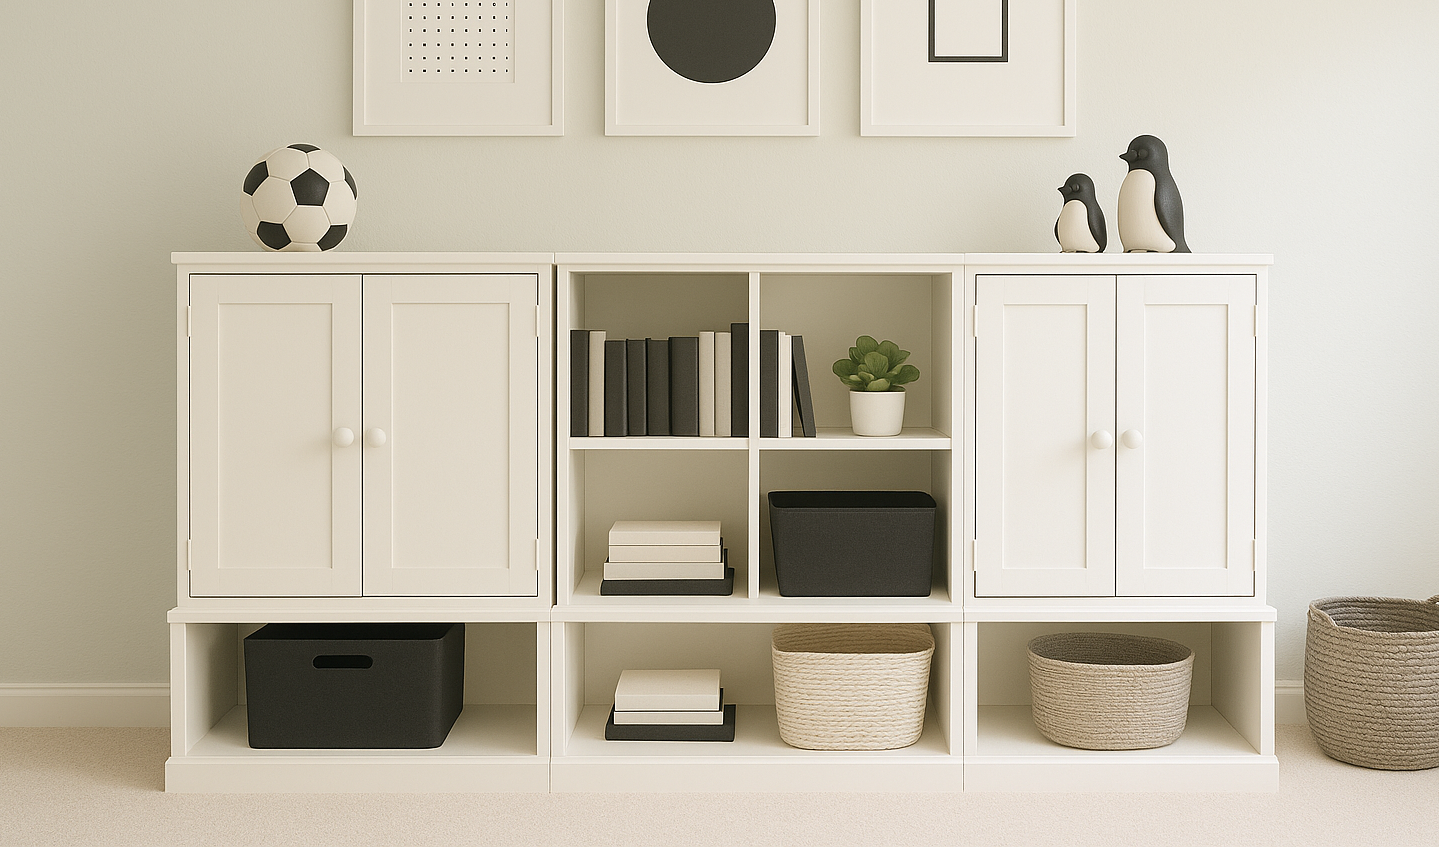
Modular Cubby Hutch – Pottery Barn Kids Inspired DIY Playroom Storage Bring high-end style to your playroom—without the price tag. This Modular Cubby Hutch is inspired by the classic look of the Pottery Barn Kids Cameron Wall System and is designed to fit standard 11" storage bins. With clean lines and open cubbies, it offers both form and function—perfect for organizing toys, books, crafts, and more. Part of a fully customizable modular collection, this hutch stacks easily with matching base units, bookcases, and media consoles so you can build your own Cameron-inspired storage wall tailored to your space. • Pottery Barn Kids style on a DIY budget • Sized to fit 11" bins (IKEA, Target, etc.) • Matches with other pieces in the Modular Storage Collection • Perfect for playrooms, nurseries, or homeschool setups • Free, beginner-friendly woodworking plans included Create a timeless, organized space your kids will love—with a DIY project that looks store-bought. Download the now and start building your own Pottery Barn Kids-style storage system. design image is rendered from plans UPDATE: Check out this new, updated plan for an easy to build option.
Specifications
| Project type | Cubby Project Plans |
|---|---|
| Room | Storage Solutions |
| Style | Children's and Kid's Room Furniture and Toy Plans |
| Difficulty | Intermediate |
| Estimated cost | $20 - $50 |
Dimensions
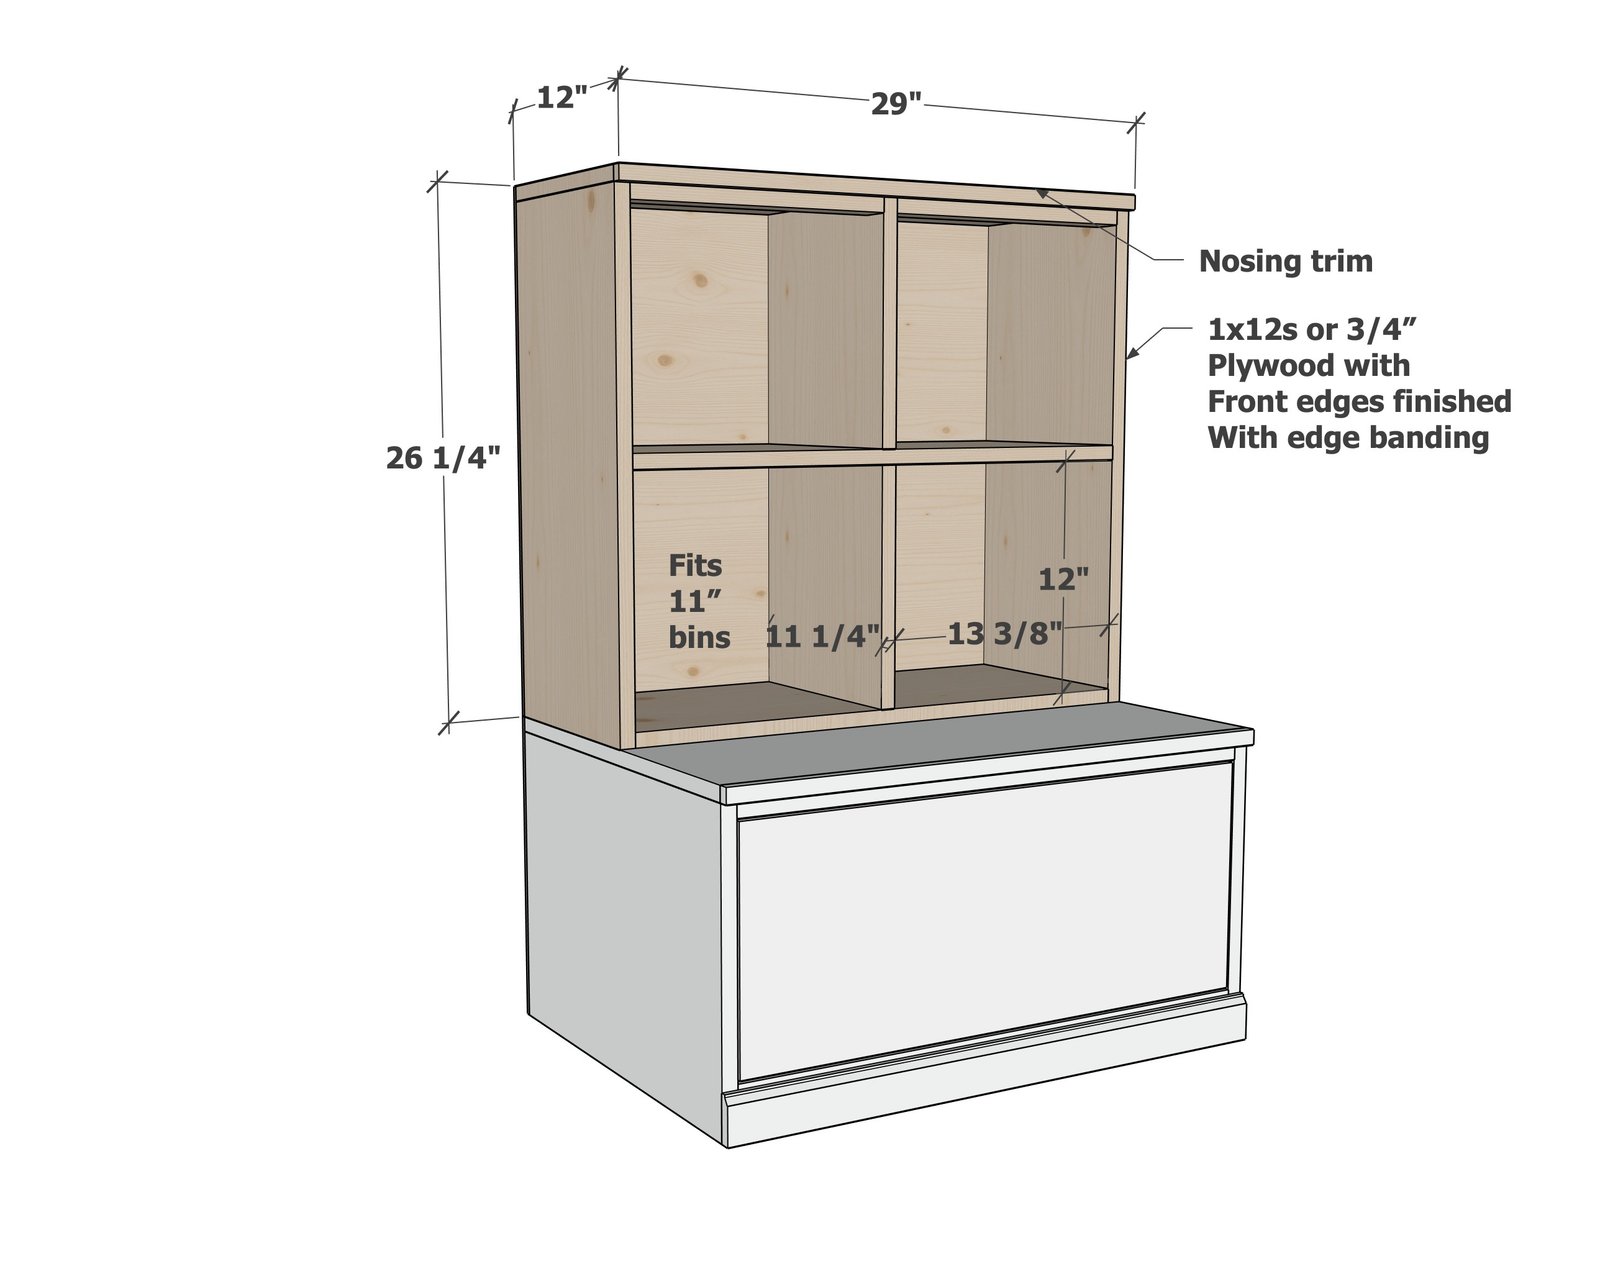
Use the size-specific shopping and cut lists below.
Shopping List
- 2 - 1x12 boards @ 8 feet long, or half sheet of 3/4" cabinet grade plywood, ripped into strips 11-1/4" wide (you'll need two strips)
- 1 - 1x2 @ 3 feet long
- 3/4" wide nosing trim @ 30" long
- 1/4" plywood for back
- 3/4" and 1-1/4" brad nails
- 1-1/4" pocket hole screws
- wood glue
- edge banding in matching wood veneer if using plywood
- wood filler
- wood finishing supplies for desired finish
Cut List
- 2 – 1x12 or 3/4″ Plywood 11-1/4" wide @ 25 1/2″ (sides)
- 2 – 1x12 or 3/4″ Plywood 11-1/4" wide @ 27 1/2″ x 14″ (Shelves)
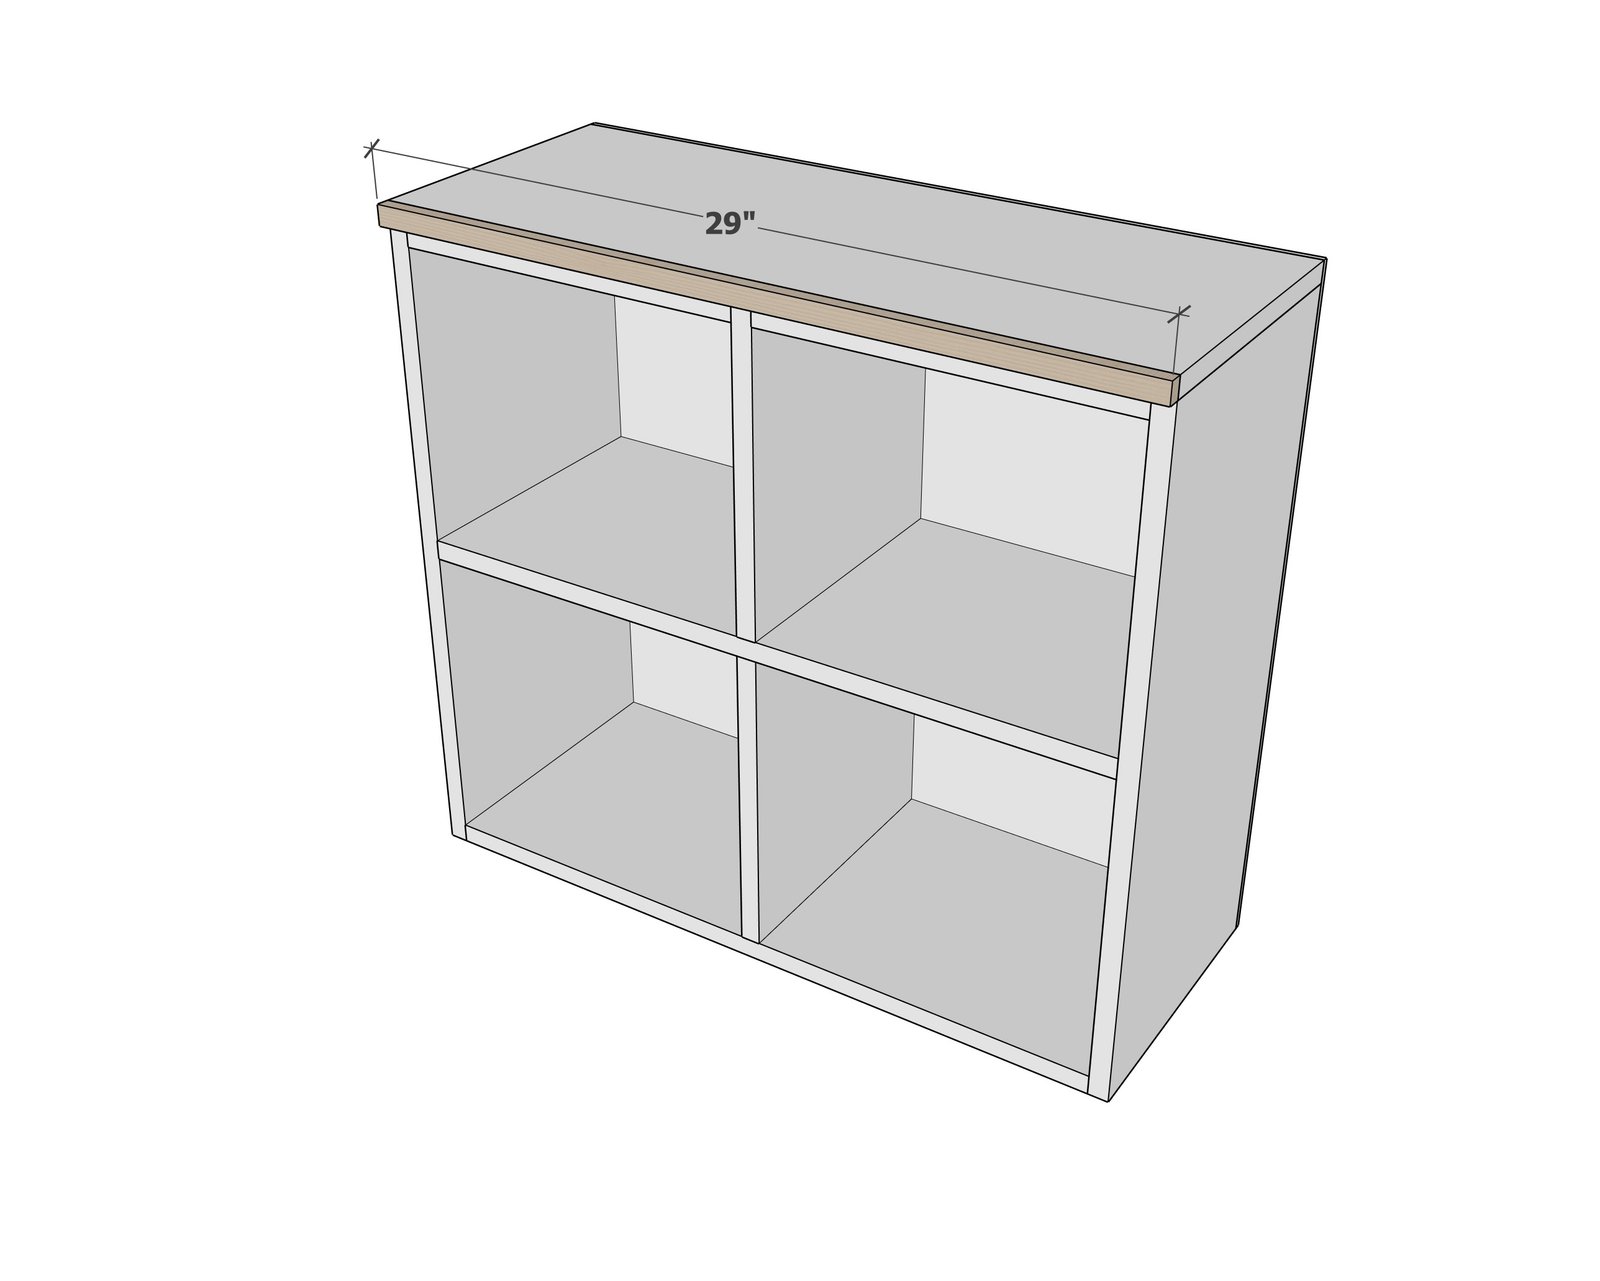
- 1 – 1x12 or 3/4″ Plywood 11-1/4" wide @ 29″ x 14 1/2″ (Top)
- 2 – 1x12 or 3/4″ Plywood 11-1/4" wide @ 12″ x 14″ (Vertical Dividers)
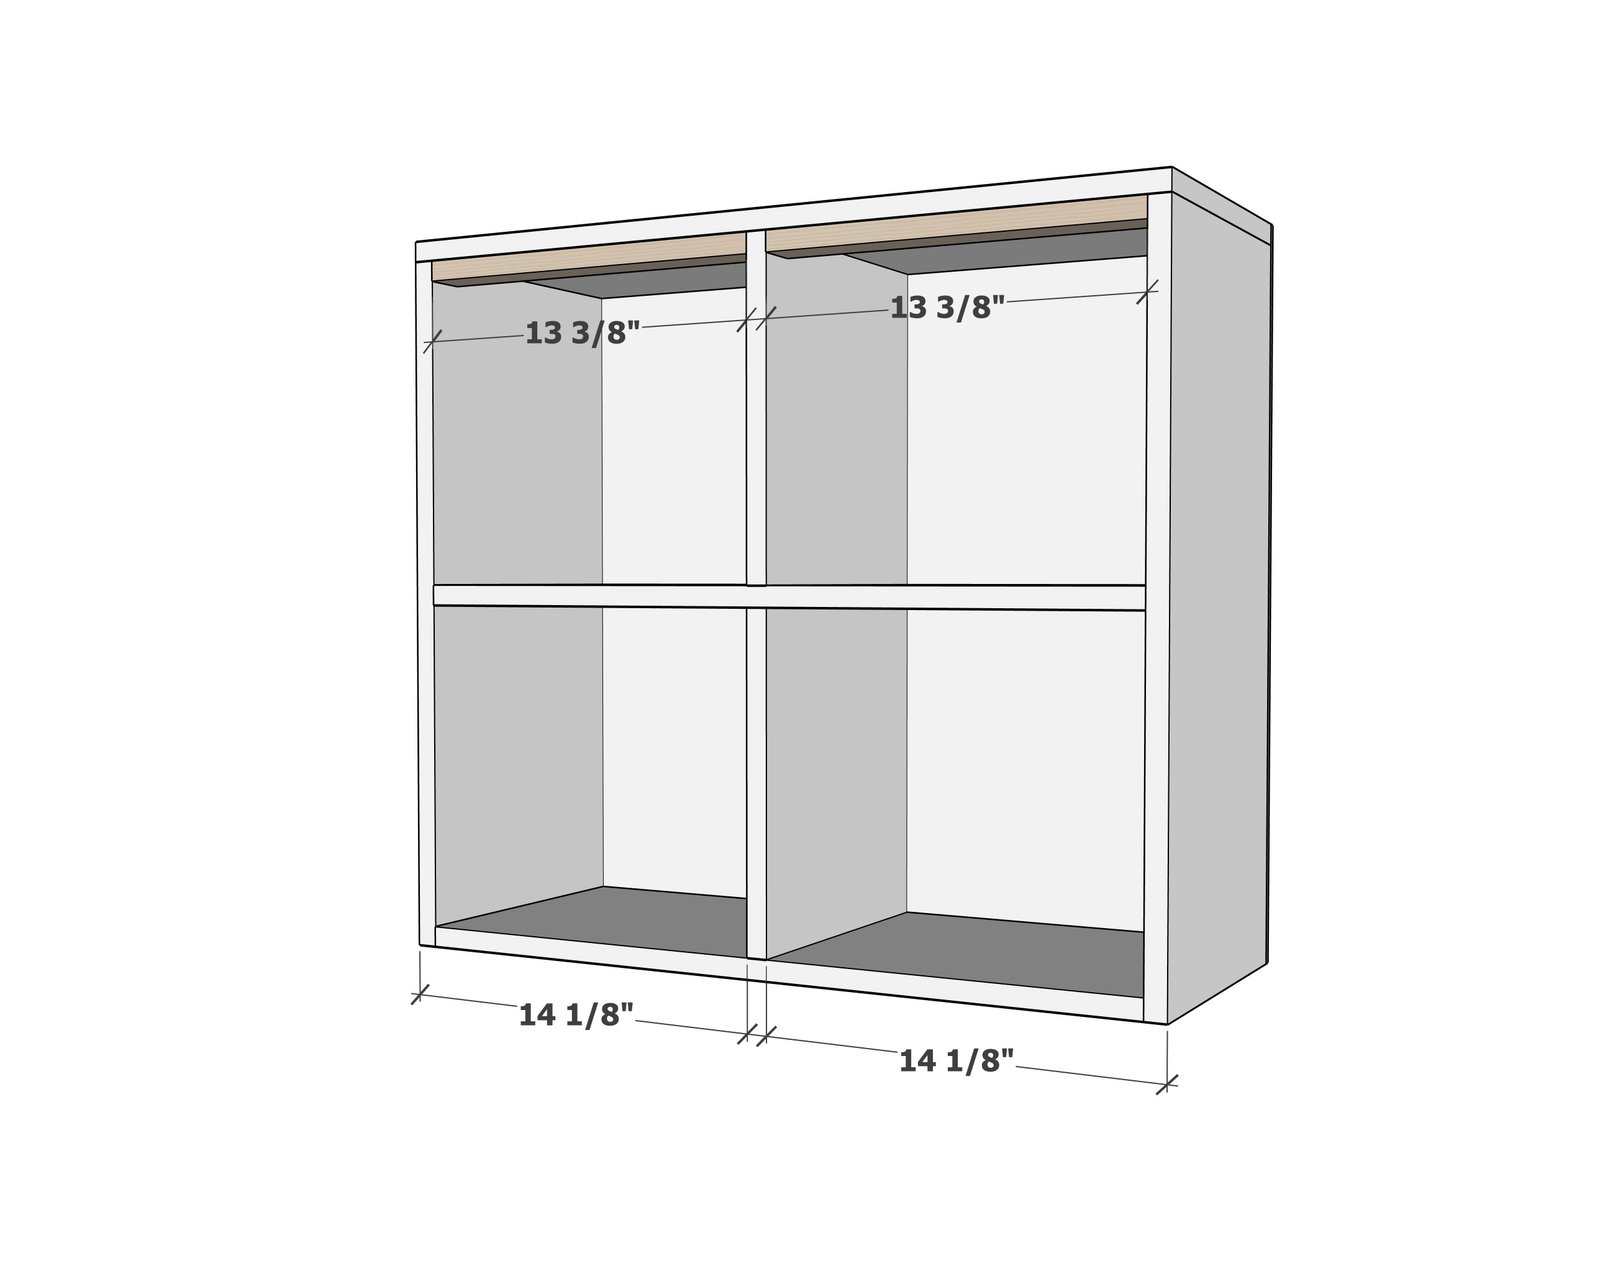
- 2 – 1×2 @ 13 3/8″ (Top Trim pieces)
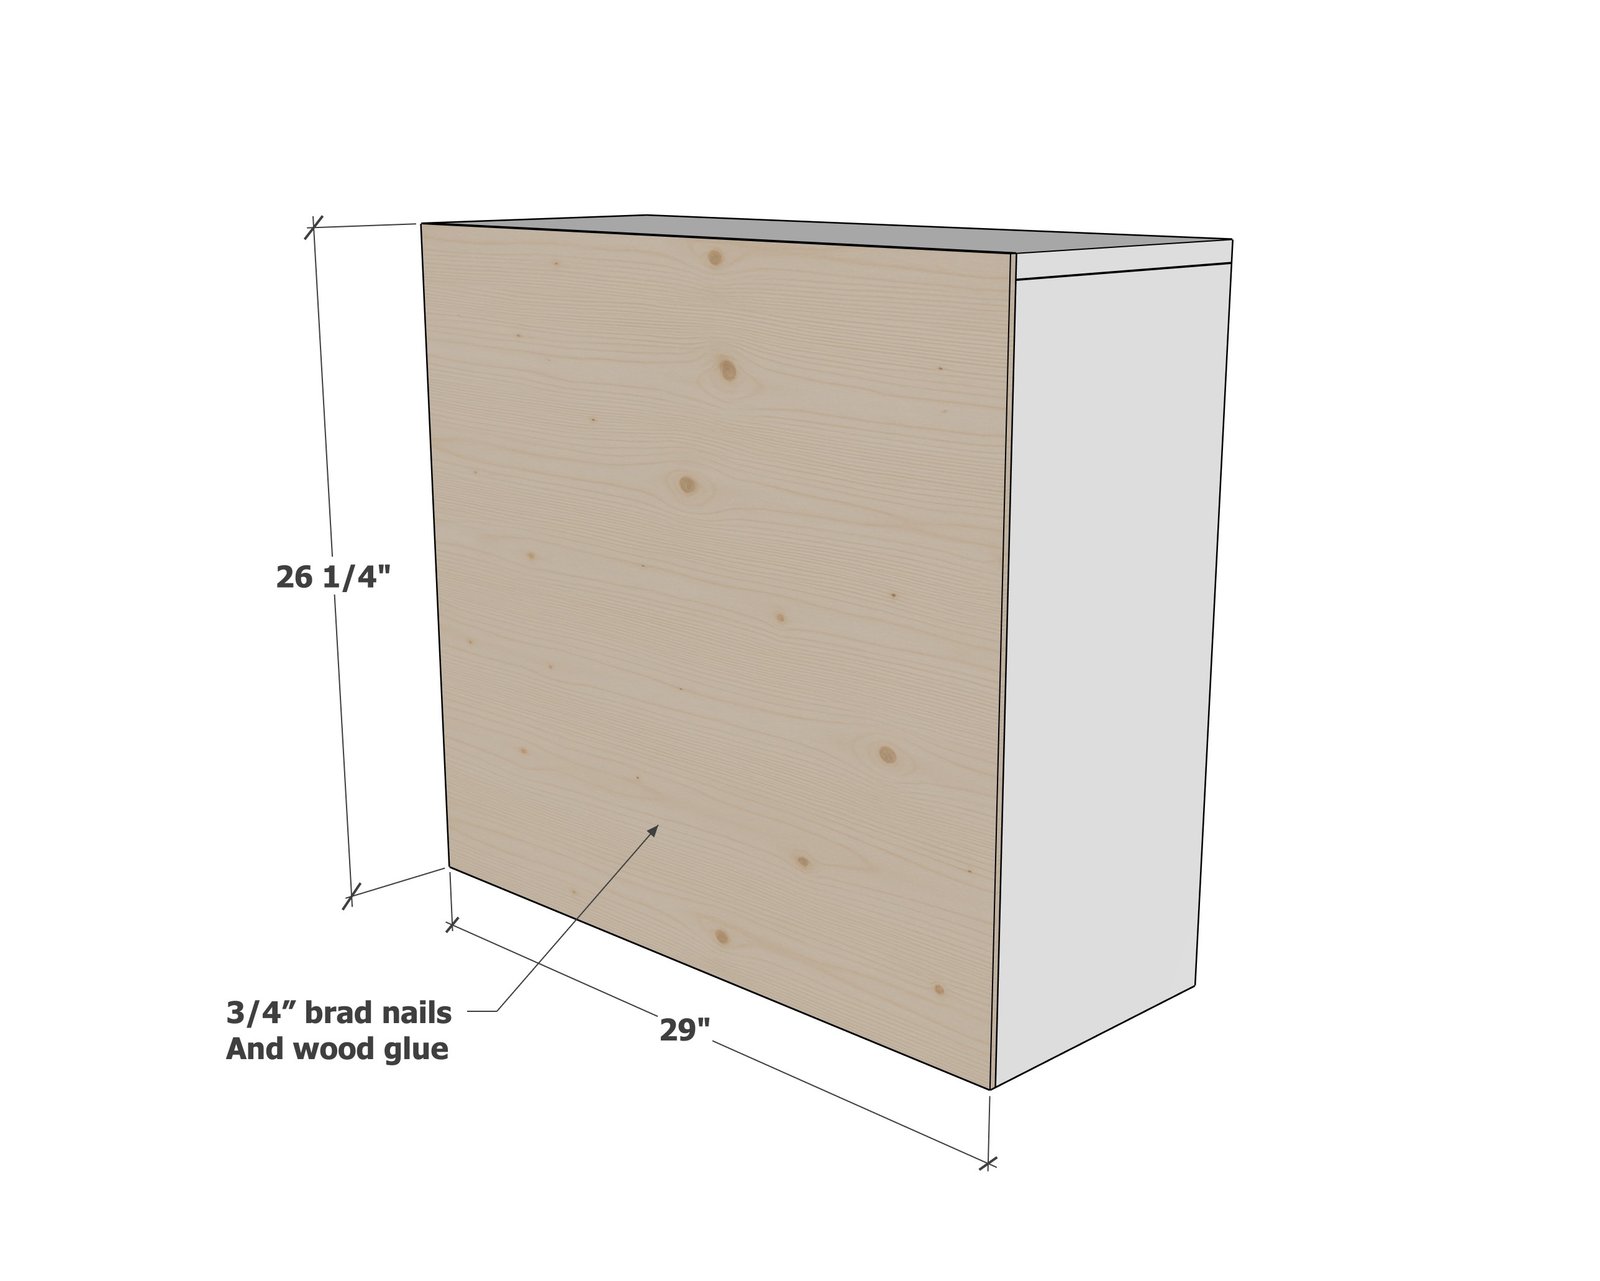
- 1 – 1/4″ Plywood @ 29″ x 26 1/4″ (Back)
Tools
- measuring tape
- square
- pencil
- safety glasses
- hearing protection
- kreg-jig
- circular saw
- nailer
- sander
Step-by-step Instructions
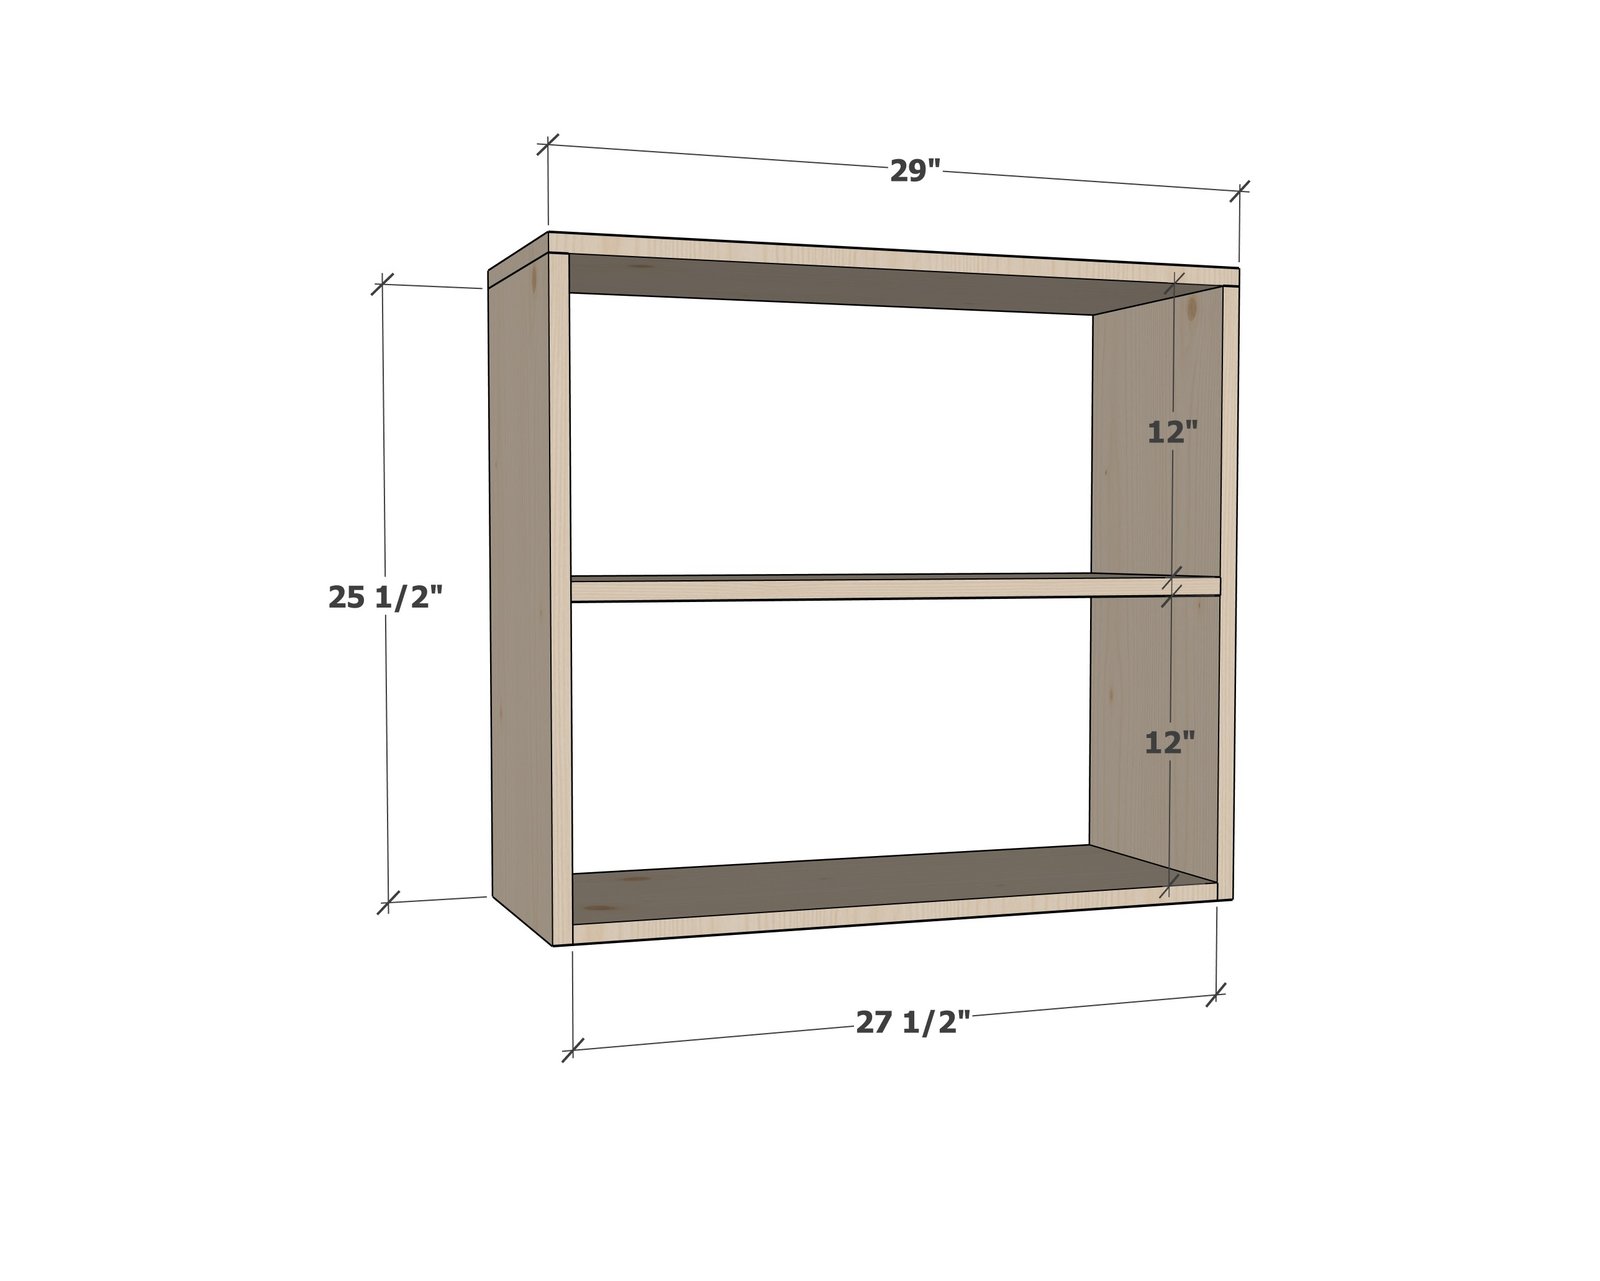
Step 1
Build the basic outline of the hutch. You can use pocket holes, but they will be visible. I recommend a combination of pocket holes (hidden on undersides) and 1-1/4" brad nails and wood glue.
Step 2
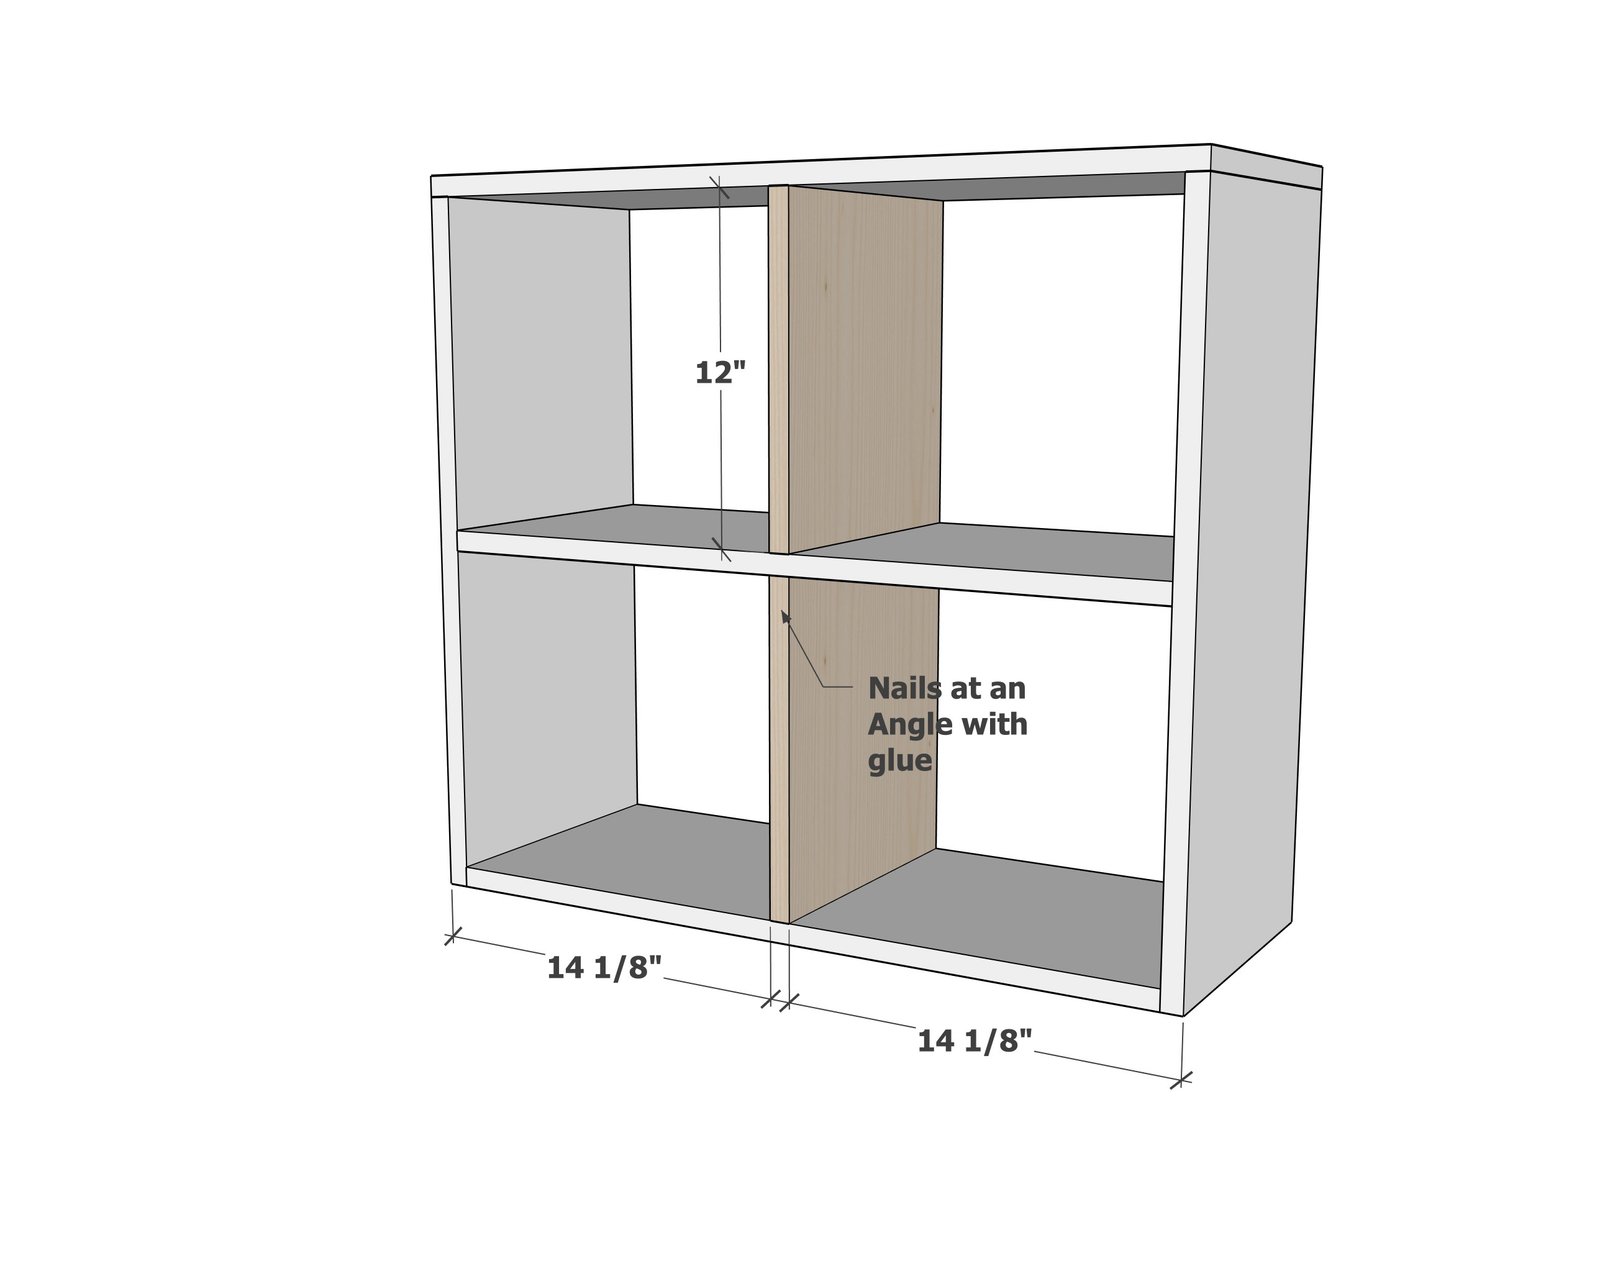
The inner pieces are not structural but still need to be tacked in place with brad nails. Attach with glue and angle nail at the center when you can't nail from the outside.
Step 3
Cut the back 1/4" plywood and attach with 3/4" brad nails to the back, attaching to all 1x12 boards. Use the plywood to square up the piece, so the edges of the hutch match the edges of the square cut back.
Step 4
Add the 1x2 inner trim to the insides with glue and 1-1/4" brad nails.
Add 3/4" thick nosing trim to the top front edge.
Installation: Multiple pieces need to be attached together, tall pieces need to be attached to studs in the wall to prevent forward tipping.
Finishing
Sand all surfaces, starting with a medium grit and finishing with fine. Wipe off the dust, fill any holes or gaps with wood filler, and sand smooth once dry. Apply primer if you're painting, then finish with your choice of paint or stain and seal with a durable clear topcoat. For outdoor projects, use exterior-rated primer, paint or stain, and sealer so the piece stands up to the weather.
Source (temporary): https://www.ana-white.com/woodworking-projects/four-cubby-hutch-modular-playroom-storage-wall-collection