Four Dollar Stackable Children’s Chairs
Build your own kids chairs using pine furring strips - Stackable economical lightweight children's chairs. Can be used indoors or outdoors. This is a using beginner techniques with step by step diagrams, shopping and cut lists, and lots of reader submitted photos.
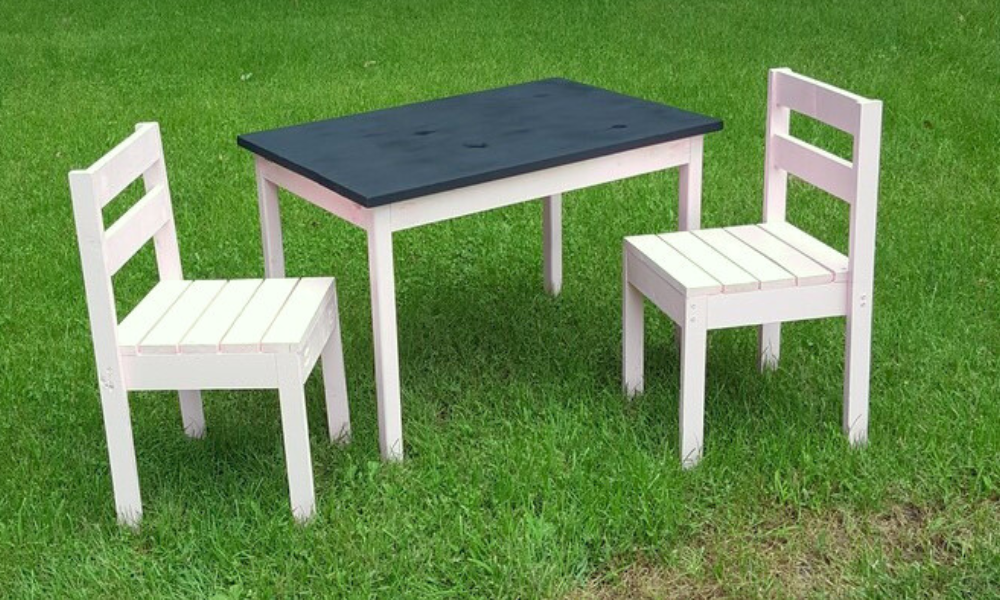
Specifications
| Project type | Kids Tables and Chairs |
|---|---|
| Room | Kids and Toys |
| Style | Children's and Kid's Room Furniture and Toy Plans |
| Difficulty | Beginner Projects |
| Estimated cost | Under $20 |
Dimensions
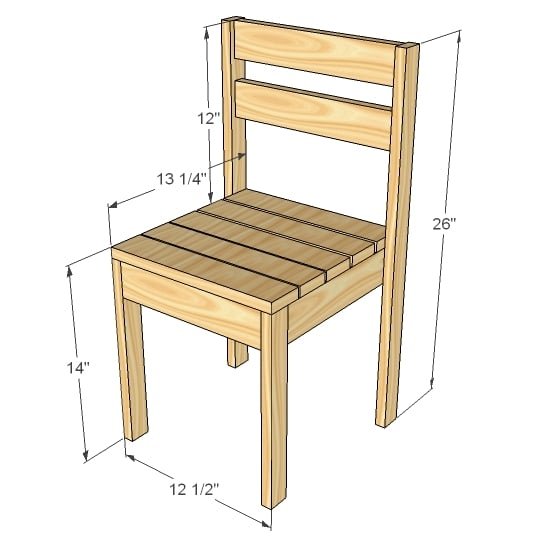
Use the size-specific shopping and cut lists below.
Shopping List
- 2 – 1x3s, 8′ long (Furring strips were used for my chair, about $1.50 each)
- 1 – 1×2, 8′ long (furring strips again, $1 a stick)
- 1 1/4″ screws 2″ screws OR 1 1/4″ pocket hole screws for pocket holes
- wood glue finishing supplies
Cut List
- 3 – 1×3 @ 11″ (Front and Side Aprons)
- 2 – 1×3 @ 11 3/4″ (Side Supports)
- 1 - 1x3 @ 12 1/2" (Back Apron)
- 2 – 1×2 @ 13 1/4″ (Front Legs)
- 8 – 1×3 @ 12 1/2″ (Seat Slats and Back Slats)
- 2 – 1×2 @ 26″ (Back Legs)
Tools
- measuring tape
- square
- pencil
- safety glasses
- hearing protection
- drill
- circular saw
- sander
- level
- countersink drill bit
Step-by-step Instructions
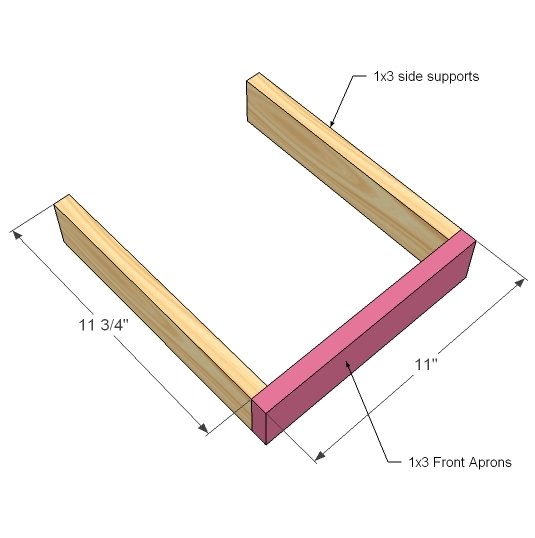
Side Supports
Predrill holes and screw the side supports to the front aprons. I built mine with 1 1/4″ pocket hole screws, but you could also use 2″ screws. Use glue.
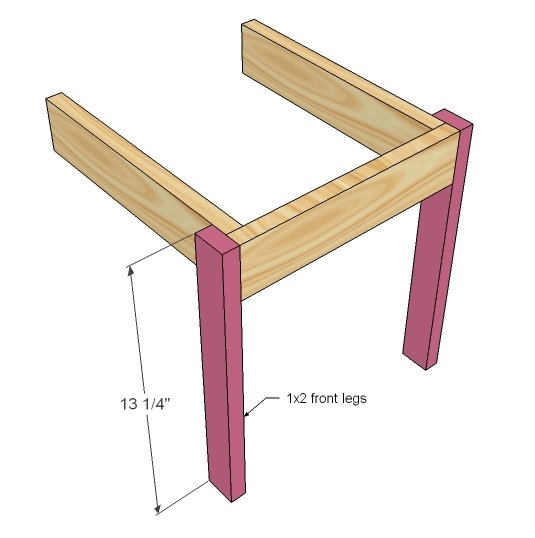
Front Legs
Now just screw the legs to the front apron and supports. Use 1 1/4″ screws to screw into the side supports.
Side Aprons
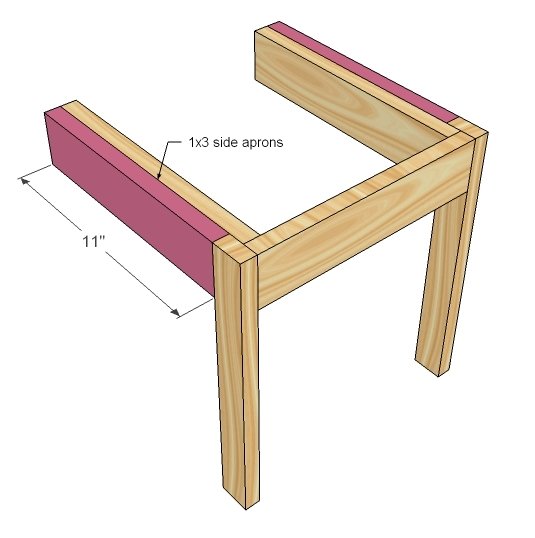
Now simply add the side aprons with glue and 1 1/4″ screws.
Back Apron
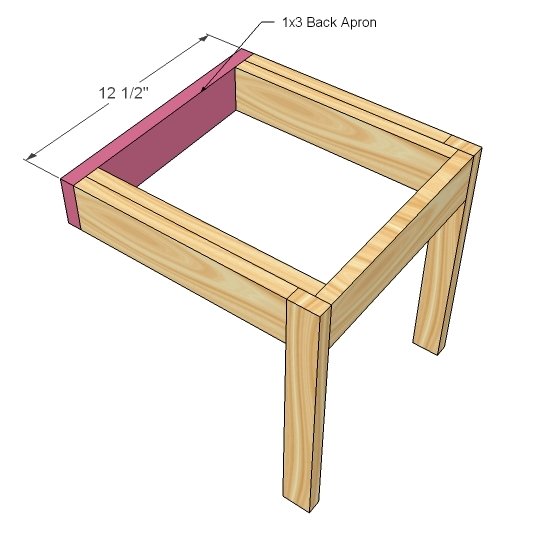
Back apron is the same length as the seat slats. Just attach the back apron with 2″ screws and glue.
Step 5
Back Slats
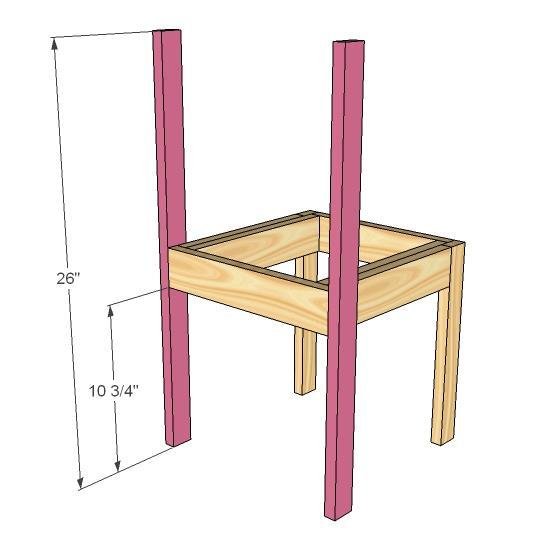
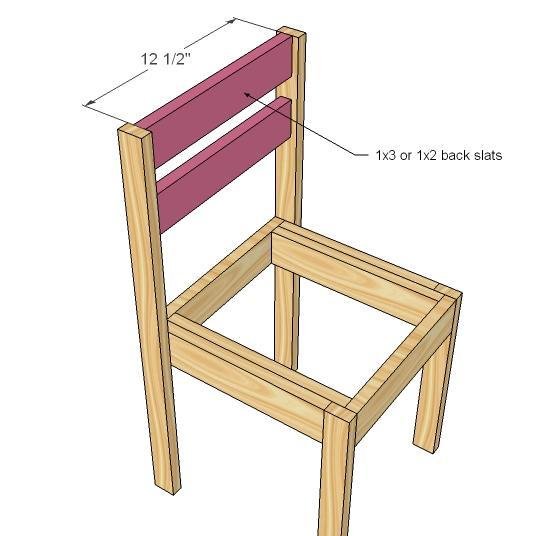
Predrill and attach the back slats to the back legs. I spaced mine 1 1/2″ apart. For a different look, you can cut an arch shape out or use three 1x2s for back slats.
Seat Slats
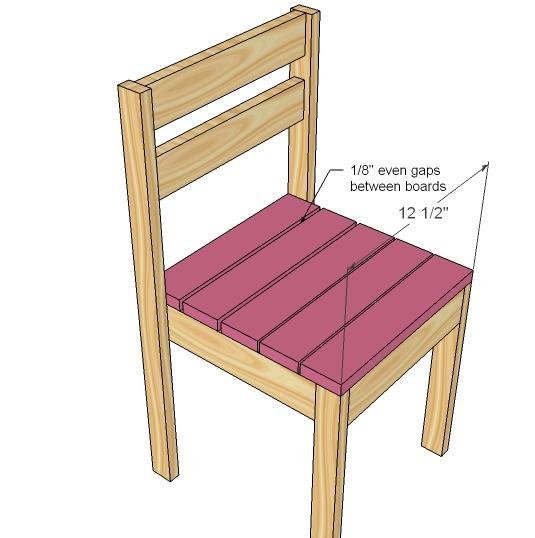
Predrill two holes in both ends of each seat slat. Then screw the seat slats to the chair frame, with 1/8″ gap (evenly spaced between all seat slats) between seat slats. Use glue.
Finishing
Sand all surfaces, starting with a medium grit and finishing with fine. Wipe off the dust, fill any holes or gaps with wood filler, and sand smooth once dry. Apply primer if you're painting, then finish with your choice of paint or stain and seal with a durable clear topcoat. For outdoor projects, use exterior-rated primer, paint or stain, and sealer so the piece stands up to the weather.
Source (temporary): https://www.ana-white.com/woodworking-projects/four-dollar-stackable-childrens-chairs