A Frame Chicken Coop Tractor
How to build A Frame Chicken Coop - portable and small with built in nesting box and perch. You'll love our easy to follow from Builders spend about $100 building this coop. UPDATE: I have created new, updated plans for this chicken coop here.
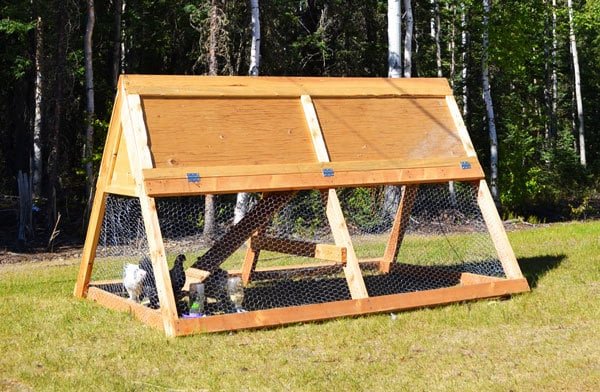
Specifications
| Project type | Chicken Coop Plans |
|---|---|
| Room | Outdoor |
| Style | Farmhouse Furniture |
| Difficulty | Beginner Projects |
Dimensions
Use the size-specific shopping and cut lists below.
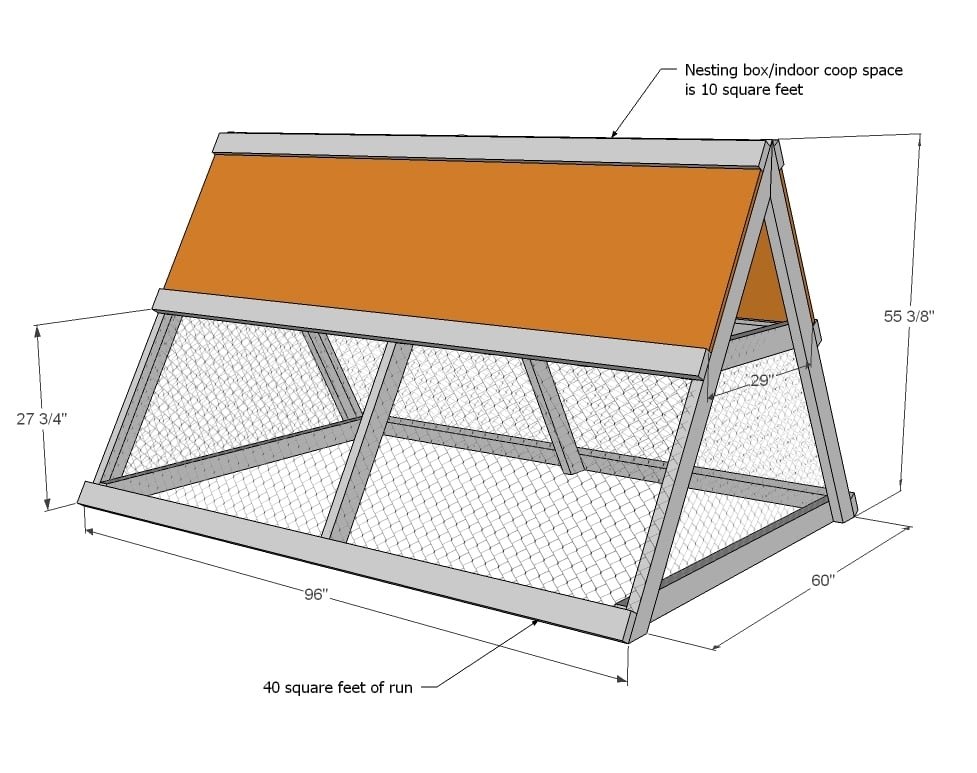
Shopping List
- 14 - 2x4s, 8 feet long
- 1 - sheet 3/4" t1-11
- 6 total T-Strap hinges
- 30 feet of 30" wide chicken wire (I used 36" because I couldn't find 30" locally)
- 2 3/4" exterior self tapping deck screws
- 1/2" exterior staples for chicken wire
- scrap plywood piece for floor of upstairs coop and ladder
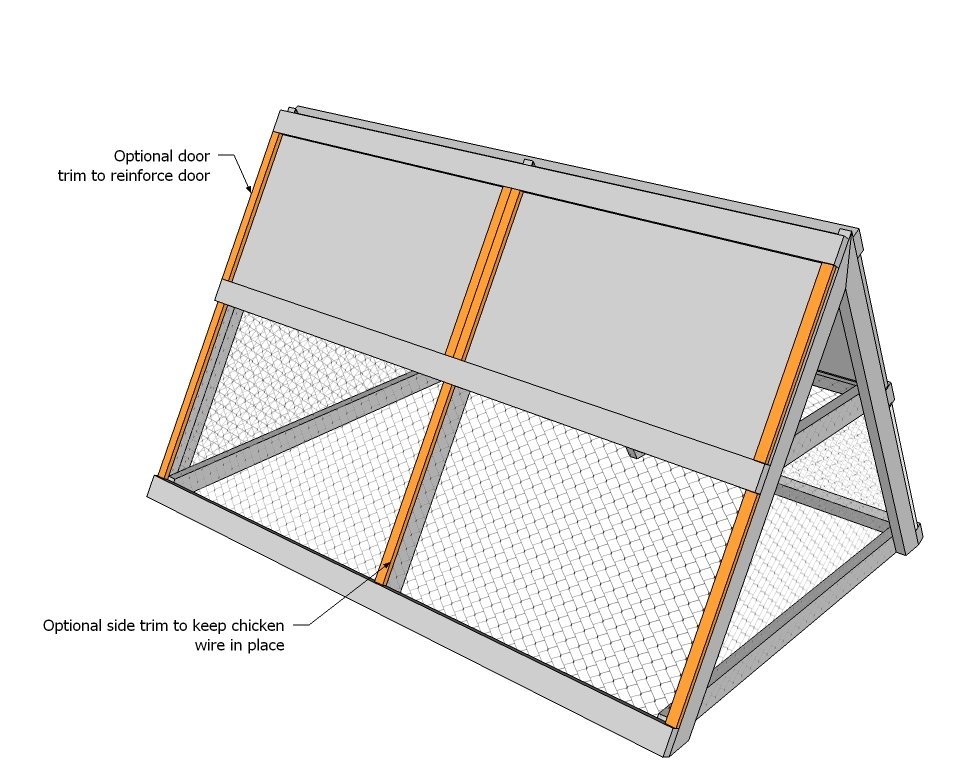
- Optional 1x2s for trim out if desired
Cut List
- 6 - 2x4 @ 64" (Long point measurement, top end cut at 60 degrees off square, bottom end cut at 30 degrees off square)
- 6 - 2x4 @ 96"
- 2 - 2x4 @ 64" (Long point measurement, both ends cut at 30 degrees off square)
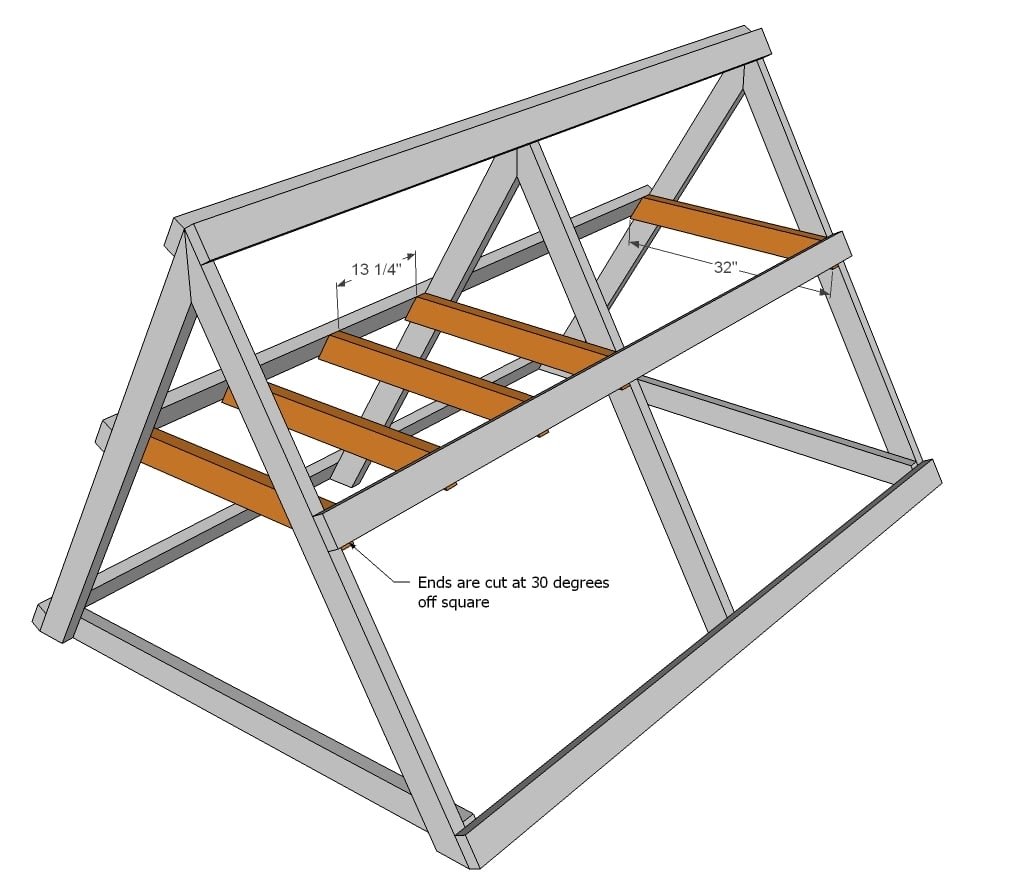
- 5 - 2x4 @ 32" (Long point measurement, both ends cut at 30 degrees off square)
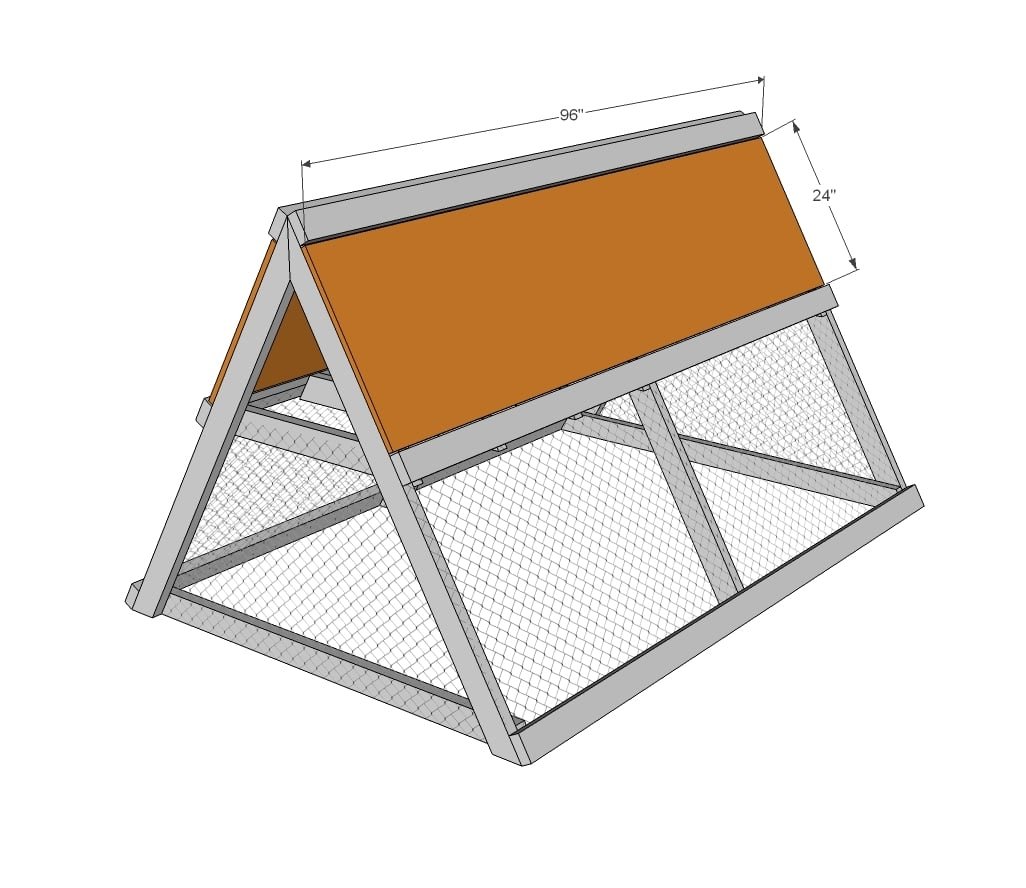
- 4 - pieces t1-11 siding cut into 24" x 48" pieces
- Optional 1x2 trim
Tools
- measuring tape
- square
- pencil
- safety glasses
- hearing protection
- drill
- circular saw
- staple gun
- countersink drill bit
Step-by-step Instructions
Step 1
Cutting the top angle is going to be a pain - I know - if your miter saw does not cut 60 degree angles. What you will need to do is mark the angles with your square and then cut with a circular saw. Remember, it's 60 degrees off square. Once you have your rafters cut, then you can simply attach the side support boards. NOTE: I left a 24 1/2" gap for 24" wide t1-11 - you may wish to leave a slightly wider gap for easier access to the upstairs coop - or you can cut your plywood down to fit. Another trick here is to cover the bottom with chicken wire. These things are always easier done now rather than when you are inside the coop:)
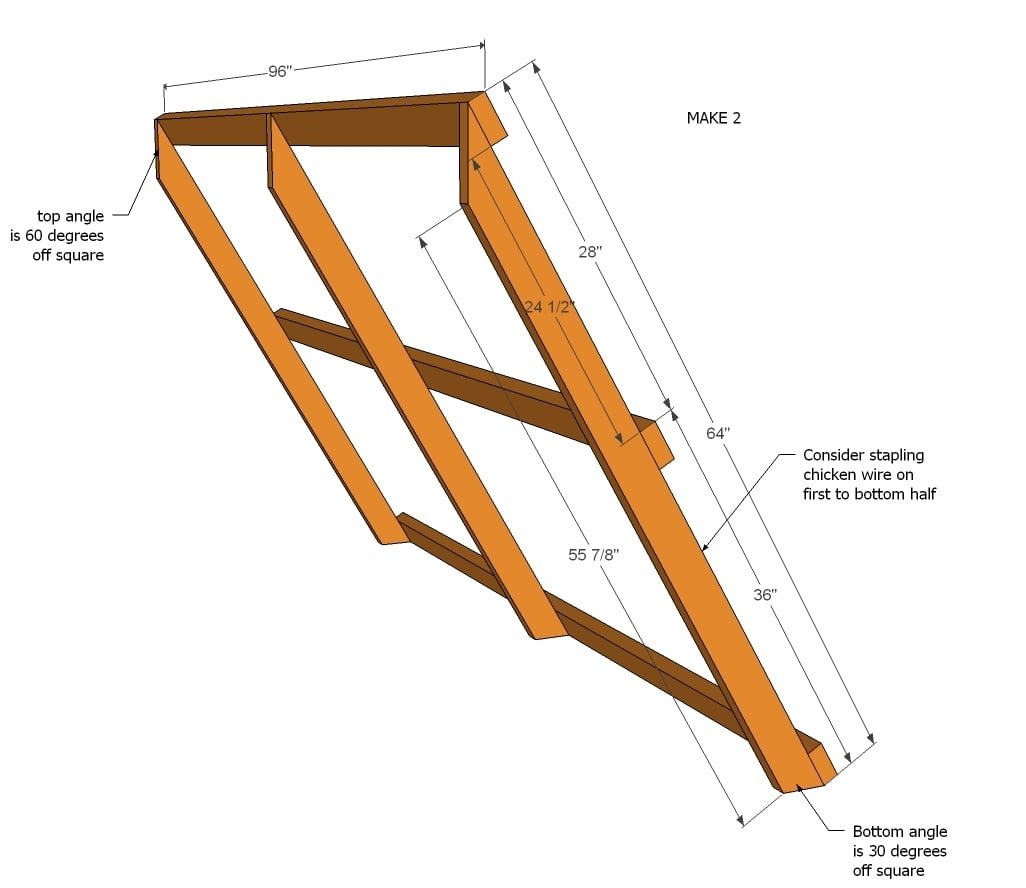
Step 2
Once you have the two walls built, just attach at base with base supports. Then attach tops with countersunk screws.
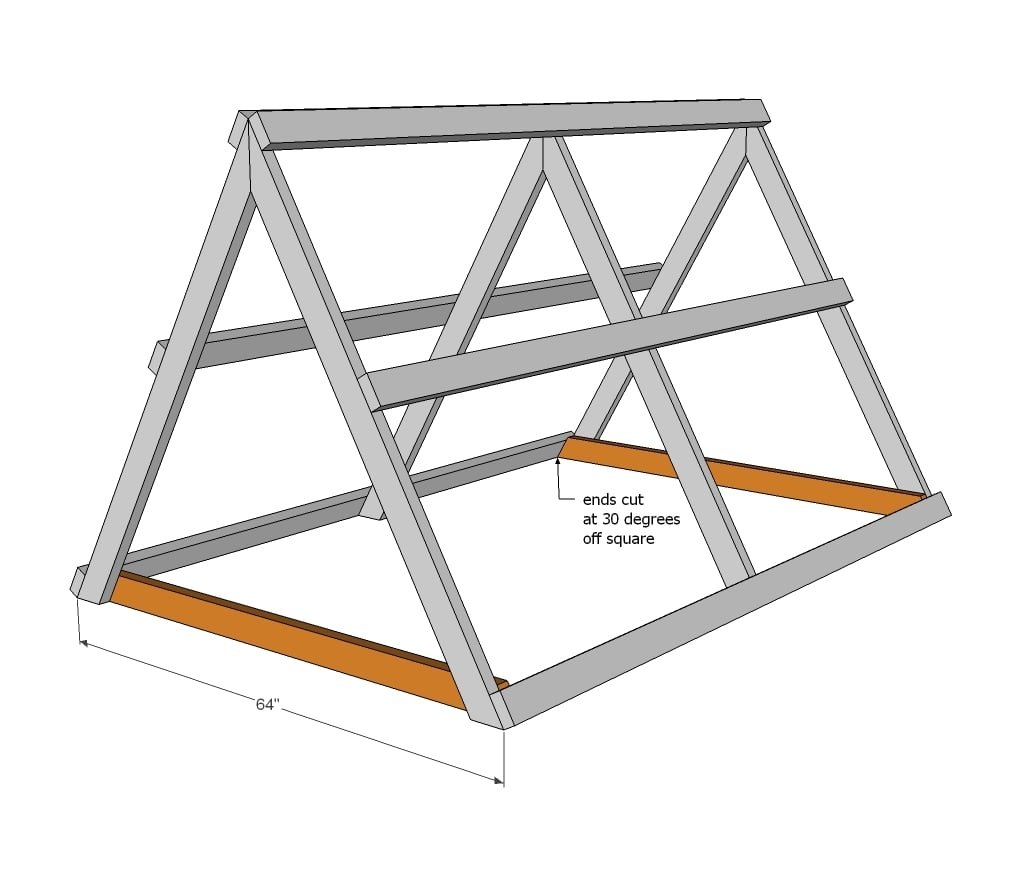
Step 3
Thes are really going to add a ton of strength to the coop! And make a floor for the upstairs room. Attach from outside with the 2 3/4" exterior screws.
Step 4
Now add the doors. For mine, we used two full doors, but a better idea would be to split the doors into two so accessing the different sections is easier. NOTE: We trimmed out the doors in 1x3s for added strength and because the hinges we had required it.
Step 5
Finishing
Sand all surfaces, starting with a medium grit and finishing with fine. Wipe off the dust, fill any holes or gaps with wood filler, and sand smooth once dry. Apply primer if you're painting, then finish with your choice of paint or stain and seal with a durable clear topcoat. For outdoor projects, use exterior-rated primer, paint or stain, and sealer so the piece stands up to the weather.
Source (temporary): https://www.ana-white.com/woodworking-projects/frame-chicken-coop-tractor