A Frame Dollhouse
How to build an A Frame Dollhouse free tutorial by
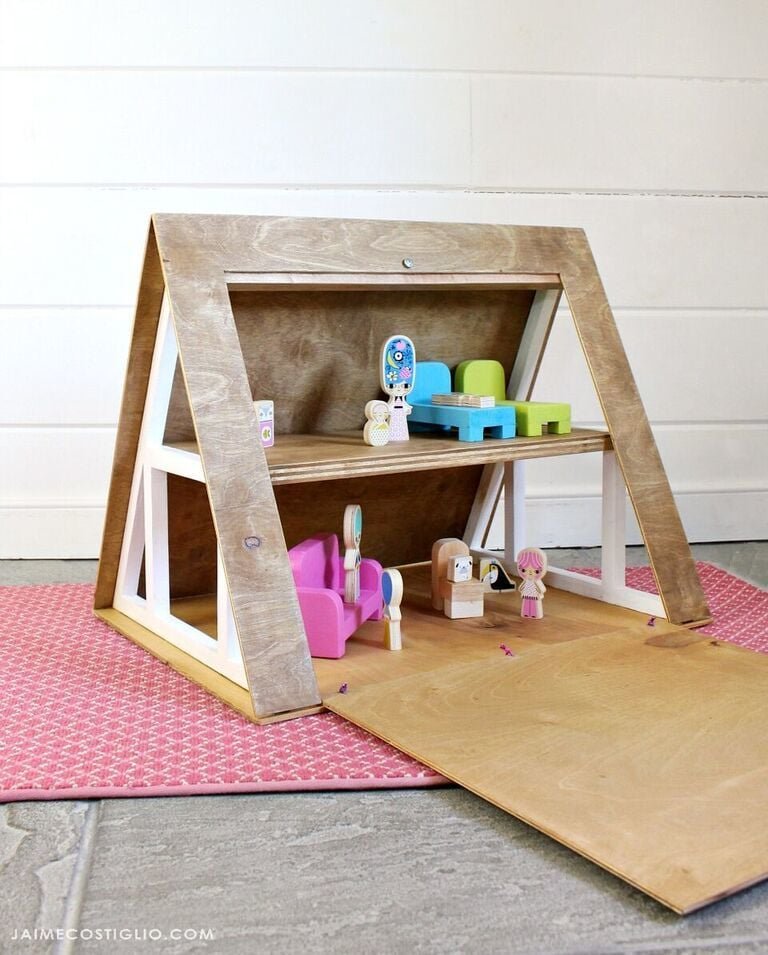
Specifications
| Project type | Toys |
|---|---|
| Room | Kids and Toys |
| Style | Modern Style Furniture Plans |
| Difficulty | Intermediate |
| Estimated cost | Under $20 |
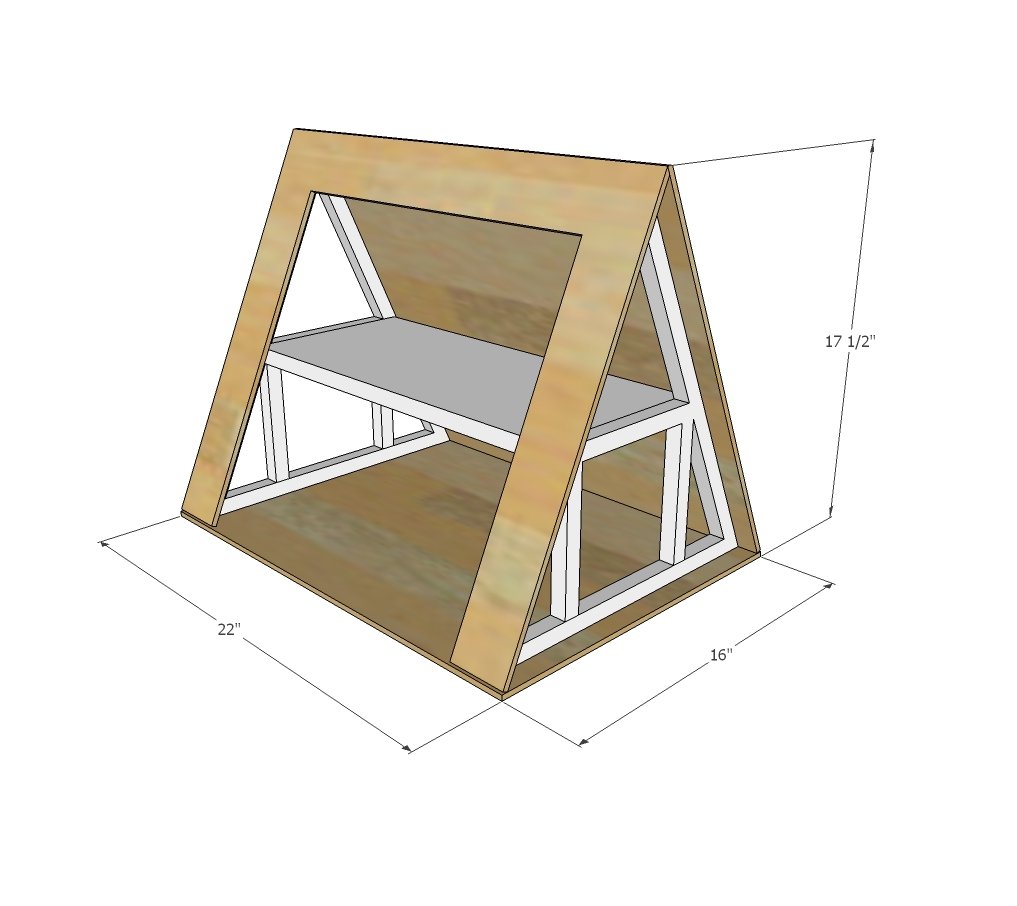
Dimensions
Use the size-specific shopping and cut lists below.
Shopping List
1/4" plywood panel 24" x 48"
3/4" plywood 18-1/2" x 24"
1 - 1x3 @ 18-1/2" long
Cut List
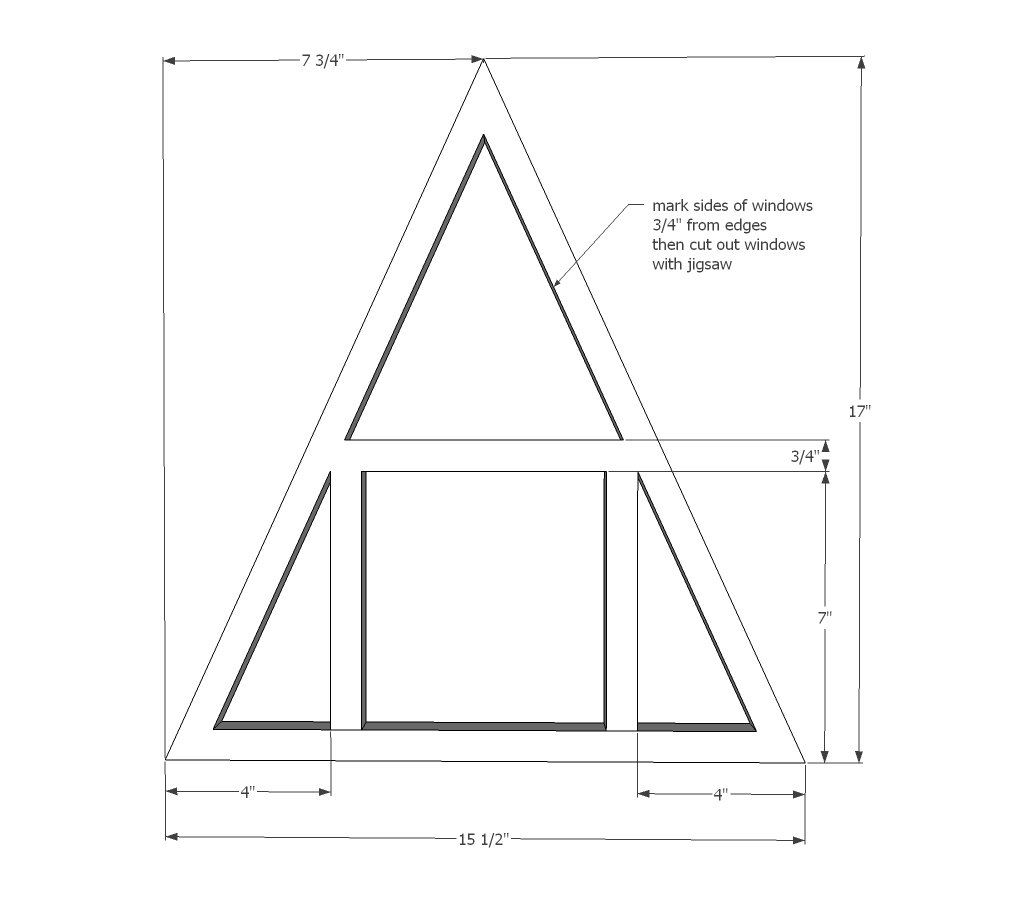
2 - 3/4" plywood pieces, 15-1/2" x 17" - cut into triangles as shown in step 1
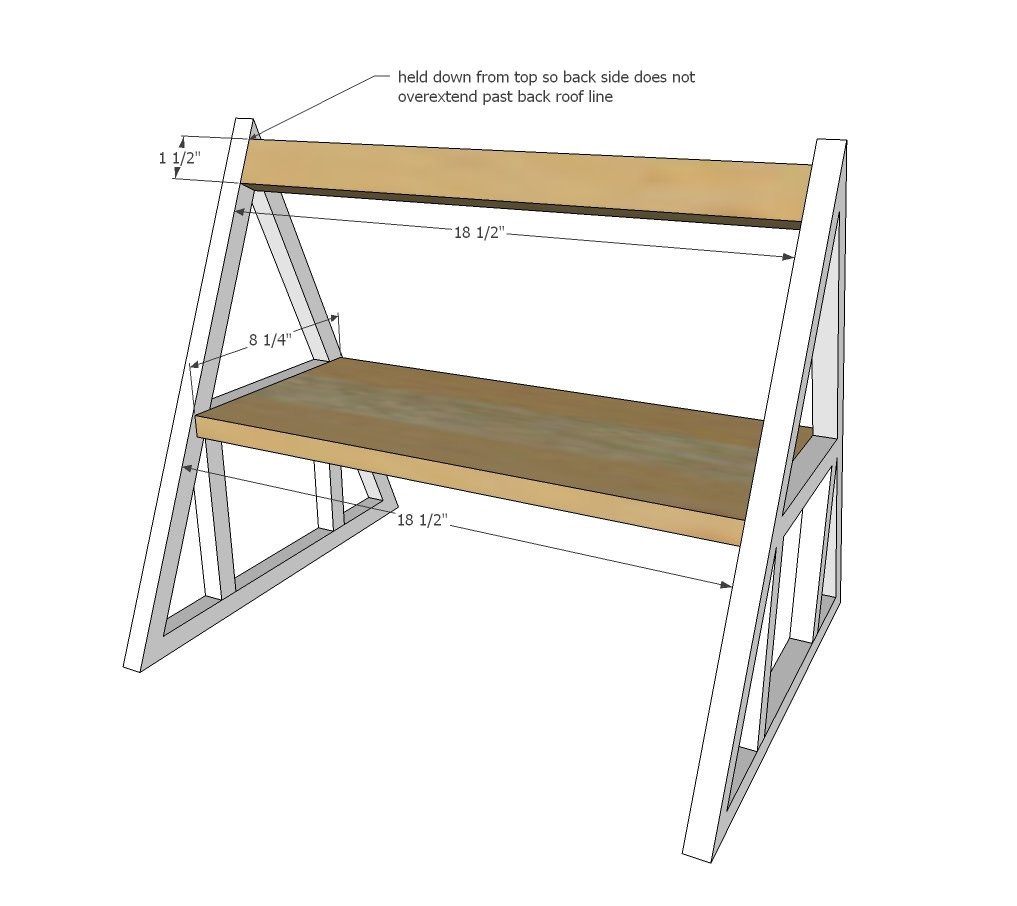
1 - 1x3 @ 18-1/2"
1 - 3/4" plywood @ 18-1/2" x 8-1/4"
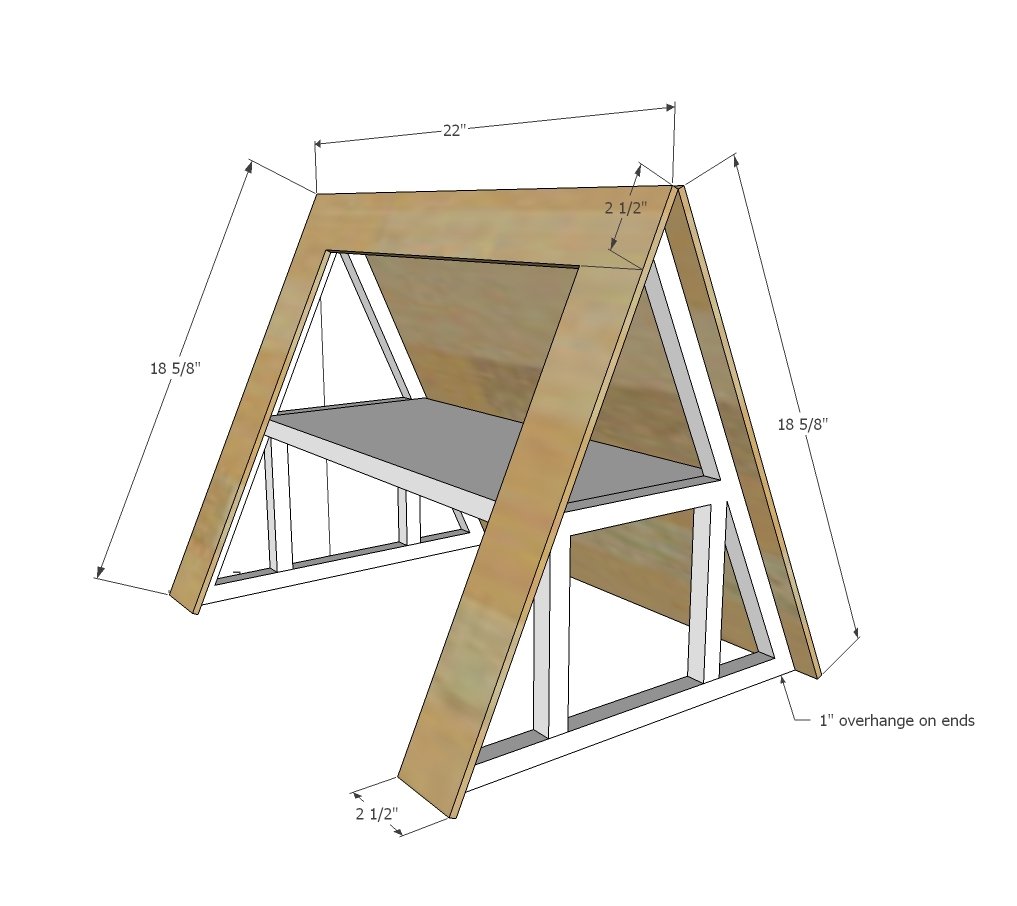
2 - 1/4" plywood @ 18-5/8" x 22"
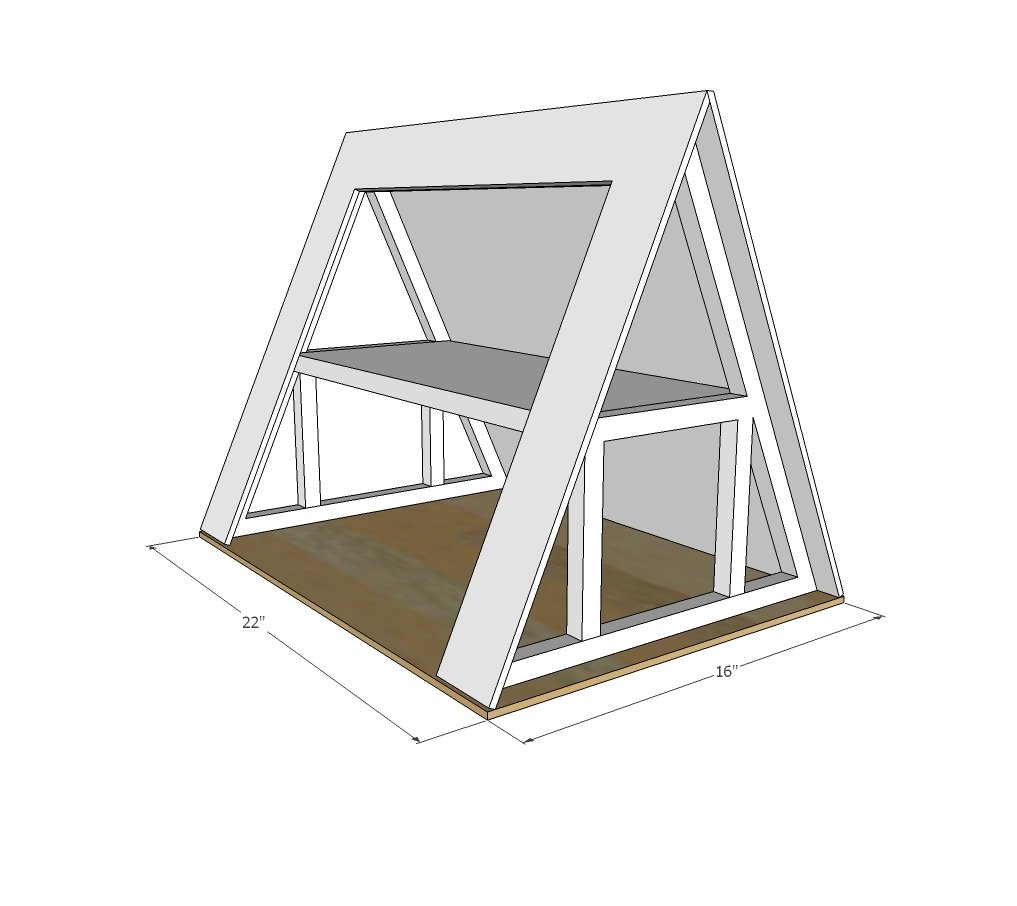
1 - 1/4" plywood @ 22" x 16"
Tools
- measuring tape
- square
- pencil
- safety glasses
- hearing protection
- drill
- circular saw
- jigsaw
- nailer
- sander
- countersink drill bit
Step-by-step Instructions
Step 1
With a jigsaw, cut out sides as shown above. You can change window cutouts but leave the 3/4" edges and second floor horizontal piece. TIP: Drill holes to start cuts with a drill bit sized just bigger than your jigsaw blade.
Step 2
Attach 1x3 and loft floor to the A Frame sides. You can use pocket holes or screws or 1-1/4" nails (or longer) and wood glue. NOTE: 1x2 shown in diagram has been altered to 1x3 to allow roof side to close easier.
Cut roof out on one side to allow roof to fold down.
Attach 1/4" plywood panels to the sides of the 3/4" plwyood with 3/4" brad nails and wood glue.
Step 4
Nail bottom to 3/4" plywood edges.
Step 5
Finishing
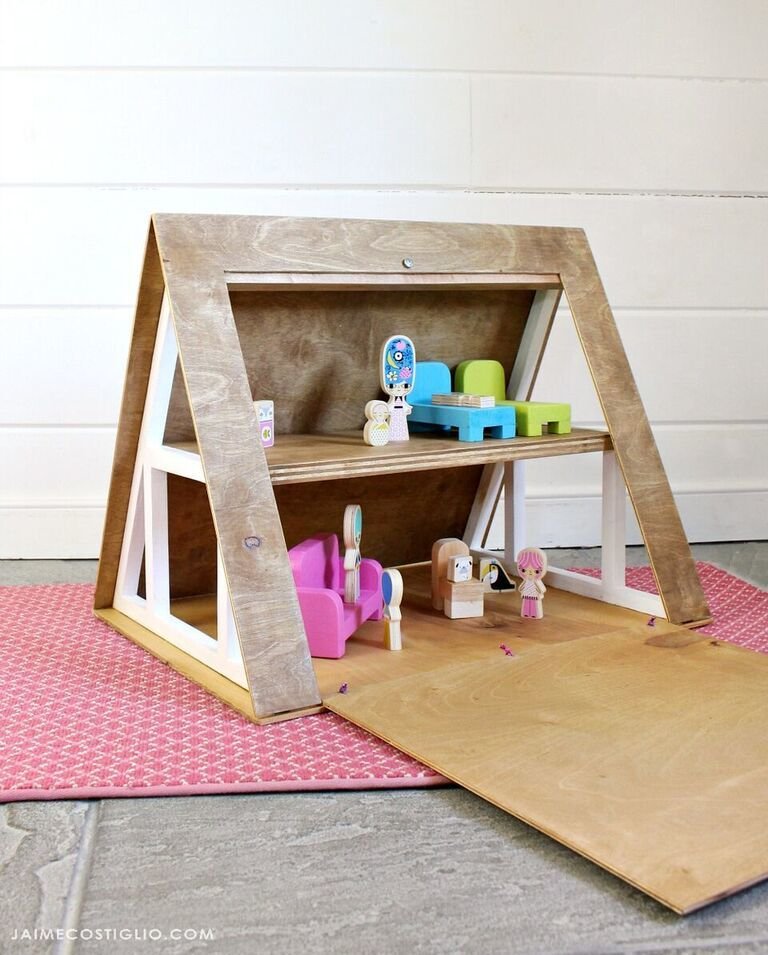
Sand all surfaces, starting with a medium grit and finishing with fine. Wipe off the dust, fill any holes or gaps with wood filler, and sand smooth once dry. Apply primer if you're painting, then finish with your choice of paint or stain and seal with a durable clear topcoat. For outdoor projects, use exterior-rated primer, paint or stain, and sealer so the piece stands up to the weather.
Source (temporary): https://www.ana-white.com/woodworking-projects/frame-dollhouse