Framed Mirror Tile Wall Decor
Transform a basic mirror tile into an eye-catching decorative piece with ’s free tutorial for framed mirror tile wall decor. Perfect for brightening windowless spaces, this beginner-friendly DIY project uses just mirror tiles and simple lumber (like 1×2 boards). You'll get step-by-step instructions, a cut list, tool guidance, and even a video walkthrough to help bring this affordable yet stylish mirror to life. A fun, low-cost way to elevate your home decor using tools you already have.
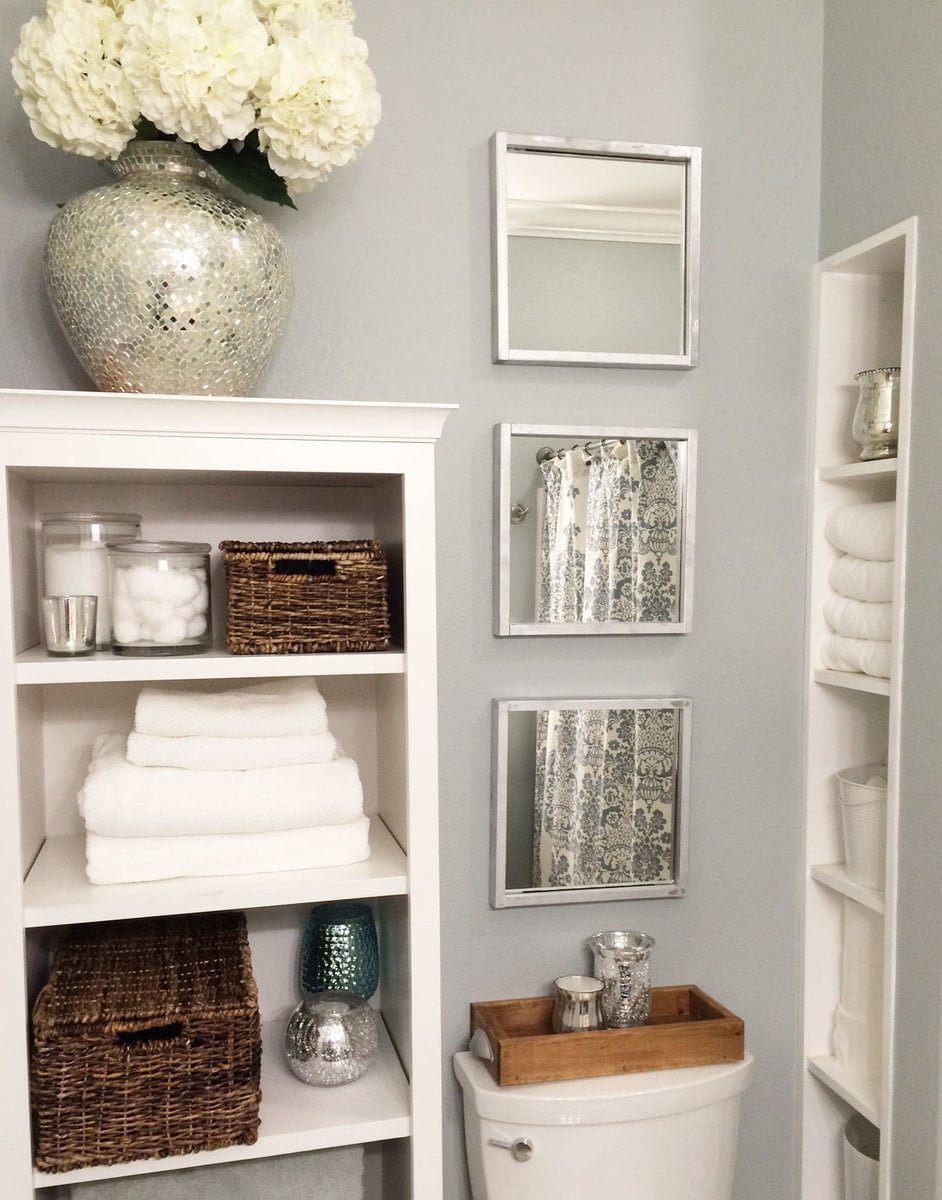
Specifications
| Project type | frames |
|---|---|
| Room | Teens |
| Style | Tradditional Style Furniture Plans |
| Difficulty | Starter Projects |
| Estimated cost | Under $20 |
Dimensions
Use the size-specific shopping and cut lists below.
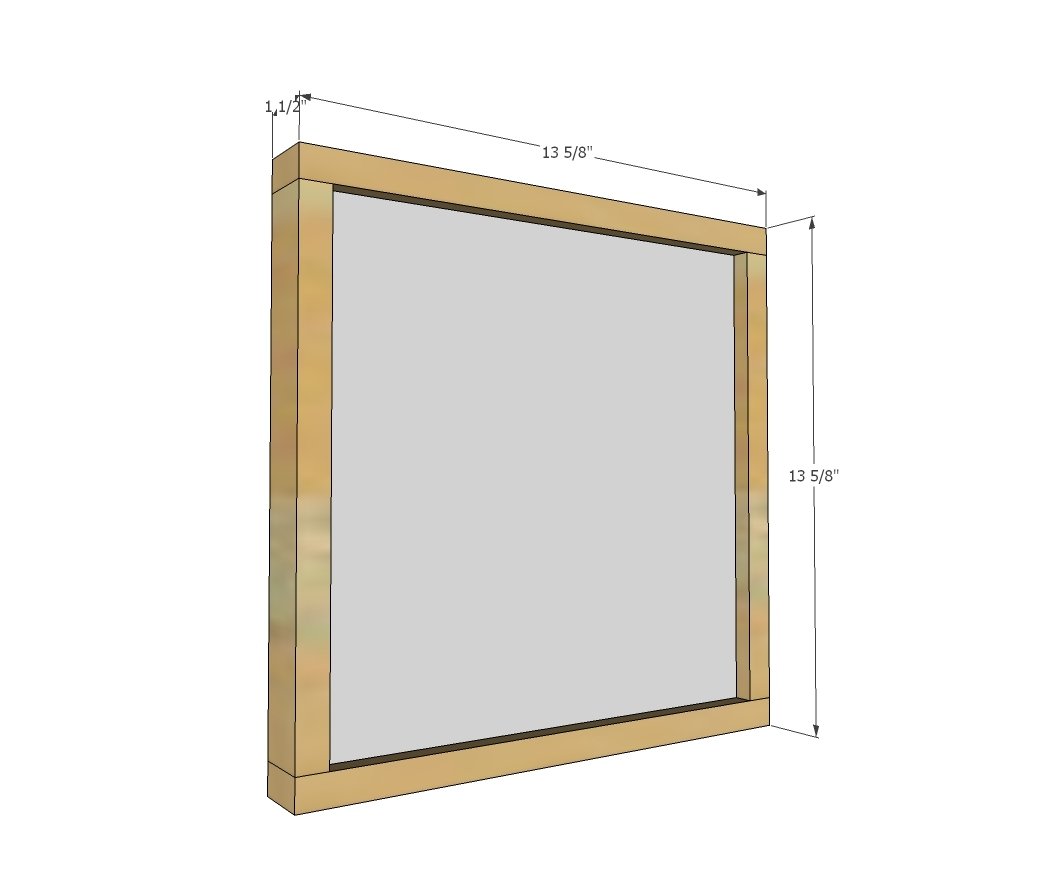
Shopping List
For ONE Mirror -
- 1 - 12" x 12" mirror tile
- 1 - 1x2 @ 8 feet long
- mirror adhesive
- wood glue and nails or screws or pocket hole screws
- picture hanging kit and hanging hardware
Cut List
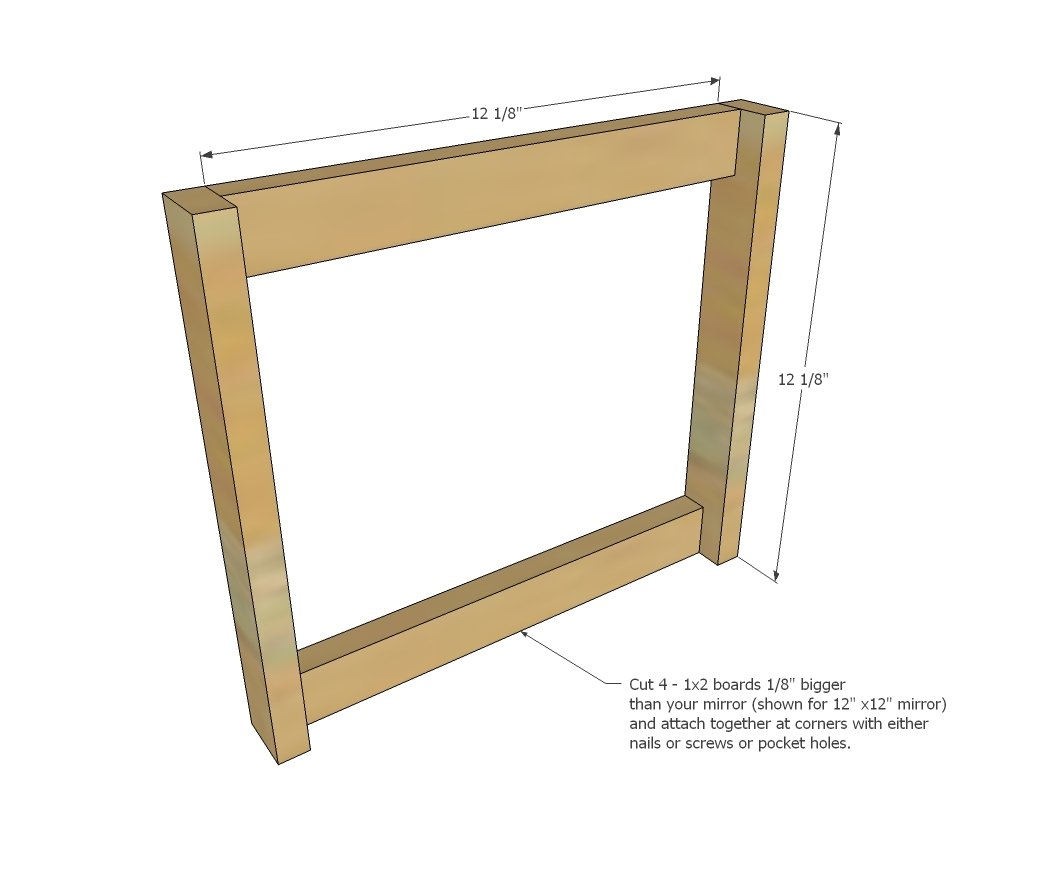
- 4 - 1x2 @ 12-1/8" (for 12" mirror tiles)
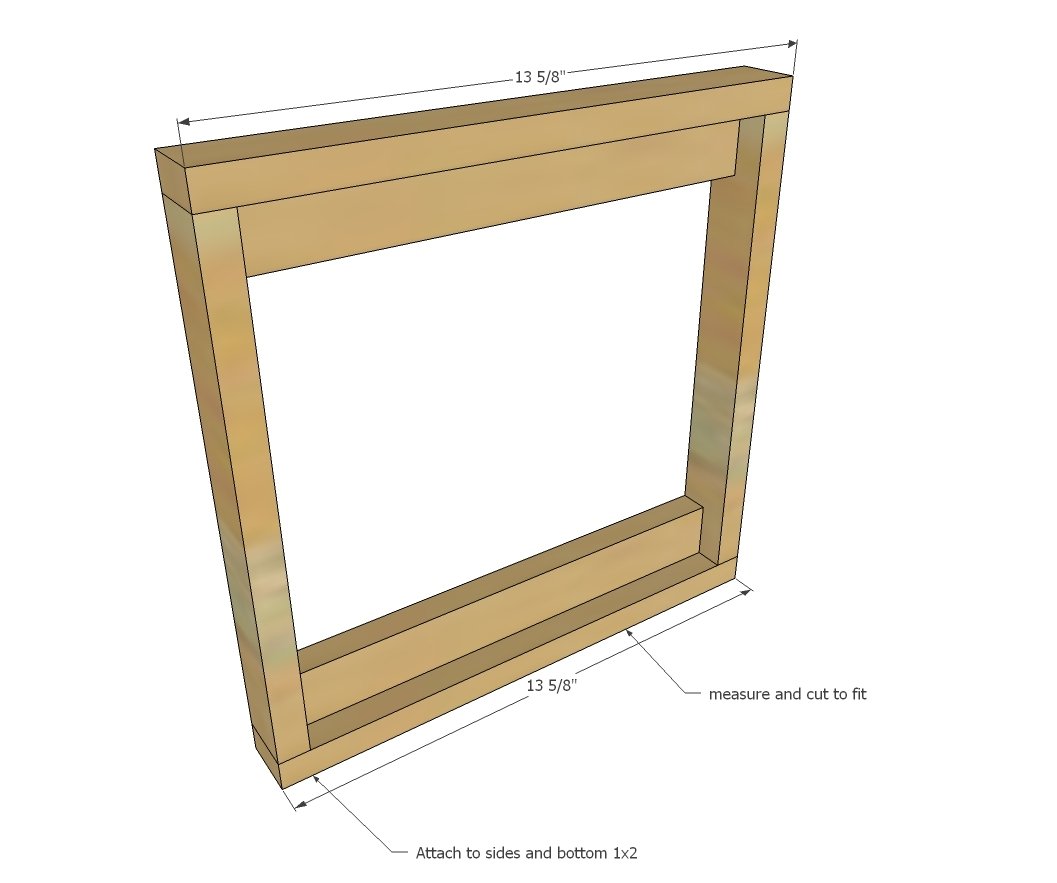
- 2 - 1x2 @ 13-5/8" (cut to fit)
Tools
- measuring tape
- square
- pencil
- safety glasses
- hearing protection
- circular saw
- nailer
- sander
Step-by-step Instructions
Step 1
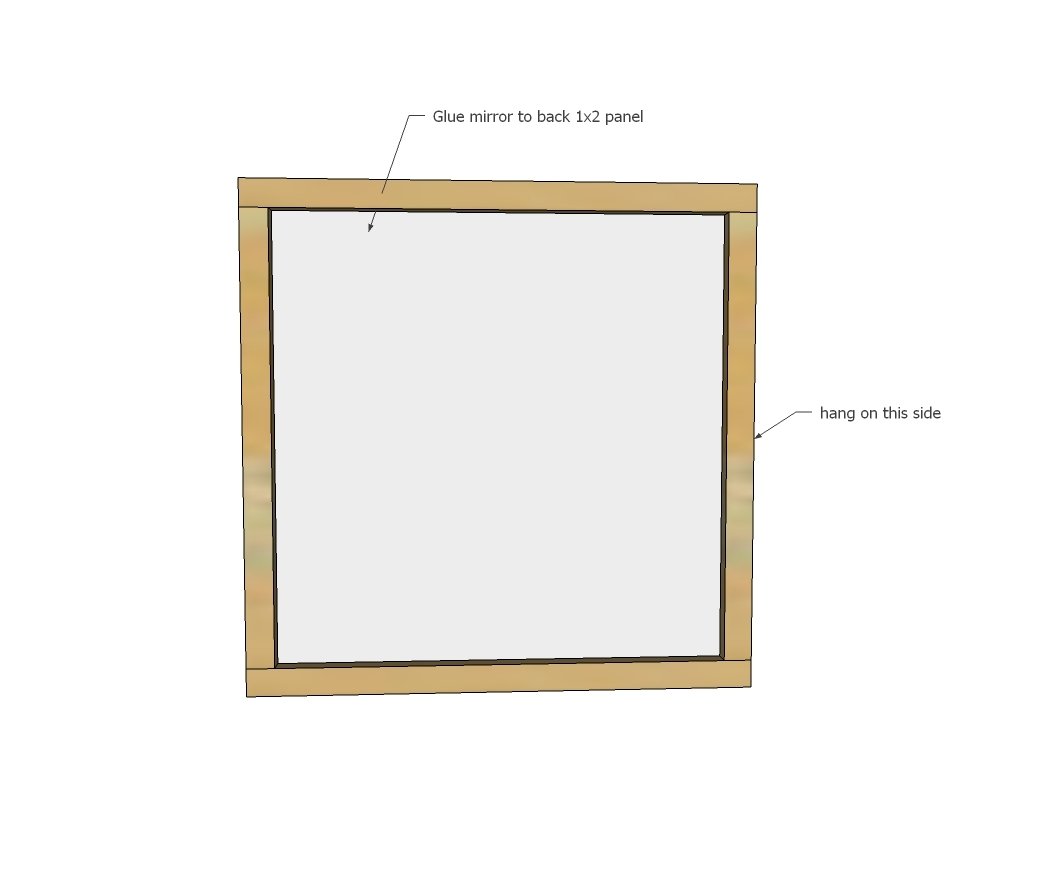
Cut 4 - 1x2s 1/8" bigger than your mirror (you don't want too tight or it could crack your mirror. Also if you live in moist environments where wood can expand, consider using MDF). Attach together as shown.
Step 2
Then cut two more 1x2s and attach on outsides with glue and nails or screws or pocket holes to all of the exisiting 1x2 boards.
NOTE: Add picture hanging kit hardware before installing mirror.
Glue the mirror to the frame according to the directions with the mirror. For added security, you may wish to also apply a small bead of clear silicone around the front of the mirror, further preventing mirror from popping outward. Hang using a picture hanging kit.
Finishing
Sand all surfaces, starting with a medium grit and finishing with fine. Wipe off the dust, fill any holes or gaps with wood filler, and sand smooth once dry. Apply primer if you're painting, then finish with your choice of paint or stain and seal with a durable clear topcoat. For outdoor projects, use exterior-rated primer, paint or stain, and sealer so the piece stands up to the weather.
Source (temporary): https://www.ana-white.com/woodworking-projects/framed-mirror-tile-wall-decor