Frameless Nightstands with Drawers and Shelves
Build a matching set of extra-large modern nightstands framed from just one sheet of plywood! These DIY frameless nightstands feature a spacious drawer, two large open shelves, and a clean, simple design that fits any style. With minimal waste, detailed step-by-step diagrams, and a full shopping and cut list, this makes it easy to create beautiful, functional bedside tables on a budget.
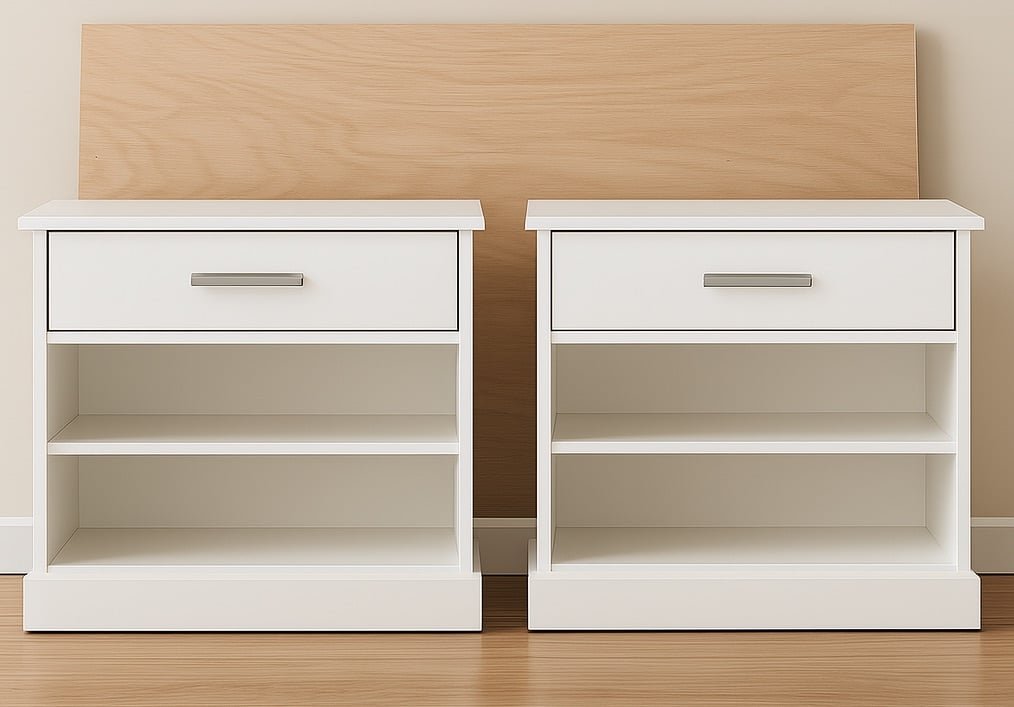
Specifications
| Project type | Nightstands |
|---|---|
| Room | Storage Solutions |
| Difficulty | Intermediate |
| Estimated cost | $100-$150 |
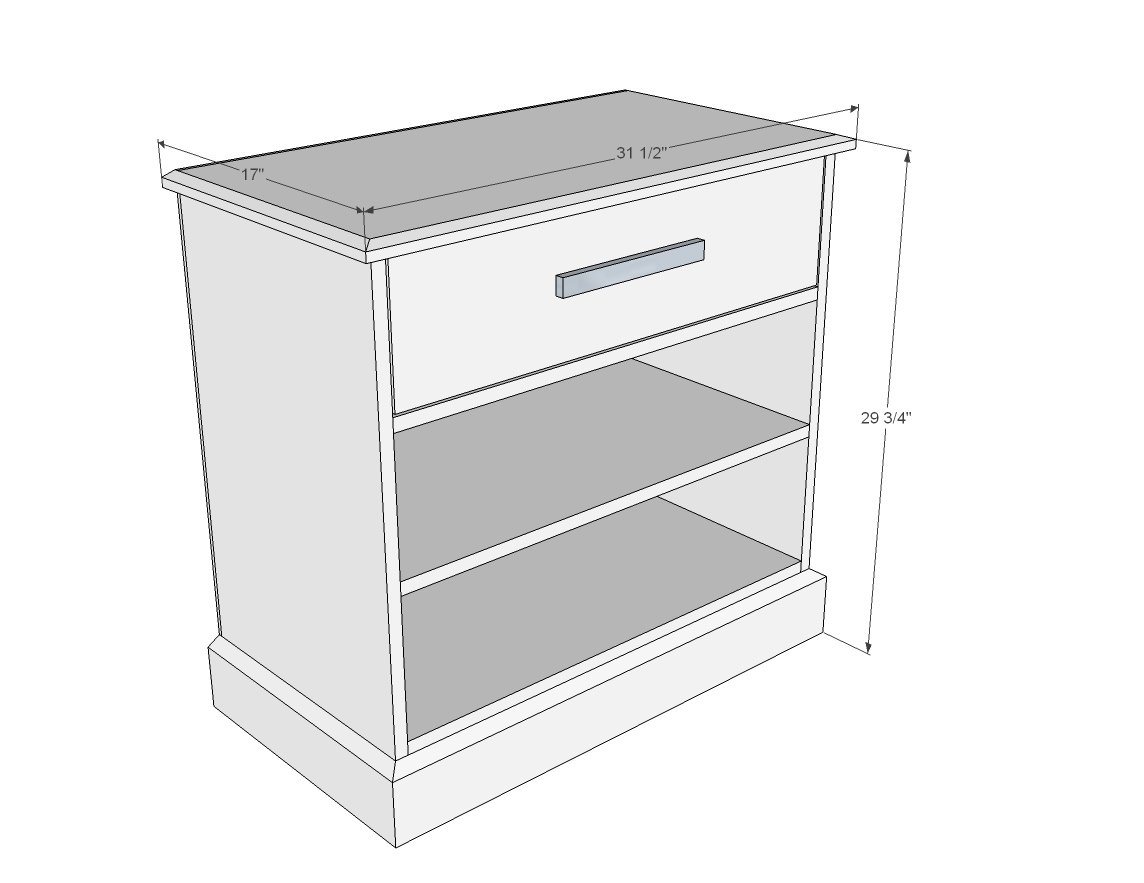
Dimensions
Use the size-specific shopping and cut lists below.
Shopping List
For TWO Nightstands
- 1 - sheet of 3/4" thick plywood ripped into strips 15-3/4" wide x 8 feet long
- 2 - 1x2 @ 6 feet long
- 1 - sheet of 1/4" plywood or other hardboard for backs and drawer bottoms
- 2 - 1x4 @ 8 feet long (for building drawers)
- 1 - 1x8 @ 5 feet long (drawer faces)
- 1-1/4" pocket hole screws for assembling carcass and drawers
- 3/4" brad nails or brads for attaching back and drawer bottom
- 1-1/4" brad nails or brads for attaching trim/drawer face
- 2 - set of drawer slides (recommend euro style drawer slide, 14" length)
- 2 knobs or handles
- Edge banding is recommend
- 12 feet of base moulding (4-1/4") 12 feet of cove moulding for the top edge
Cut List
For TWO nightstands
CARCASSES
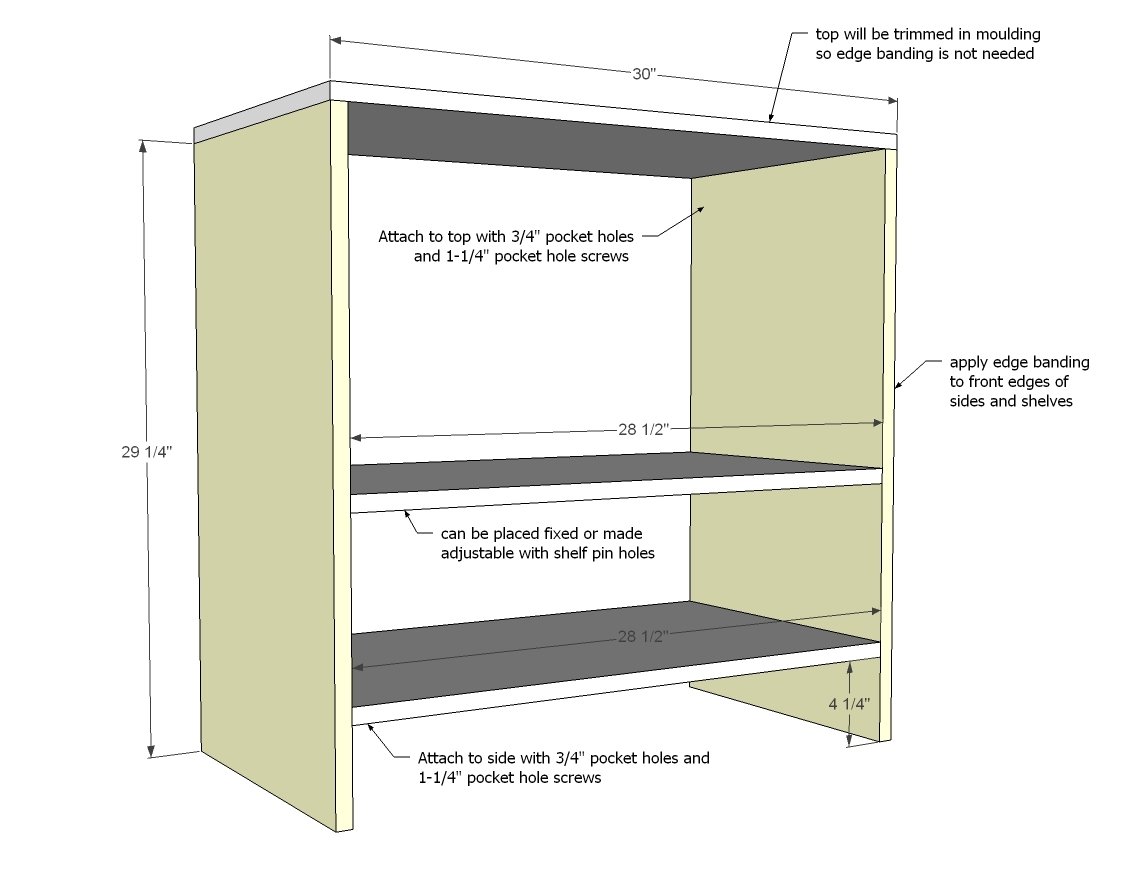
- 2 - 3/4" plywood @ 15-3/4" x 30" (tops)
- 4 - 3/4" plywood @ 15-3/4" x 29-1/4" (sides)
- 4 - 3/4" plywood @ 15-3/4" x 28-1/2" (shelves)
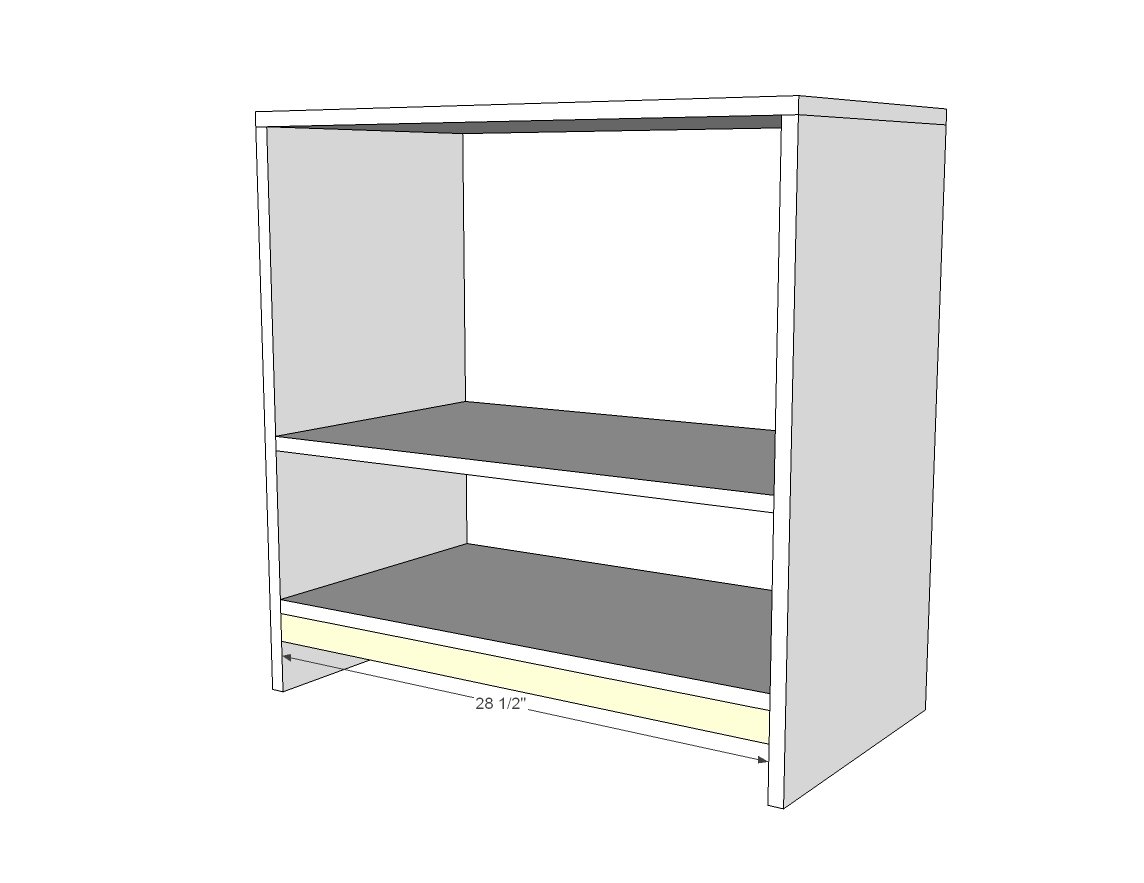
- 4 - 1x2 @ 28-1/2" (bottom shelf support)
- 2 - 1/4" plywood @ 30" x 30" (backs)
DRAWERS - Adjust to fit your openings and drawer slides, measurements shown are for 1/2" clearance (1" overall clearance) drawers slides)
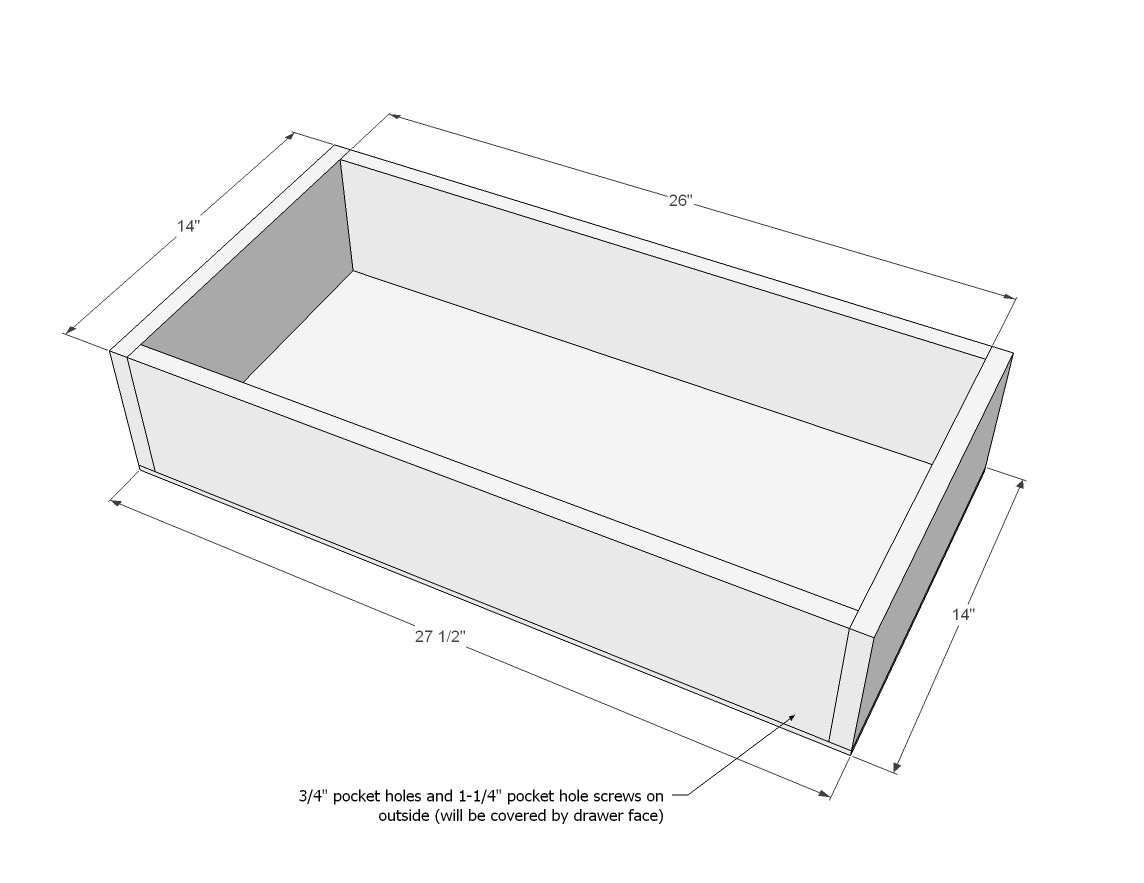
- 4 - 1x4 @ 14" - drawer box sides
- 4 - 1x4 @ 26" - drawer box front and backs
- 2 - 1/4" plywood @ 27-1/2" x 14" (drawer bottoms)
- 2 - 1x8 @ 28-3/8" (drawer face)
Cut moulding to fit
Tools
- measuring tape
- square
- pencil
- safety glasses
- hearing protection
- kreg-jig
- drill
- circular saw
- compound miter saw
- nailer
- sander
Step-by-step Instructions
Step 1
Build the basic box out of the plywood. If you are staining, you may wish to edge band the front edges before you assemble. Shelf can be attached fixed (you may wish to attach after installing the drawer) or you can make a floating shelf with shelf pins.
Step 2
This board will tie in the bottom, help keep the piece square, and also give you something to attach the base moulding to.
Step 3
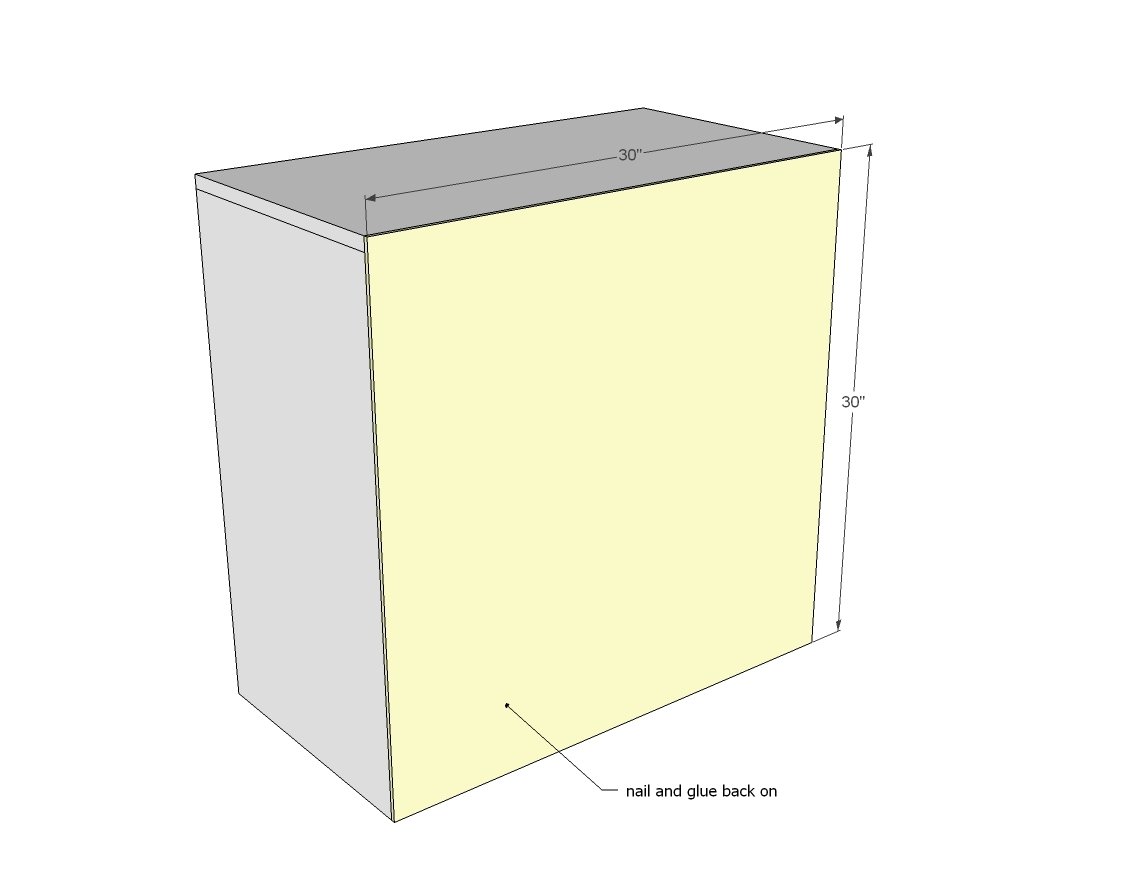
Attach back to the back with glue and finish nails.
Step 4
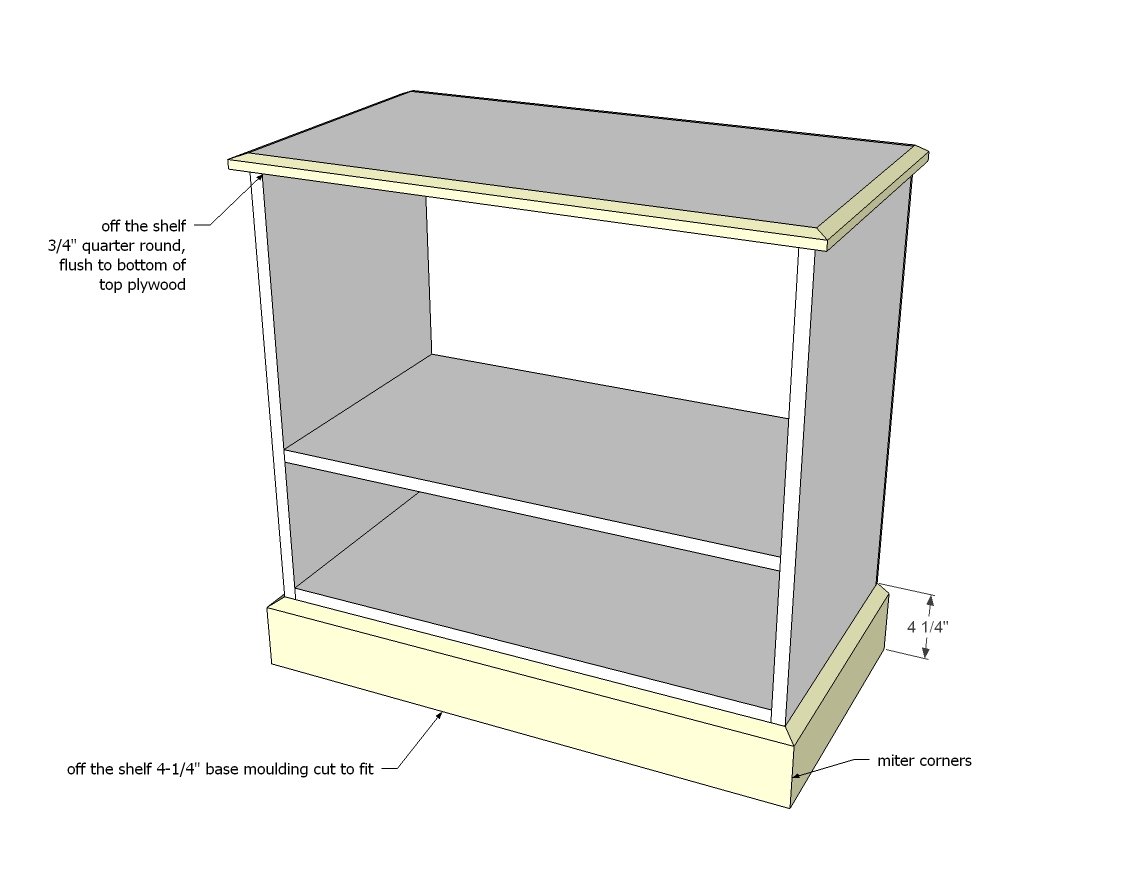
Miter the corners of the base moulding and wrap bottom with finish nails and glue.
Step 5
Use 1-1/4" brad nails to nails the drawer box together and glue. Use 3/4" staples or brad nails to attach the 1/4" plywood to the bottom of the drawer box. Use the plywood to square up the drawer box. Here is a video showing how to build drawers and install them for this type of drawer slide
Step 6
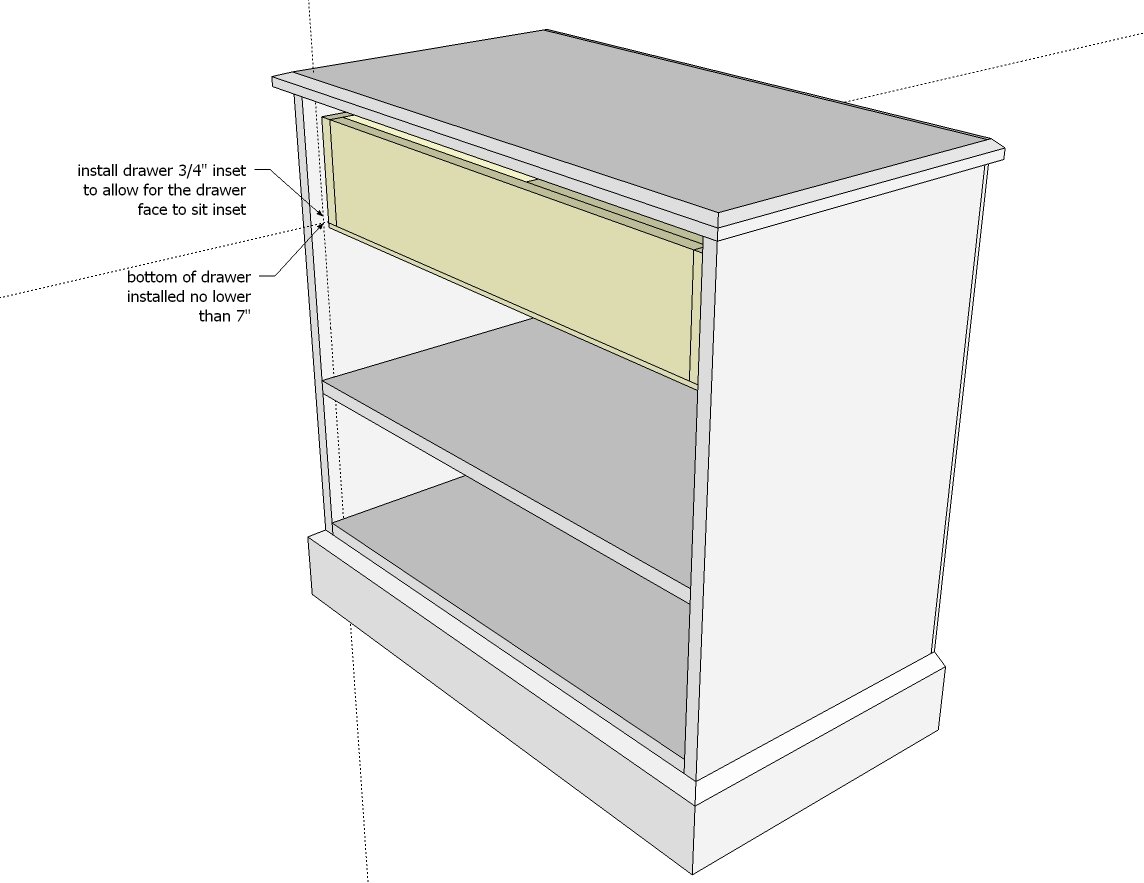
Install drawer inside cabinet, not more than 7" from top (to allow drawer face to hide drawer box) using drawer slides. Inset drawers 3/4" from outside of the nightstand.
Step 7
Attach drawer face to front of drawer with a couple of finish nails from outside. Then remove drawer and add a few 1-1/4" screws from inside. TIP: attach hardware to drawer face first.
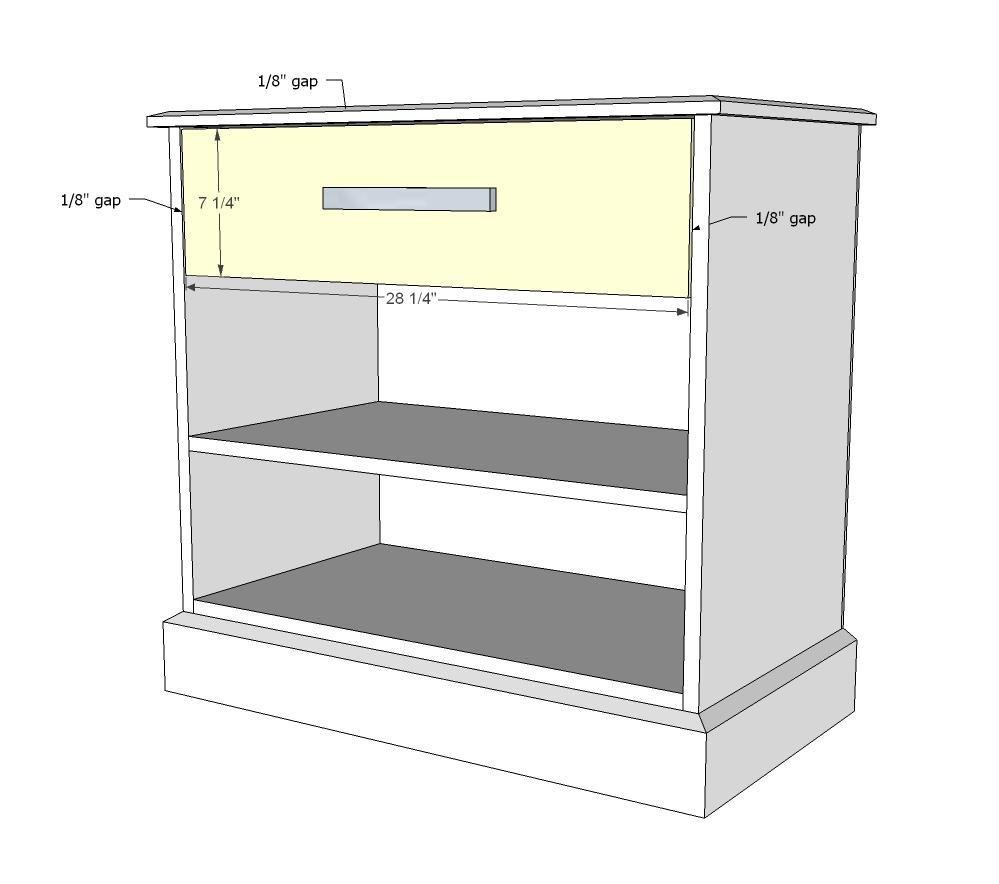
Step 8
Trim bottom edge of drawer out with remaining 1x2. Can be attached with pocket holes or 1-1/4" finish nails from outside.
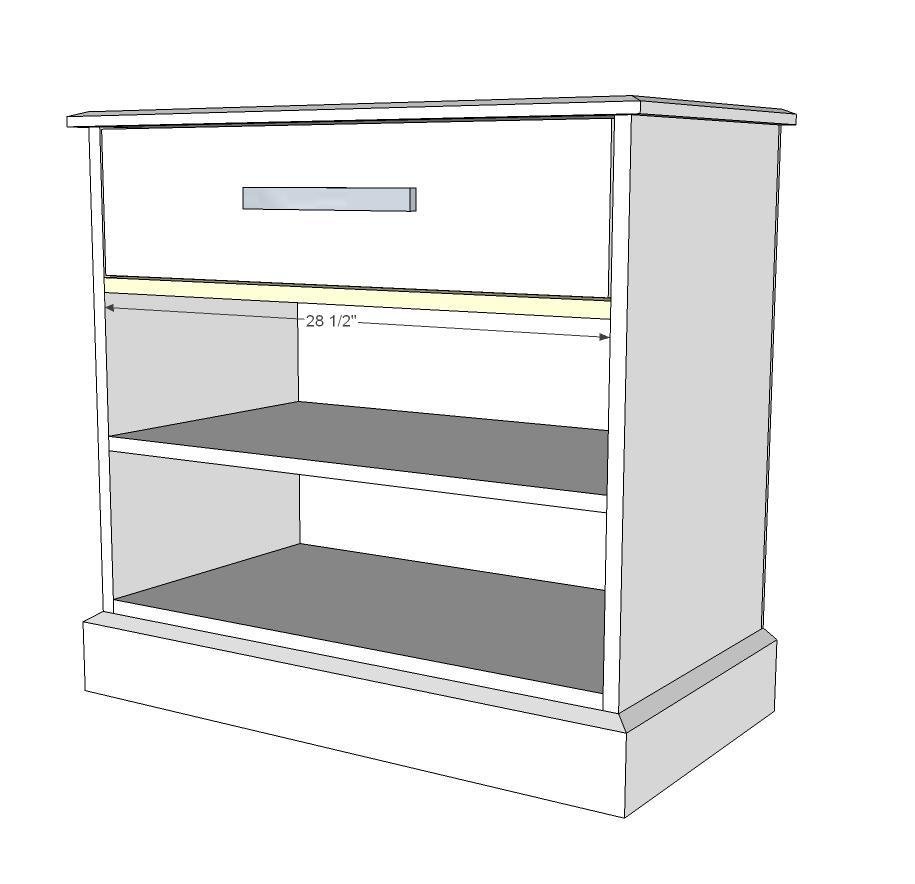
Finishing
Sand all surfaces, starting with a medium grit and finishing with fine. Wipe off the dust, fill any holes or gaps with wood filler, and sand smooth once dry. Apply primer if you're painting, then finish with your choice of paint or stain and seal with a durable clear topcoat. For outdoor projects, use exterior-rated primer, paint or stain, and sealer so the piece stands up to the weather.
Source (temporary): https://www.ana-white.com/woodworking-projects/frameless-nightstands-drawers-and-shelves-frame-set-2-1-sheet-plywood