Frameless Office Open Shelf Base
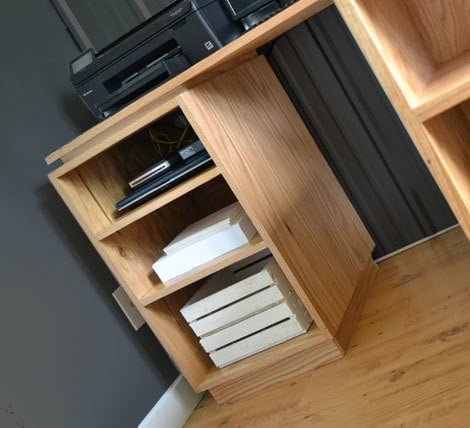
DIY Plywood Desk Base with Open Storage – Build your own custom desk base with! Designed from simple plywood, this base is easy to build, budget-friendly, and versatile. The open shelf design provides accessible storage for books, baskets, or office supplies, keeping your workspace clean and organized. Want even more function? You can easily add a drawer to tuck away small items for a clutter-free desktop. The clean, modern design makes it perfect for home offices, kids’ study spaces, or craft rooms. Features: • Easy to build – beginner-friendly project with simple cuts • Low-cost design – uses plywood for an affordable build • Open storage shelves – perfect for baskets, books, or supplies • Customizable – add a drawer or modify the size to fit your space • Eco-friendly option – shown built with PureBond formaldehyde-free plywood The include step-by-step instructions, detailed diagrams, and plenty of photos to help you build with confidence. Pair two bases with a desktop to create a full workstation that’s both beautiful and functional. 👉 Get the today and build your own sturdy desk base with open storage!
Specifications
| Project type | Bookshelf and Bookcase Plans |
|---|---|
| Room | Craftroom |
| Style | Green or Eco-Friendly Style Furniture |
| Difficulty | Intermediate |
| Estimated cost | $50 - $100 |
Dimensions
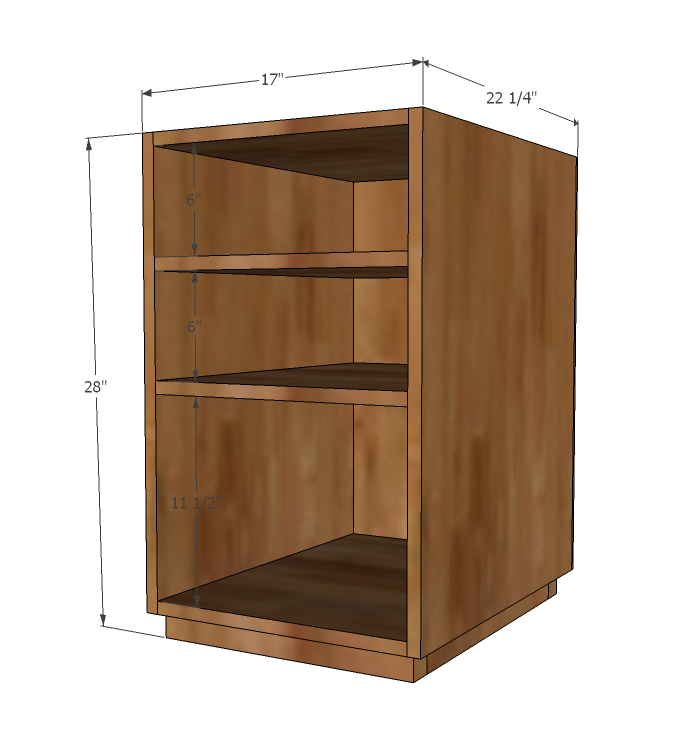
Use the size-specific shopping and cut lists below.
Shopping List
- 1 - Sheet 3/4" Hardwood Plywood
- 1 - 1/4" sheet 1/4" hardwood plywood
- 1 - 1x2 @ 6 feet long (optional, see step 3)
- Edge Banding, 1 25' long roll, in matching wood grain
Cut List
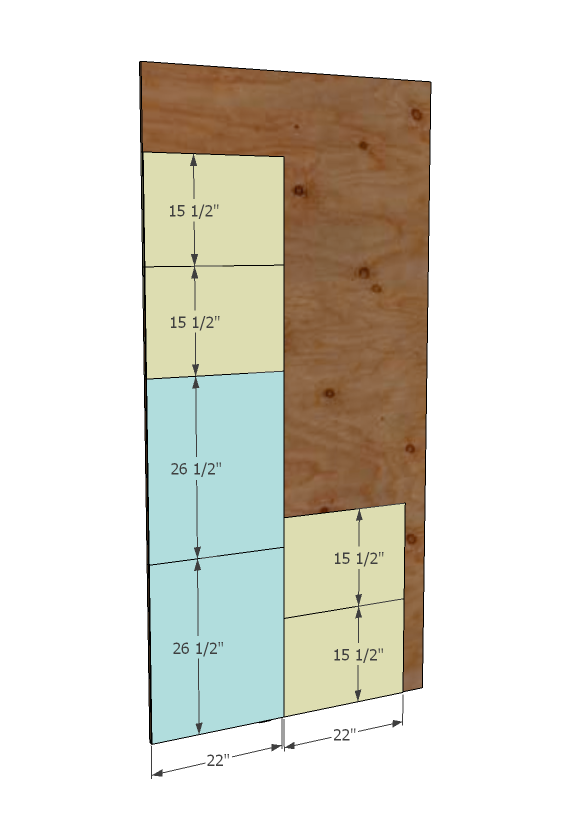
- 4 - 3/4" plywood 22" x 15 1/2" (Shelves)
- 2 - 3/4" plywood 22" x 26 1/2" (Sides)
- 1 - 1/4" plywood @ 17" x 26 1/2" (Back)
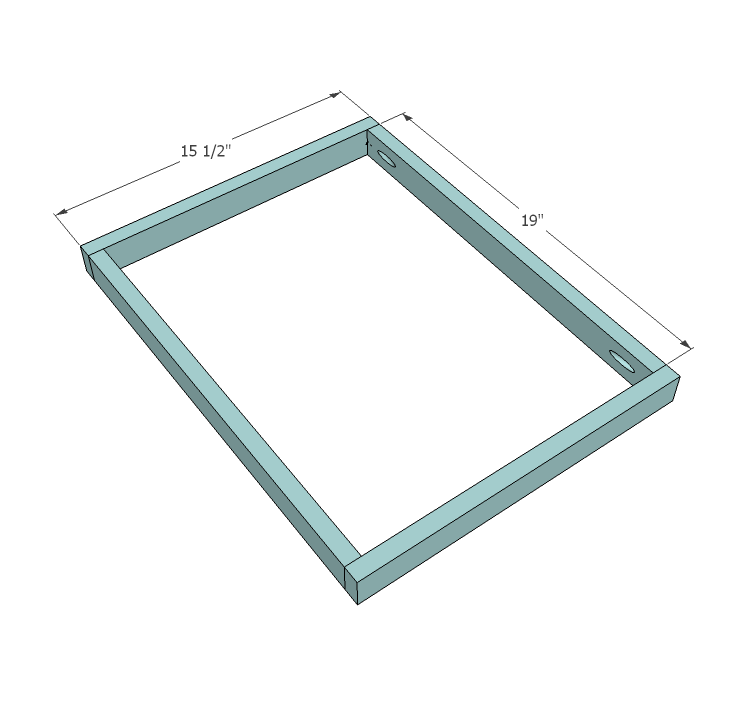
- 2 - 1x2 @ 15 1/2" 2 - 1x2 @ 19"
Tools
- measuring tape
- square
- pencil
- safety glasses
- hearing protection
- kreg-jig
- drill
- circular saw
- table saw
- nailer
- sander
- level
- countersink drill bit
Step-by-step Instructions
Step 1
There's more to cutting plywood than a chalk line and a circular saw. First of all, you have to consider the direction of the wood grain. And then you have to take into account the saw blade width. And then it's about conserving plywood for future projects and cutting tight, square corners - without having to finish the cuts with a jigsaw or handsaw. For plywood projects, I still like to treat pieces like "boards" - it makes the project that much easier and your wood grains will match right. You can use the scraps above to build a drawer (we'll get to that) or door, or even a desktop organizer. Save your scraps - it's the silver lining. First rip your plywood into two 22" wide strips, 8 feet long. And then from these strips, cut your sides/shelves, treating the strips like boards.
Step 2
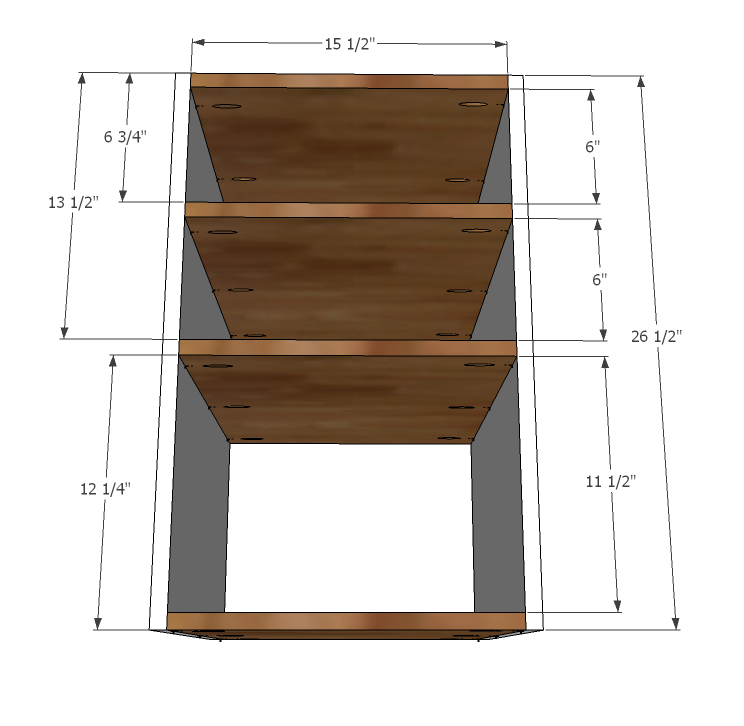
Build your cabinet as shown above. If you are using the Kreg Jig, use 1 1/4" pocket hole screws and wood glue, drilling holes set for 3/4" stock. You can alternatively use countersunk screws and wood glue.
Step 3
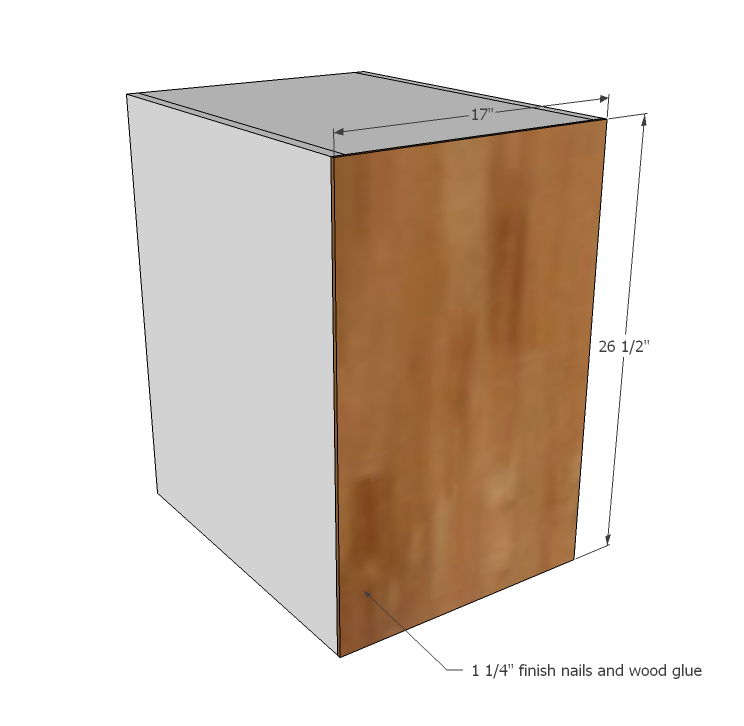
Adjust your shelf for square and attach the back. Make sure you attach to shelves too.
Step 4
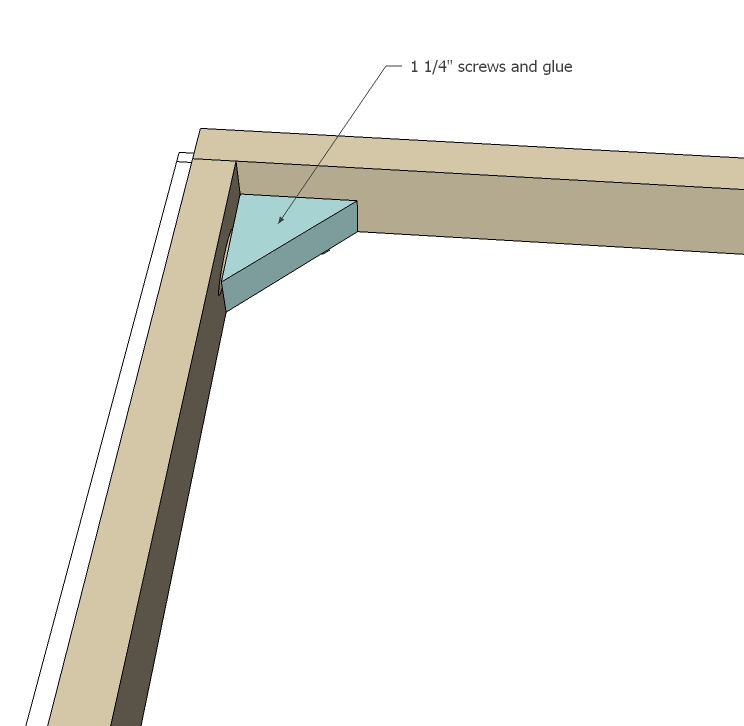
From your scrap plywood, you can rip a 1 1/2" wide strip, and then use these for the base, or buy 1x2s and build the base that way. Your call.
Step 5
Step 6
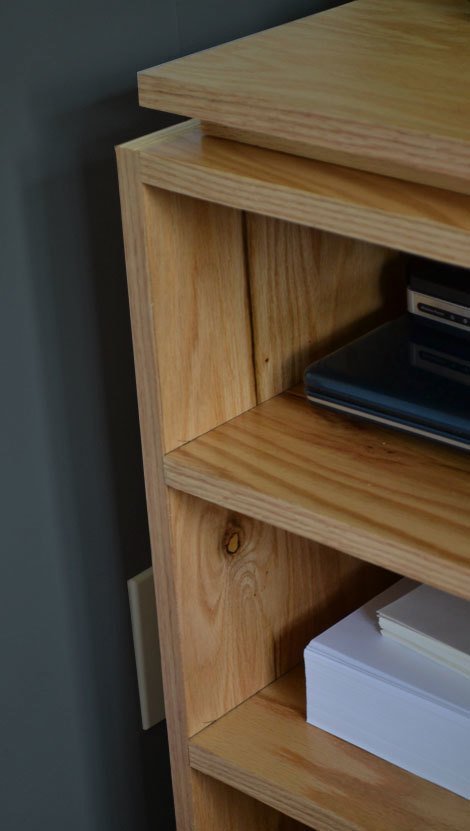
Apply edge banding according to manufacturer instructions - it's easy to do.
Finishing
Sand all surfaces, starting with a medium grit and finishing with fine. Wipe off the dust, fill any holes or gaps with wood filler, and sand smooth once dry. Apply primer if you're painting, then finish with your choice of paint or stain and seal with a durable clear topcoat. For outdoor projects, use exterior-rated primer, paint or stain, and sealer so the piece stands up to the weather.
Source (temporary): https://www.ana-white.com/woodworking-projects/frameless-office-open-shelf-base