Jelly Cupboard
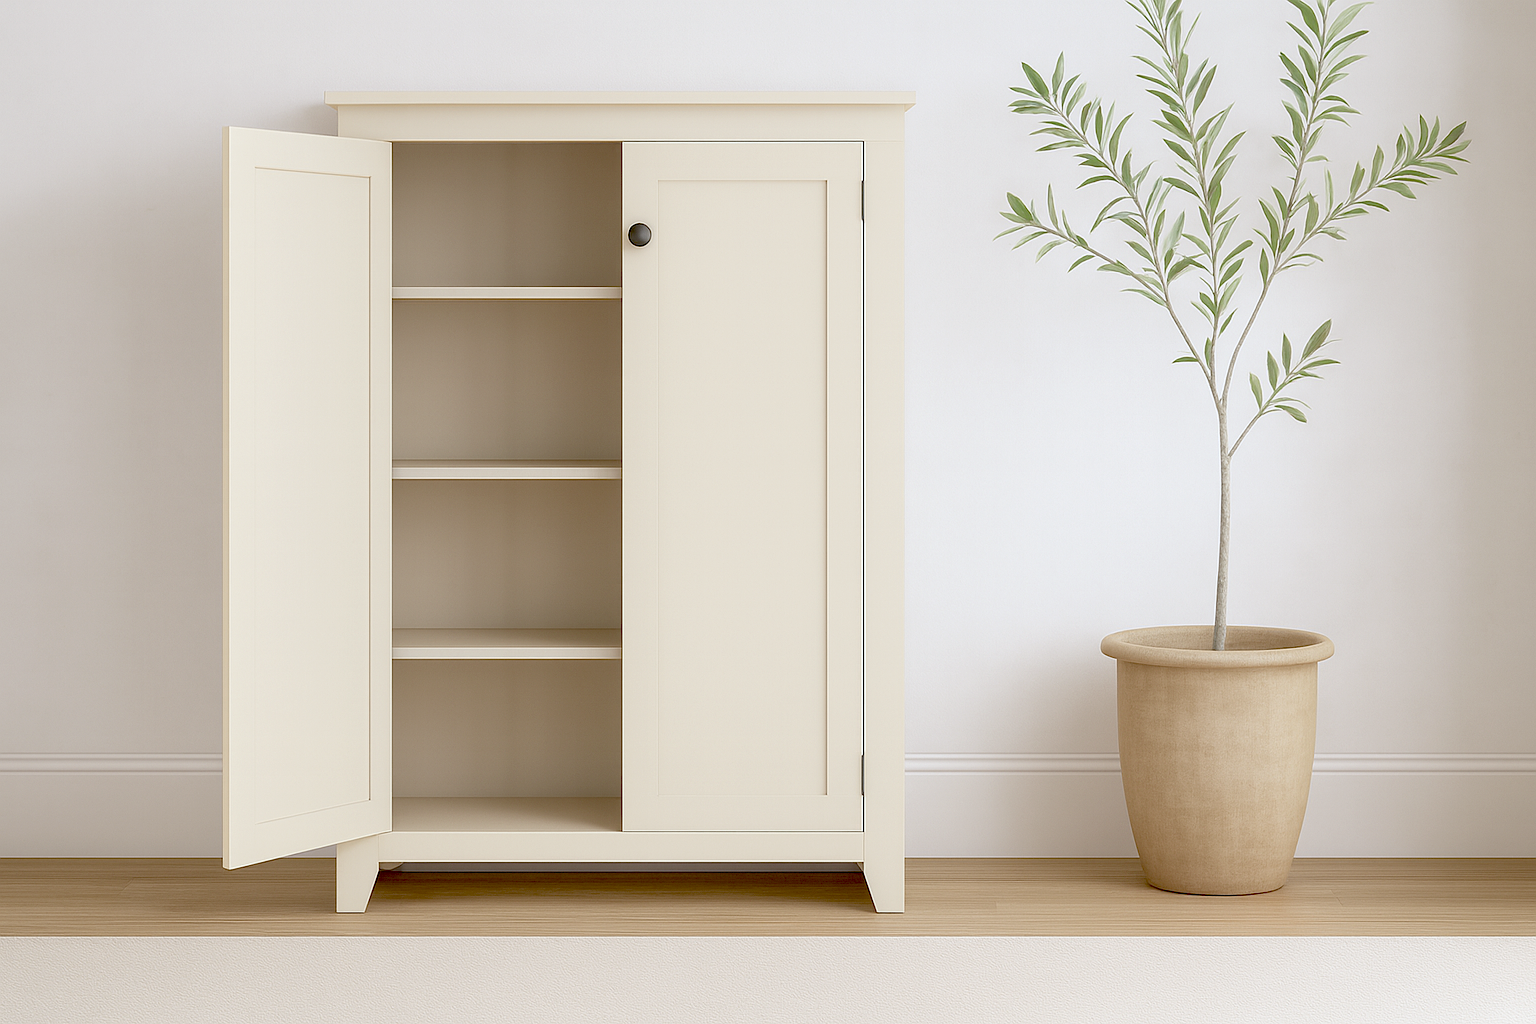
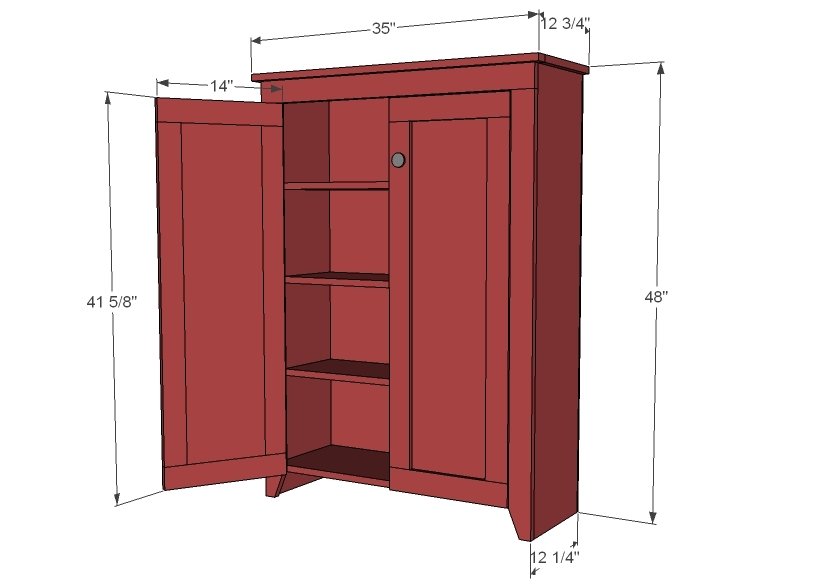
Build your own classic jelly cupboard with. This timeless piece features clean Shaker-style doors, sturdy frame-and-panel construction, and three adjustable interior shelves—perfect for storing pantry items, linens, or household essentials. Designed with farmhouse charm in mind, this project is beginner-friendly and ideal for weekend builders. • Finished dimensions: 35" W x 48" H x 12 3/4" D • Materials: Solid wood or plywood • Features: Two inset doors,three interior shelves, cutout side feet (optional) • Skill level: Beginner to intermediate • Tools required: Drill, pocket hole jig (recommended but can use a brad nailer), circular saw or table saw, sander Whether you're furnishing a modern farmhouse kitchen or adding storage to a guest room, this cabinet delivers function and style. Download the and start building today!
Specifications
| Project type | Bookshelf and Bookcase Plans |
|---|---|
| Room | Storage Solutions |
| Style | Primitive or Early American Style Furniture Plans |
| Difficulty | Intermediate |
Dimensions
Use the size-specific shopping and cut lists below.
Shopping List
- 1 – 1x10 @ 8 feet long
- 2 – 1x12 @ 8 feet long
- 1 sheet 1/4” plywood or beadboard paneling
- 5 – 1x3 @ 8 feet long
- 1 – 1x2 @ 3 feet long
- Hinges
- Knobs
- Magnetic Clasps
Cut List
- 2 – 1x12 @ 47 1/4”
- 3 – 1x10 @ 32”
- 1 – 1x12 @ 32”
- 1 – 1x12 @ 35”
- 1 – 1x3 @ 33 1/2”
- 2 – 1x3 @ 44 3/4”
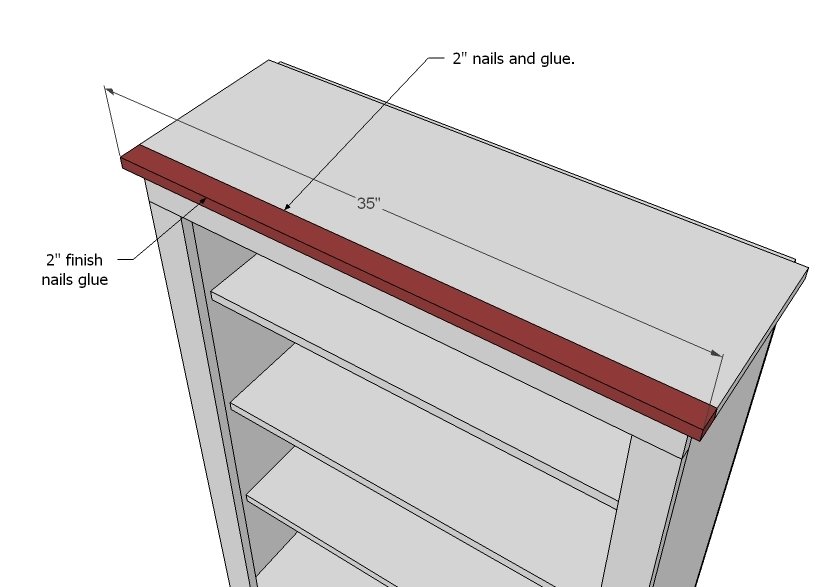
- 1 – 1x2 @ 35”
- 1 – 1/4” plywood @ 48” x 33 1/2”
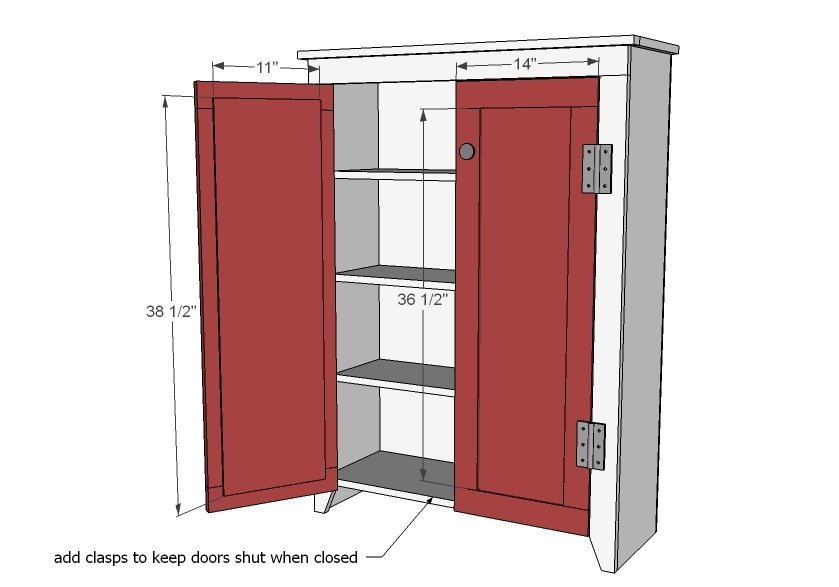
- 2 – 1/4” plywood @ 12” x 38 1/2”
- 4 – 1x3 @ 14”
- 4 – 1x3 @ 36 1/2”
Tools
- measuring tape
- square
- pencil
- safety glasses
- kreg-jig
- drill
- circular saw
- compound miter saw
- nailer
- sander
Step-by-step Instructions
Step 1
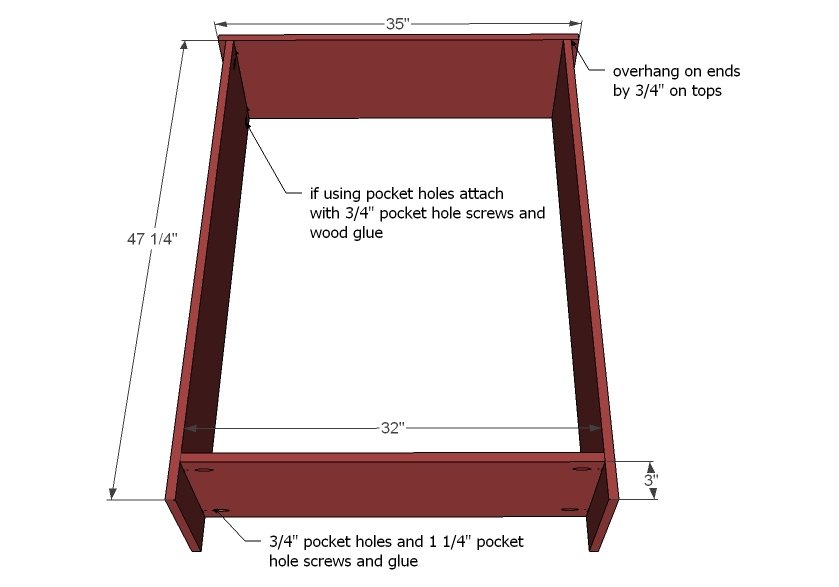
Build exterior frame of cupboard with screws and glue. Mark overhangs on top and bottoms and attach carefully. Adjust for square.
Step 2
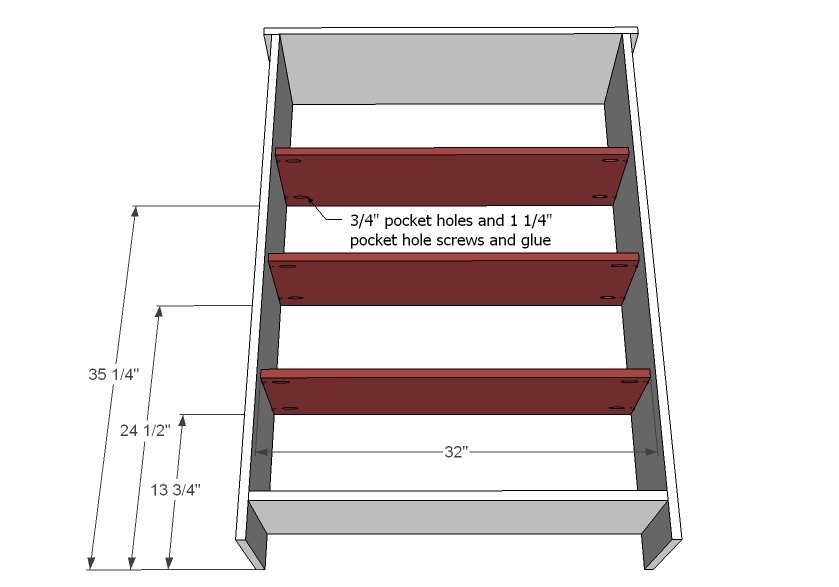
Shelves are 1x10, narrower width than the outside frame. Shelves are installed flush to back of cabinet. This will give room for your doors to have backing, if used.
Step 3
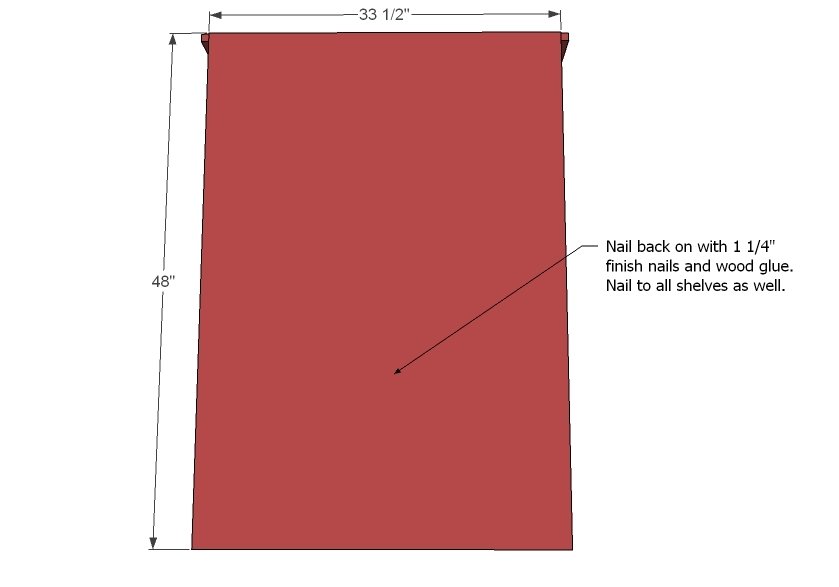
Attach plywood to back with 1 1/4" finish nails and glue. Make sure the cabinet is square, and attach to all fixed boards for best support.
Step 4
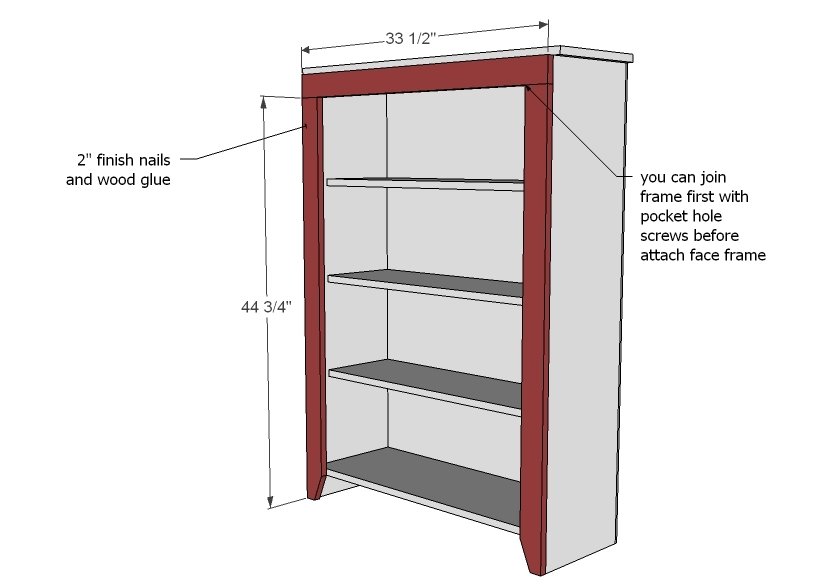
If you are using a pocket hole jig, build the frame first, then attach to the face of the cabinet. You can also taper bottom legs for a decorative look with a jigsaw or circular saw.
Step 5
Step 6
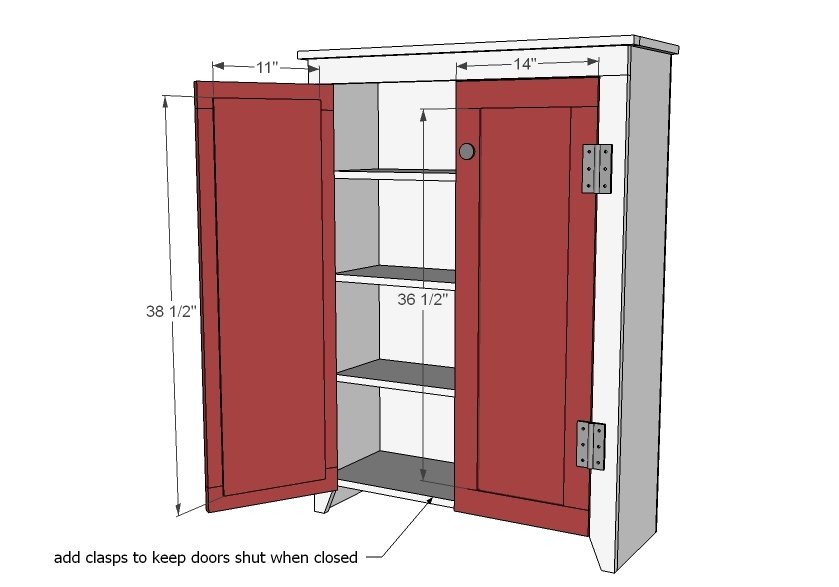
Measure your door openings, as board widths may vary, and build your doors giving an 1/8" gap on all sides of the doors. Attach backing to doors, and attach with hinges to cupboard.
Step 7
Finishing
Sand all surfaces, starting with a medium grit and finishing with fine. Wipe off the dust, fill any holes or gaps with wood filler, and sand smooth once dry. Apply primer if you're painting, then finish with your choice of paint or stain and seal with a durable clear topcoat. For outdoor projects, use exterior-rated primer, paint or stain, and sealer so the piece stands up to the weather.
Source (temporary): https://www.ana-white.com/woodworking-projects/free-diy-jelly-cupboard-plans