Outdoor Grill Cart
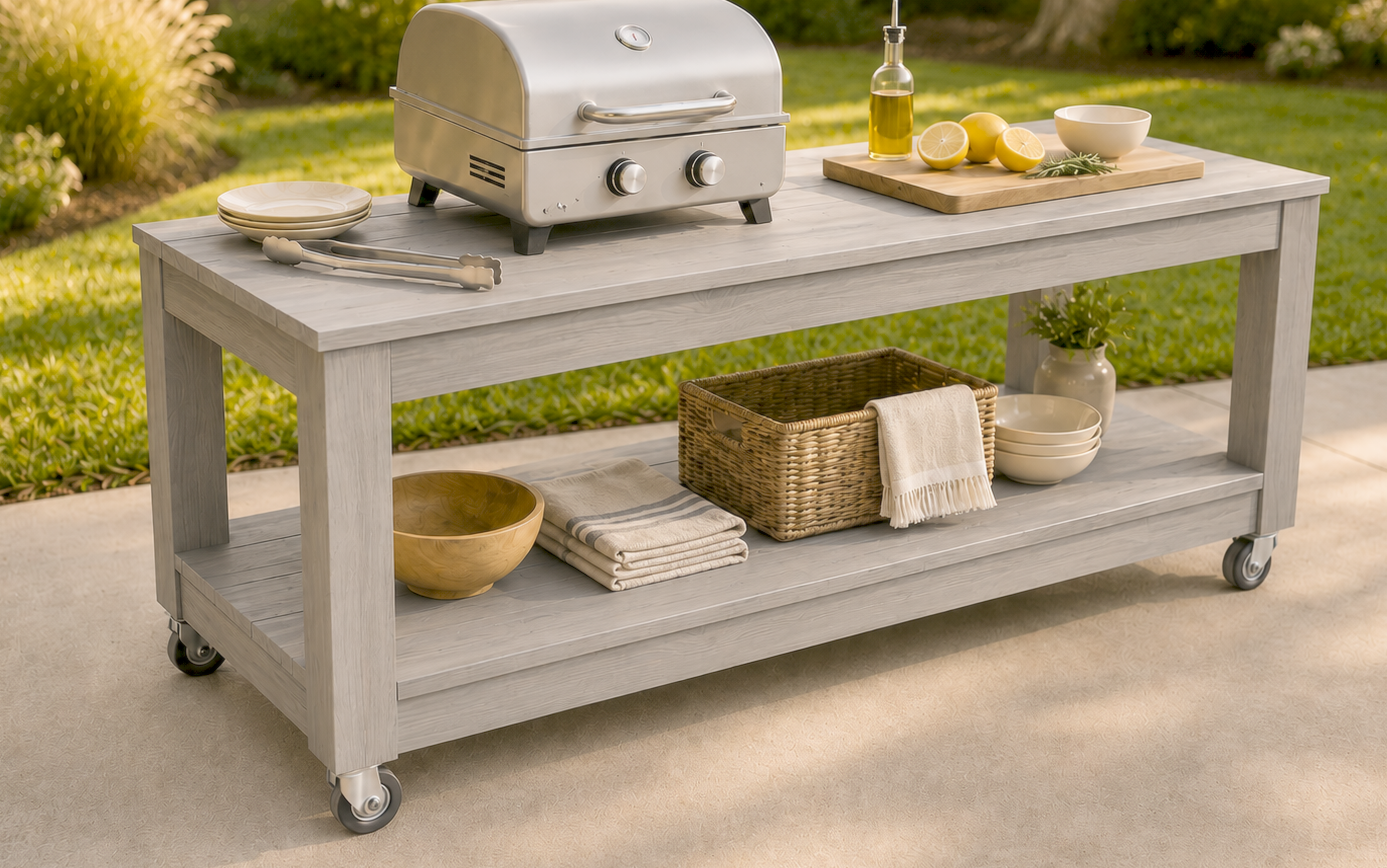
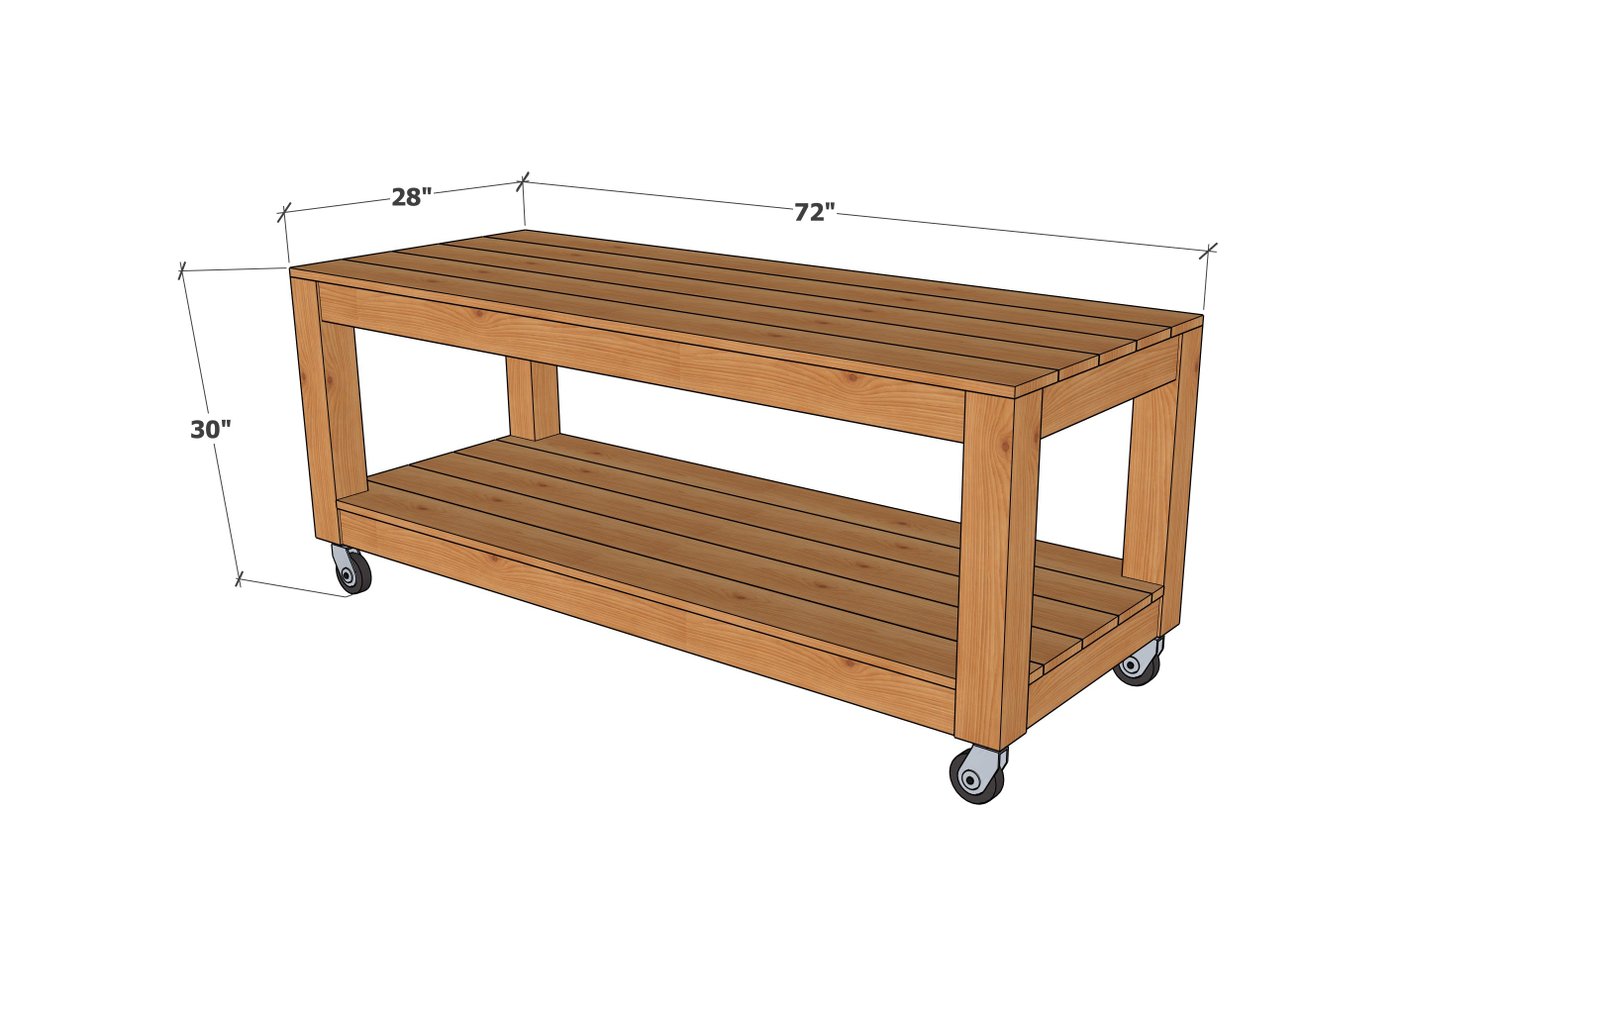
Build this easy outdoor grill cart! At 30" tall, it’s a comfortable height for using a tabletop portable grill, prepping food, or serving from during backyard BBQs and summer parties. The design includes a roomy lower shelf for plates, towels, baskets, and grilling supplies, plus caster wheels so it can roll wherever you need it. The length can be adjusted to fit your space, and you can use cedar fence pickets for the top and shelf boards for an affordable outdoor-friendly option. Perfect as a grill prep table, outdoor serving table, or rolling patio island. For safety, use a heat-safe surface under the grill and follow your grill’s clearance instructions.
Specifications
| Project type | Picnic Tables and Outdoor Dining |
|---|---|
| Room | Outdoor |
| Difficulty | Intermediate |
Dimensions
Use the size-specific shopping and cut lists below.
Shopping List
- 1 - 4x4 @ 8 feet long
- 5 - 2x4 @ 8 feet long
- 10 - 1x6 or 5-1/2" wide cedar fence pickets @ 72" long
- 50 - 1-1/2" pocket hole screws
- 80 - 1-3/4" self tapping exterior deck screws
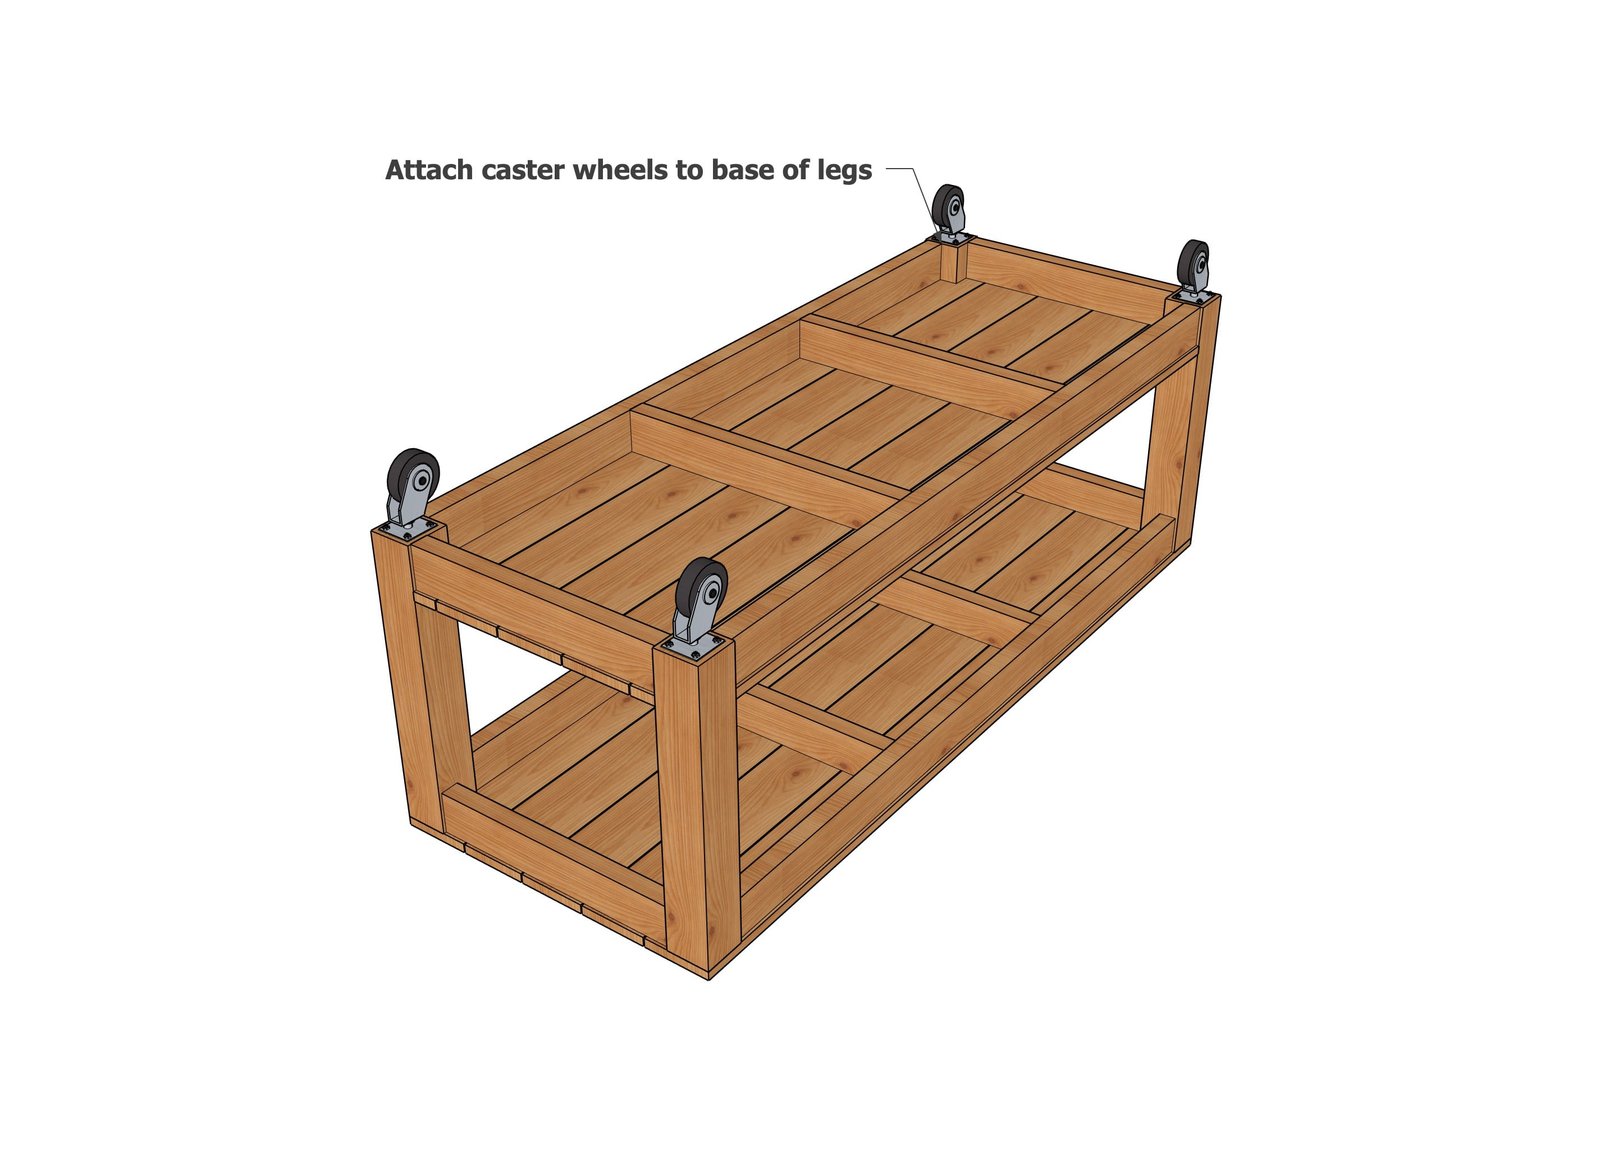
- 4 caster wheels, about 5" total height
- exterior penetrating stain
Cut List
- 4 - 4x4 @ 23-3/4" - legs
- 4 - 2x4 @ 21" - adult this length to widen table
- 4 - 2x4 @ 65" - adjust this length to shorten table
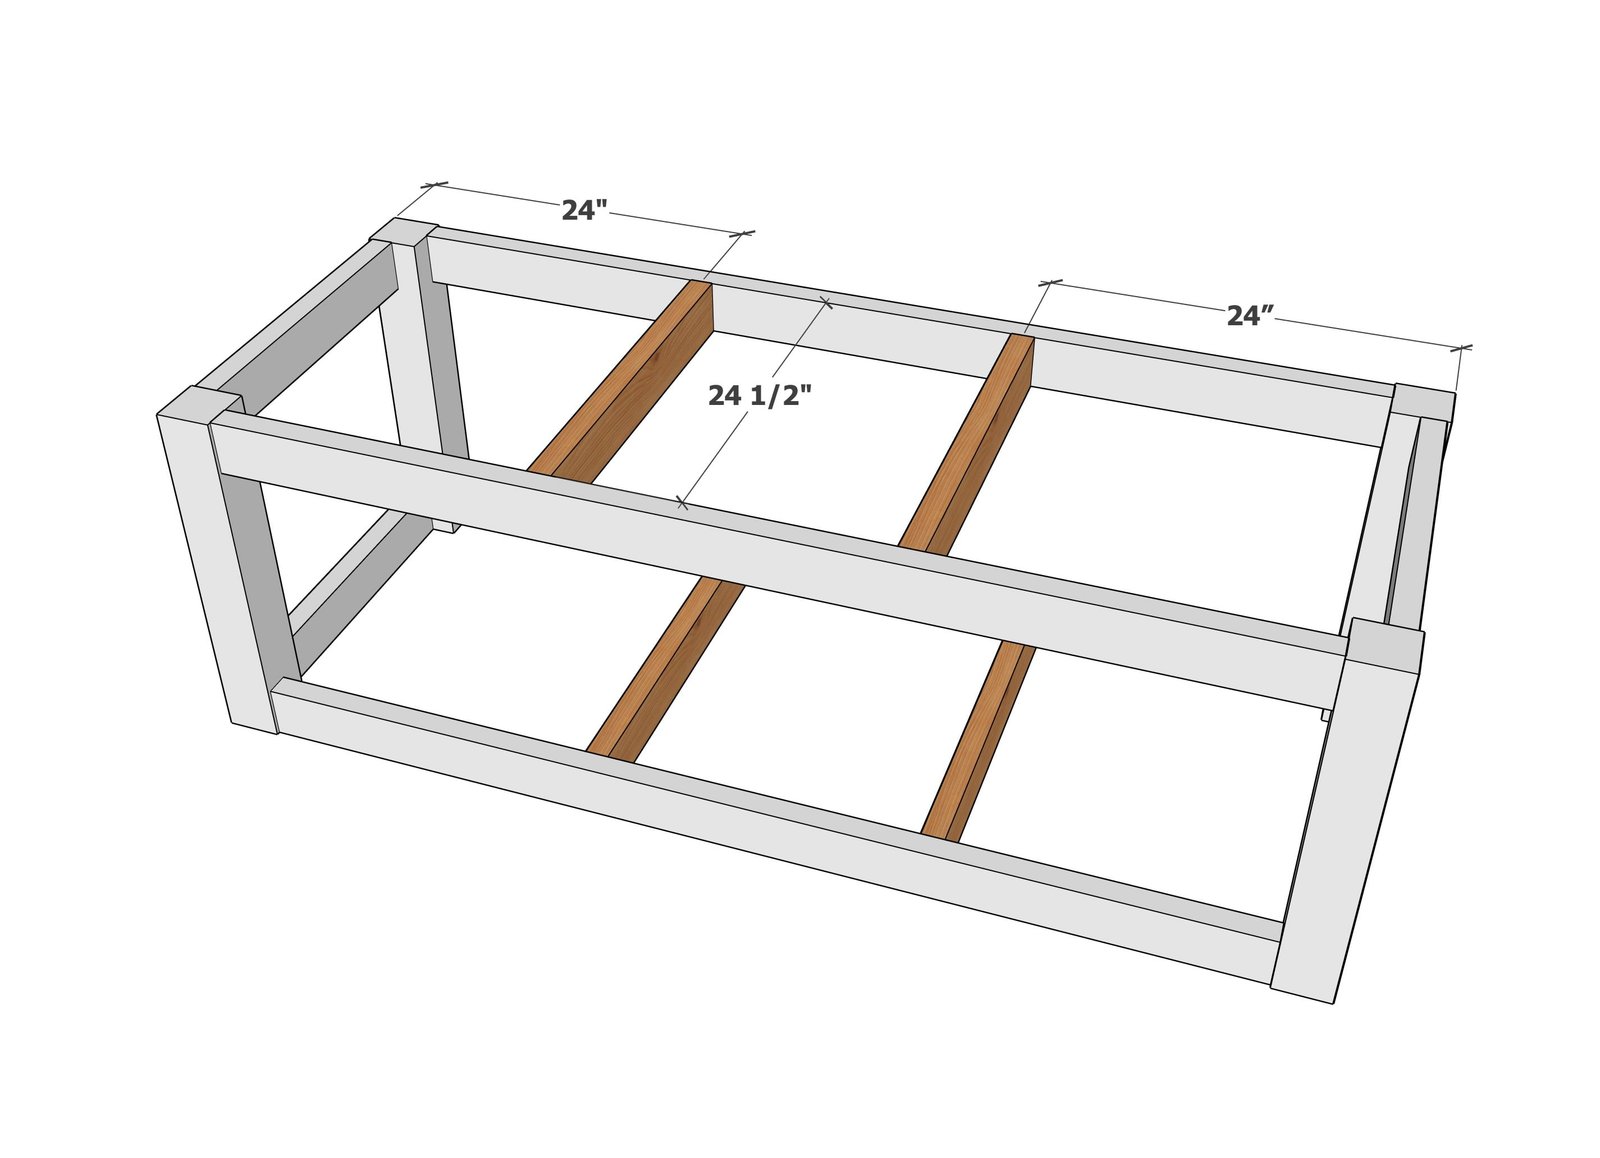
- 4 - 2x4 @ - 24-1/2" supports
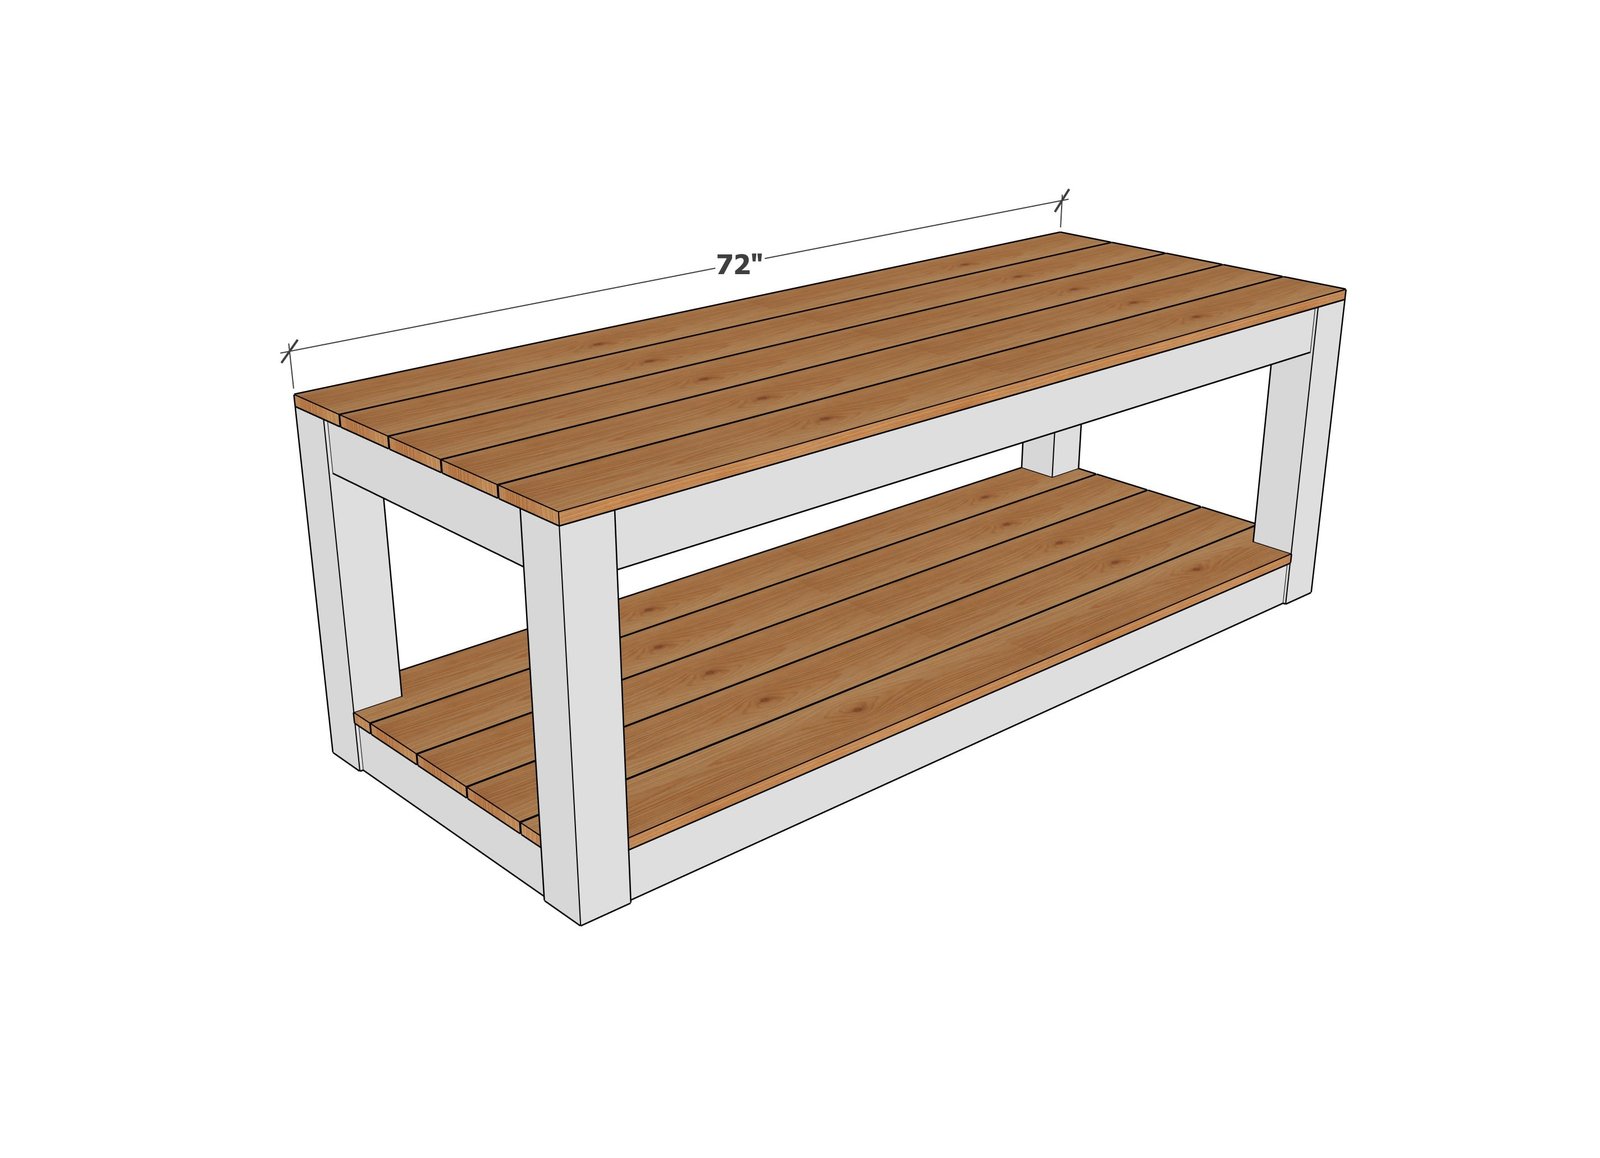
- 10 - 5-1/2" wide boards (can be fence pickets) @ 72"
Tools
- measuring tape
- square
- pencil
- safety glasses
- kreg-jig
- drill
- circular saw
Step-by-step Instructions
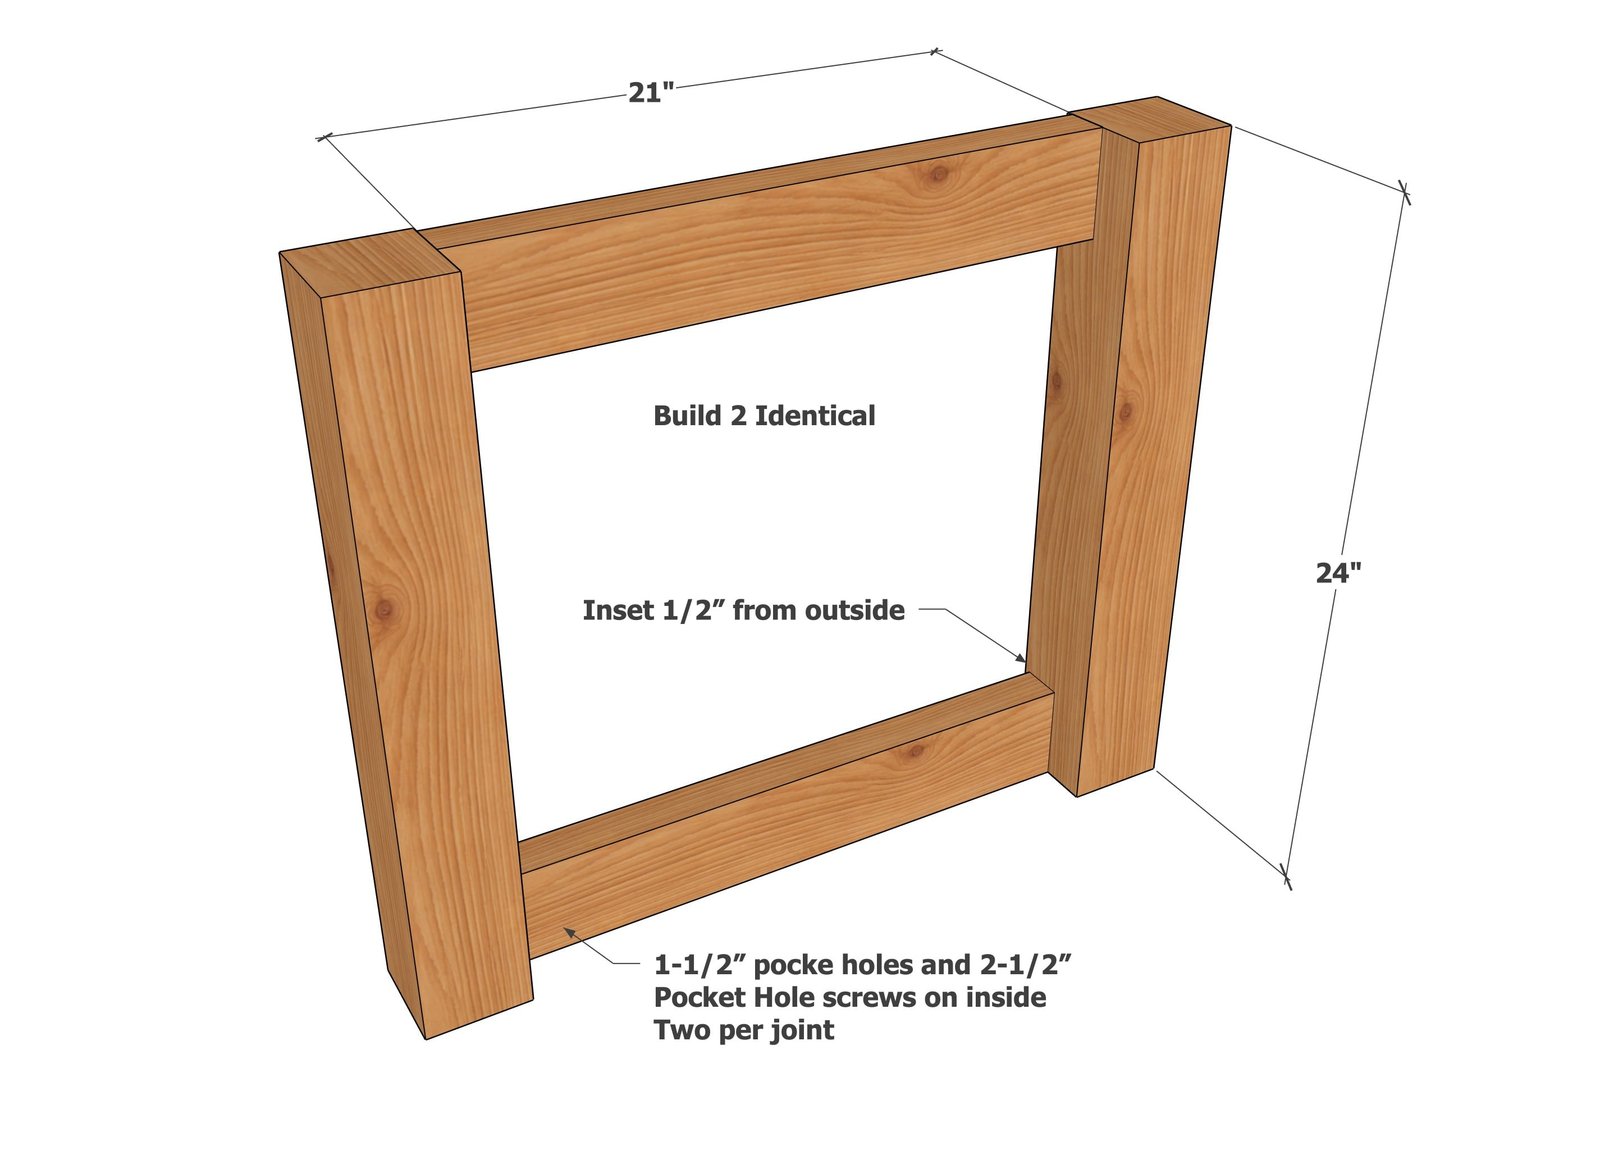
On all the 2x4 boards, drill two 1-12" pocket holes on each end.
Then attach two of the 21" to two legs as shown with 1-1/2" pocket hole screws. Repeat to build two identical.
Step 2
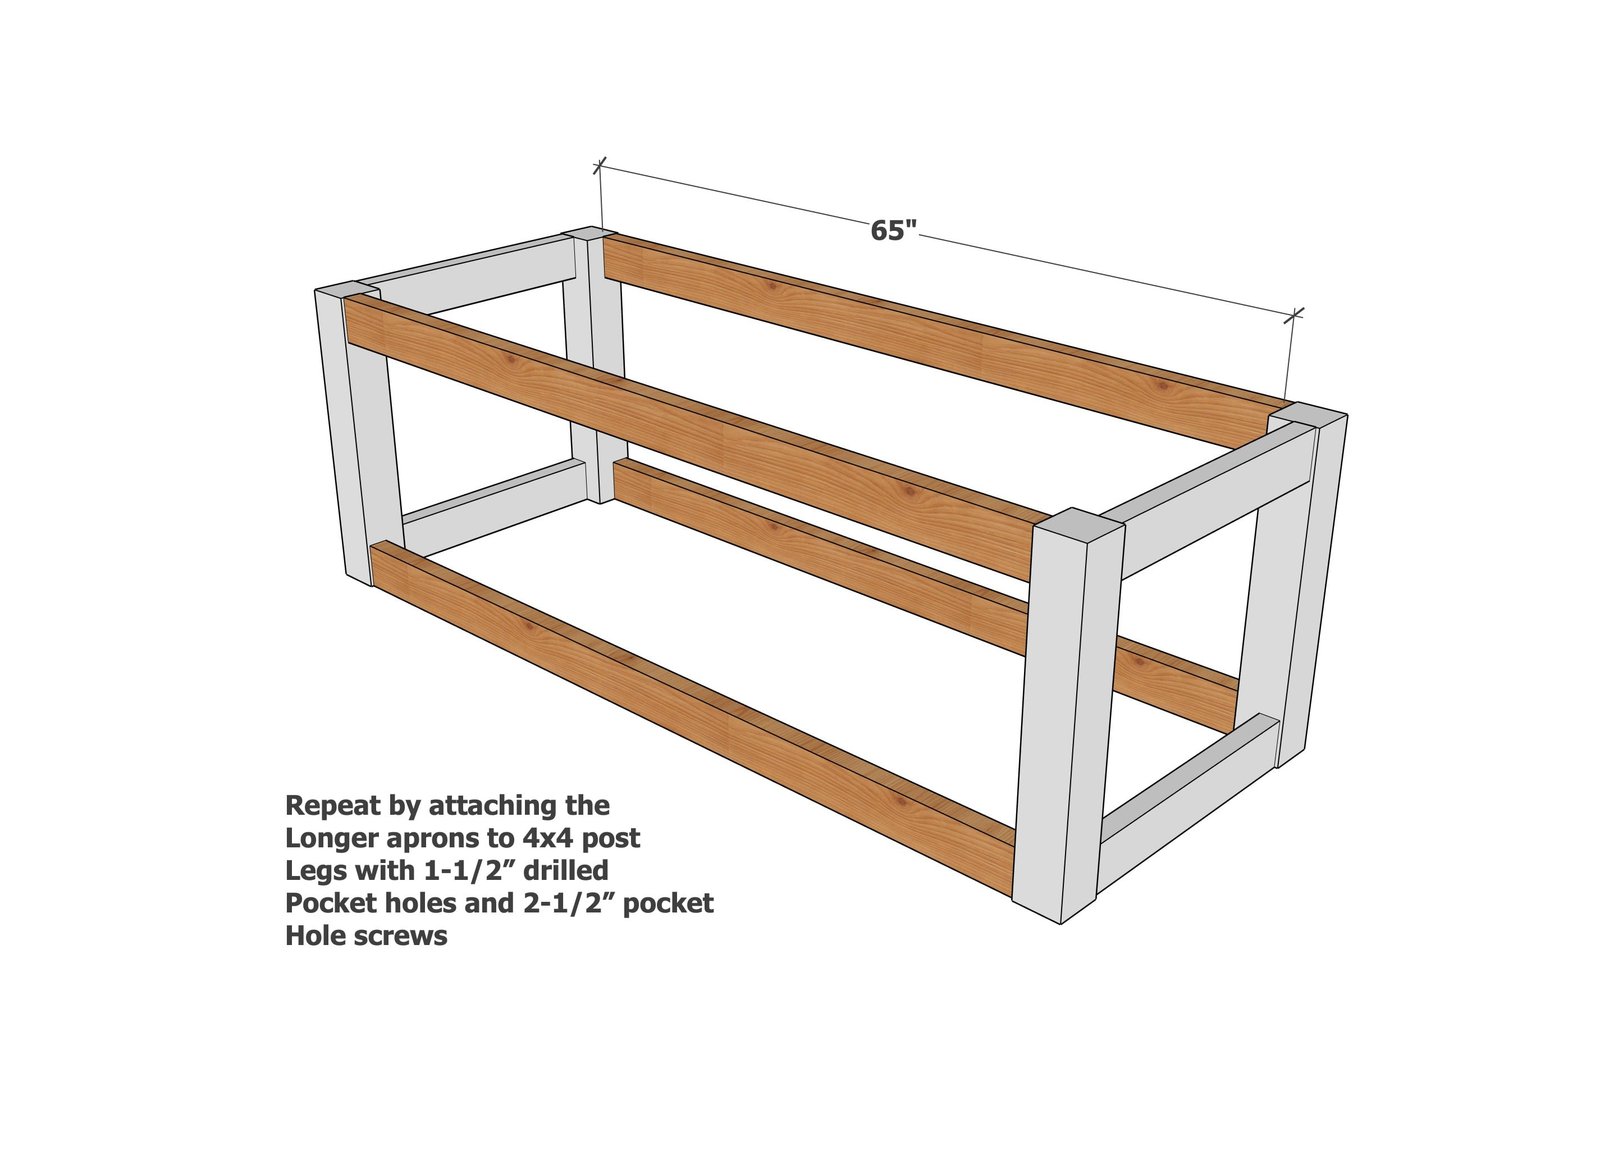
Attach the longer 2x4 aprons to the legs sets as shown.
Step 3
Add in the center supports.
Step 4
Cover with the 1x6 or fence picket hoards.
Step 5
Add the caster wheels to the bottom
Finishing
Sand all surfaces, starting with a medium grit and finishing with fine. Wipe off the dust, fill any holes or gaps with wood filler, and sand smooth once dry. Apply primer if you're painting, then finish with your choice of paint or stain and seal with a durable clear topcoat. For outdoor projects, use exterior-rated primer, paint or stain, and sealer so the piece stands up to the weather.
Source (temporary): https://www.ana-white.com/woodworking-projects/free-diy-outdoor-grill-cart-plans