Tote Storage Rack Configurator and
Design a custom 2x4 storage rack for any tote and any space. Enter your tote measurements and layout to generate a personalized cut list and diagram, then follow the below.
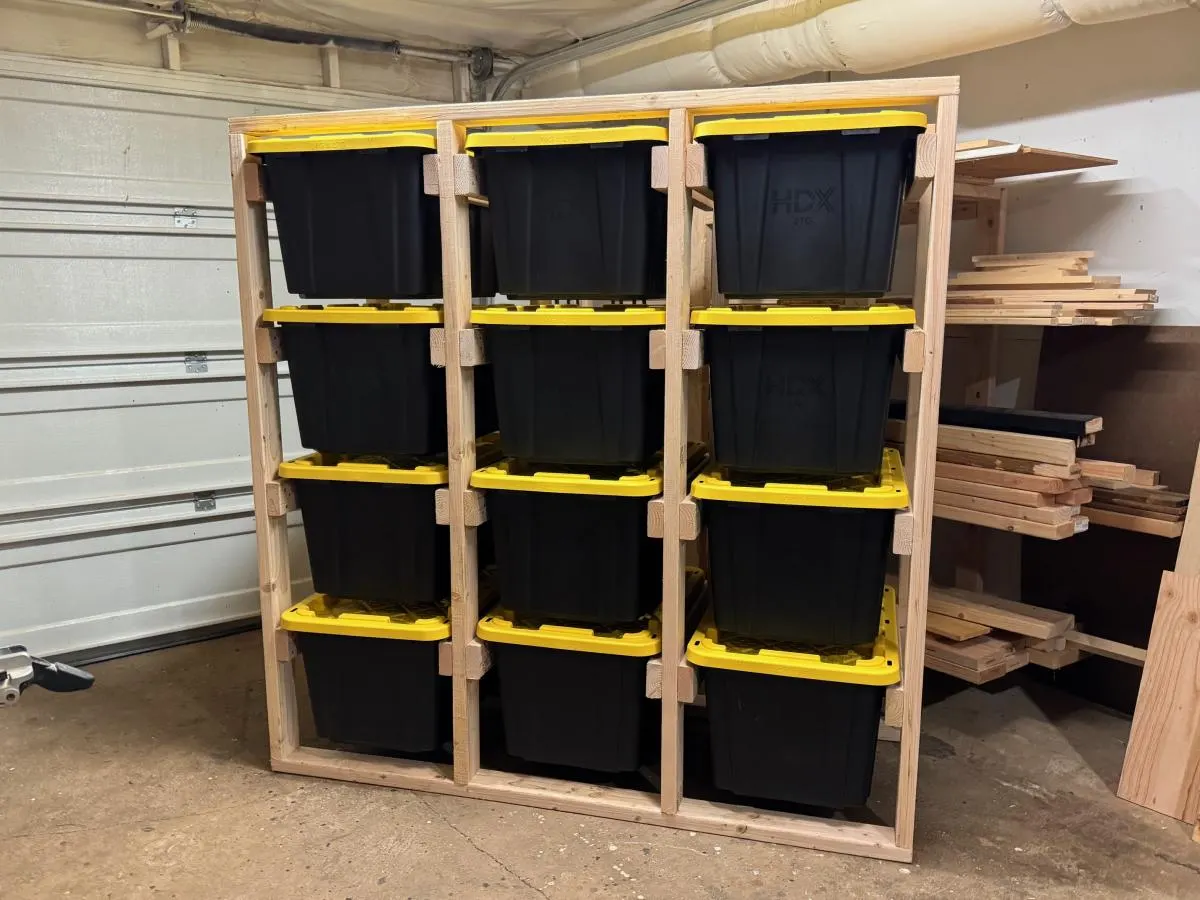
Specifications
| Project type | Garage Storage |
|---|---|
| Room | Garage and Workshop |
| Style | Industrial Style Furniture Plans |
| Difficulty | Intermediate |
| Estimated cost | Depends on Size |
| Build time | 1 day |
Dimensions
Use the size-specific shopping and cut lists below.
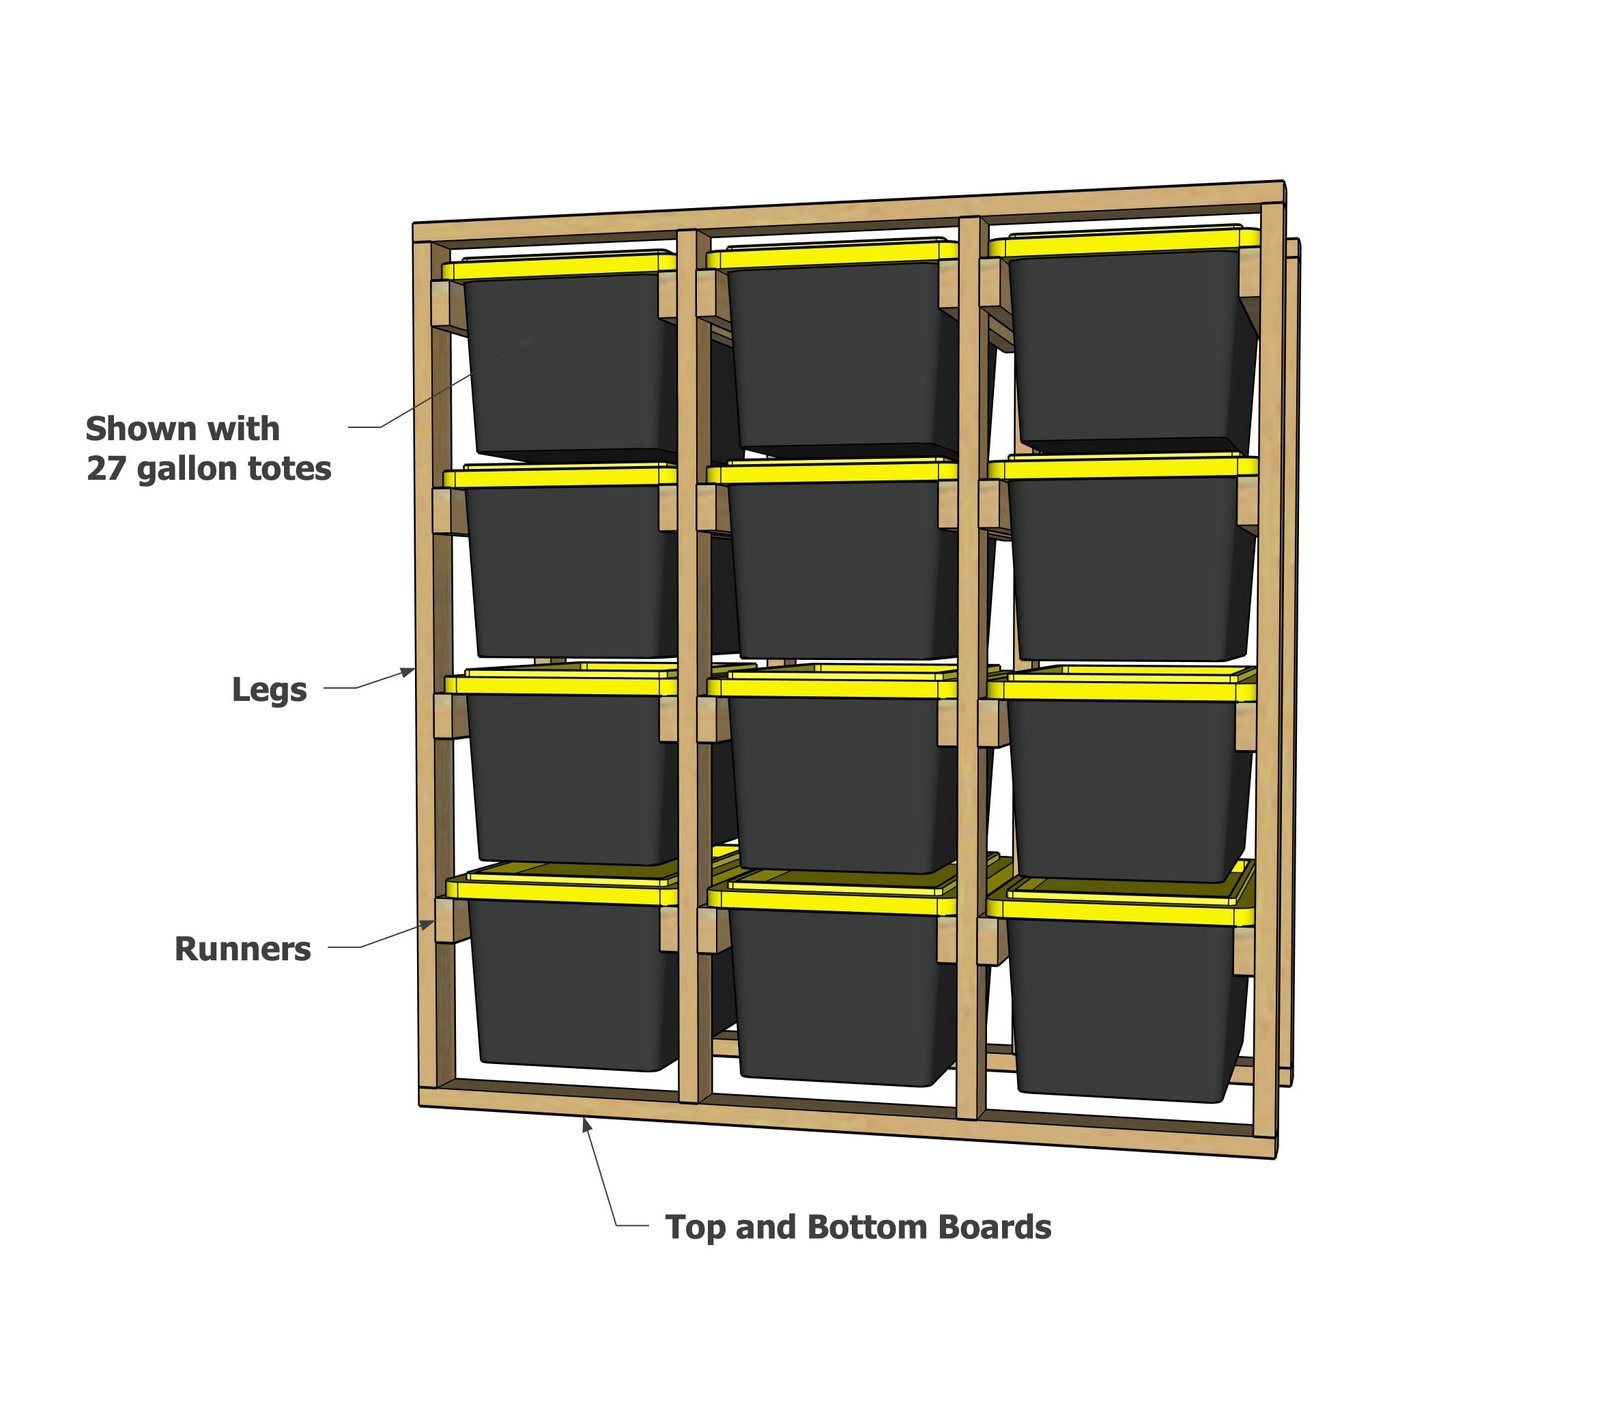
Shopping List
- 2x4s, board feet specified in the configurator
- 2-3/4" self tapping star bit screws (number of screws needed specified in the cut list)
- 27 gallon totes
Cut List
Cut list is generated in the tote rack configurator tool at the top of this page
Tools
- measuring tape
- square
- pencil
- safety glasses
- drill
- circular saw
Step-by-step Instructions
Step 1
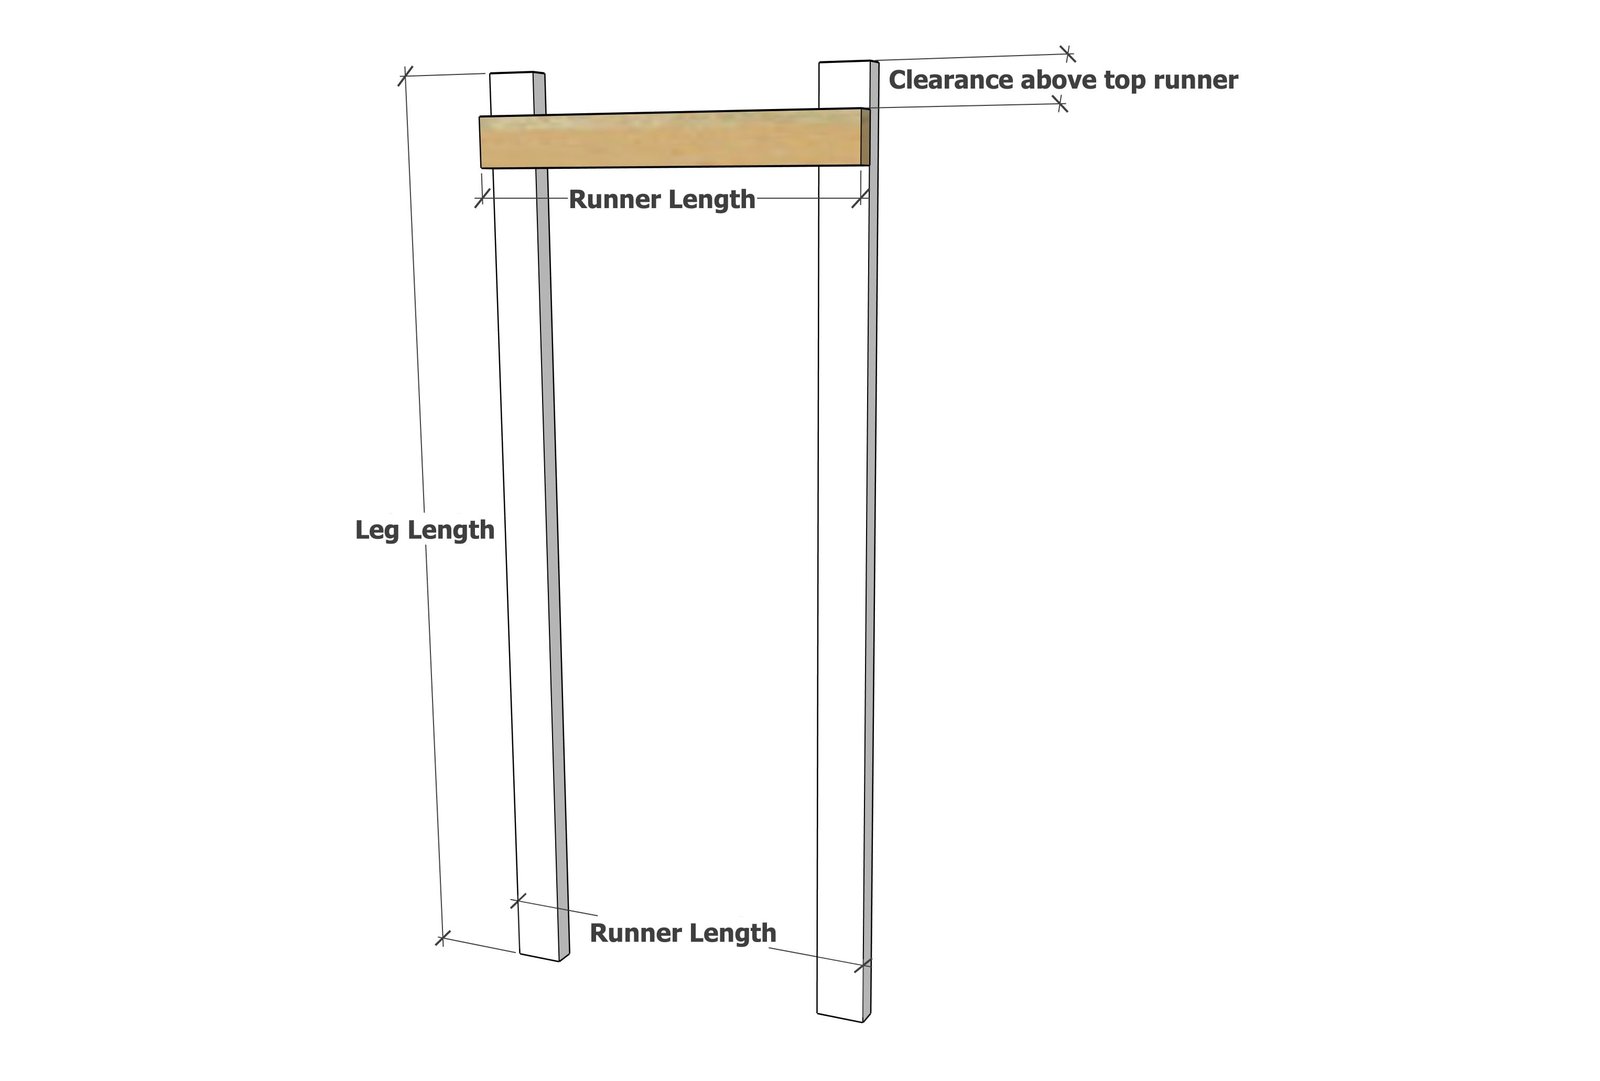
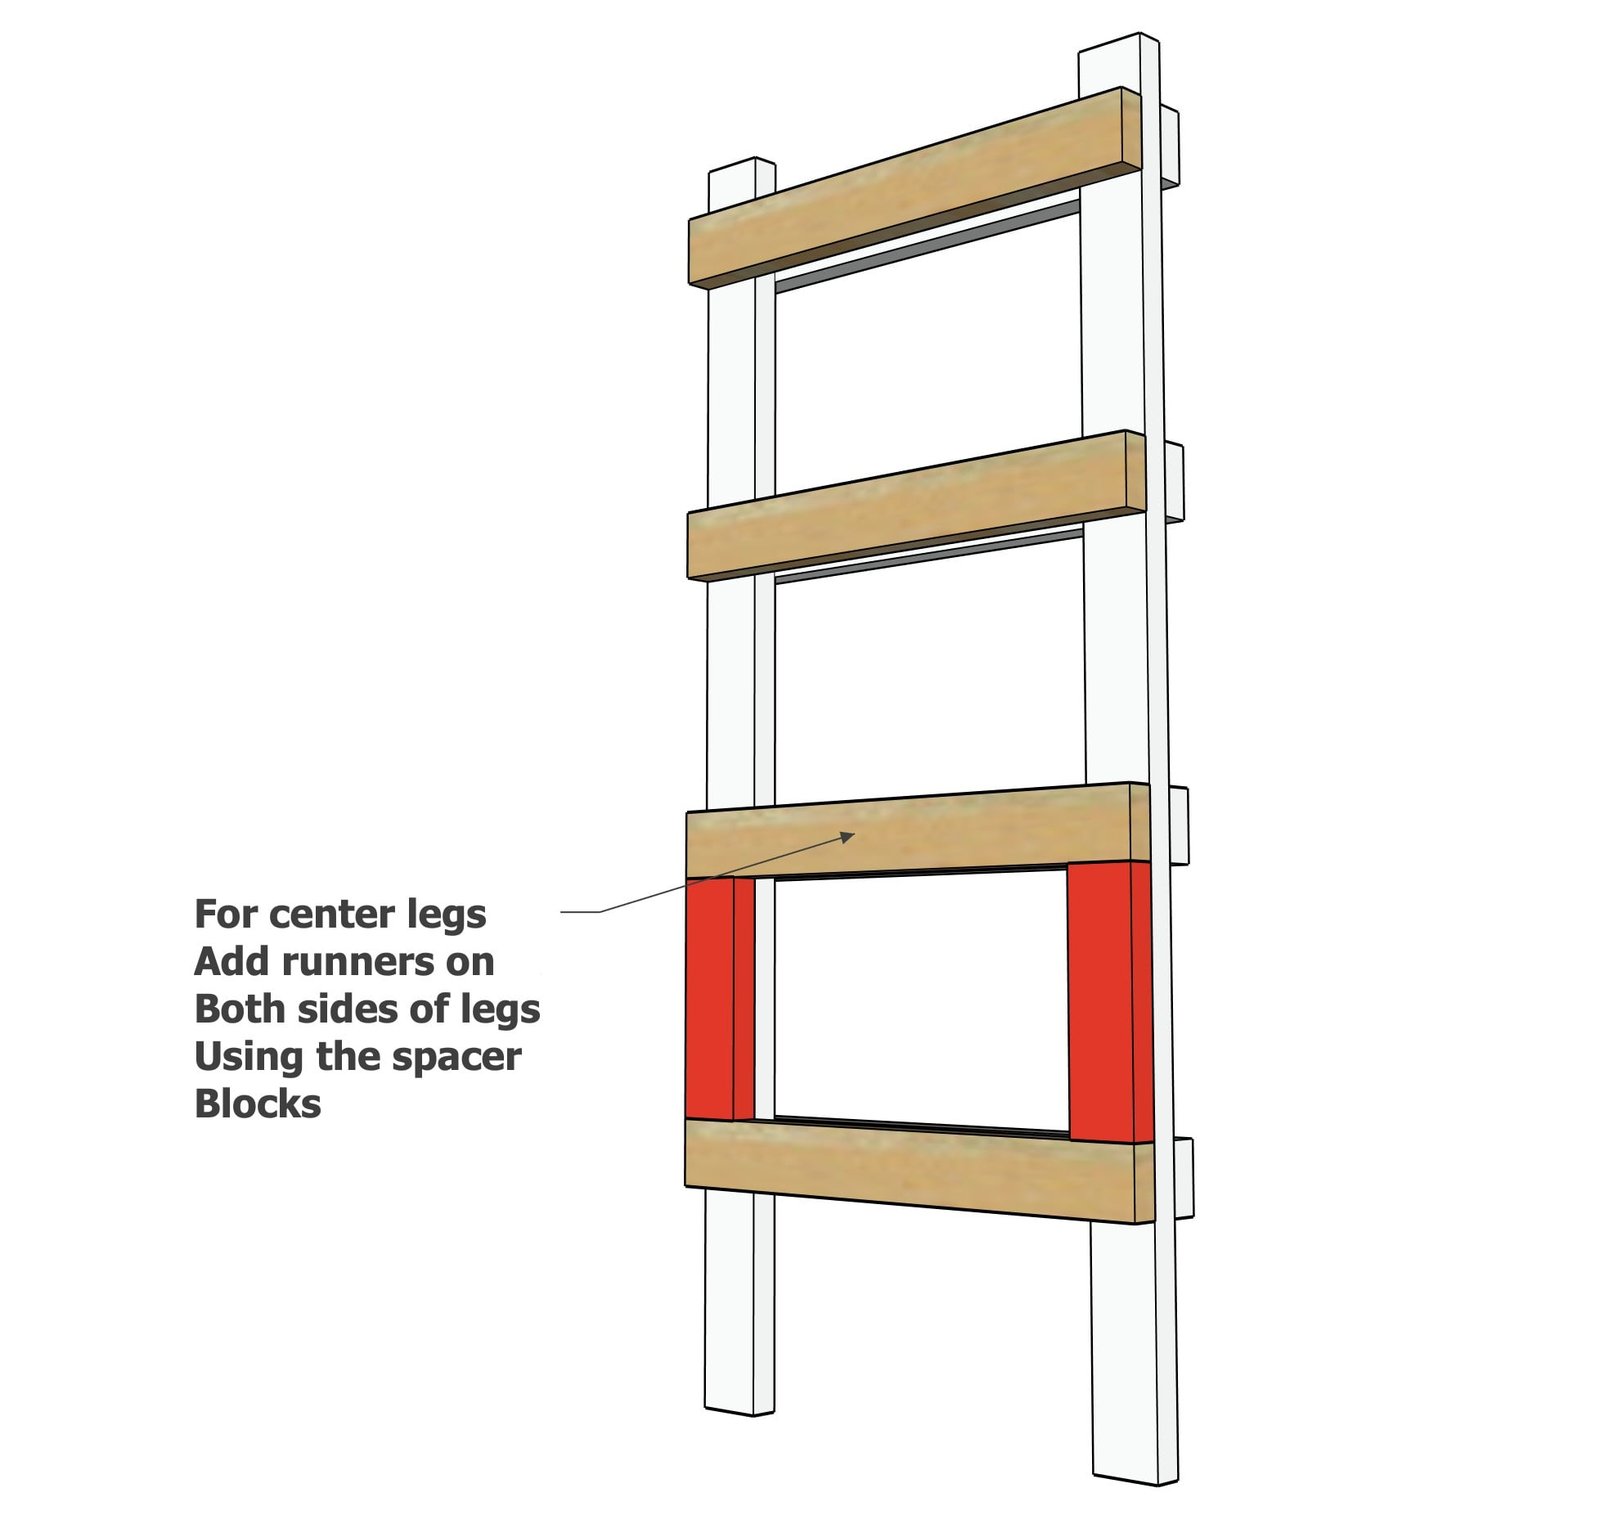
Mark the legs down from the top the "Clearance Above Spacer Block" amount. Attach the top runner to the legs with two screws per joint, making sure the legs remain parallel and the distance at the base is the same as the distance at the top.
Step 2
Use the spacer block to add remaining runners below the first runner, until all runners have been added per leg. There will be one runner per row, so a three tote high storage rack would have three runners.
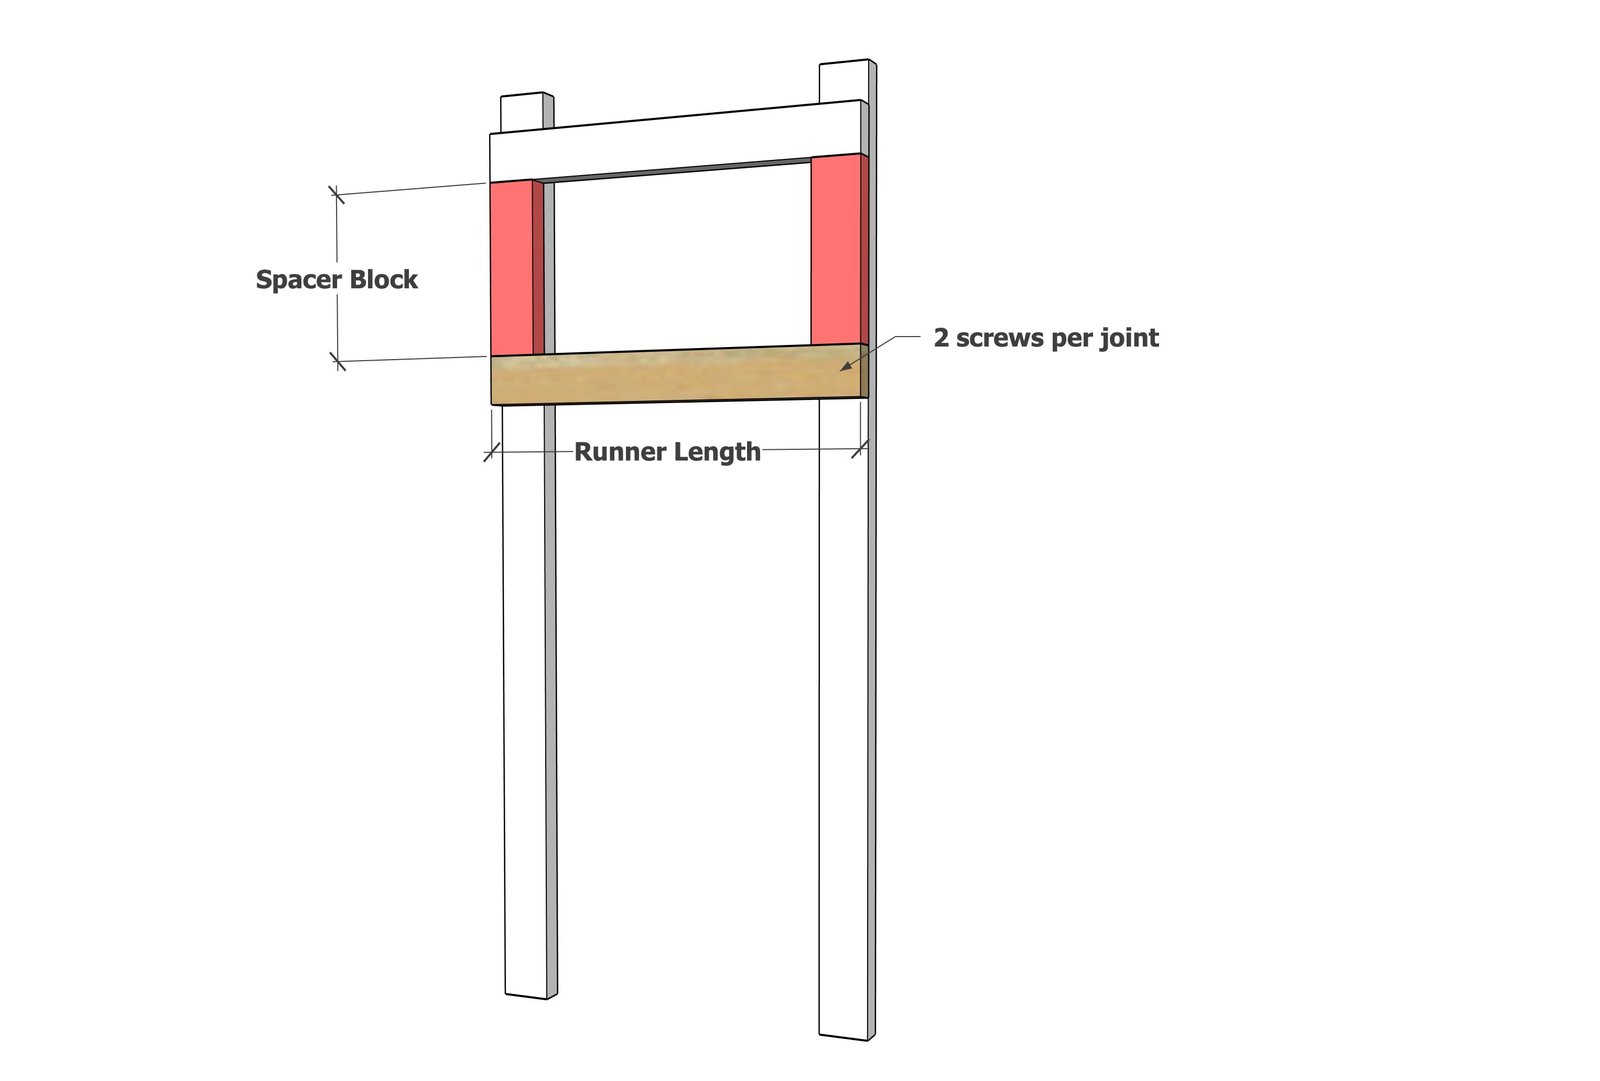
For the outer legs of the rack, runners are on only one side.
For the center legs on the rack, runners are on both sides. Add runners to the second side if needed. TIP: Use the FIRST leg set you made as an outer leg, and lay it out as a pattern for creating the remaining leg sets from.
Step 4
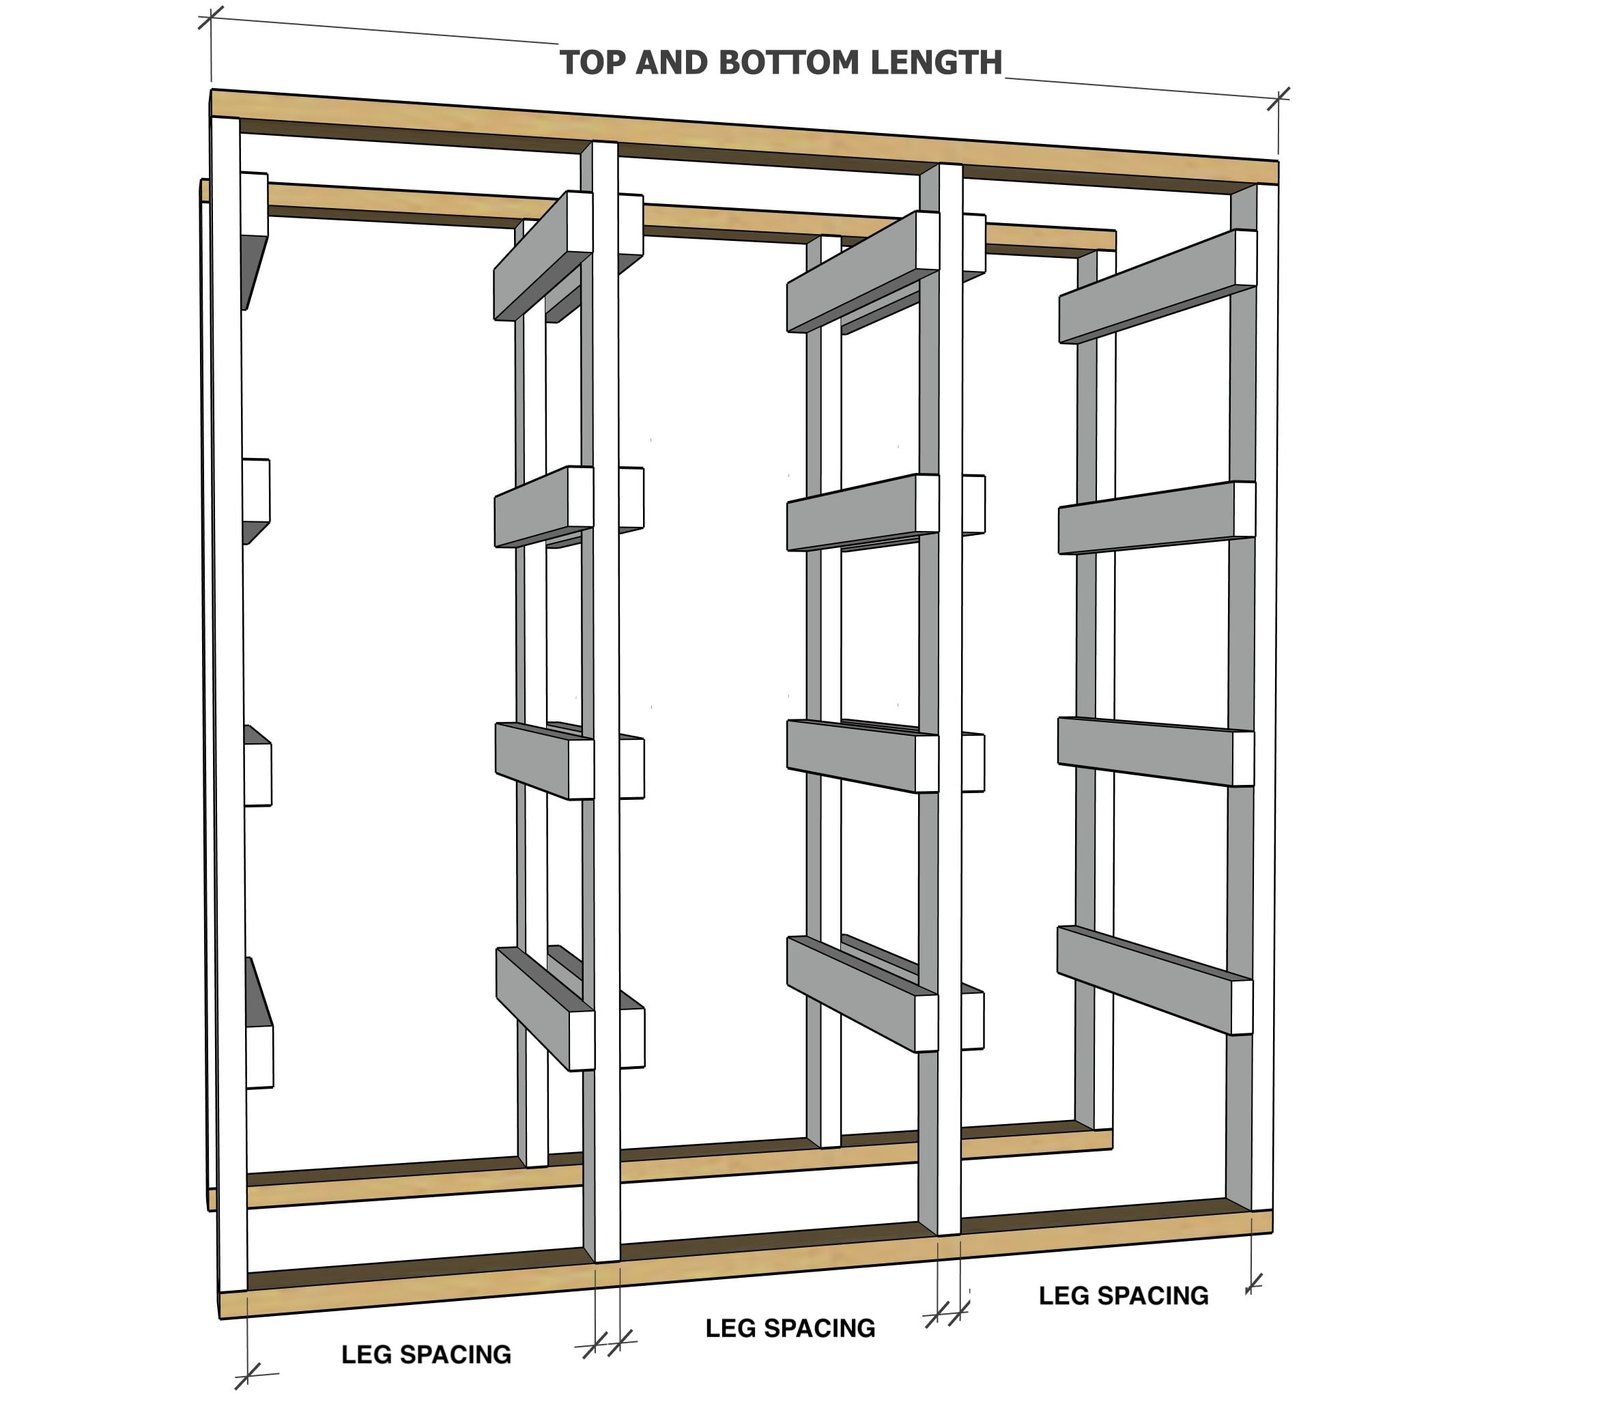
Add the top and bottom pieces to join the leg sets together and create the frame. Use the dimension given in the configurator for spacing in between legs.
Step 5
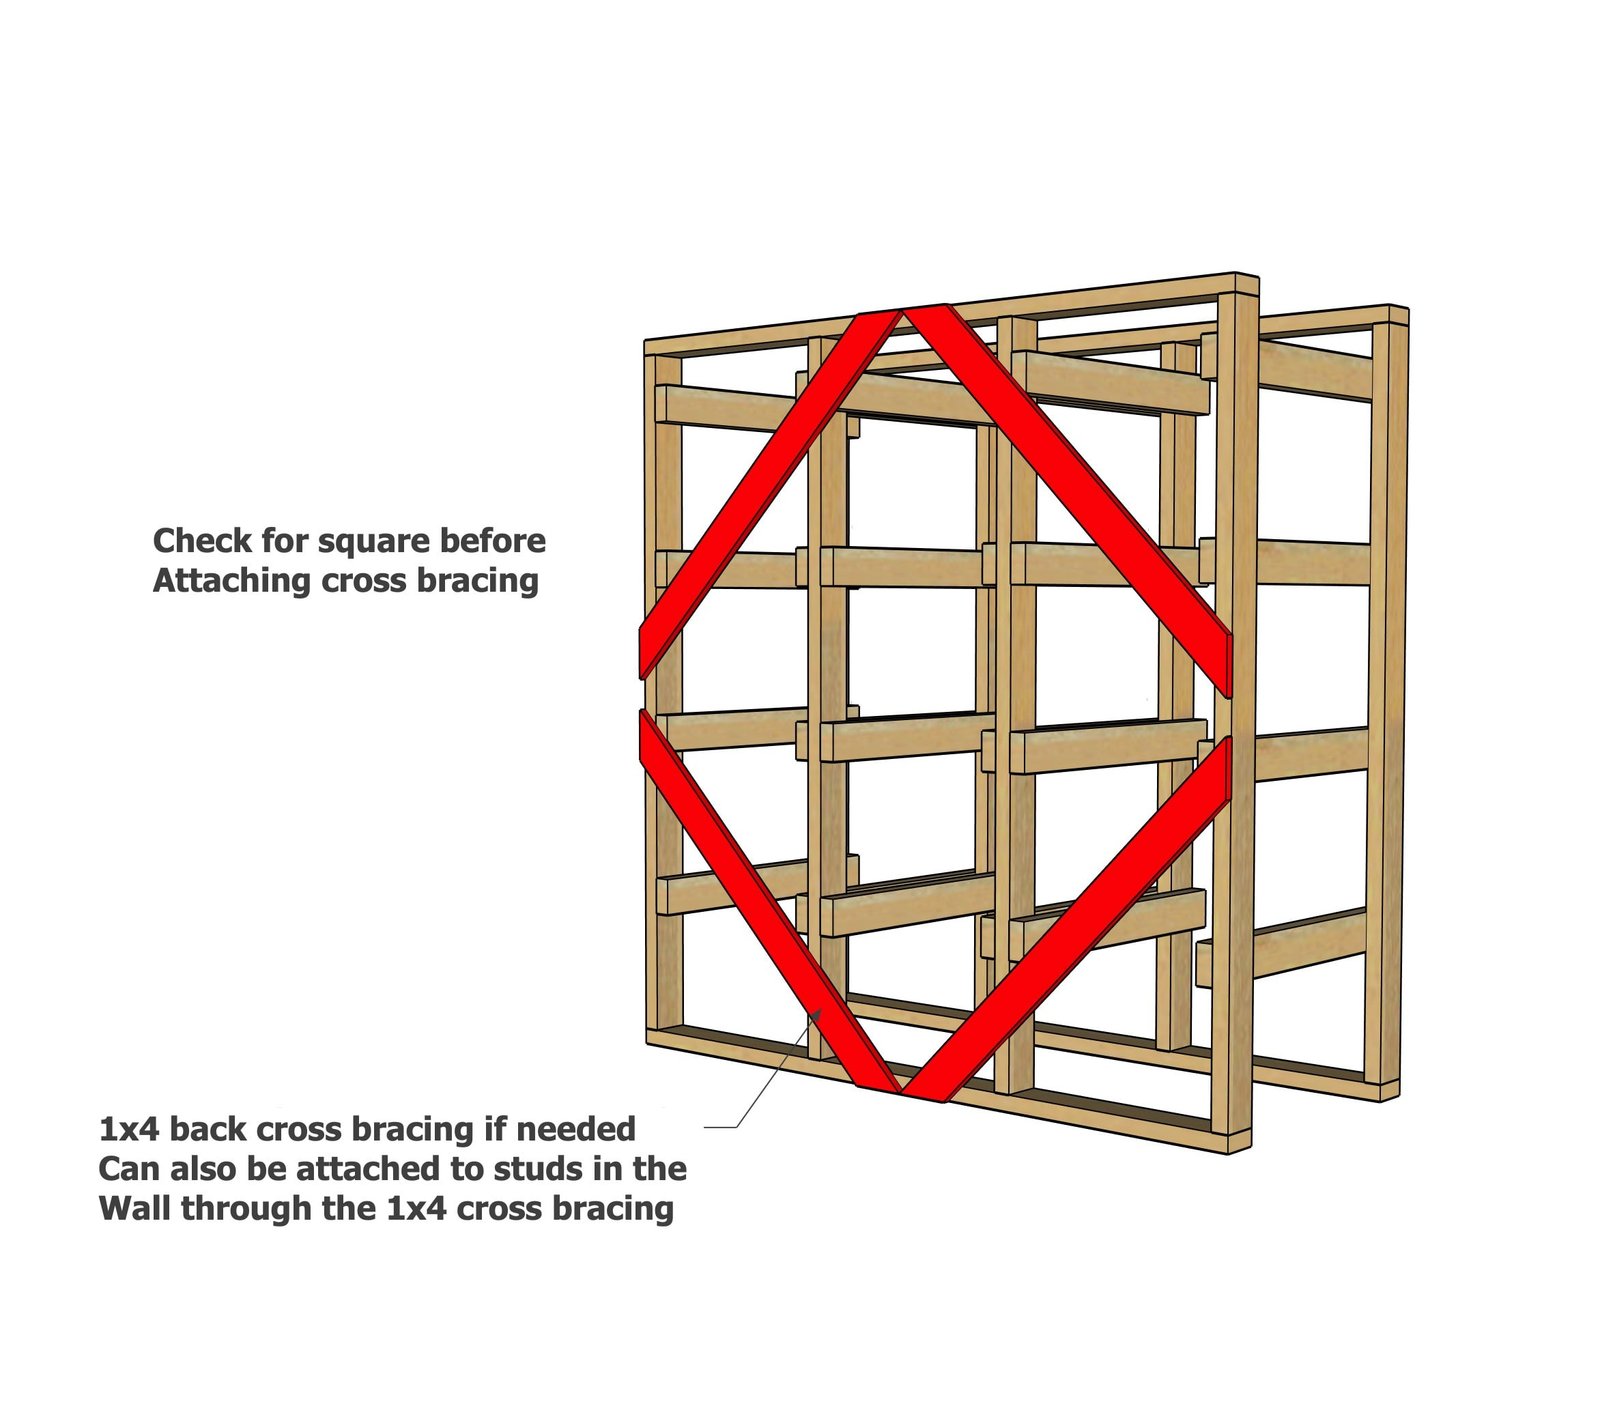
For smaller tote storage racks, you may not need additional cross bracing. But for larger racks, use 1x4s as shown to cross brace the backs. To secure to the wall, screw through the 1x4s into studs in the wall to prevent forward tipping.
Step 6
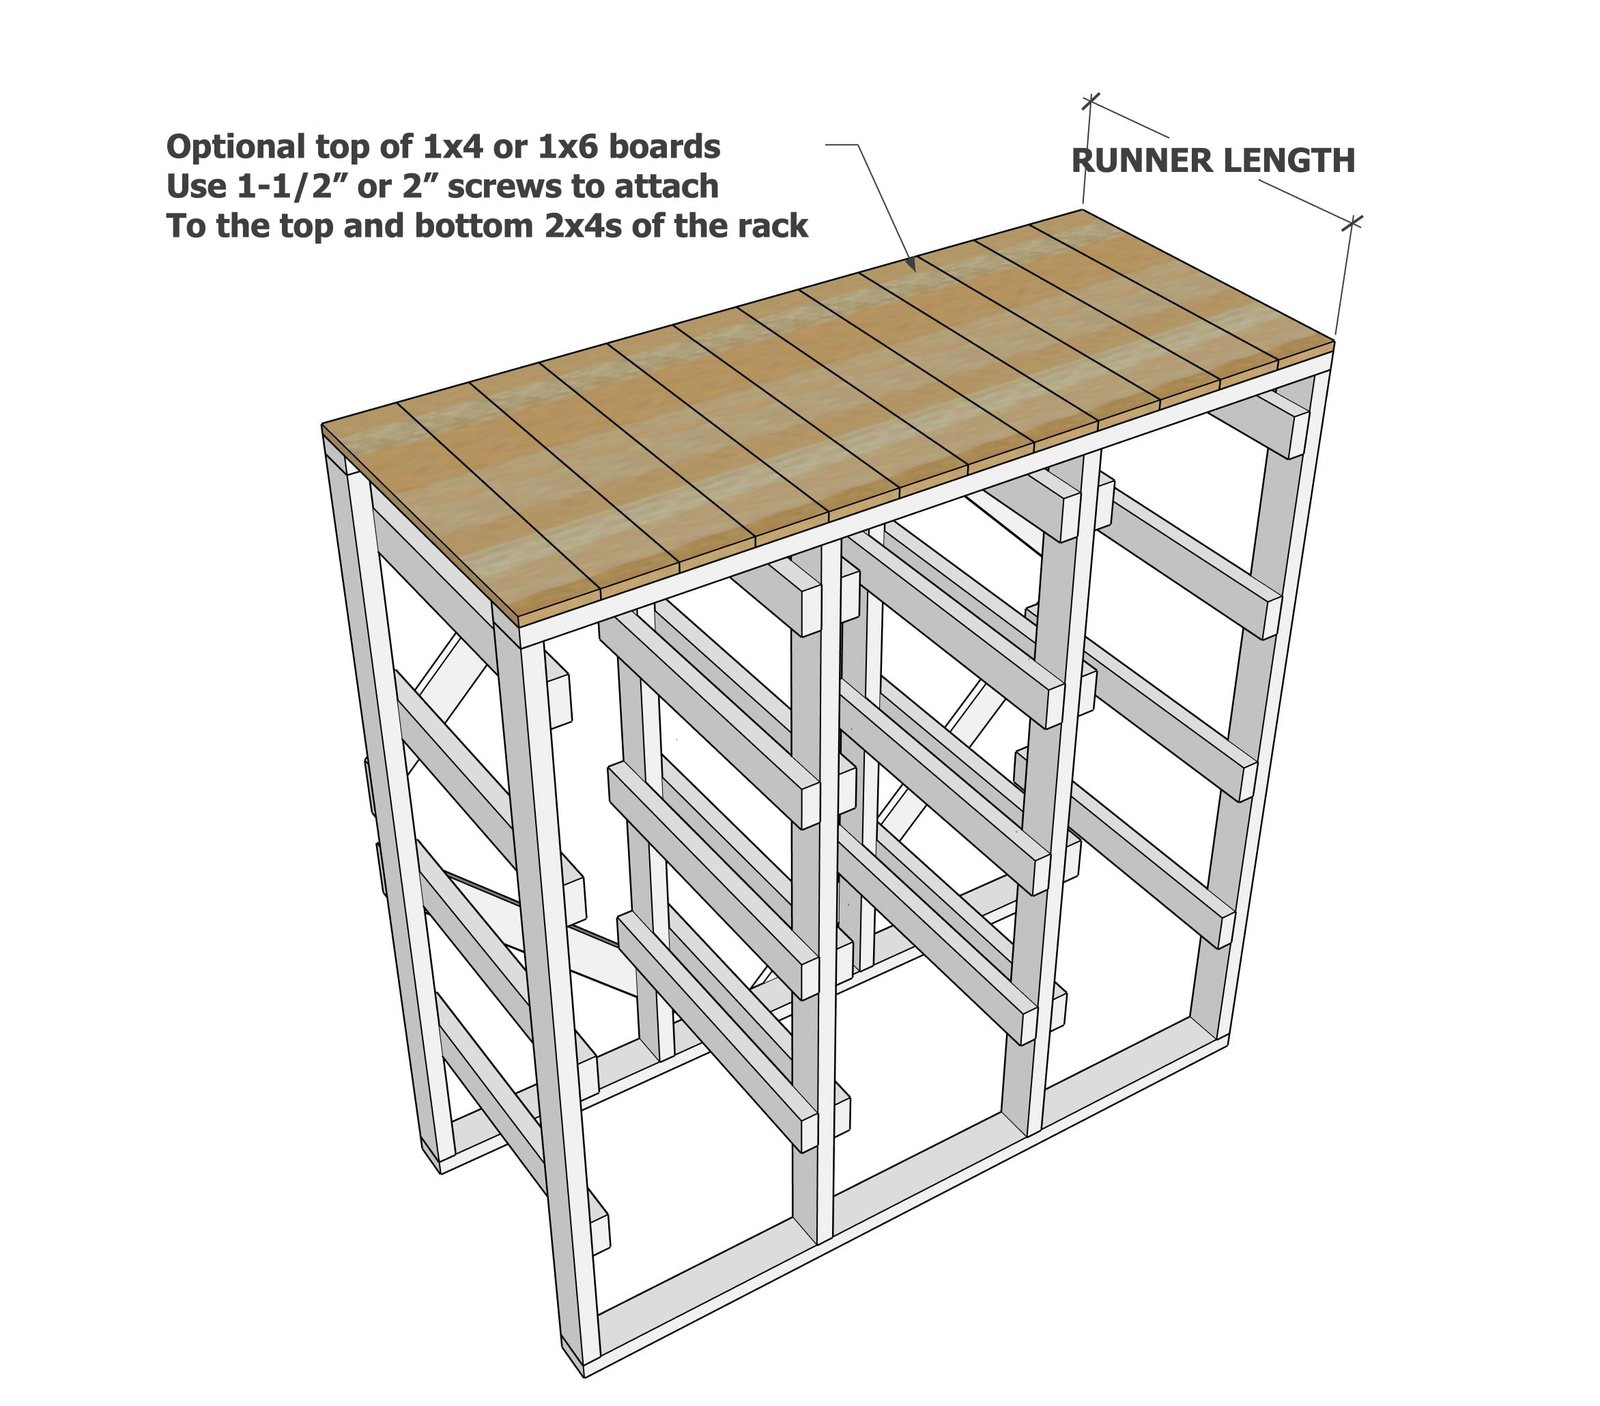
If a top is desired, the easiest method to achieve this is to use 1x6 boards or similar sized, and attach to the top with 1-1/2" to 2" long self tapping star bit screws.
Finishing
Sand all surfaces, starting with a medium grit and finishing with fine. Wipe off the dust, fill any holes or gaps with wood filler, and sand smooth once dry. Apply primer if you're painting, then finish with your choice of paint or stain and seal with a durable clear topcoat. For outdoor projects, use exterior-rated primer, paint or stain, and sealer so the piece stands up to the weather.
Source (temporary): https://www.ana-white.com/woodworking-projects/free-diy-tote-storage-rack-configurator-and-plans-ana-white