Narrow Wall Shelf
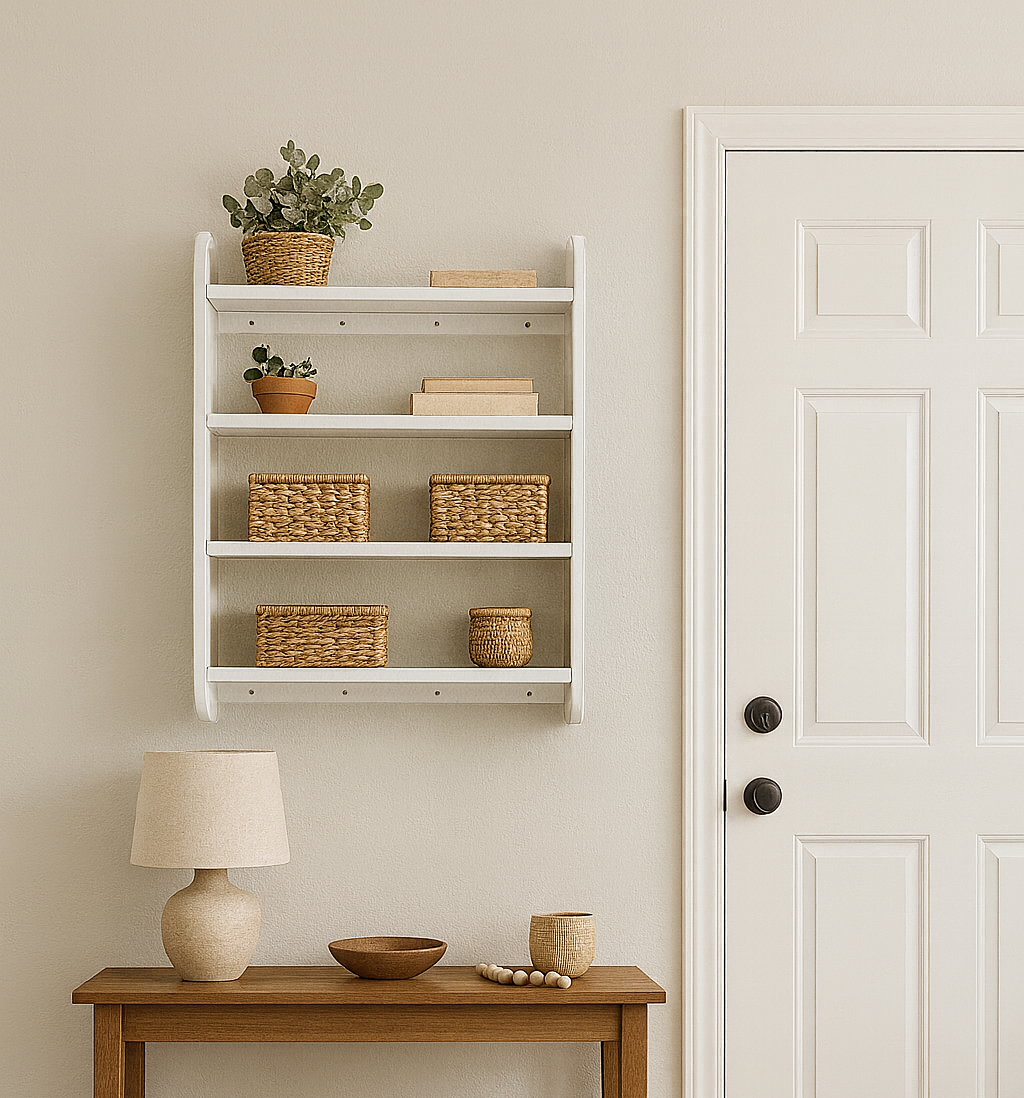
Add stylish, functional storage to any room with this easy-to-build wall shelf. Designed with clean lines and a compact profile, this piece is perfect for organizing and displaying small items without taking up valuable floor space. Whether you need a spot for baskets in a narrow entryway, a place to keep books and décor above a nightstand, or extra storage in a hallway, this shelf fits seamlessly into your home. Its four roomy tiers provide plenty of space for essentials while the shallow depth makes it ideal for tight spaces. Why You’ll Love It: • Versatile design – works in bedrooms, living areas, entryways, kitchens, or baths • Space-saving – slim profile adds storage even in narrow halls • Customizable – paint or stain to match your décor • Practical storage – perfect for baskets, books, keys, and other small essentials This gives you step-by-step instructions to create a functional and timeless piece you’ll use every day.
Specifications
| Project type | Other Projects |
|---|---|
| Room | Storage Solutions |
| Difficulty | Beginner Projects |
| Estimated cost | scraps |
Dimensions
Use the size-specific shopping and cut lists below.
Shopping List
- 1 - 1×8 8′ long
- 1 - 1×8 10′ long
- 1 - 1×2 8′ long
- Paint, Wood Filler
- 1-1/4" or 2″ Brad Nails
- Wood Glue
Cut List
- 2 – 1×8 @ 41″ (Sides, cut these out of the 8′ 1×8)
- 4 – 1×8 @ 28 1/2″ (Shelves, cut these out of the 10′ 1×8)
- 2 – 1×2 @ 28 1/2″ (Supports)
Tools
- measuring tape
- square
- safety glasses
- hearing protection
- drill
- circular saw
- jigsaw
- nailer
- sander
Step-by-step Instructions
Step 1
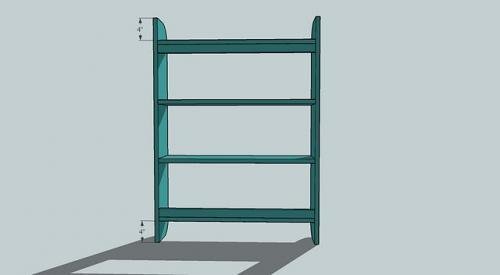
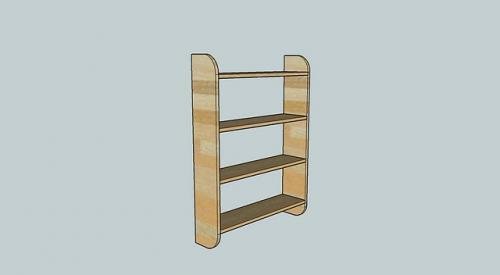
Start by cutting the desired end shape out of the sides. Remember not to go past 4″ on the vertical (up and down), as the top and bottom shelves will sit at 4″ from the top and 4″ from the bottom. After you cut one side out, use it as a pattern for the other side. Now would also be a good time to mark out your shelves, as shown below, on the sides. Remember, the shelves are 3/4″ thick.

Step 2
There is a 4" space on the top/bottom of the top and bottom shelves. See additional photos below.
Step 3
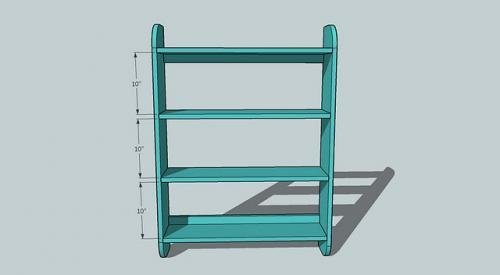
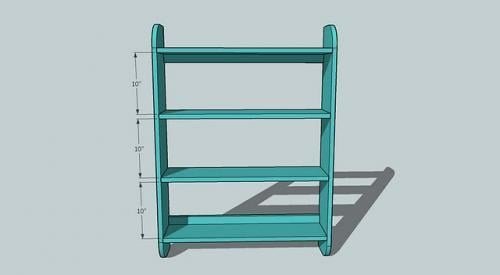
Shelves are spaced 10" apart.
Step 4
Attach shelves to the sides. Use glue and 2" screws or nails.
Step 5
Hang to studs in the wall using the back 1x2 supports and screw about 3" long.
Finishing
Sand all surfaces, starting with a medium grit and finishing with fine. Wipe off the dust, fill any holes or gaps with wood filler, and sand smooth once dry. Apply primer if you're painting, then finish with your choice of paint or stain and seal with a durable clear topcoat. For outdoor projects, use exterior-rated primer, paint or stain, and sealer so the piece stands up to the weather.
Source (temporary): https://www.ana-white.com/woodworking-projects/free-narrow-wall-shelf-plan-simple-versatile-storage-anywhere