Plans: Classic Farmhouse Kitchen Island
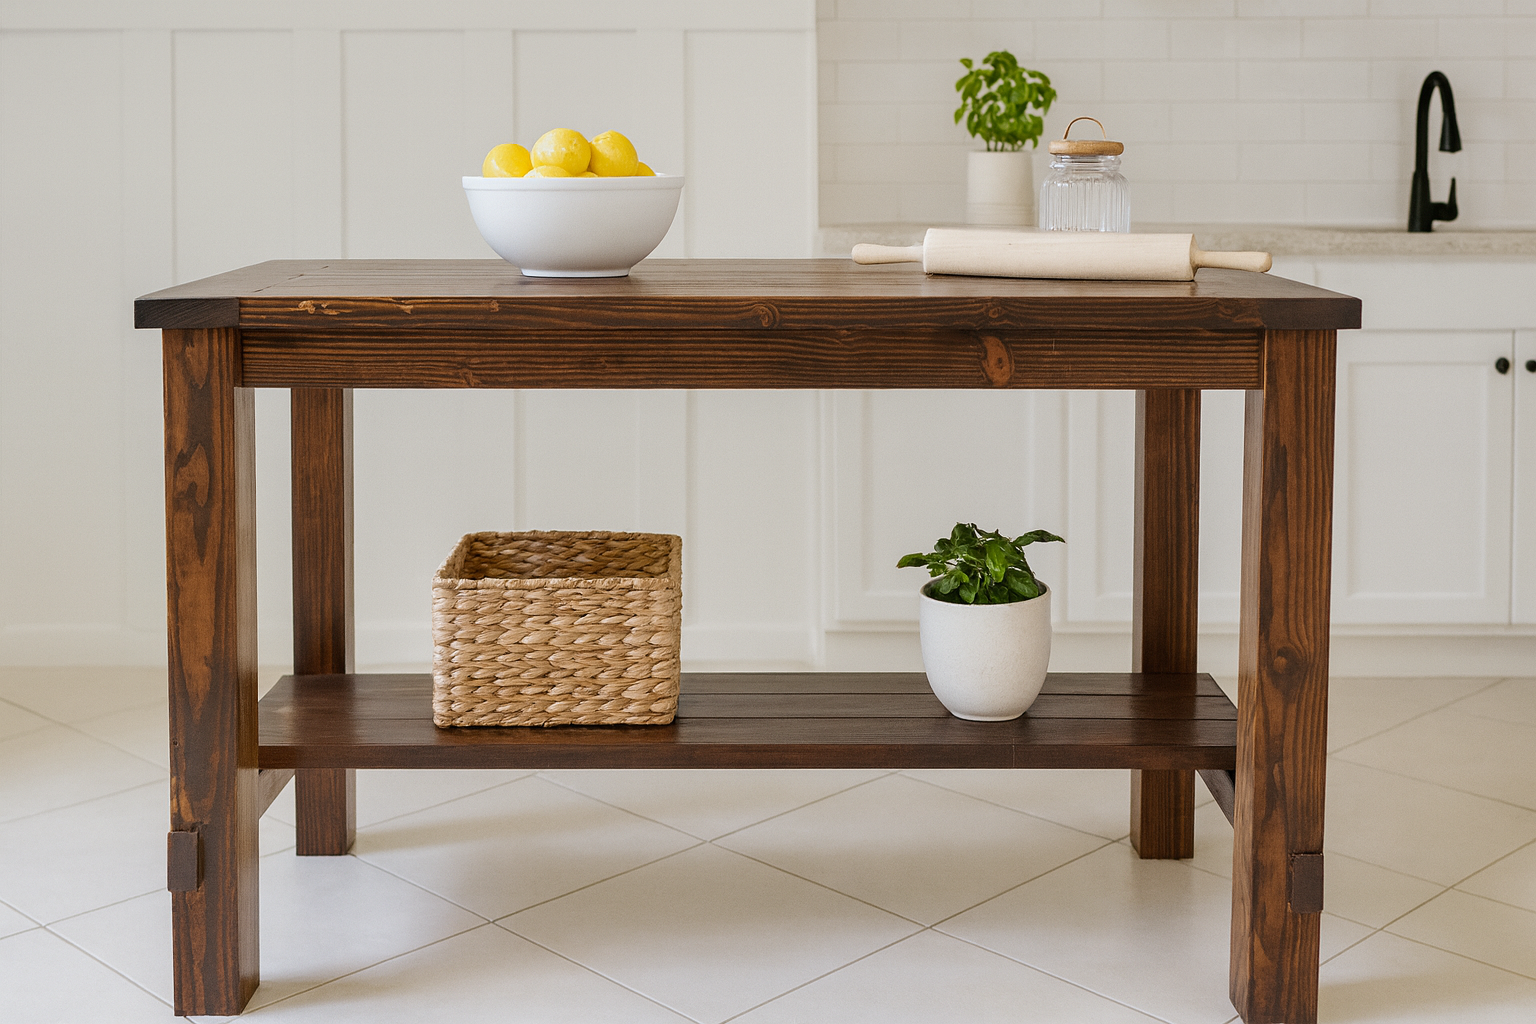
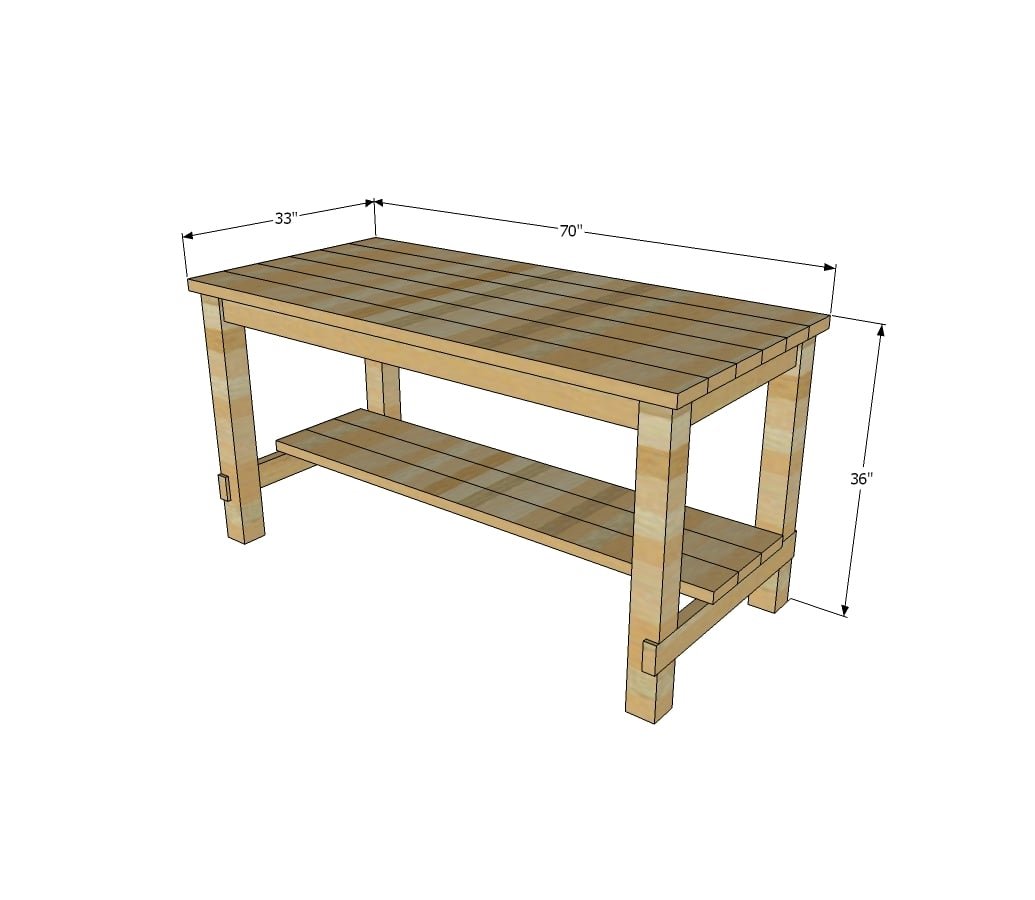
Bring timeless style and rugged durability to your kitchen with this Classic Farmhouse Kitchen Island. Designed for practical everyday use and built entirely from standard lumber—including solid 4x4 legs—this piece is as strong as it is beautiful. With a wide lower shelf for storage and an optional butcher block top, this island is ideal for food prep, serving, or simply adding character to your space. The include detailed diagrams, a full cut list, and step-by-step instructions to guide you through a rewarding DIY build. Plan Highlights: • Classic farmhouse design with open lower shelf • Constructed from 4x4 legs and all 2x lumber • Approximate dimensions: 70"L x 33"W x 36"H • Optional butcher block or solid wood top • Step-by-step diagrams, shopping list, and cut list included • Beginner-friendly—no pocket holes or complicated joinery required Whether you're outfitting a modern farmhouse or updating a traditional kitchen, this island makes a stunning and functional centerpiece. Download the free Classic Farmhouse Kitchen Island plans and start building today!
Specifications
| Project type | Kitchen Island Plans |
|---|---|
| Room | kitchen |
| Style | Farmhouse Furniture |
| Difficulty | Intermediate |
Dimensions
Use the size-specific shopping and cut lists below.
Shopping List
2 - 4x4 @ 6 feet long
4 - 2x4 @ 8 feet long
9 - 2x6 @ 6 feet long (cut 12 footers in half)
Cut List
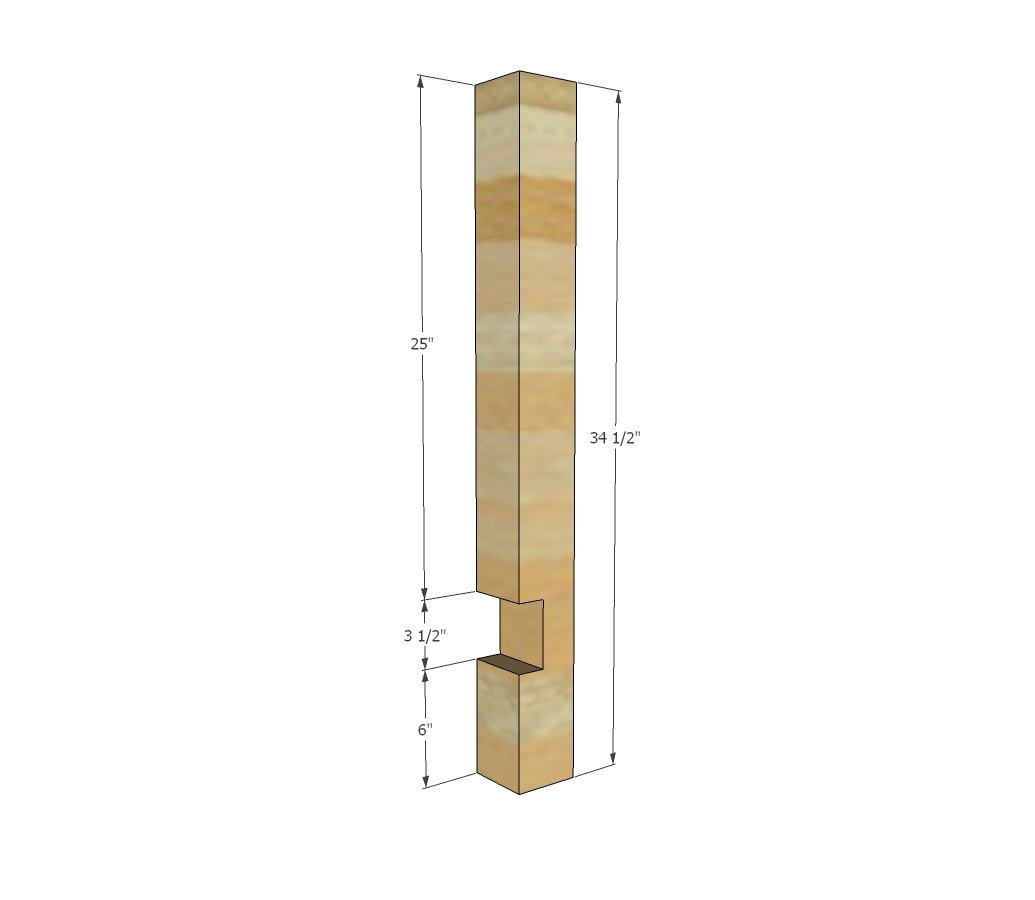
4 - 4x4 @ 34-1/2" - legs
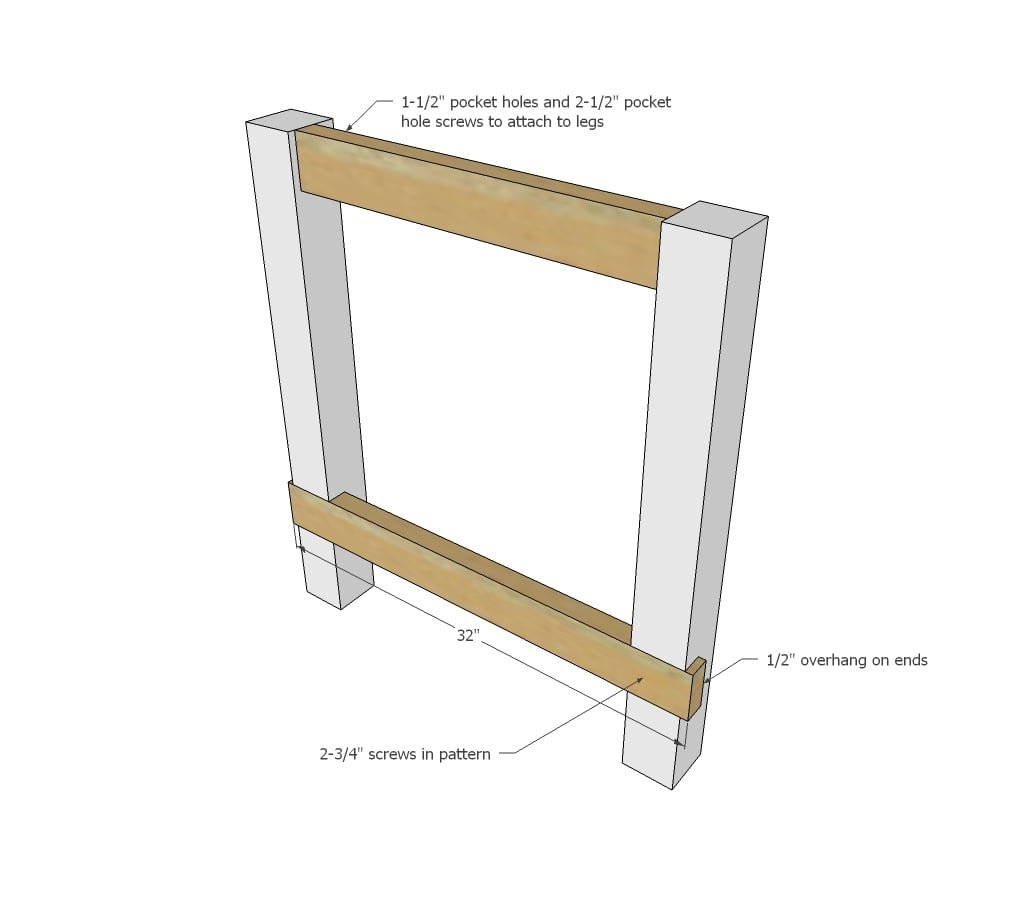
2 - 2x4 @ 32" - bottom stretcher
2 - 2x4 @ 24" - end aprons
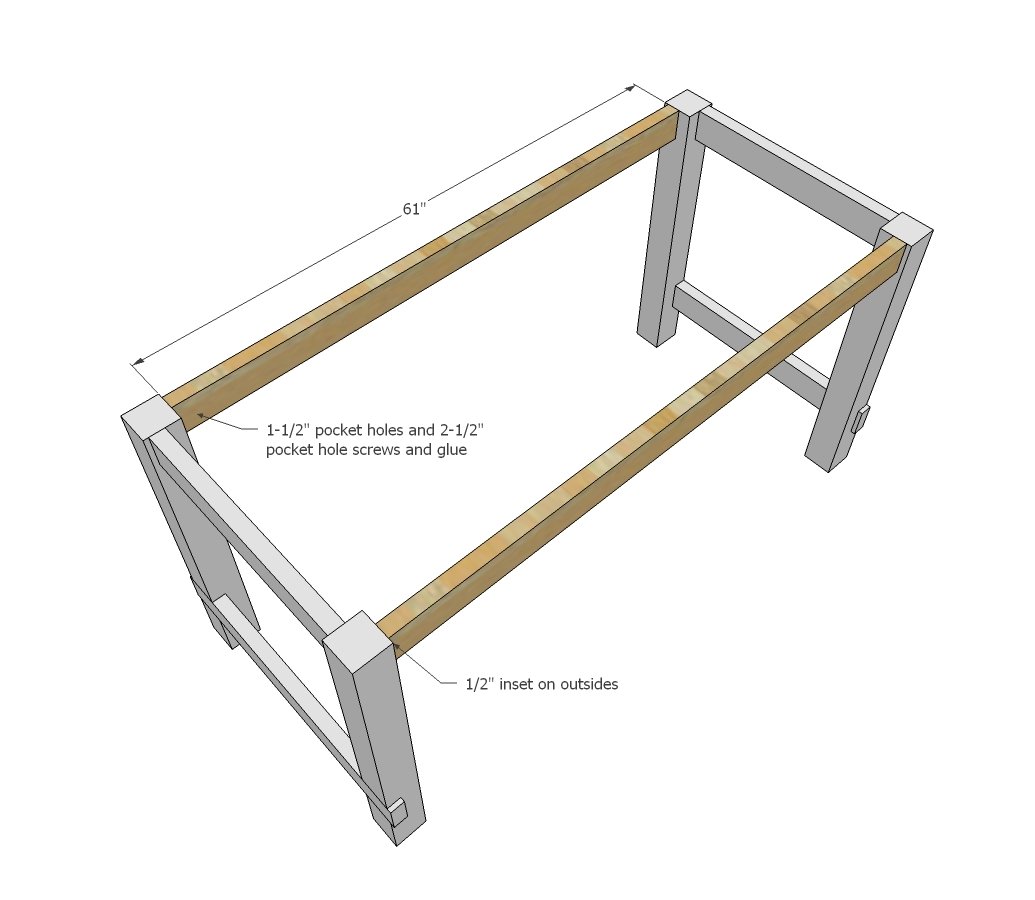
2 - 2x4 @ 61" - side aprons
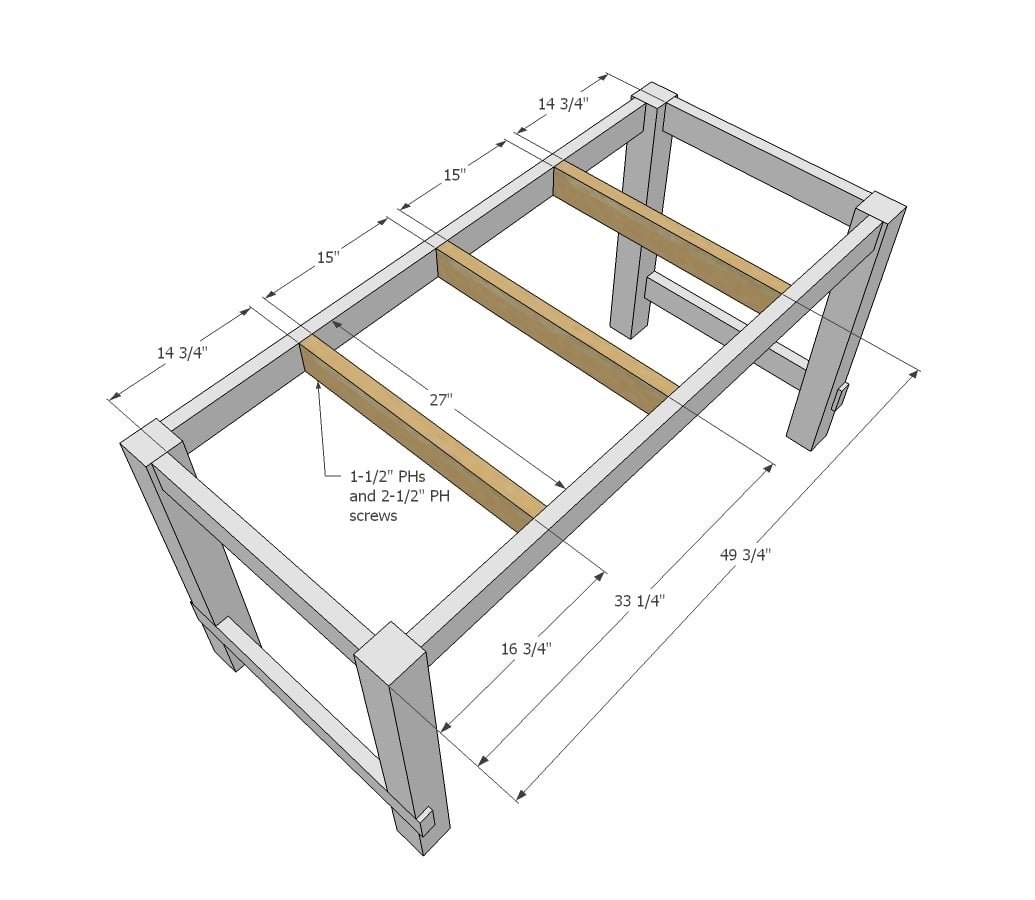
3 - 2x4 @ 27" - under table supports
3 - 2x6 @ 69" - shelf
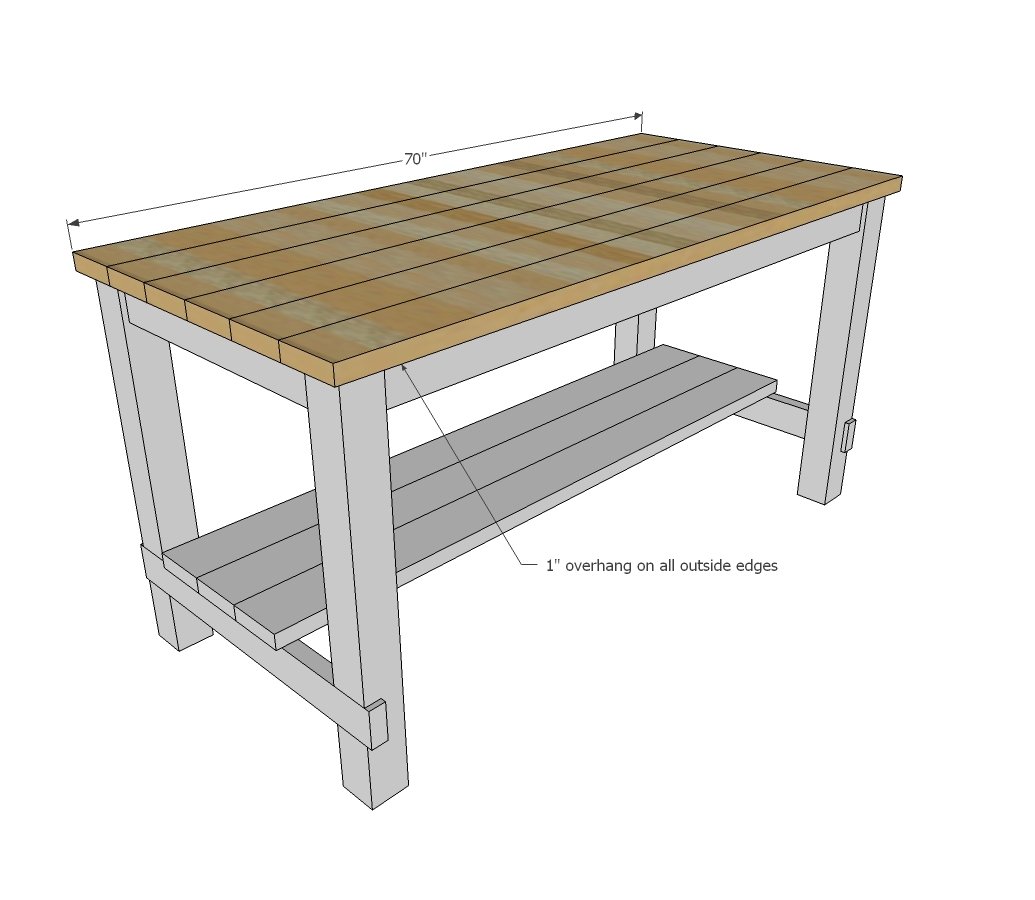
6 - 2x6 @ 70" - tabletop
Tools
- measuring tape
- square
- pencil
- safety glasses
- hearing protection
- kreg-jig
- drill
- circular saw
- compound miter saw
- sander
Step-by-step Instructions
Step 1
Notch each of the 4x4 legs out with a circular saw. To do this, set your circular saw blade depth to 1-1/2". Then make cuts in the notch out area every 1/4". Remove the material with a chisel.
Step 2
Attach bottom stretcher in notched out area with 2-1/2" screws and wood glue. Then drill two 1-1/2" pocket holes on each end of the top end apron board. Attach to legs. Check for square. Build two leg sets. TIP: Drill 1-1/2" pocket holes facing upward on inside of aprons for attaching tabletop in later steps.
Step 3
TIP: Drill 1-1/2" pocket holes facing upward on inside of aprons for attaching tabletop in later steps. Drill two 1-1/2" pocket holes on each end of the 2x4 side apron boards. Attach to 4x4 legs with 2-1/2" pocket hole screws and glue. Adjust for square.
Step 4
TIP: Drill 1-1/2" pocket holes facing upward on inside of supports for attaching tabletop in later steps. Use pocket holes to attach the supports to the side aprons with 2-1/2" pocket hole screws.
Step 5
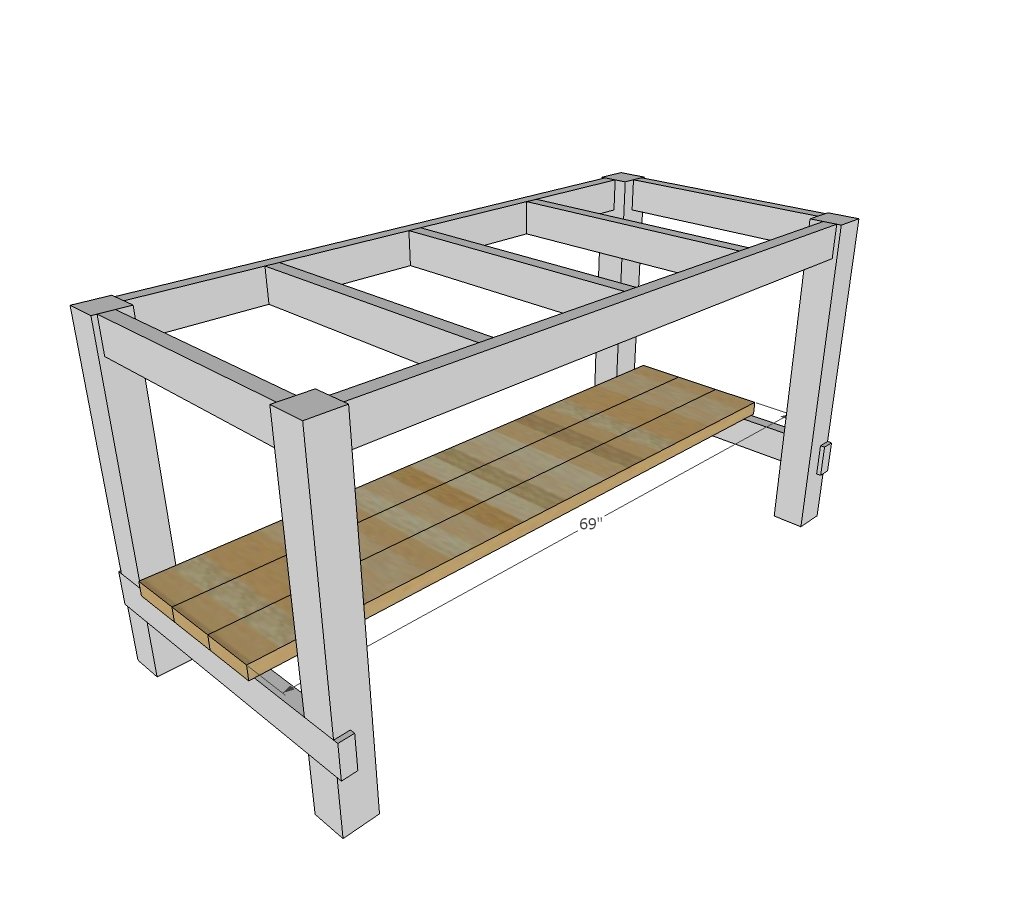
Build tabletop - here is a good tutorial -
And then attach tabletop to the aprons.
Finishing
Sand all surfaces, starting with a medium grit and finishing with fine. Wipe off the dust, fill any holes or gaps with wood filler, and sand smooth once dry. Apply primer if you're painting, then finish with your choice of paint or stain and seal with a durable clear topcoat. For outdoor projects, use exterior-rated primer, paint or stain, and sealer so the piece stands up to the weather.
Source (temporary): https://www.ana-white.com/woodworking-projects/free-plans-classic-farmhouse-kitchen-island-built-2x-lumber-solid-4x4-legs