Plans: DIY Bathroom Tall Boy Cabinet
Need more bathroom storage and a stylish piece of furniture? This DIY bathroom tall boy cabinet checks all the boxes. It stands tall on the floor and gives you a ton of functional storage—from a big lower cupboard for toilet paper and bathroom supplies, to open shelves on top for towels, toiletries, and those pretty little decorative items that make your space feel complete. Whether you're working with a small bathroom or just need extra space to organize, this tall bathroom cabinet is a game-changer.
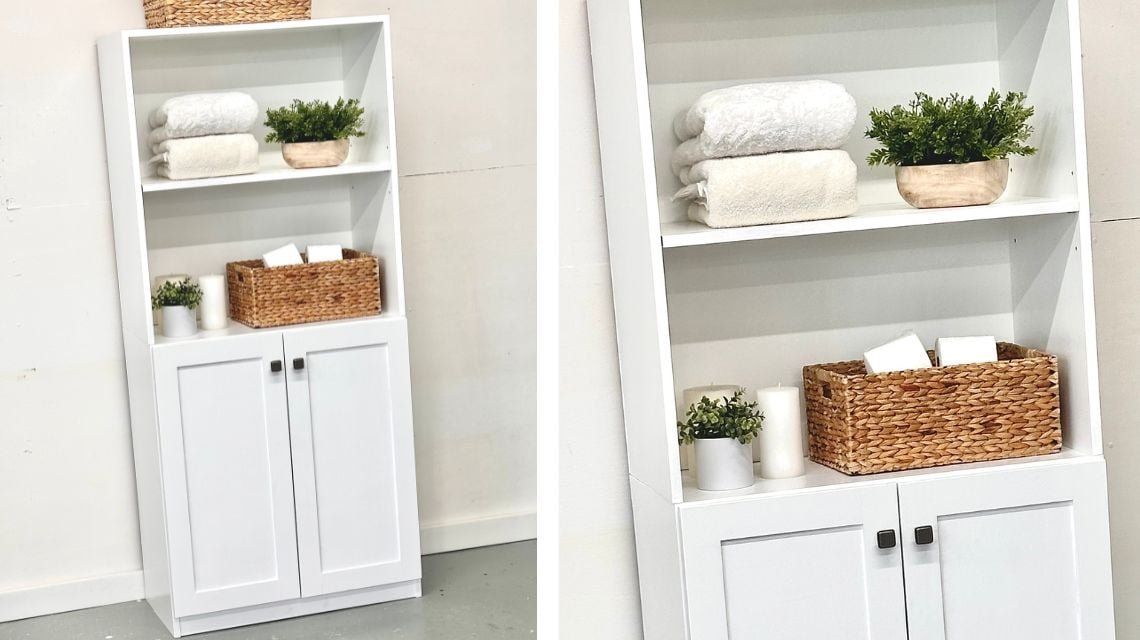
Specifications
| Project type | Hutch Plans |
|---|---|
| Room | Bathroom |
| Difficulty | Intermediate |
Dimensions
Use the size-specific shopping and cut lists below.
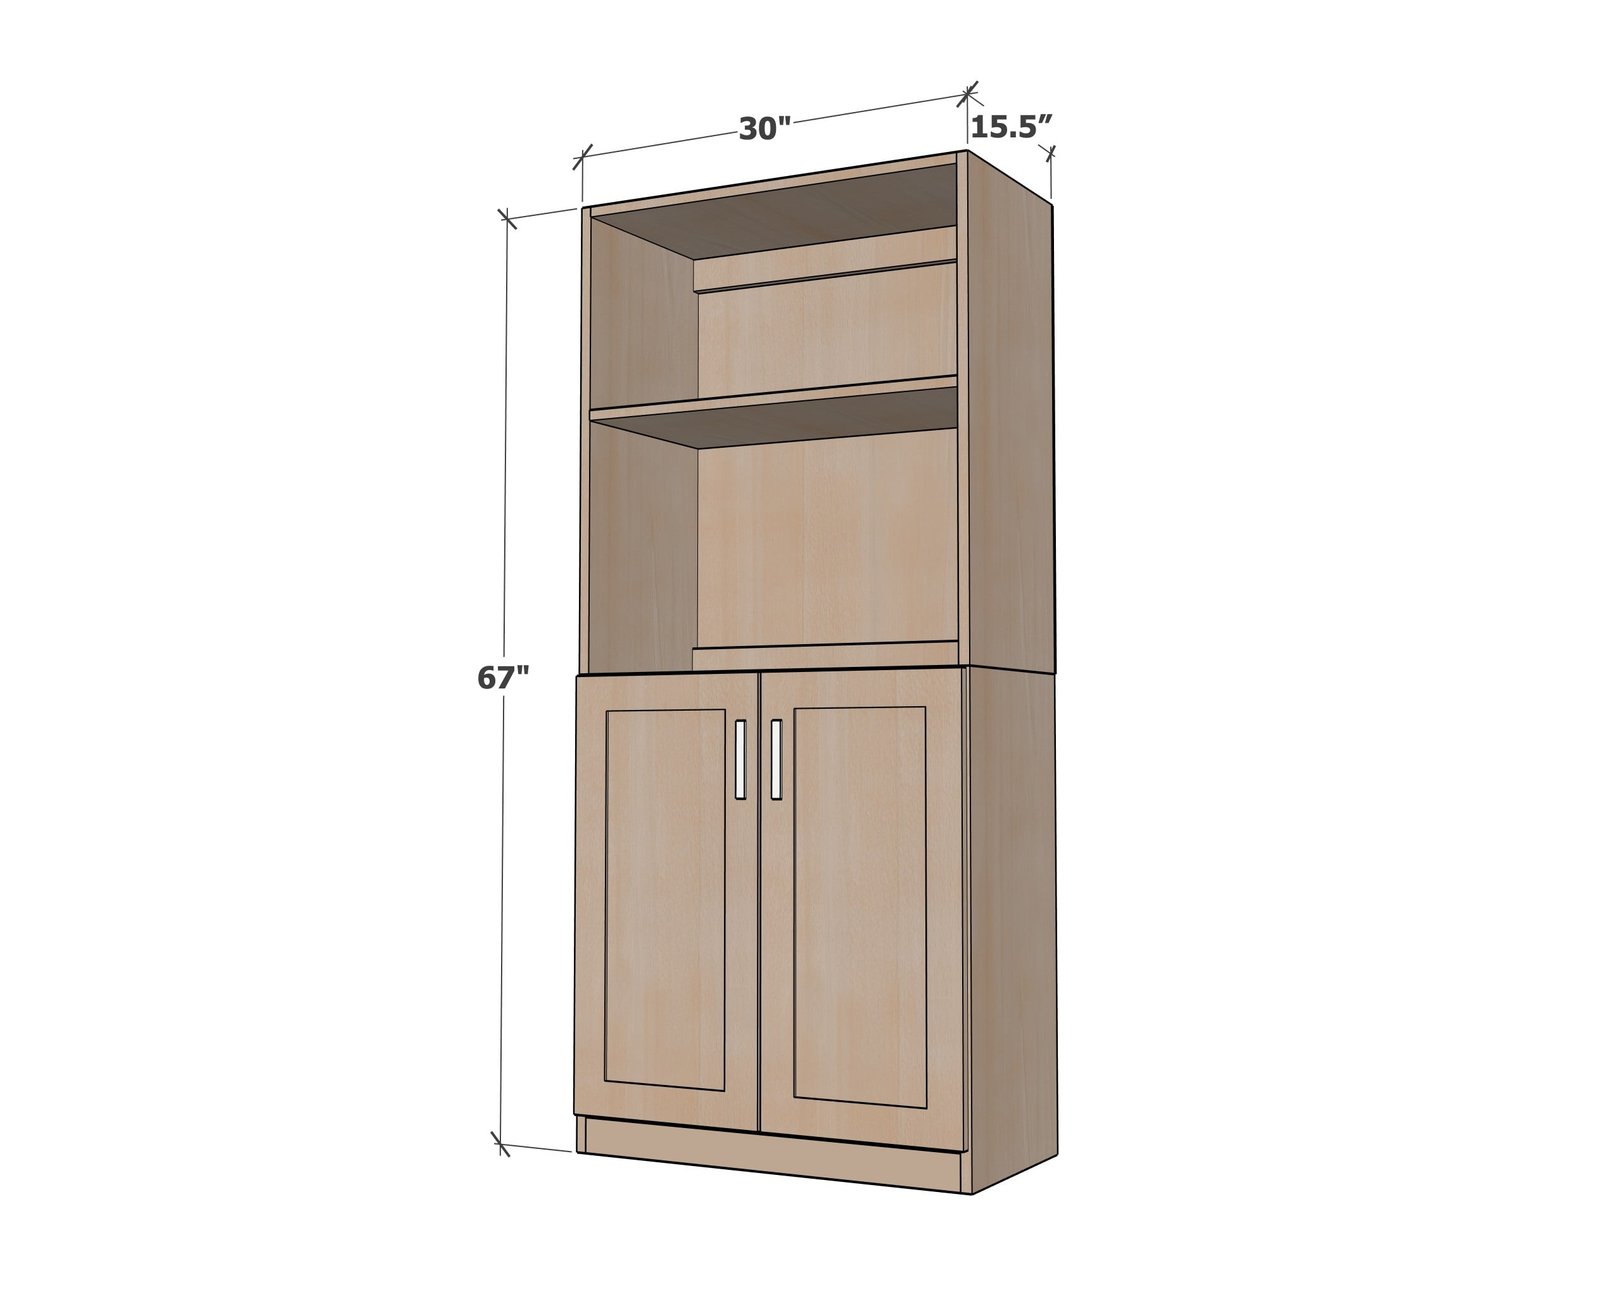
Shopping List
- 1 - sheet of 3/4" plywood, ripped into strips 15-1/4" wide x 8 feet long
- 2 - 1x3 @ 8 feet long
- 1 - sheet of 1/4" thick underlayment or hardwood plywood
- 25 feet of 3/4" wide edge banding
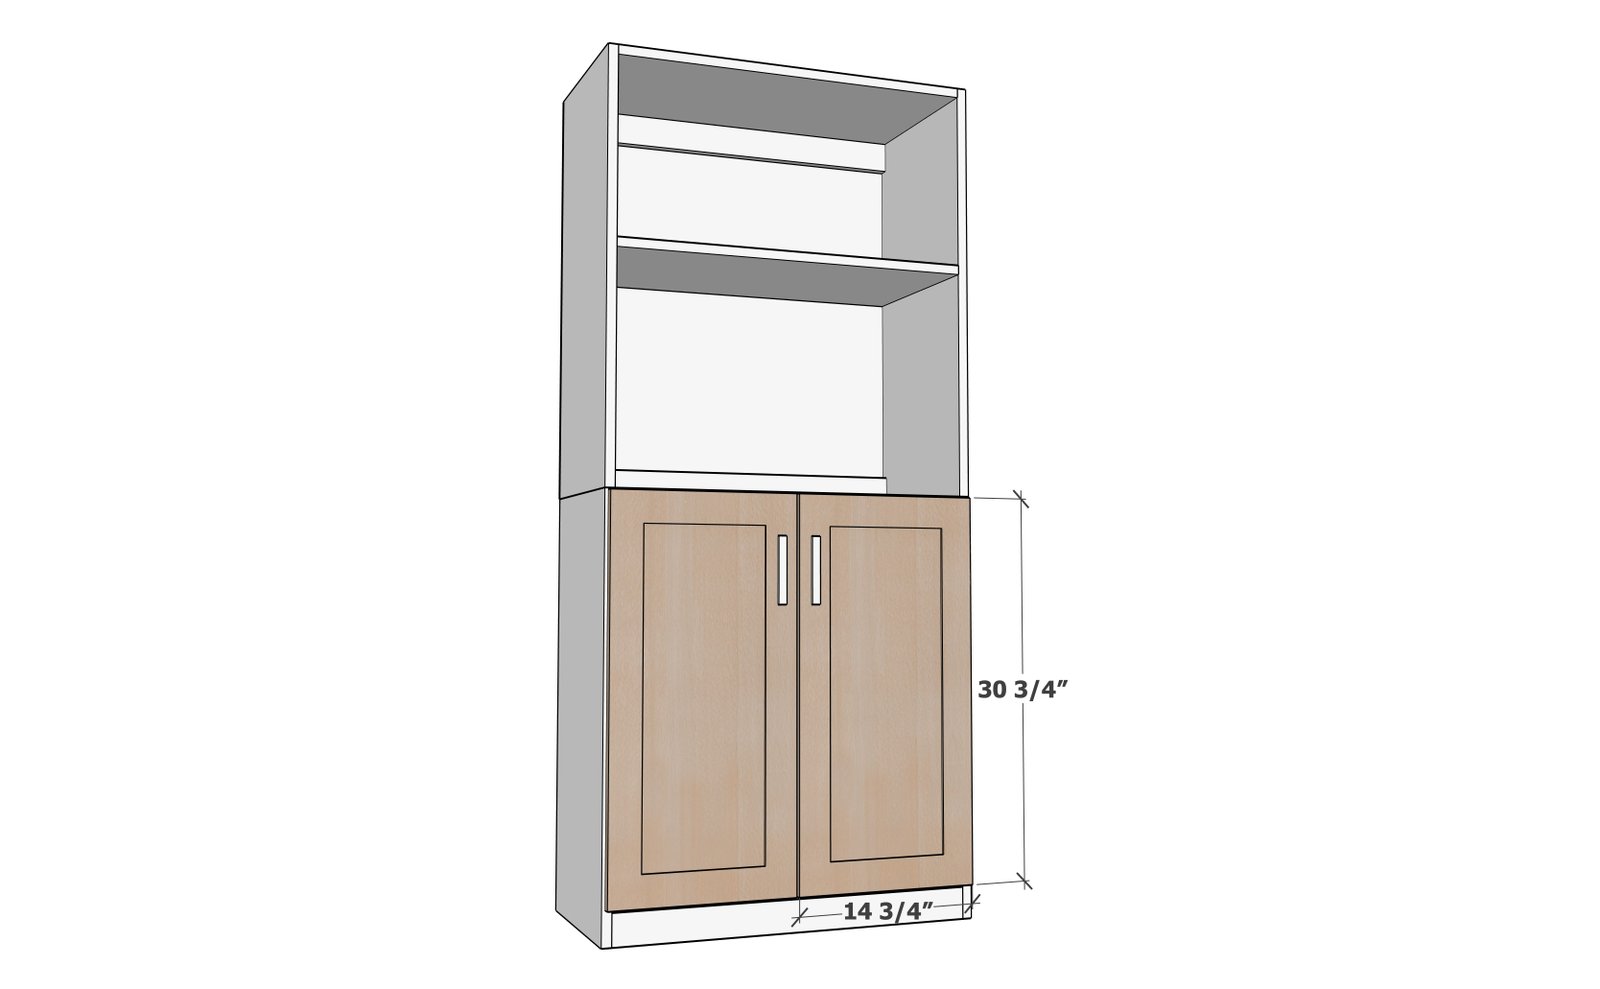
- 2 cabinet doors, dimensions 30-3/4" x 14-3/4"
- 2 sets of Frameless Full Overlay (5/8") Concealed Hinges
- Shelf Pins if using adjustable shelves
- About (45) 1-1/4" coarse thread pocket hole screws
- 3/4" brad nails
- wood glue
- cabinet paint
Cut List
- 4 - 3/4" plywood @ 33-1/2"- cut first from strips
- 5 - 3/4" plywood @ 28-1/2" - cut after cutting the 33-1/2" pieces
- 5 - 1x3 @ 28-1/2" - bay supports
Tools
- measuring tape
- square
- safety glasses
- kreg-jig
- drill
- circular saw
- compound miter saw
- nailer
- sander
Step-by-step Instructions
Step 1
Build two carcasses as shown, but place the pocket holes on the top carcass at the top, and on the base carcass underneath, so they will be hidden.
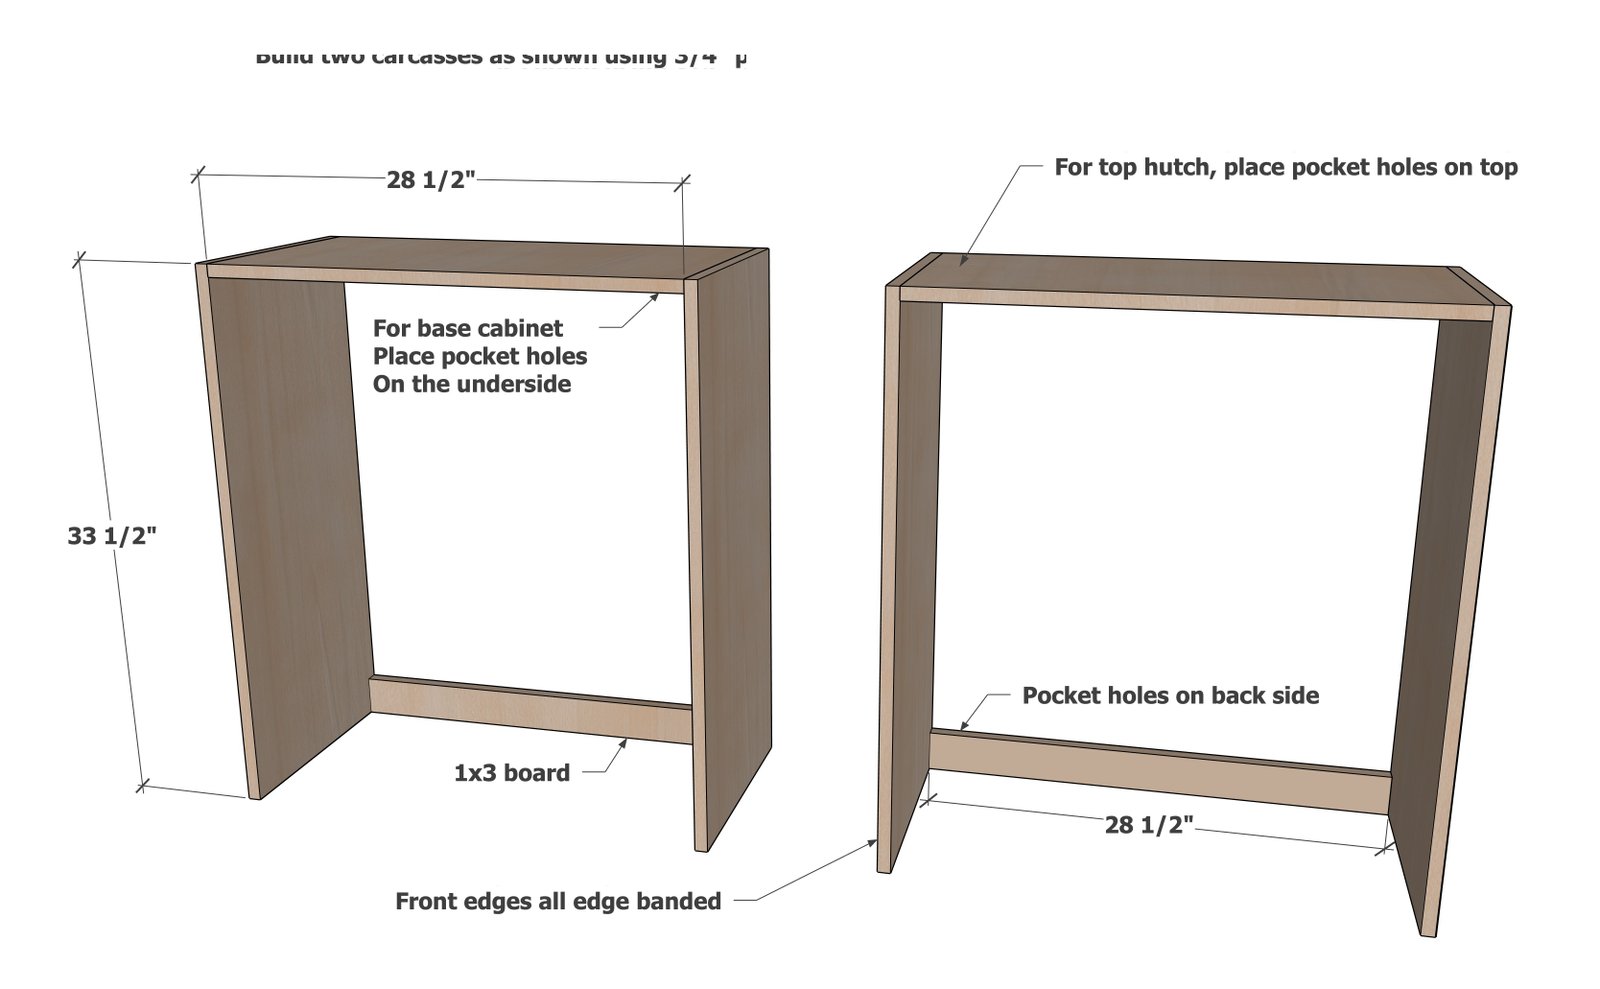
Step 2
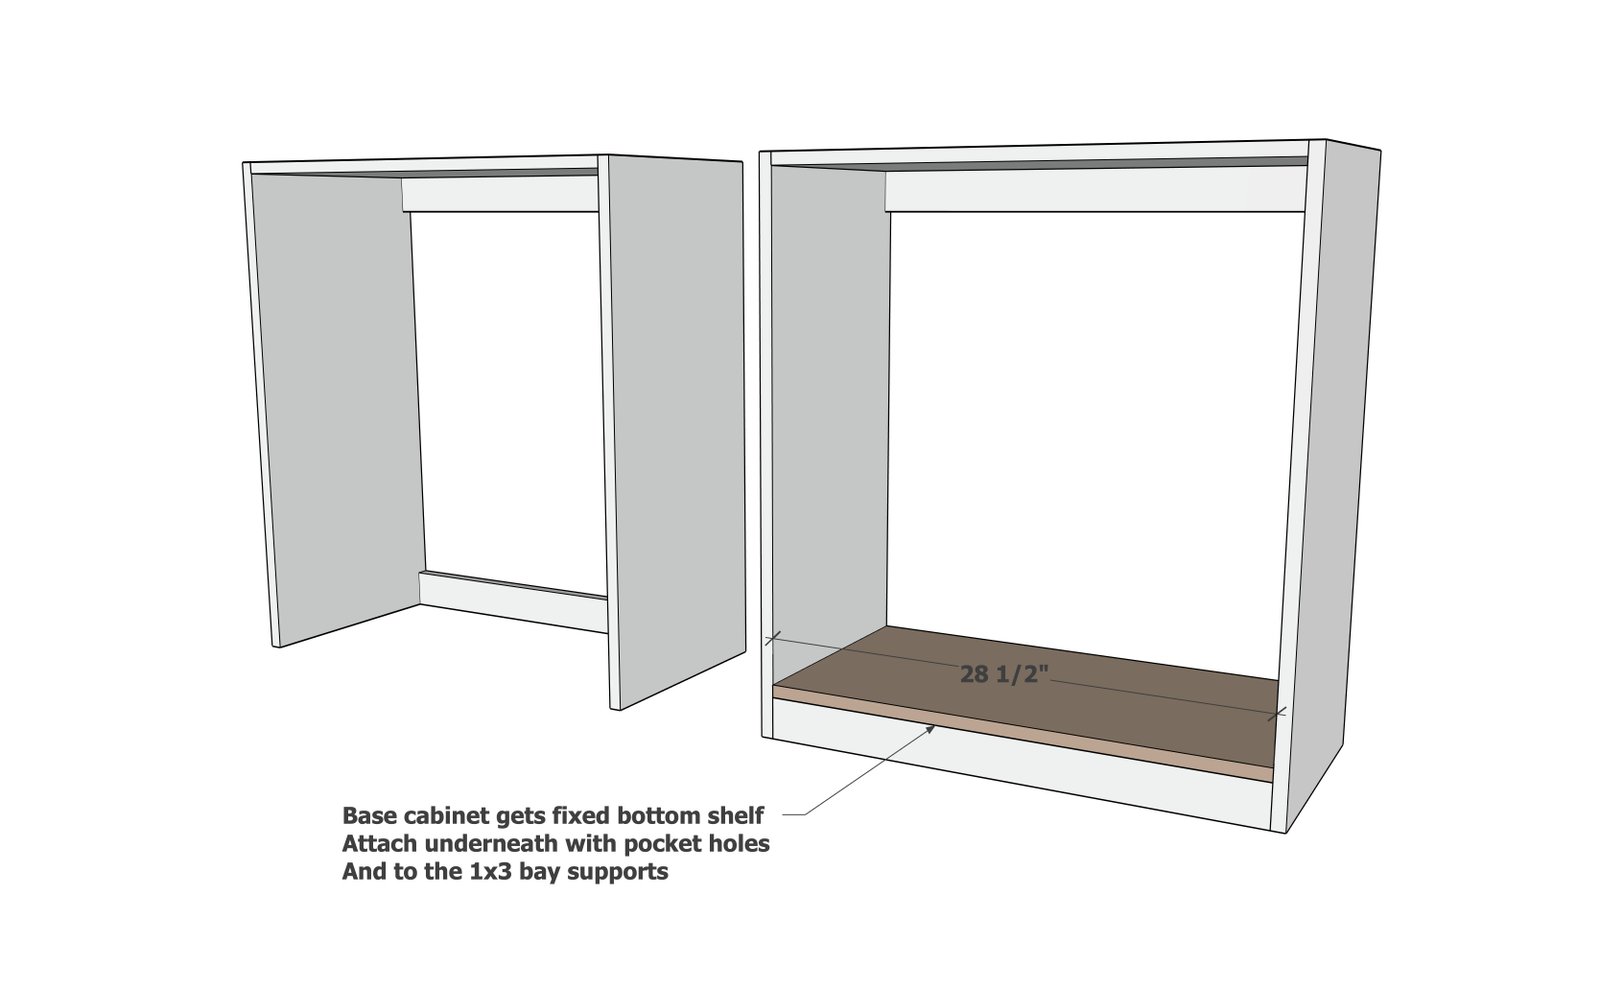
On both carcasses, add additional bay support at the to back, as shown, using pocket holes facing upward and into the ends. This will add considerable structure to your project. On just the base carcass (the one with no pocket holes showing on the top) add a second bay support as shown. Make sure pocket holes are facing the back of the cabinet. NOTE: Base carcass will get a bottom shelf in next steps, so plan pocket holes to drill into underside of bottom shelf for base carcass.
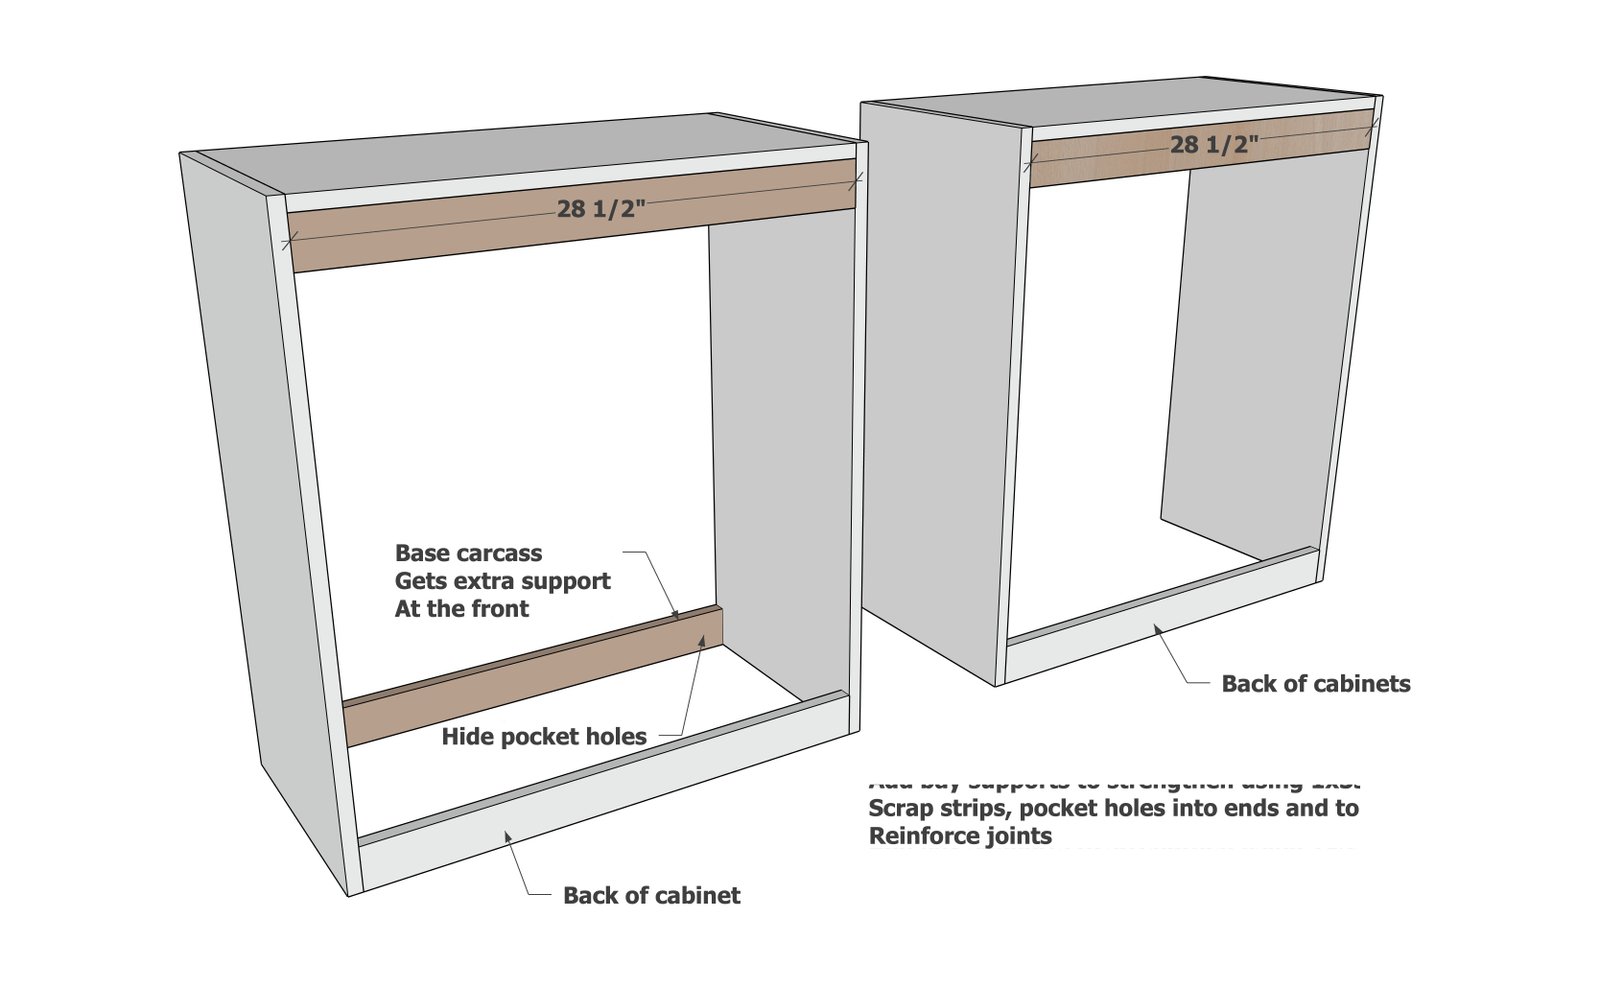
Step 3
On the base carcass, add the bottom piece of plywood and attach with pocket holes.
Step 4
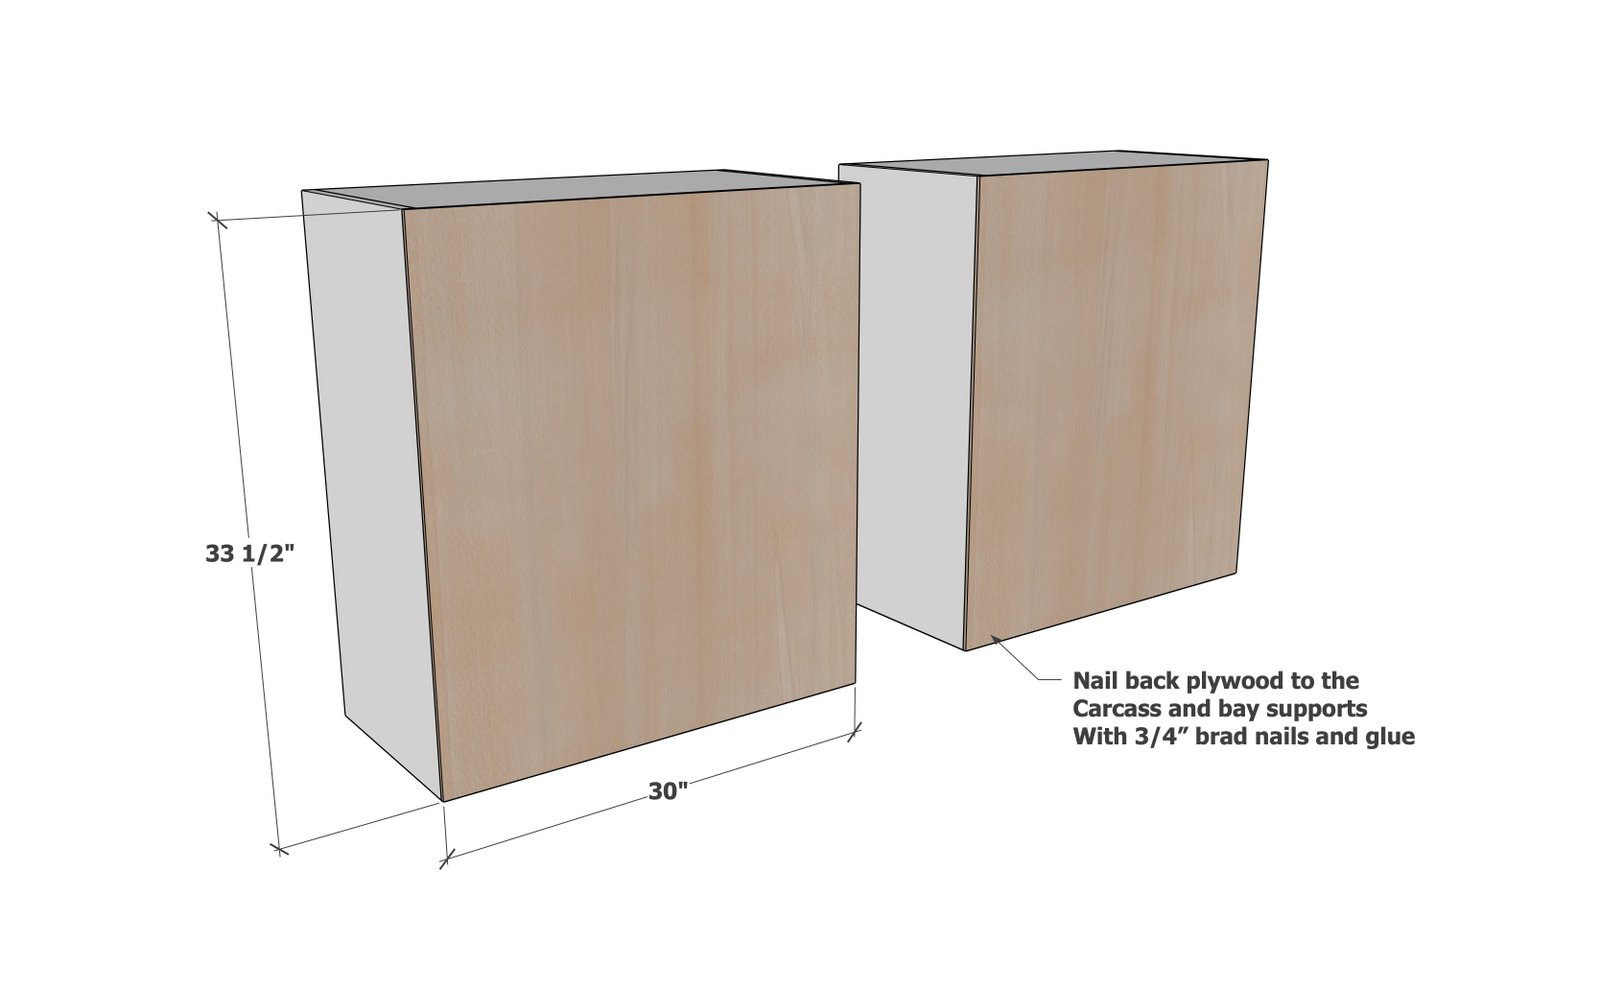
Cut the back pieces. Apply glue to the backs of the carcass. Line up a factory edge of the 1/4" plywood to the side of the carcass and attach. Then work around the carcass nailing down with 3/4" brad nails, maneuvering the carcass so it matches the square edges of the plywood. This squares up the cabinets.
Step 5
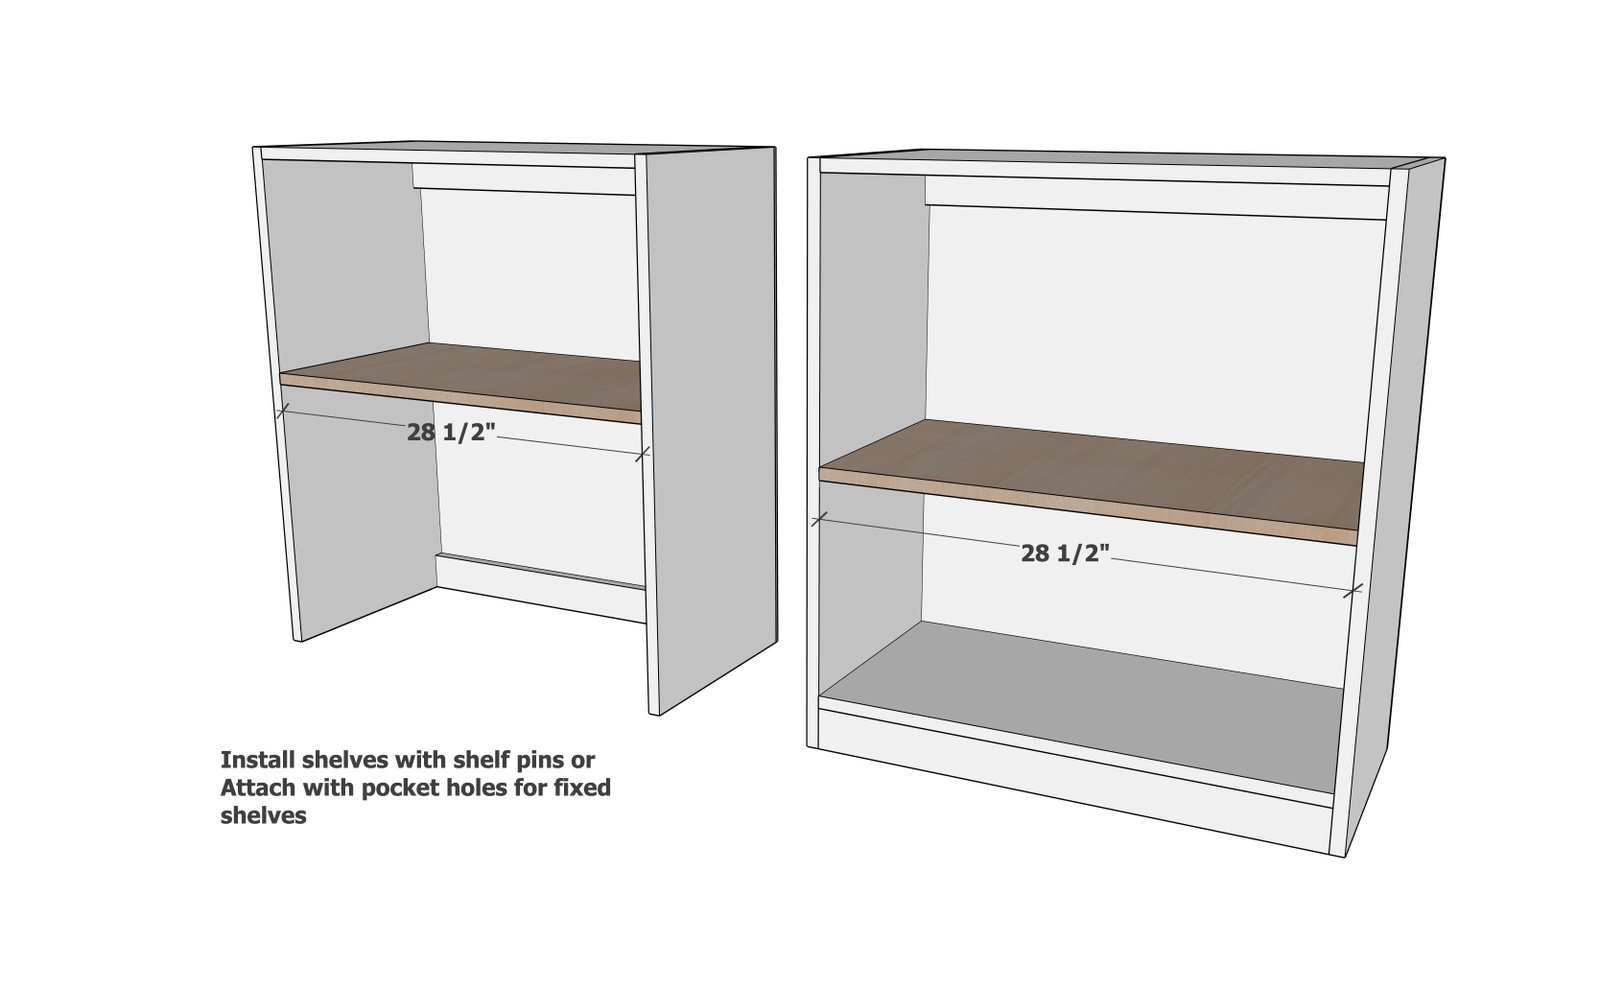
Attach shelves fixed in place, or drill shelf pins for adjustable shelves. If doing adjustable shelves, you may need to trim the shelf length an 1/8" to allow for easy placement.
Step 6
Build the doors and install with frameless concealed hinges for full overall doors.
Finishing
Sand all surfaces, starting with a medium grit and finishing with fine. Wipe off the dust, fill any holes or gaps with wood filler, and sand smooth once dry. Apply primer if you're painting, then finish with your choice of paint or stain and seal with a durable clear topcoat. For outdoor projects, use exterior-rated primer, paint or stain, and sealer so the piece stands up to the weather.
Source (temporary): https://www.ana-white.com/woodworking-projects/free-plans-diy-bathroom-tall-boy-cabinet