Plans Lightweight Cornhole Boards
Build your own lightweight cornhole boards with this easy and affordable DIY project. Using simple materials like 1x3s and 1/2" plywood, you can make portable cornhole boards for under $25 each. Perfect for beginners, these boards are fun to build and easy to customize with paint or stain—great for backyard games, tailgating, and summer parties. RELATED: for standard corn hole boards
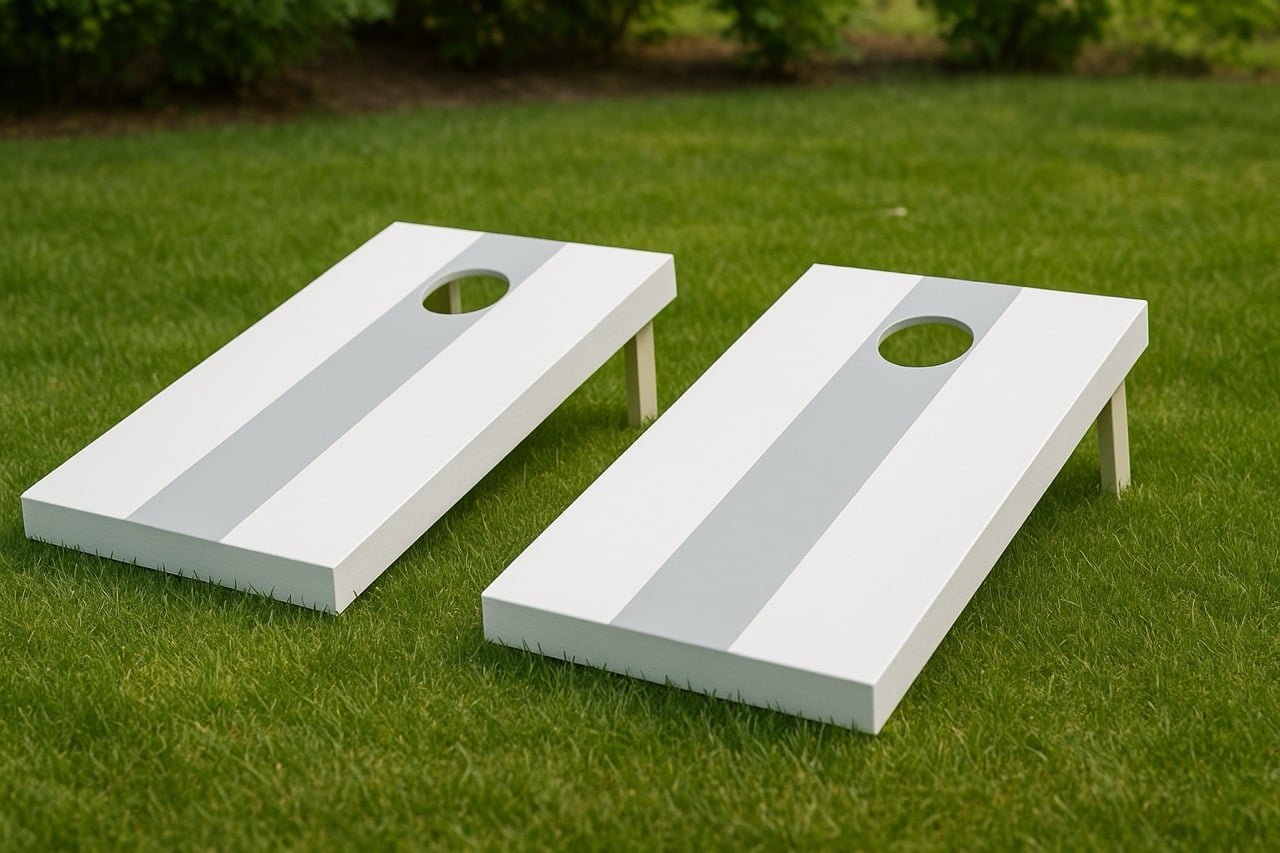
Specifications
| Project type | Toys |
|---|---|
| Room | Outdoor |
| Difficulty | Starter Projects |
| Estimated cost | $20 - $50 |
Dimensions
Use the size-specific shopping and cut lists below.
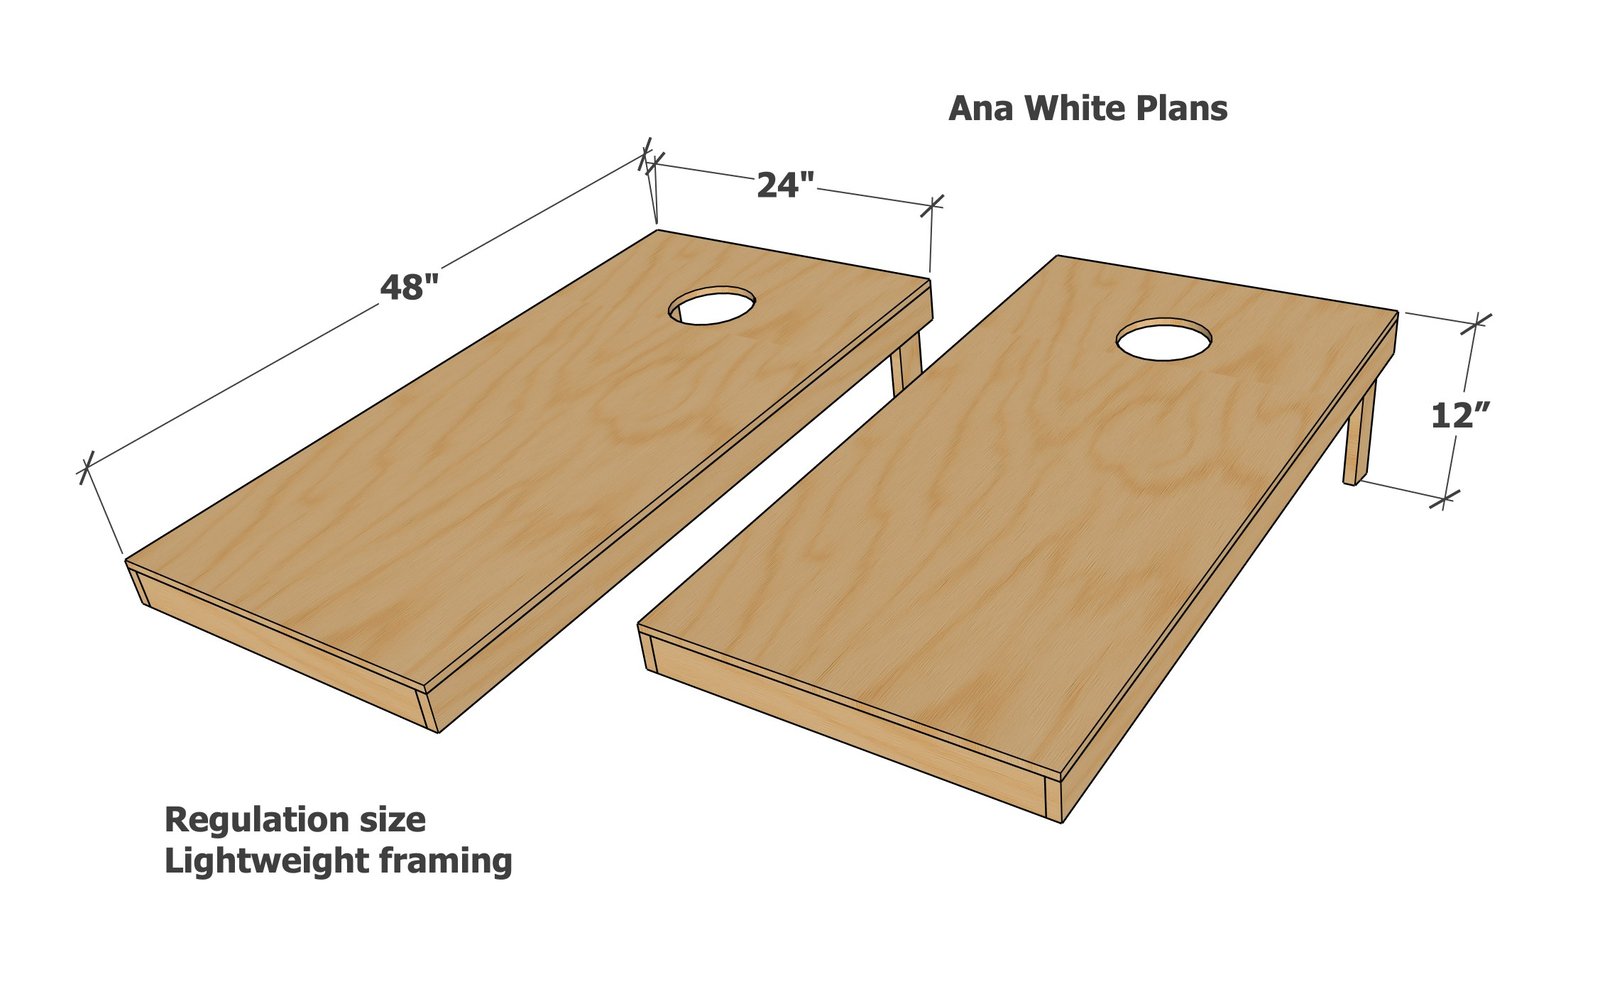
Shopping List
For Set of 2 Corn Hole Boards
- 4 - 1x3 @ 8 feet long (can be furring strips for budget option)
- 1 - 48" x 48" sheet of 1/2" thick exterior plywood, with one smooth side (AC or sanded) - can also purchase two 24" x 48" panels
- 50 - 1-5/8" star bit, flat headed exterior decking screws
- 4 - 2" long, 1/4" diameter shaft, exterior bolts
- 4 - 1/4" locking nuts (matches bolts)
- 8 - fender washers that match the bolts
- 1/4" drill bit
- Bean bags (8 total, in sets of 4 in different colors)
For Set of 4 Corn Hole Boards
- 8 - 1x3 @ 8 feet long (can be furring strips for budget option)
- 1 - 96" x 48" sheet of 1/2" thick exterior plywood, with one smooth side (AC or sanded) - can also purchase two 24" x 48" panels
- 100 - 1-5/8" star bit, flat headed exterior decking screws
- 8 - 2" long, 1/4" diameter shaft, exterior bolts
- 8 - 1/4" locking nuts (matches bolts)
- 16 - fender washers that match the bolts
- 1/4" drill bit
- Bean bags (16 total, in sets of 4 in different colors)
Cut List
For Set of 2 Corn Hole Boards
- 4- 1x3 @ 48"
- 6 - 1x3 @ 22-1/2"
- 4 - 1x3 @ 11-1/2" - one end cut at 10 degrees off square, long point measurement
- 2 - 1/2" thick plywood @ 24" x 48" (if using the 48"x48" panel, simply cut exactly in half)
For Set of 4 Corn Hole Boards
- 8- 1x3 @ 48"
- 12 - 1x3 @ 22-1/2"
- 8 - 1x3 @ 11-1/2" - one end cut at 10 degrees off square, long point measurement
- 4 - 1/2" thick plywood @ 24" x 48" (if using the 48"x48" panel, simply cut exactly in quarters)
Tools
- measuring tape
- square
- pencil
- safety glasses
- drill
- jigsaw
- sander
Step-by-step Instructions
Step 1
Layout the frame pieces on a flat level surface. Attach the sides to the inside pieces with two screws per joint. If wood is splitting, predrill holes.
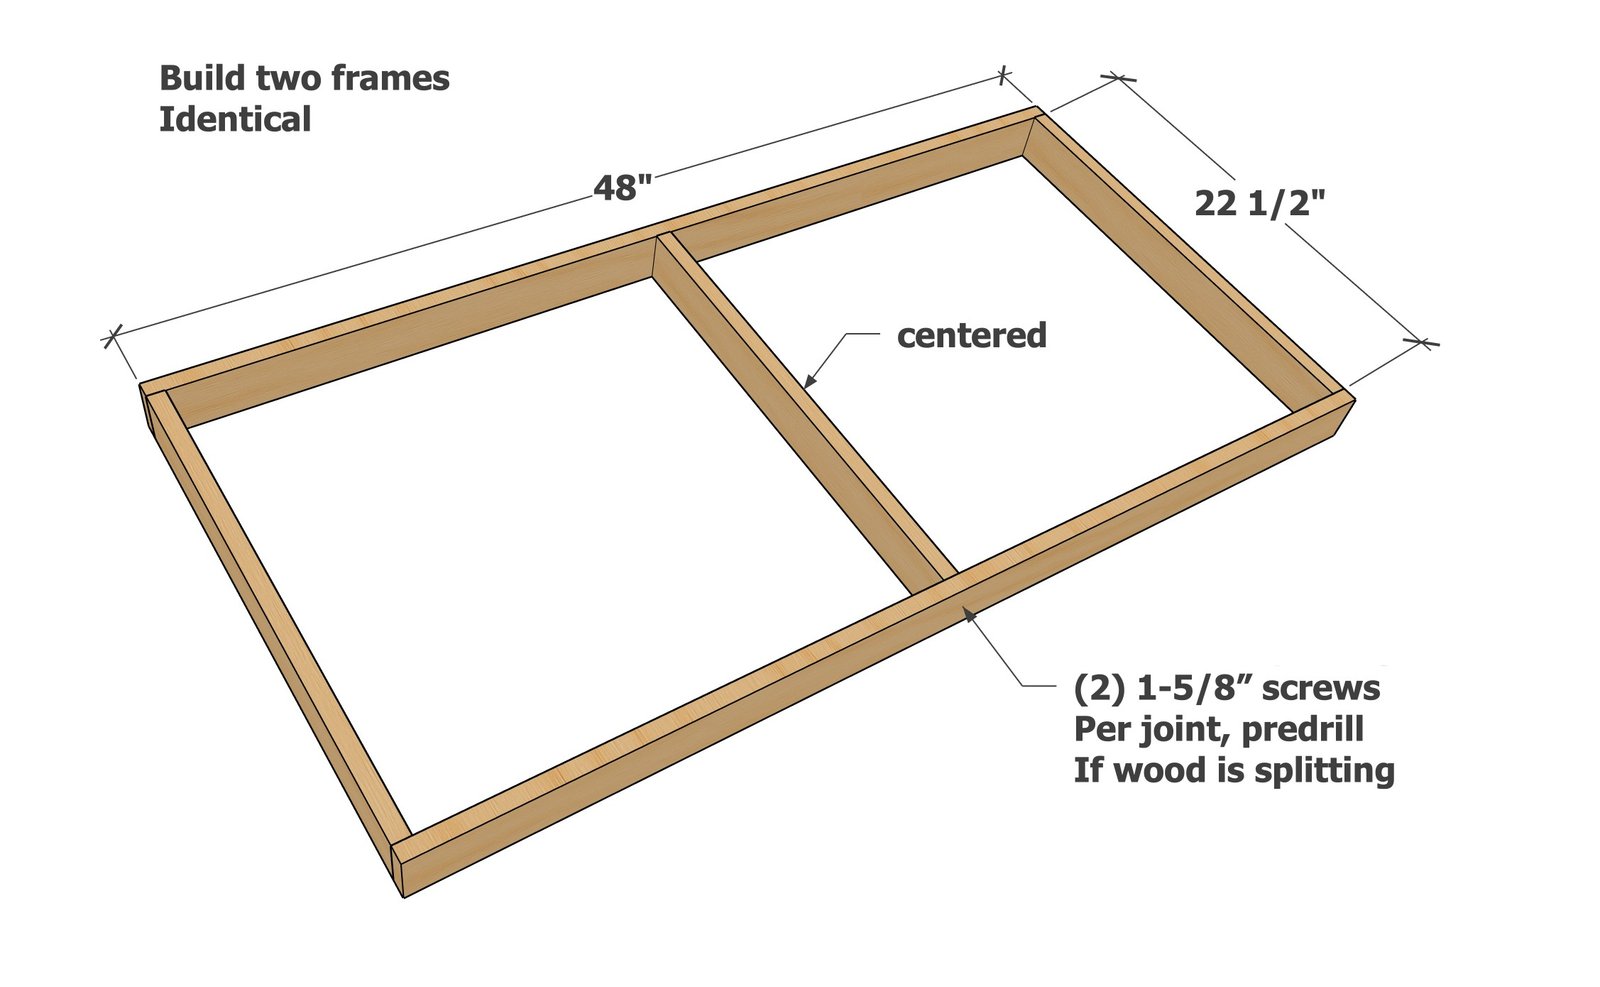
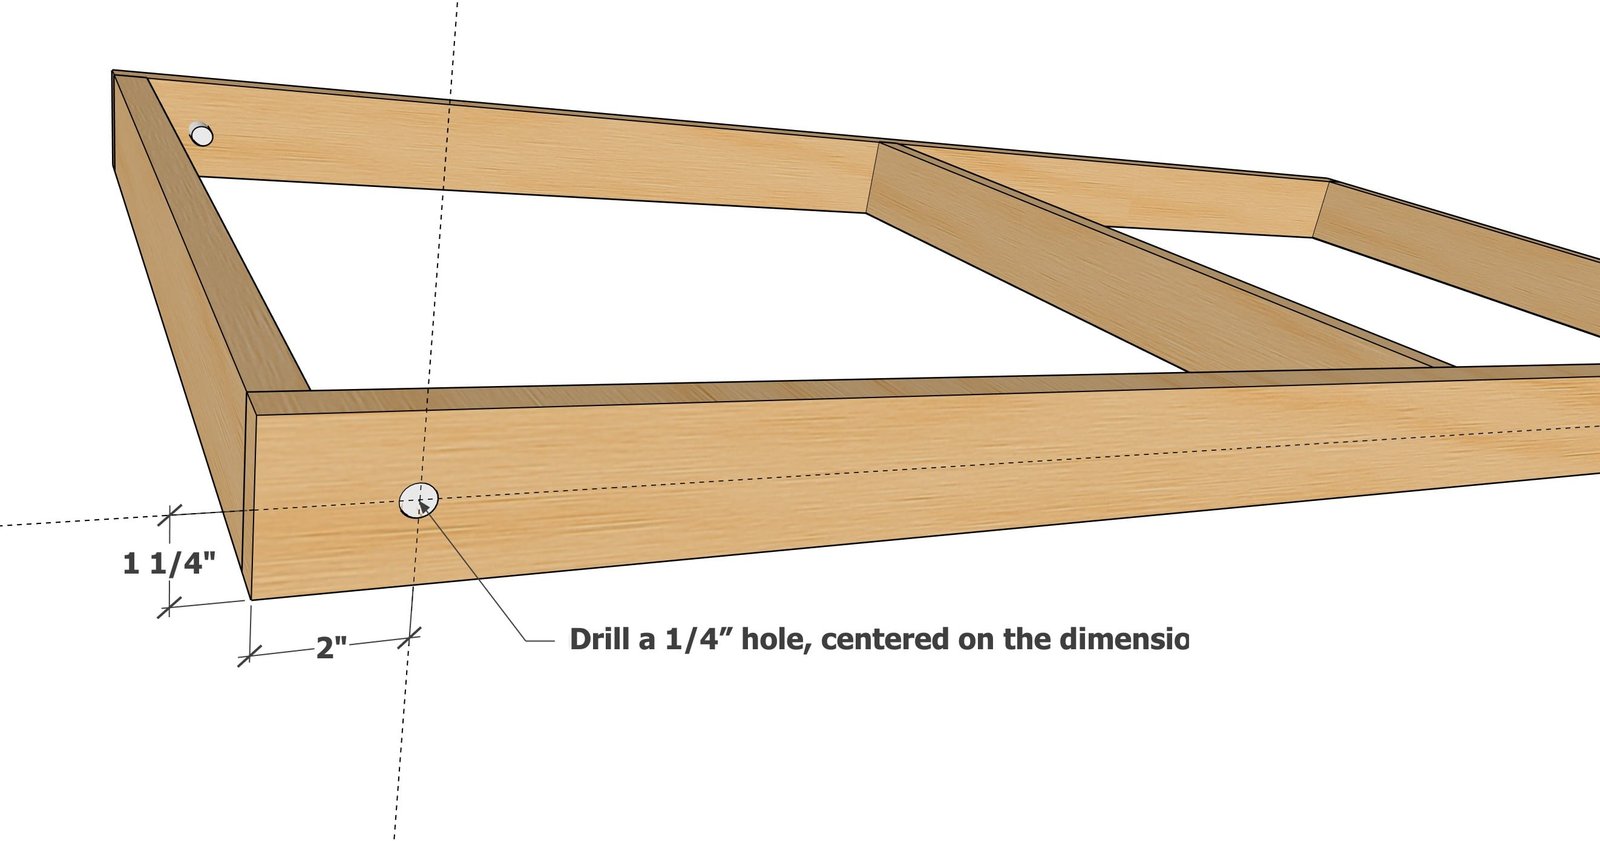
After frames are assembled, mark the center of the holes to drill for the bolts.
Drill a hole on the center point. Making a small indentation in the center point with a screw first can help keep the hole centered when starting the drilling, keeping the drill bit from "walking".
Step 3
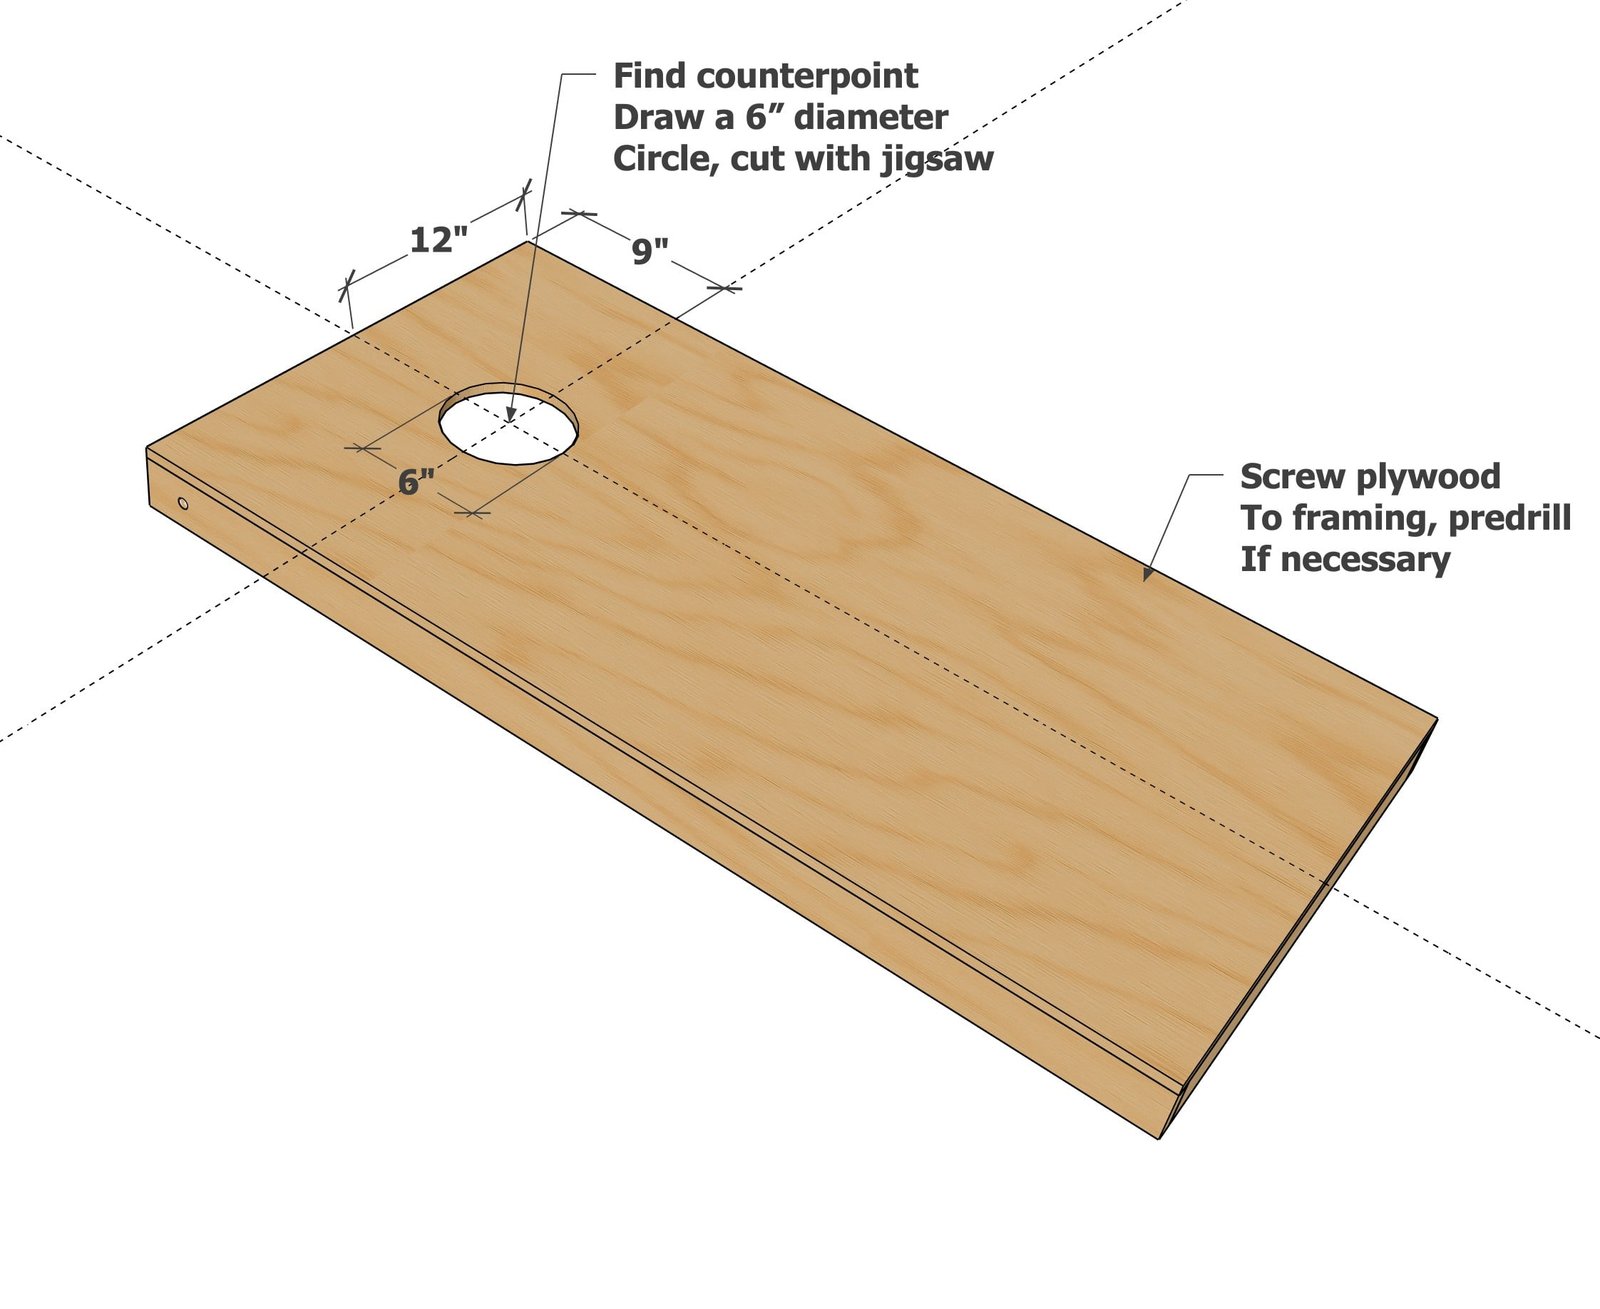
Attach plywood panels to the tops of the frames with glue and screws (use about 12 screws to attach the plywood to the top) Mark out the location of the bean bag toss hole and use a protractor to draw the 6" hole. Drill a hole inside the hole with your 1/4" drill bit, so you have somewhere to start the jigsaw. Use your jigsaw to carefully cut out the hole.
Step 4
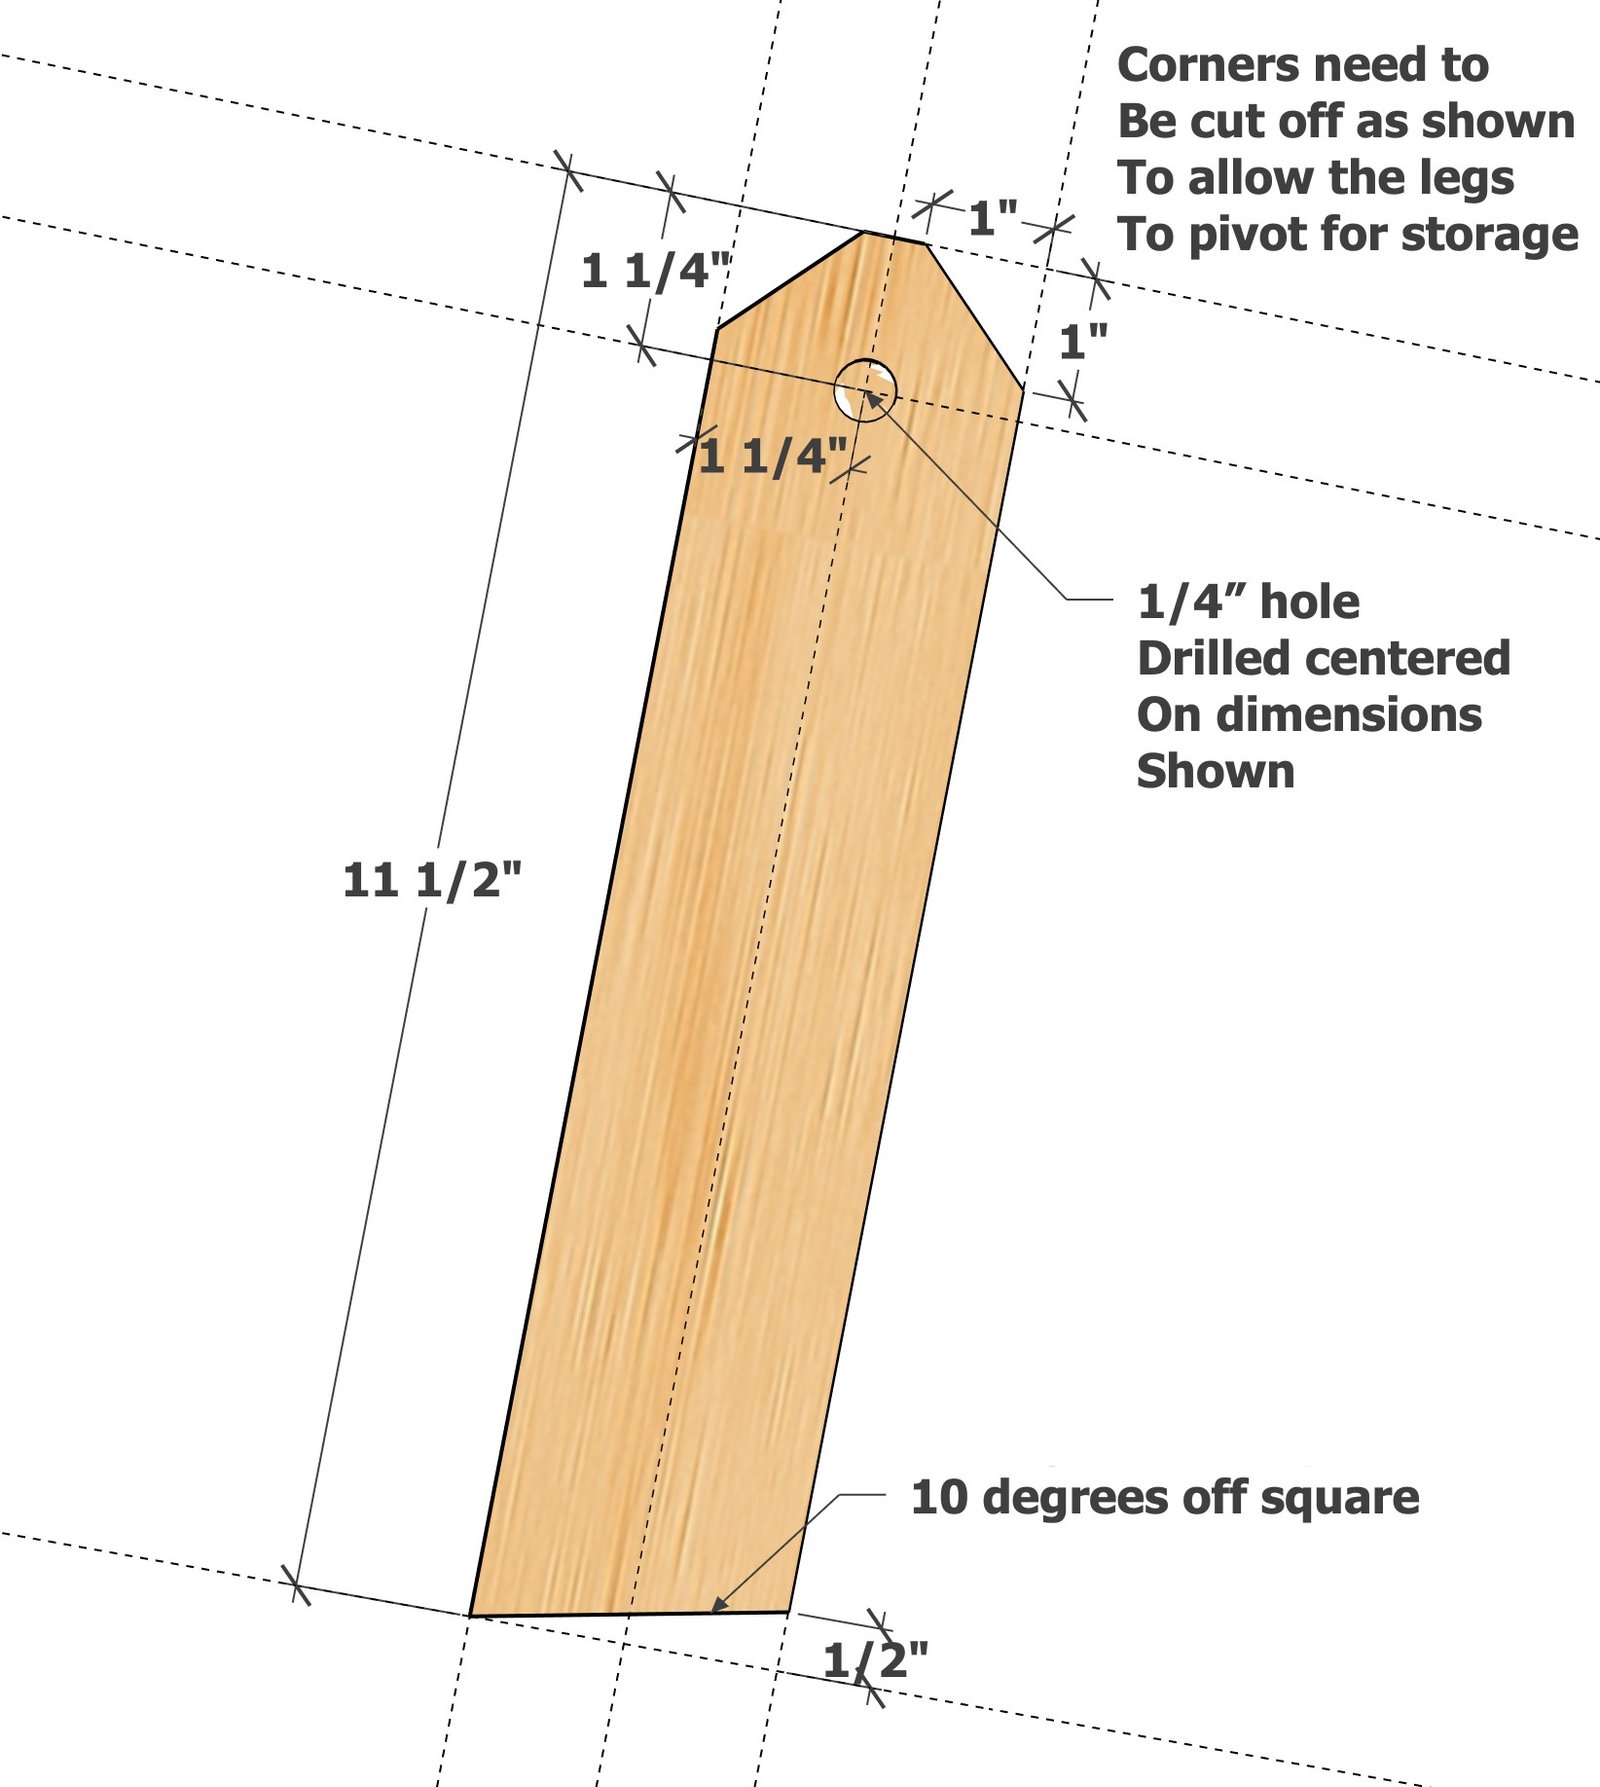
Cut the legs with one end cut at 10 degrees off square, the other end is straight cut. If you don't have a miter saw to make the 10 degrees off square cut, you can simply mark up 1/2" on one end, and mark a triangle back the long end, and cut off with a jigsaw or circular saw. Mark the location of the bolt hole and drill out with 1/4" drill bit. Finally, mark the corners off the top and cut off with circular saw or jigsaw.
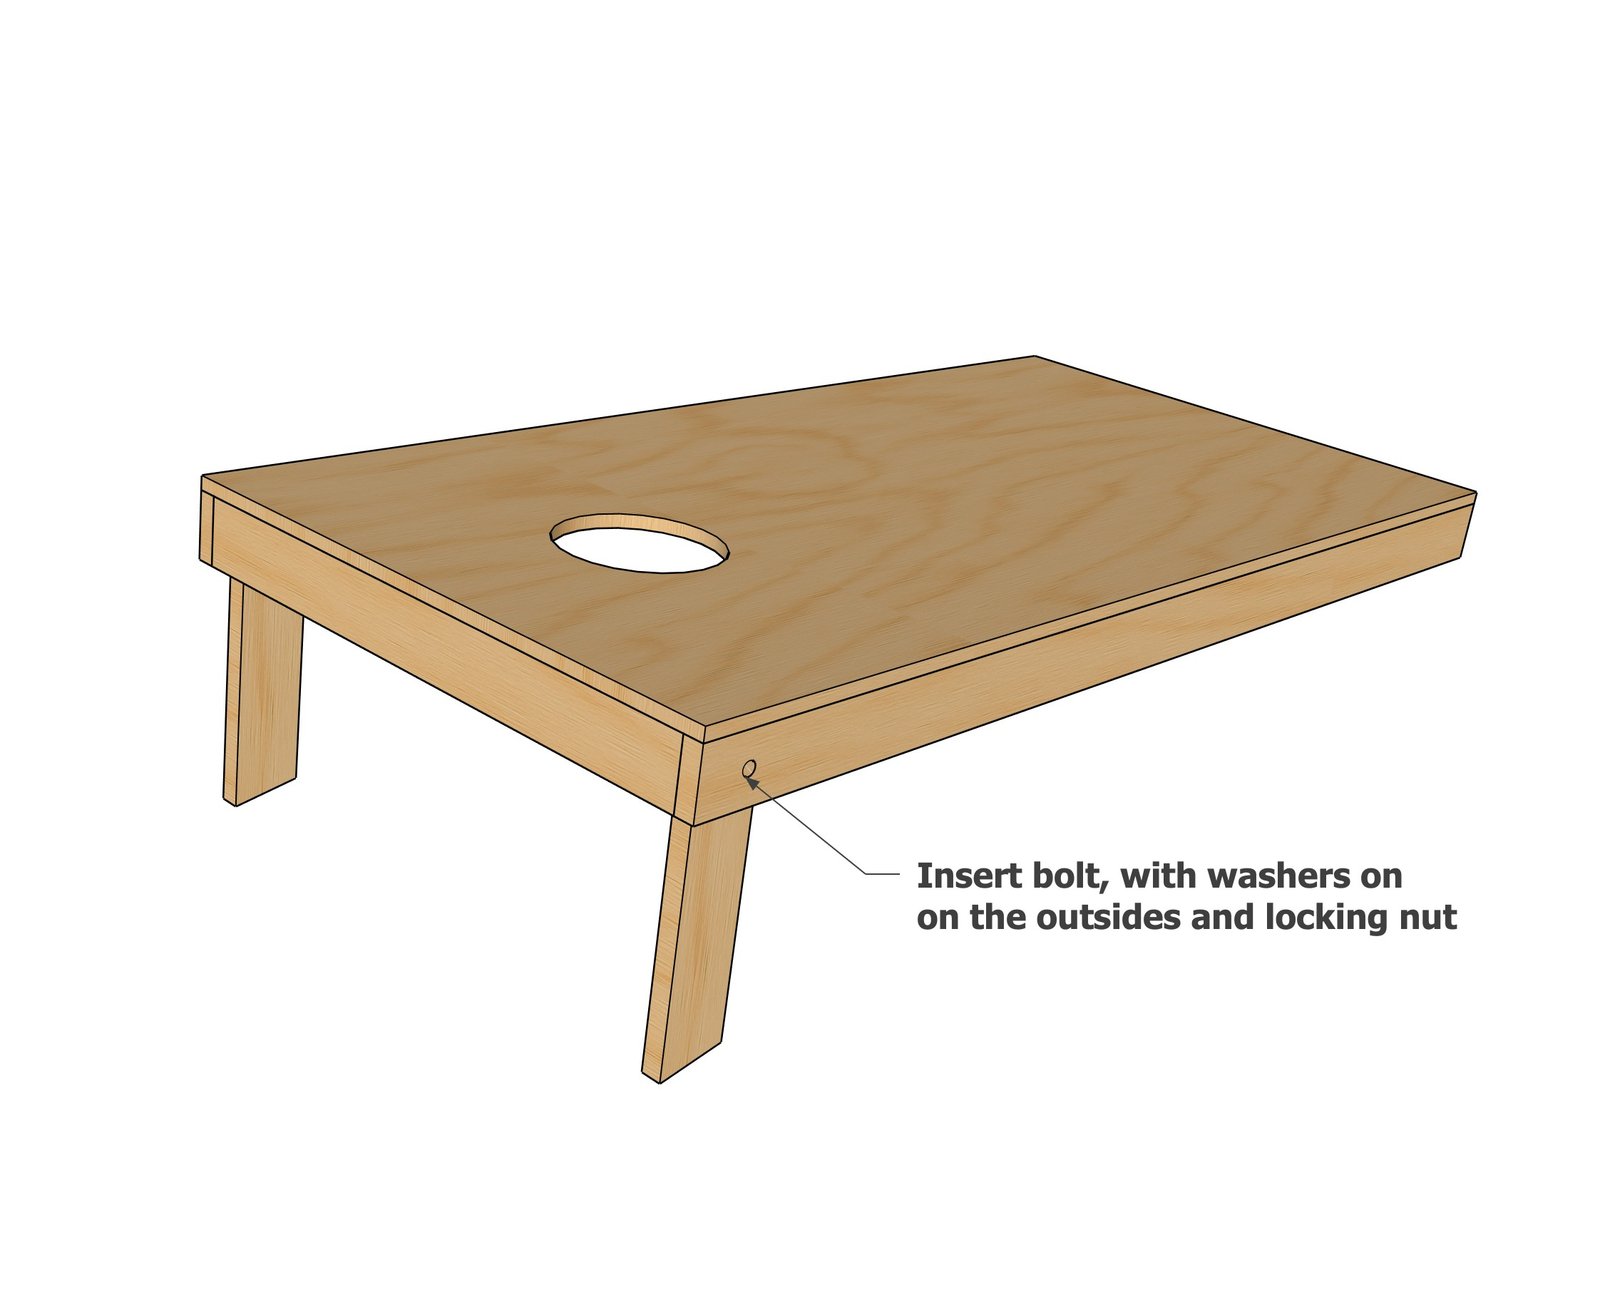
Attach the legs to the frame with the hardware in this order:
Bolt | Fender Washer | Side 1x3 | Leg 1x3 | Fender Washer | Locking Nut Test and make sure the legs fold smoothly.
Finishing
Sand all surfaces, starting with a medium grit and finishing with fine. Wipe off the dust, fill any holes or gaps with wood filler, and sand smooth once dry. Apply primer if you're painting, then finish with your choice of paint or stain and seal with a durable clear topcoat. For outdoor projects, use exterior-rated primer, paint or stain, and sealer so the piece stands up to the weather.
Source (temporary): https://www.ana-white.com/woodworking-projects/free-plans-lightweight-cornhole-boards-easy-affordable-and-fun-build