Rolling Shelf DIY
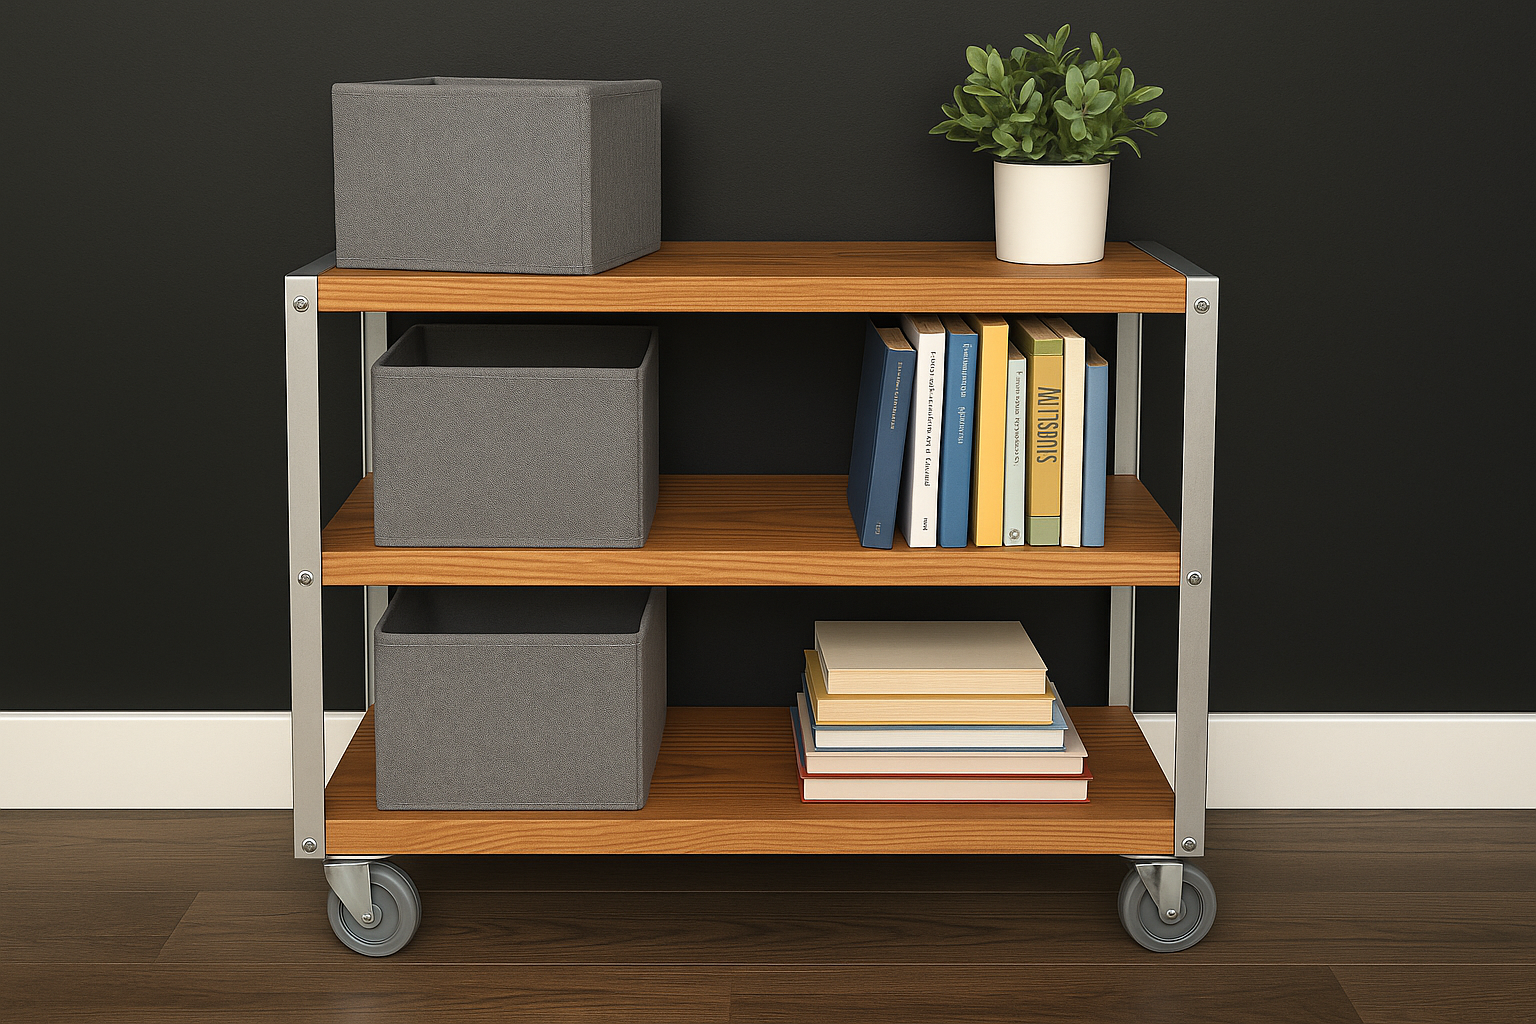
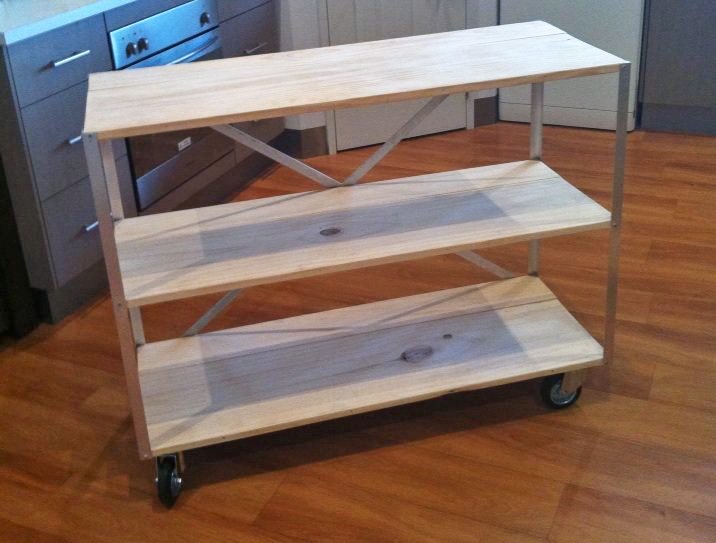
Build your own stylish and functional rolling shelf with this! Made from affordable 2x12 boards and metal angle, this easy-to-assemble shelving unit brings a modern industrial touch to any room—perfect for storing books, bins, office supplies, or kitchen essentials. This DIY metal and wood rolling cart features: • Three spacious shelves made from sturdy 2x12 lumber • Sleek metal angle legs for a clean, industrial look • Swivel caster wheels for easy mobility • Minimal tools and materials required • Beginner-friendly construction – no welding or fancy cuts! Use this project as a bookshelf, utility cart, toy organizer, kitchen island, or entryway storage. Paint or stain the wood to match your style and finish the metal angle with clear coat, paint, or leave raw for a true industrial feel. Included in the plan: • Cut list & material breakdown • Step-by-step photo instructions • Diagrams and build tips • Customizable sizing advice Download the now and create your own versatile rolling shelf—stylish, strong, and super easy to build!
Specifications
| Project type | Bookshelf and Bookcase Plans |
|---|---|
| Room | Storage Solutions |
| Difficulty | Starter Projects |
Dimensions
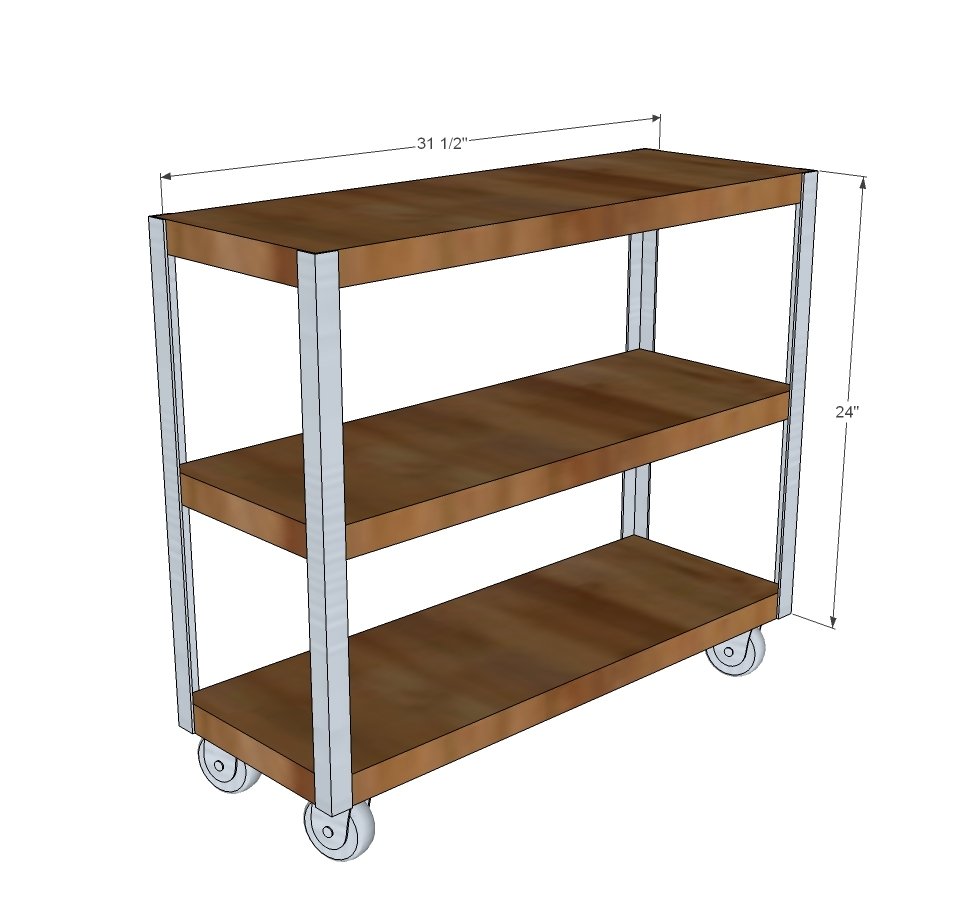
Use the size-specific shopping and cut lists below.
Shopping List
- 1 - 2x12 board, 8 feet long
- 96" of 1" x 1" aluminum angle
- 24 - 1-1/4" self tapping wood screws (yes you can use Kreg Jig screws)
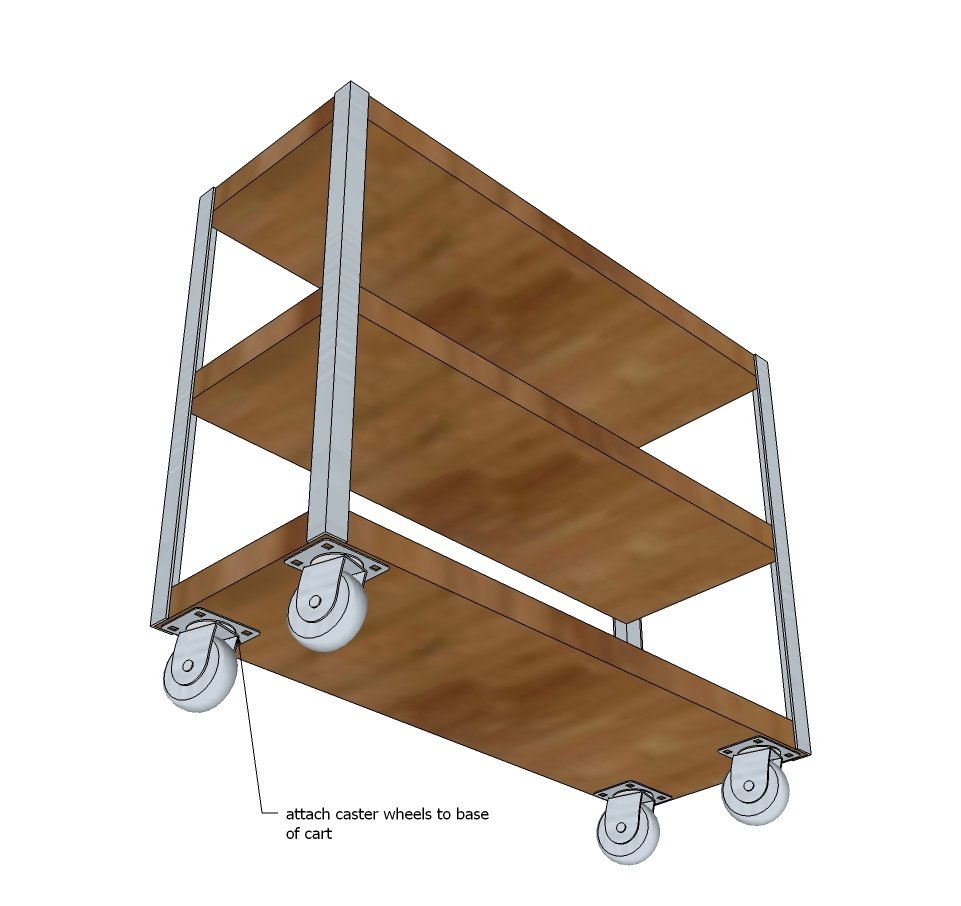
- 4 - caster wheels (we used 4") with 16 screws to attach to base (can use the 1-1/4" screws if using the 2x thick shelves, just make sure your screws are short enough that they don't poke through the bottom shelf)
Cut List
- 3 - 2x12 @ 31-1/2" (or length of your shelves)
- 4 - aluminum angle @ 24" (or desired height without casters of your shelf)
Tools
- measuring tape
- square
- pencil
- safety glasses
- hearing protection
- drill
- circular saw
- jigsaw
- sander
Step-by-step Instructions
Cut the aluminum angle with a jigsaw with a metal blade.
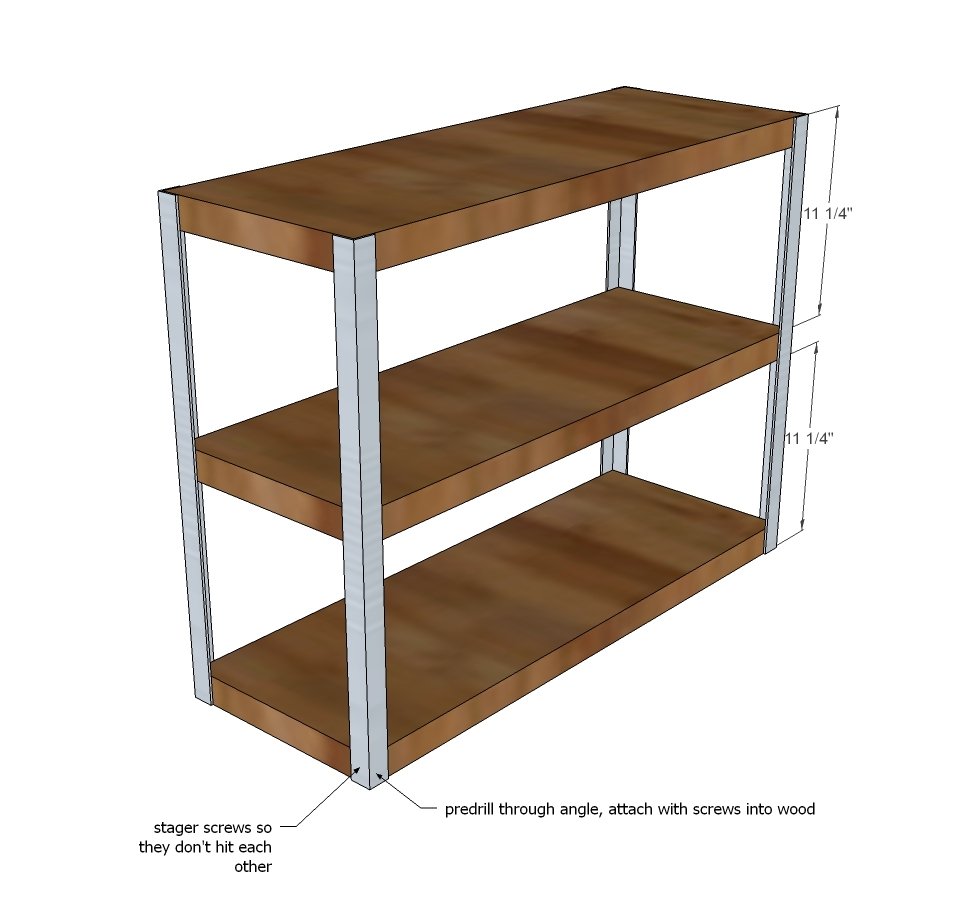
Cut the wood with a circuclar saw or miter/chop saw to desired lengths. Predrill holes where the metal angle will attach to the wood shelves. Attach the metal angle to the wood shelves with the screws.
Step 2
Flip over and attach casters to the base of the project.
Step 3
If wobbly or needs extra support, attach 1" aluminum flat bar to the back with screws.
Finishing
Sand all surfaces, starting with a medium grit and finishing with fine. Wipe off the dust, fill any holes or gaps with wood filler, and sand smooth once dry. Apply primer if you're painting, then finish with your choice of paint or stain and seal with a durable clear topcoat. For outdoor projects, use exterior-rated primer, paint or stain, and sealer so the piece stands up to the weather.
Source (temporary): https://www.ana-white.com/woodworking-projects/free-rolling-shelf-diy-plans-2x12-wood-metal-angle-design-casters