Freestanding Laundry Basket Closet
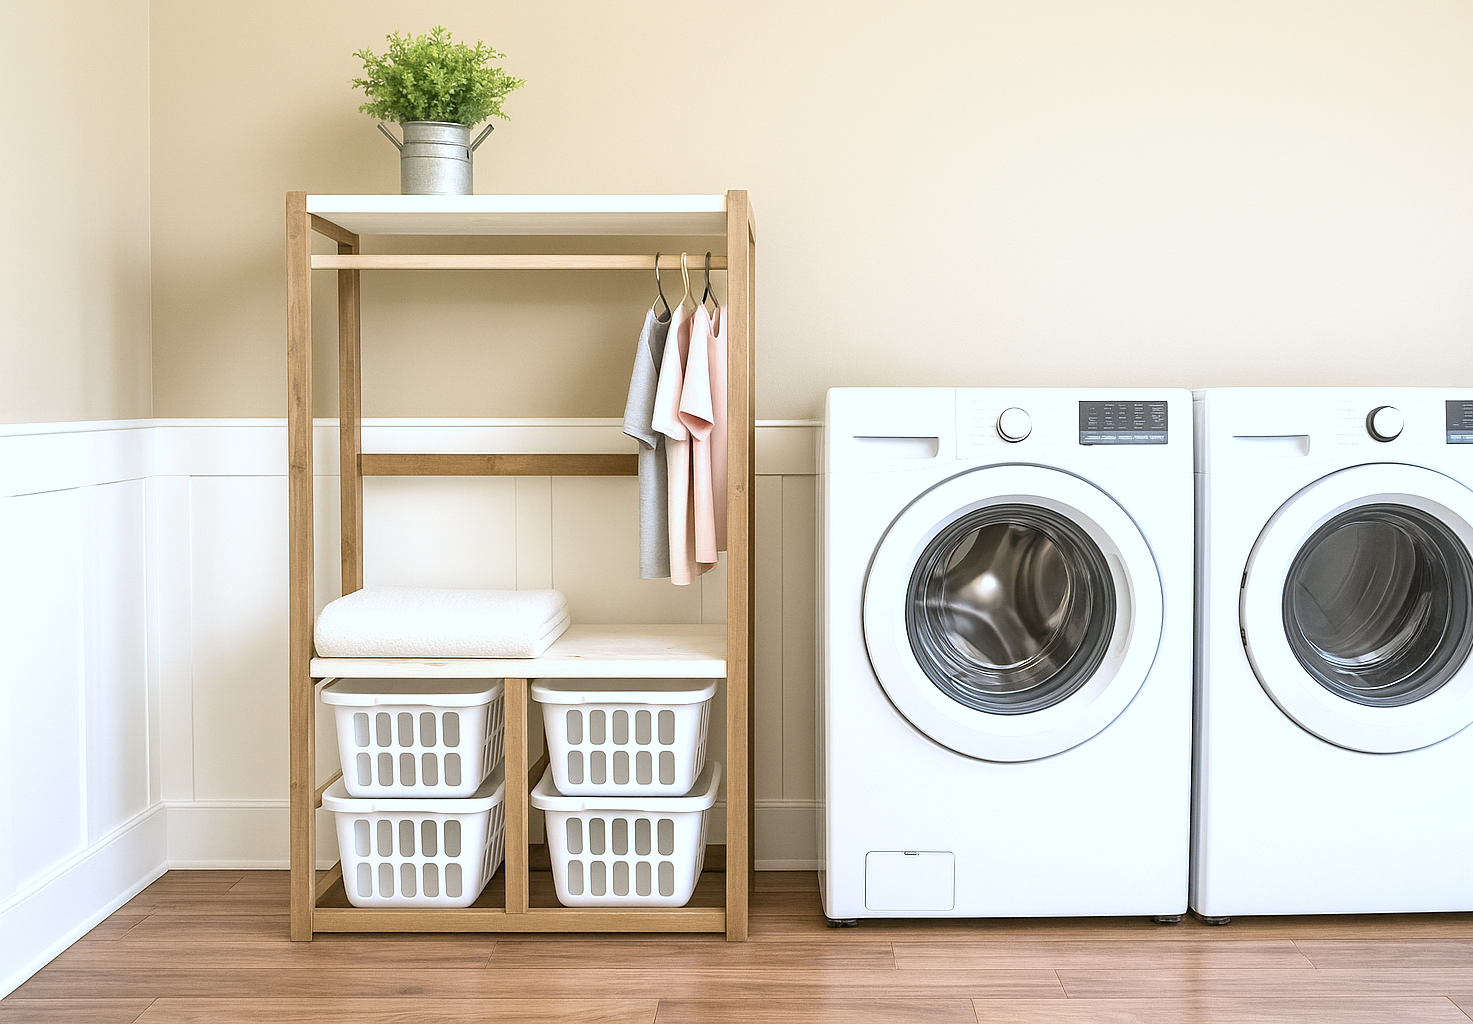
DIY Laundry Organizer with Hanging Rod & Sliding Baskets – Transform your laundry routine with this versatile DIY laundry station that combines a clothing rod, folding shelf, and sliding laundry baskets into one smart, space-saving design. Built with simple lumber and beginner-friendly joinery, this project is perfect for anyone looking to add style, function, and organization to their laundry room. ✅ Features of this DIY Laundry Organizer • Hanging rod for drying or organizing freshly laundered clothes. • Sturdy folding shelf for easy sorting and folding. • Four sliding laundry baskets (standard size) to keep loads separated and ready to go. • Customizable dimensions to fit your space and needs. • Clean, modern farmhouse style that blends with any home décor. This walks you step-by-step through the build, including a cut list, diagrams, and assembly instructions, so you can complete your own organizer with confidence. Whether you’re tackling a family’s worth of laundry or just want to streamline your washday, this DIY laundry sorter with hanging space will help keep everything neat, efficient, and beautifully organized.
Specifications
| Project type | Bookshelf and Bookcase Plans |
|---|---|
| Room | Laundry Room |
| Difficulty | Intermediate |
Dimensions
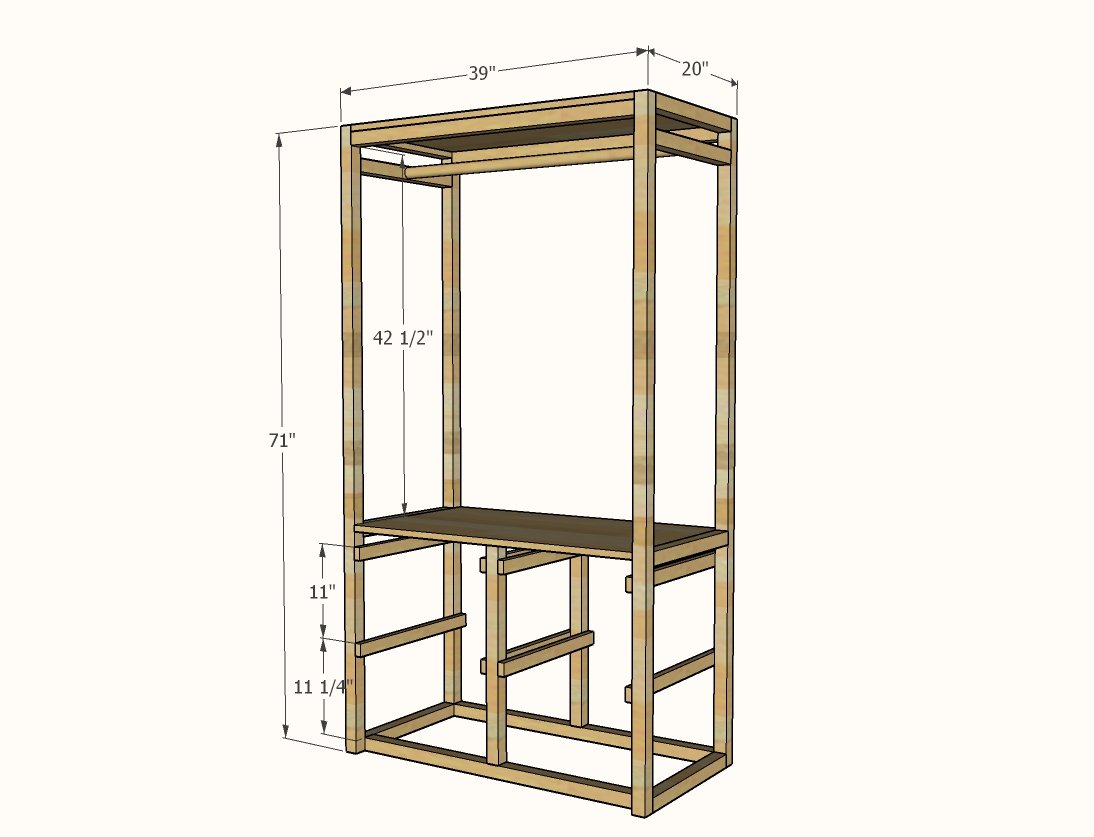
Use the size-specific shopping and cut lists below.
Shopping List
- 7 - 2x2
- 2 - 1x2
- 2 - project panels 20x36
- 1 - 36" dowel
- 2 - dowel holders
- 4 - Laundry Baskets
Cut List
- 2x2 - 4 @71"Legs for ladder
- 2x2 - 3@ 36" Bottom and back Supports
- 2x2 - 8@17" All side ladder supports
- 2x2 - 2@24" Front and back support of laundry basket section (I cut to fit, because there was a little variance where middle shelf was pocket holed and attached)
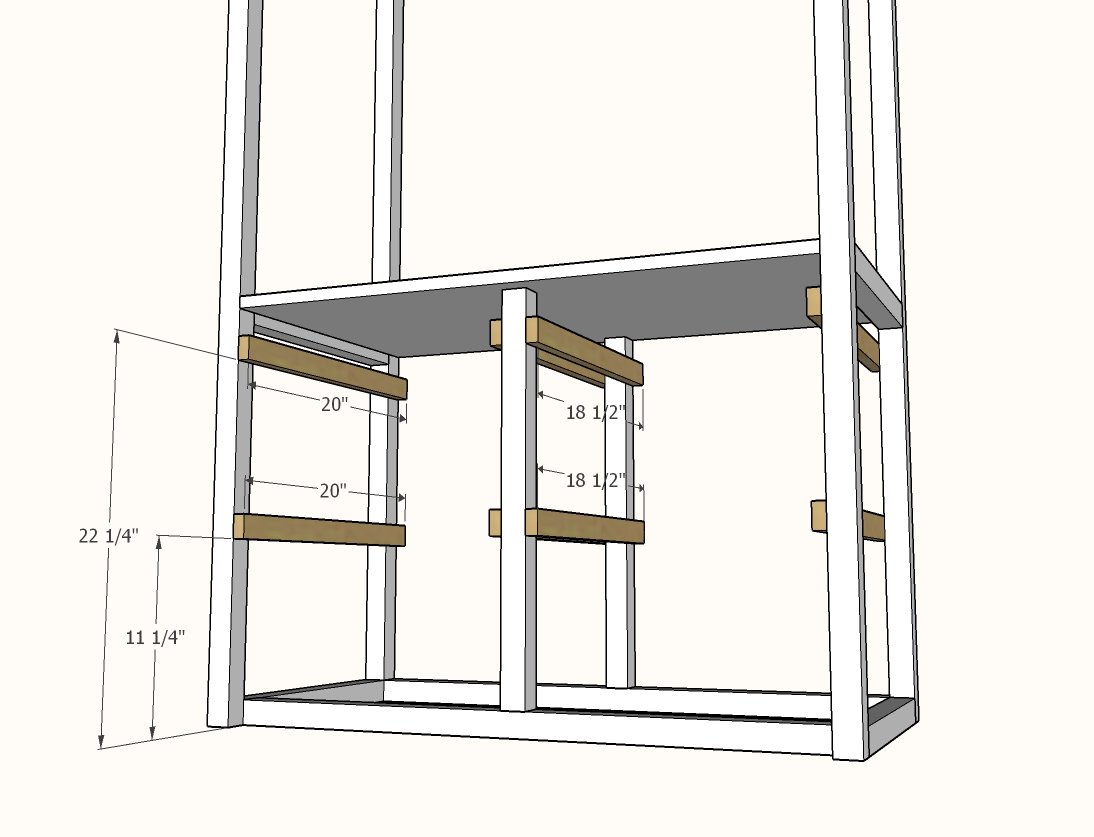
- 1x2 - 4 @20" (outside cleats)
- 1x2 - 4@18-1/2" (inside cleats)
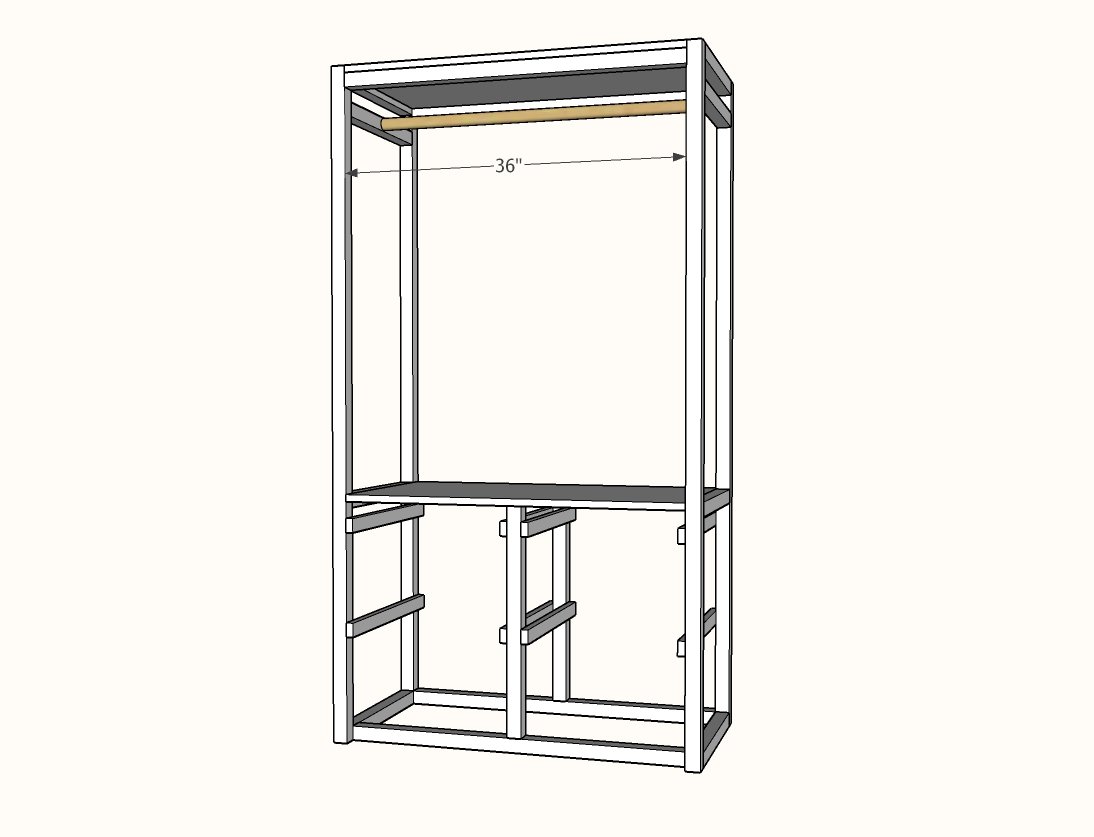
- 3' dowel
- 4 laundry baskets (will need to adjust and preplan for your laundry baskets if different)
- 2 project panels 20"x 36"
Tools
- measuring tape
- square
- pencil
- safety glasses
- drill
- circular saw
- sander
Step-by-step Instructions
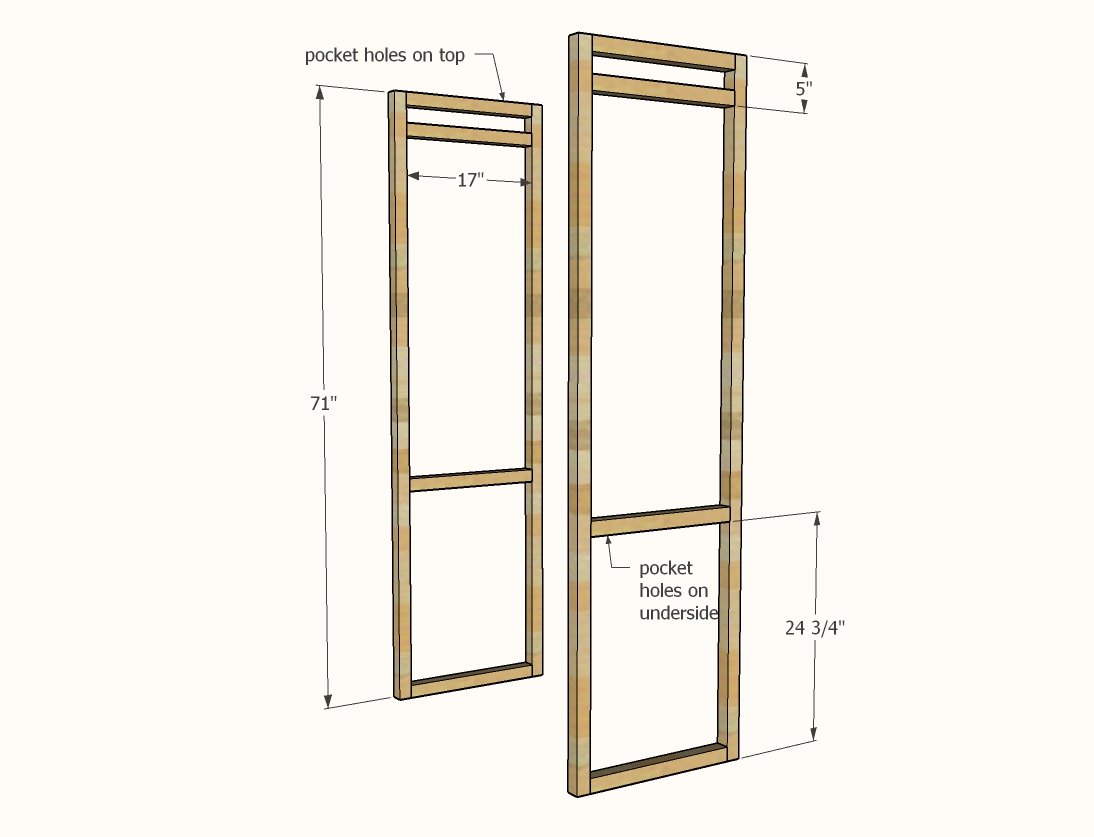
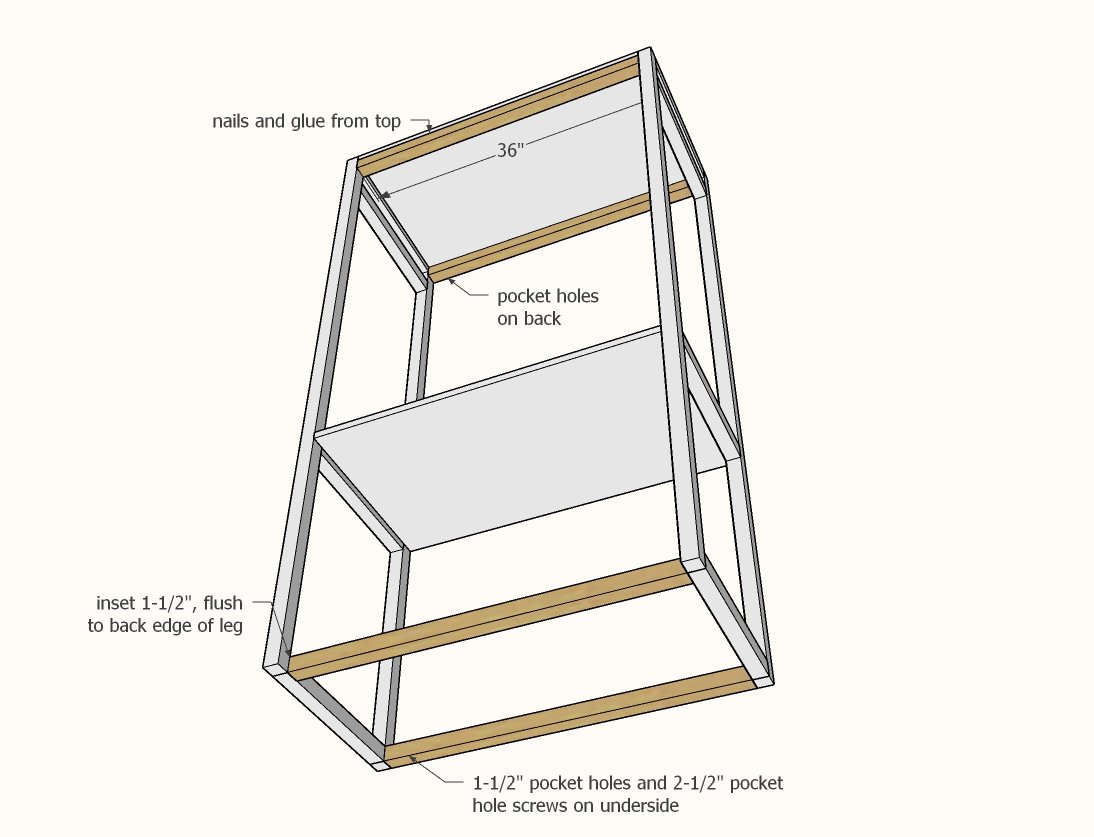
Build two of the side frames as shown.
If using screws, just attach with screws and glue. If using pocket holes, drill on the 1-1/2" setting and attach to the legs with 2-1/2" screws. Place pocket holes facing upward or downward, to keep out of line of sight.
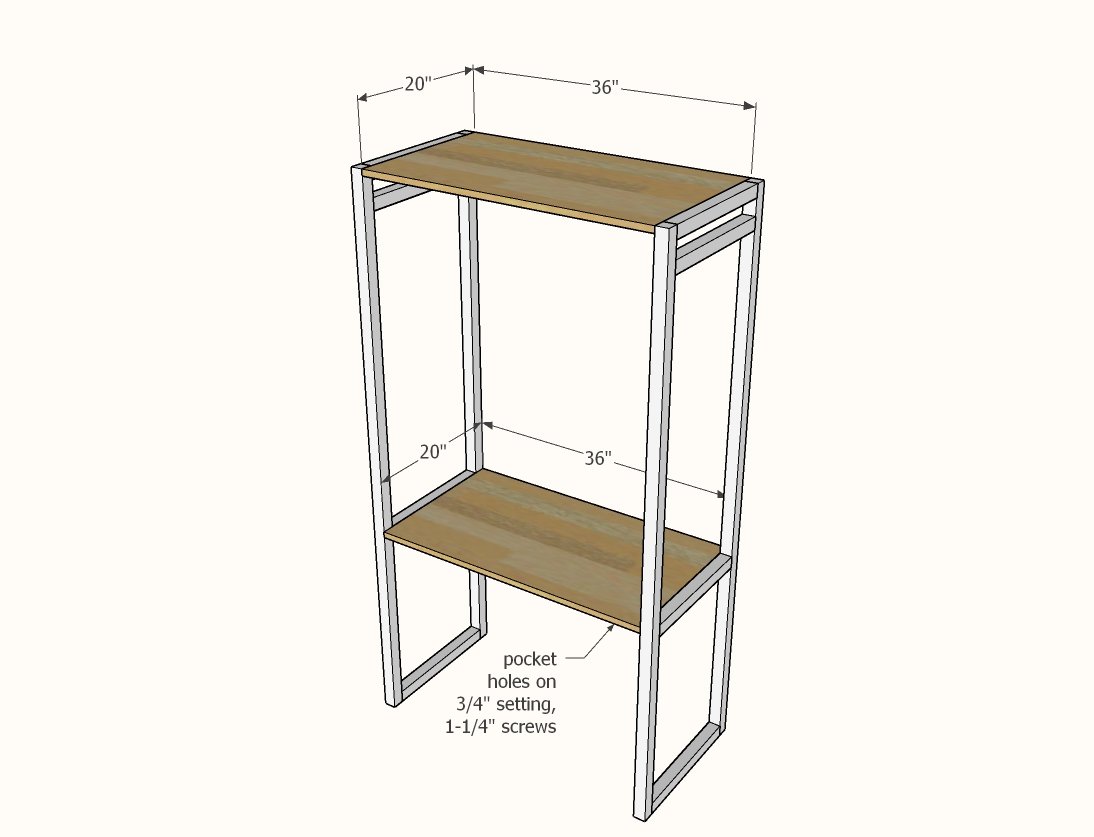
Step 2
Drill 3/4" pocket holes on ends of project panels. Attach to the side frames with 1-1/4" pocket hole screws. On top shelf, place pocket holes facing upward where they won't be seen.
Step 3
Attach 2x2s to the sides, using the longer screws. If using pocket holes, use the 1-1/2" setting.
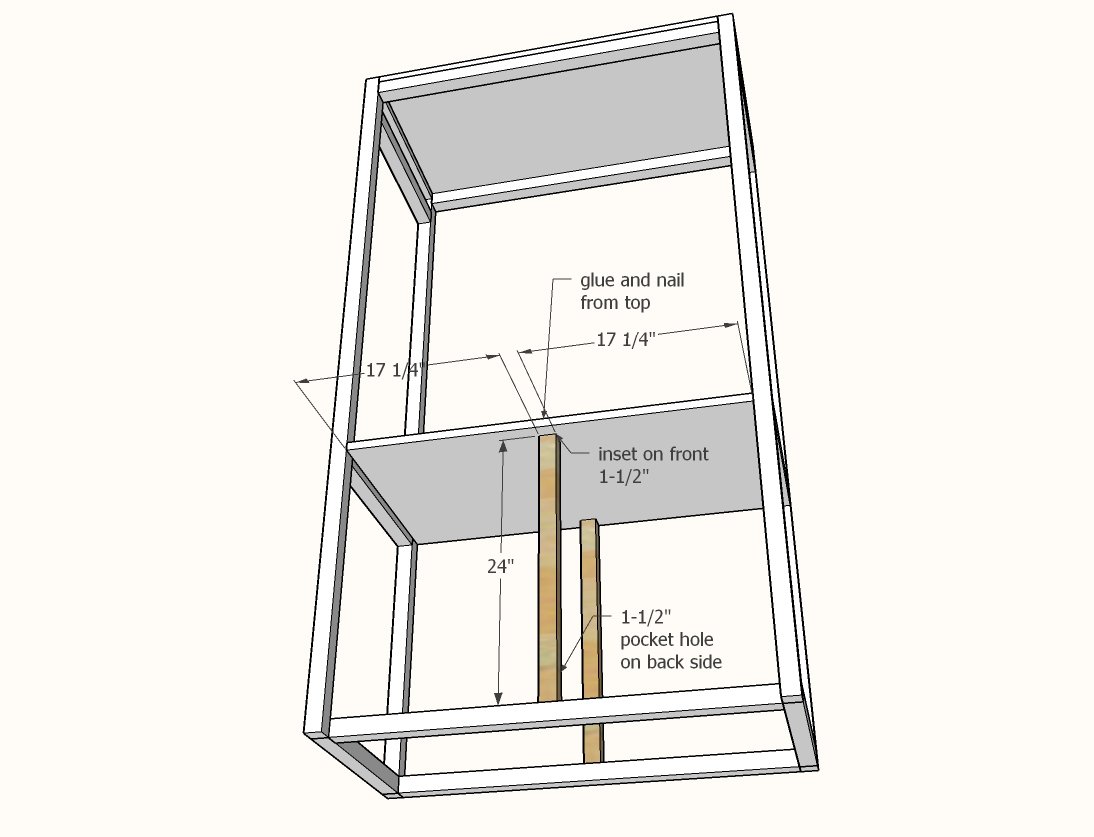
Attach center legs. At the top, you can attach from the top.
If using pocket holes, drill with the 3/4" setting and attach with 1-1/4" pocket hole screws.
Step 5
Attach cleats with 1-1/4" fasteners to the insides.
Step 6
Attach dowel with the closet rod sockets. Cut the dowel to fit.
Finishing
Sand all surfaces, starting with a medium grit and finishing with fine. Wipe off the dust, fill any holes or gaps with wood filler, and sand smooth once dry. Apply primer if you're painting, then finish with your choice of paint or stain and seal with a durable clear topcoat. For outdoor projects, use exterior-rated primer, paint or stain, and sealer so the piece stands up to the weather.
Source (temporary): https://www.ana-white.com/woodworking-projects/freestanding-laundry-basket-closet