Full Storage (Captains) Bed
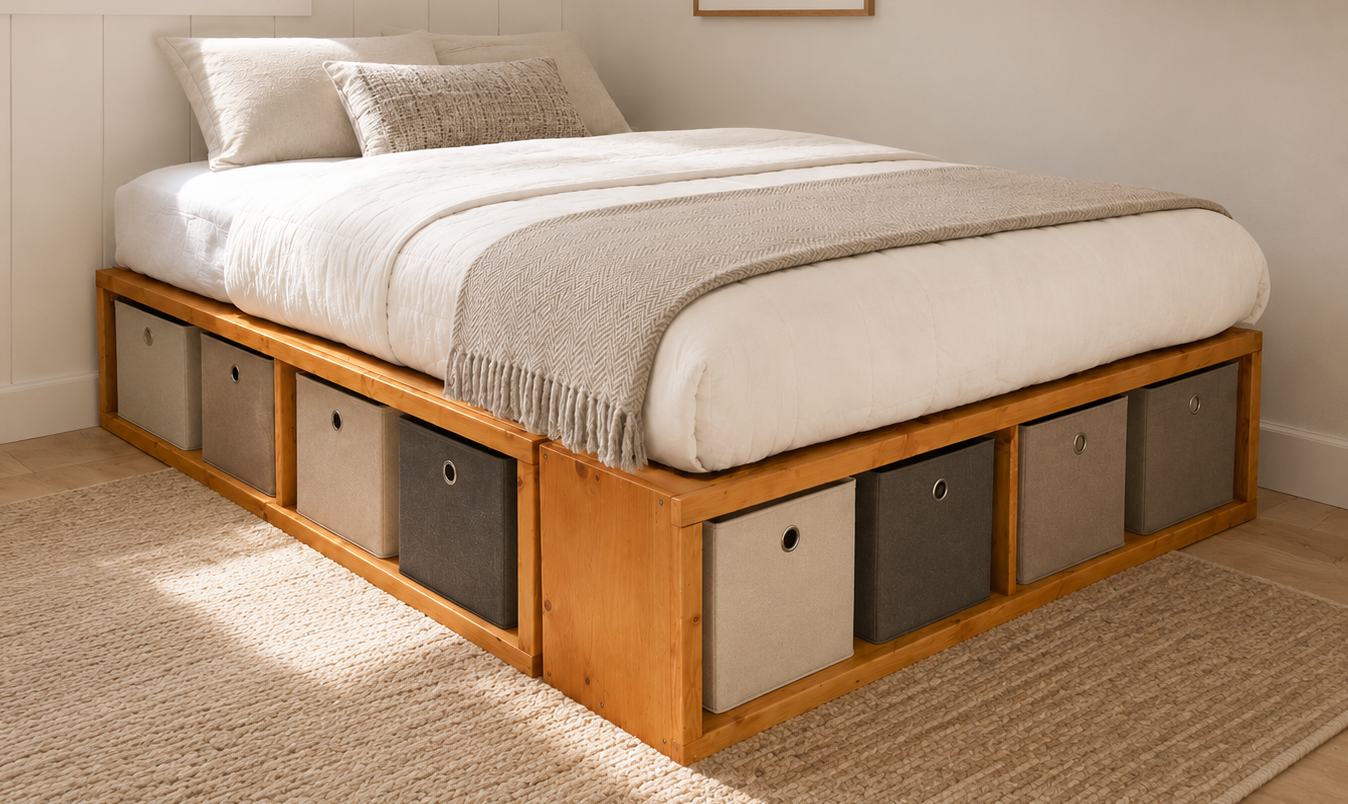
You can build a simple storage bed to elevate a mattress and provide extra storage with these simple plans. Featuring six large, wide cubbies, perfect for fabric bins, toys, or even books and games. This bed has a cubby depth of 12". This plan is also the base plan for the twin sized modification. You can see all the project plans in this collection here. Special thanks to LEAPOFFAITHCRAFTING for sharing photos with us.
Specifications
| Project type | Beds and Bed Frames |
|---|---|
| Room | Bedroom |
| Style | Cottage Style Furniture Plans |
| Difficulty | Beginner Projects |
| Estimated cost | $100-$150 |
Dimensions
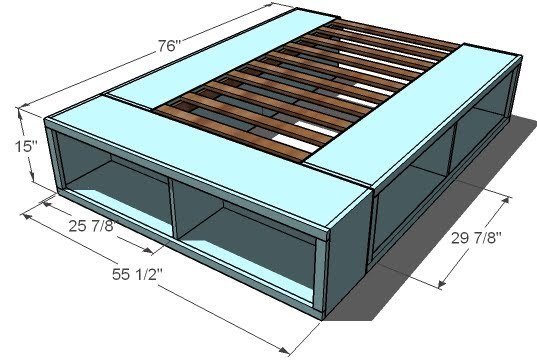
Use the size-specific shopping and cut lists below.
Shopping List
- 6 – 1×12 Boards, 8′ Long (Most economical for stain grade is pine (like the PBTEEN stained bed, and also would work great for painting. You could also use sheets of MDF cut into 1x12s, but you would need to purchase two whole sheets of plywood and only use up 1 1/2 sheets)
- 1 – Sheet of 1/4″ Plywood cut into 15″ wide strips, 8′ long
- 6 – 1×2 Boards, 8′ Long (For paint grade, 1×2 Pine Furring Strips would work for about $1.00 each)
- 5 – 1×3 Boards, 8′ Long (1×3 Pine Furring Strips are about $1.50 Each and would work perfect)
- 2″ Screws
- 1 1/4″ Screws
- 1 1/4″ Nails (optional if you have a nailer handy)
- 2″ Nails (optional if you have a nailer handy)
- Wood Glue
- Wood Filler
Cut List
CUT LIST FOR THE BOXES
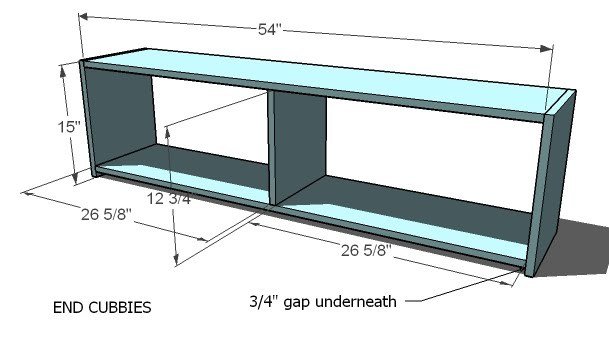
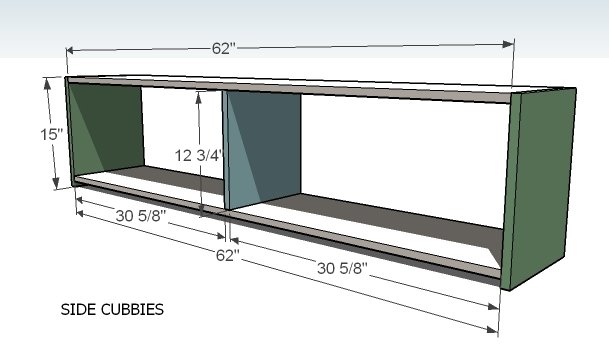
- 6 – 1×12 @ 15″ (Cubby Sides)
- 3 – 1×12 @ 12 3/4″ (Cubby Dividers)
- 2 – 1×12 @ 54″ (End Cubby Top and Bottoms)
- 4 – 1×12 @ 62″ (Side Cubby Top and Bottoms)
CUT LISTS FOR THE TRIM
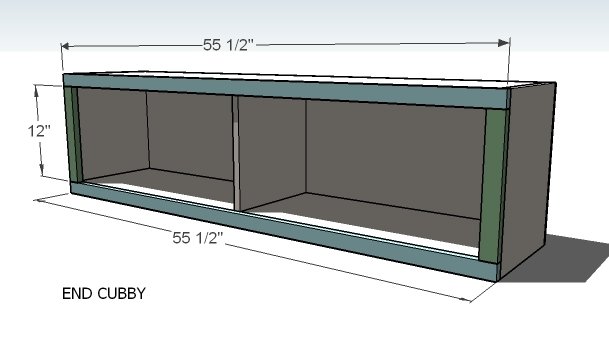
- 6 – 1×2 @ 12″ (Vertical Trim)
- 2 – 1×2 @ 55 1/2″ (End Top and Bottom Trim)
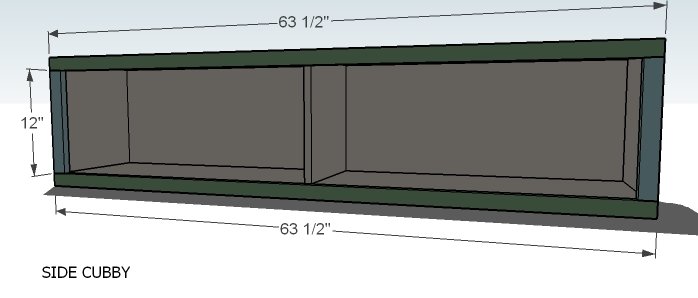
- 4 – 1×2 @ 63 1/2″ (Side Top and Bottom Trim)
CUT LIST FOR THE CENTER SUPPORT
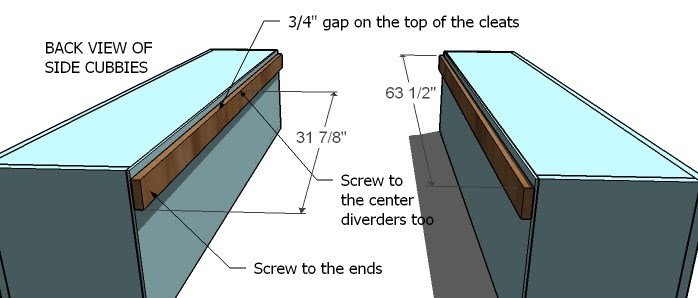
- 2 – 1×3 @ 63 1/2″ (Cleats)
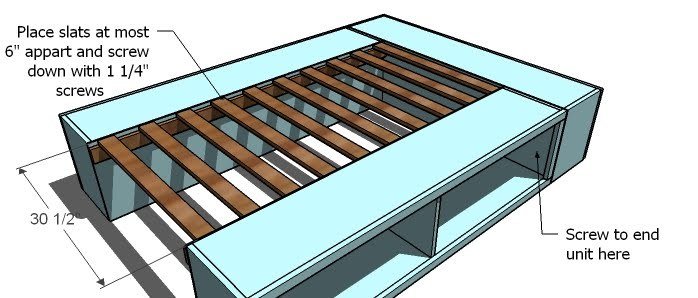
- 11 – 1×3 @ 30 1/2″ (Slats)
Tools
- measuring tape
- square
- pencil
- hammer
- safety glasses
- hearing protection
- drill
- nailer
- sander
Step-by-step Instructions
Step 1
You will need to build one end cubby.
Step 2
And two side cubbies.
Step 3
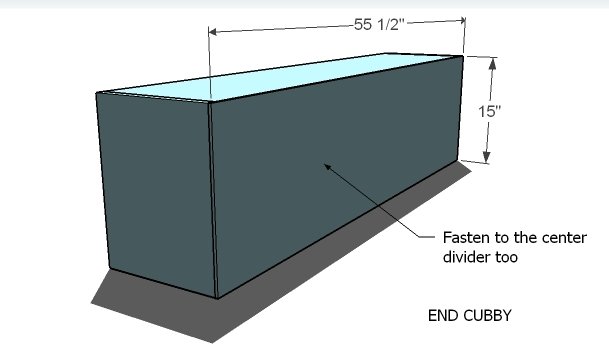
Put the back on the end cubby with nails and glue. Don't forget to nail into the center partition as well. For both backs: You can have the lumber store “rip” your 1/4″ plywood into 15″ wide strips so they are easier to manage, can be hauled in a car, and all you have to do is make a single chop. Have the plywood ripped into 3 – 15″ wide x 8′ long strips. Then cut your plywood for the backs of the end and two for the side cubbies. Use 1 1/4″ nails and glue to fasten in place.
Step 4
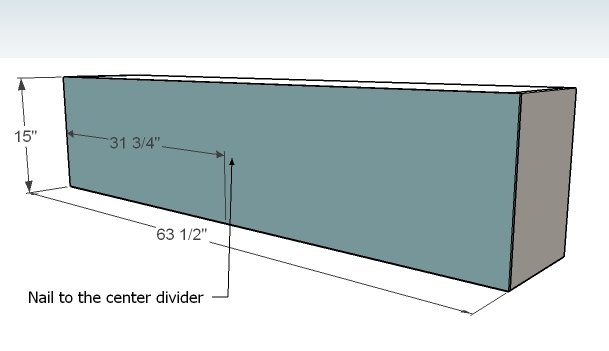
Do the same for the side cubbies.
Step 5
Step 6
Trim for the side cubbies.
CLEATS
Use the 2″ screws and glue to fasten cleats to the backs of the side cubbies only.
SLATS
Lay the slats on top of the cleats, as shown above. Screw in place. Don’t use glue so dissemblance will be a cinch. Also screw the end cubby to the side cubbies ( a couple of blots with washers and nuts would be your best option to keep everything together over time (and make dissemblance a cinch)
Finishing
Sand all surfaces, starting with a medium grit and finishing with fine. Wipe off the dust, fill any holes or gaps with wood filler, and sand smooth once dry. Apply primer if you're painting, then finish with your choice of paint or stain and seal with a durable clear topcoat. For outdoor projects, use exterior-rated primer, paint or stain, and sealer so the piece stands up to the weather.
Source (temporary): https://www.ana-white.com/woodworking-projects/full-storage-captains-bed