Gallery Ledge Shelves
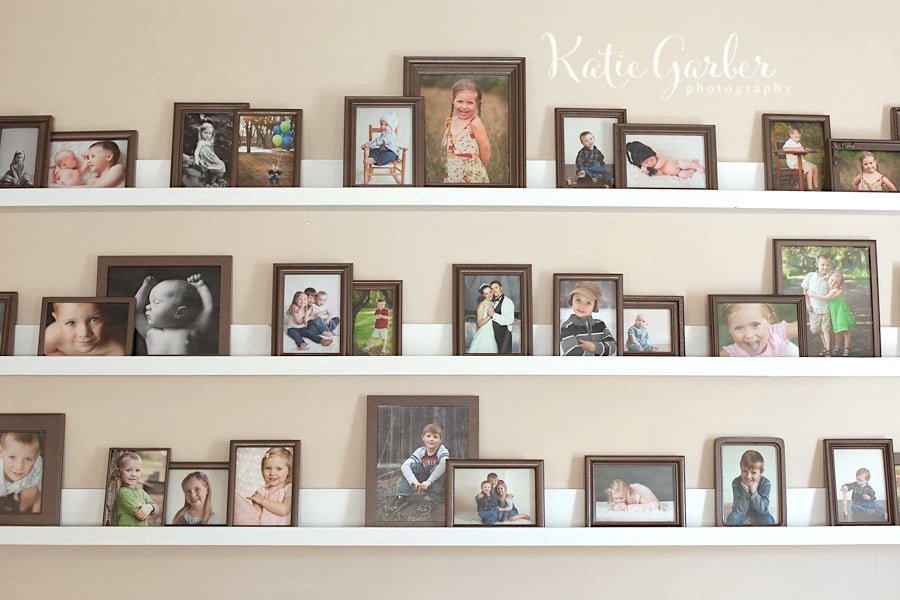
You can build your own picture ledge or gallery ledge for about a DOLLAR a foot. This easy to build picture ledge tutorial requires NO cutting and basic tools. Paint or stain any color you choose. Thousands of people have built this shelf and you can too - from
Specifications
| Project type | shelves |
|---|---|
| Room | Bathroom |
| Style | Cottage Style Furniture Plans |
| Difficulty | Starter Projects |
| Estimated cost | Under $20 |
Dimensions
Use the size-specific shopping and cut lists below.
Shopping List
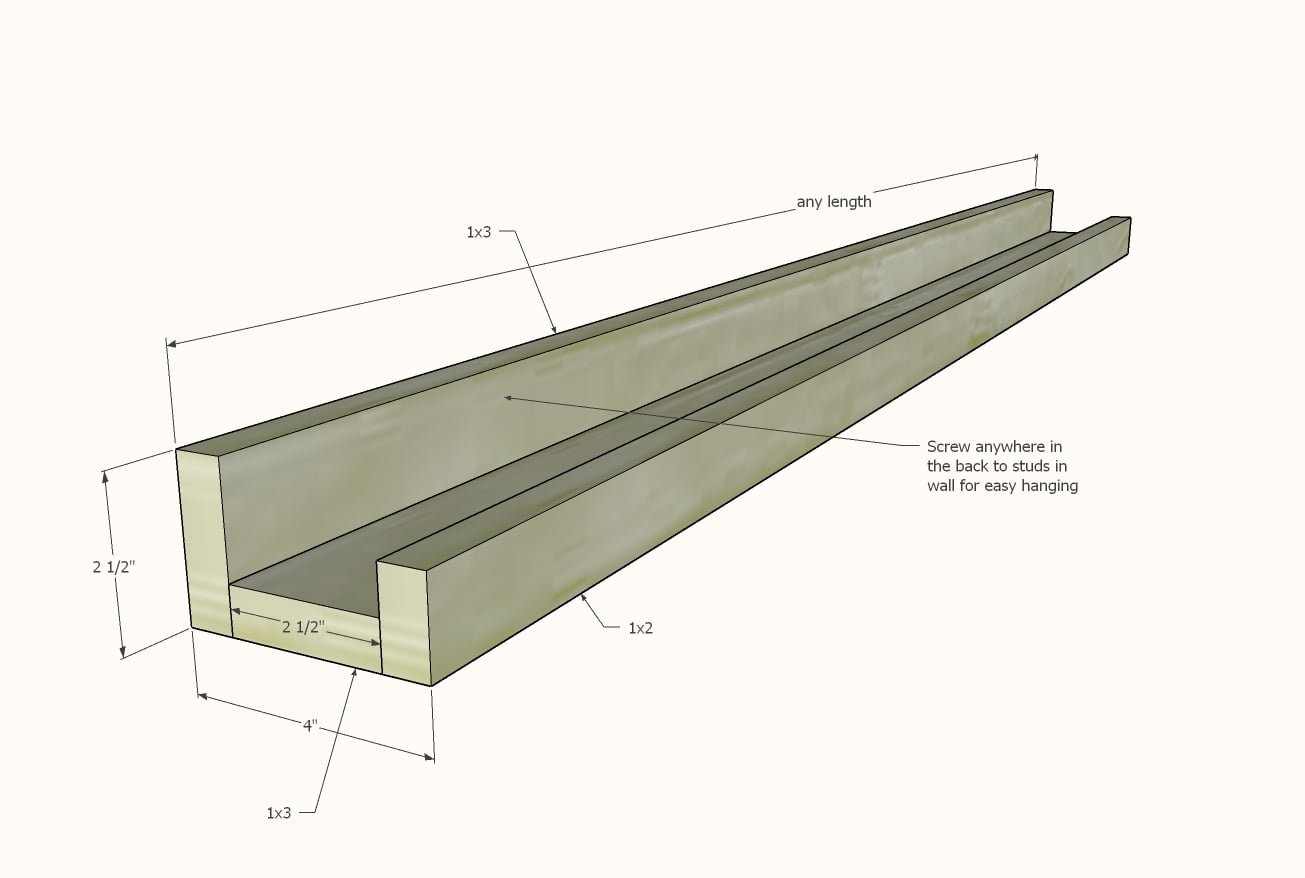
For (1) 8 foot long gallery ledge
- 2 - 1x3 @ 8 feet long
- 1 - 1x2 @ 8 feet long
- For every foot of shelving, you'll need about (3) 2" wood trim screws ( like these that also include the drill bit)
What Type of Wood?
- The least expensive is pine furring strips (about $2 for a 1x3 and $1 for a 1x2) and will paint just fine and stain to that rustic look everyone is after these days
- You can use a select pine or hardwood board as well if you are trying to match other woodwork in your home or are looking for a more refined look
- I don't recommend MDF as it doesn't have much structural integrity
Cut List
For 8 foot long shelving, NO cuts are necessary.
For shorter shelves, simply cut
- 2 - 1x3 @ desired length of shelving
- 1 - 1x2 @ desired length of shelving
EXAMPLE: For 36" long shelves, you would cut two 1x3 @ 36" and 1 - 1x2 @ 36"
Tools
- measuring tape
- pencil
- safety glasses
- hearing protection
- drill
- circular saw
- level
Step-by-step Instructions
Step 1
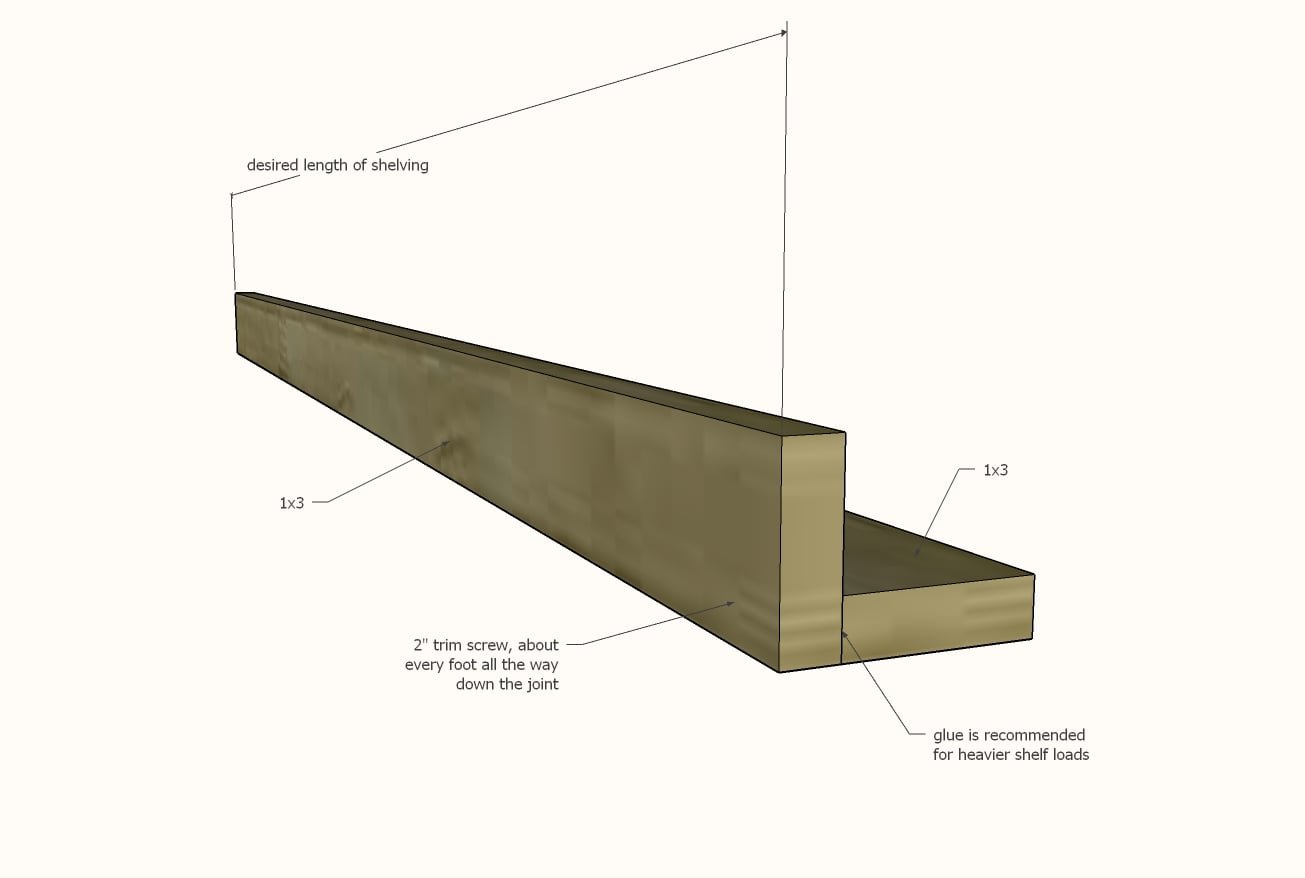
Attach the two 1x3 boards together with 2" trim screws, about every 12".
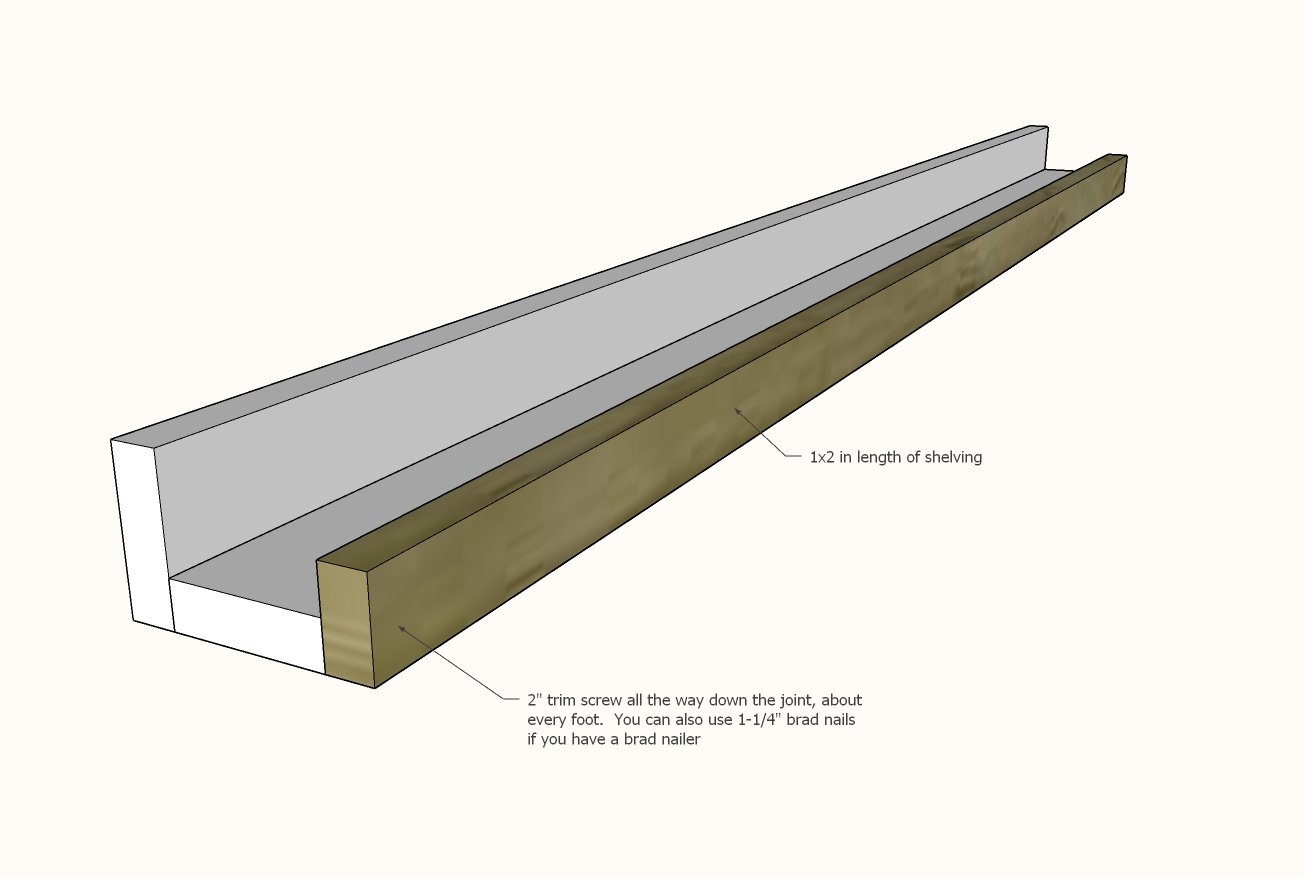
Attach the 1x2 to the front, with the 2" trim screws.
If you have a brad nailer, 1-1/4" brad nails and glue can also be used and will be easier to finish than screws. • For a painted finish, fill the screw or nail holes in the front 1x2 only with wood filler. Let the wood filler dry and then lightly sand any excess off. Then paint as desired. • For a stained finish, lightly sand the project. Then apply wood stain of your choice. Then use a stain matched wood filler to fill any holes.
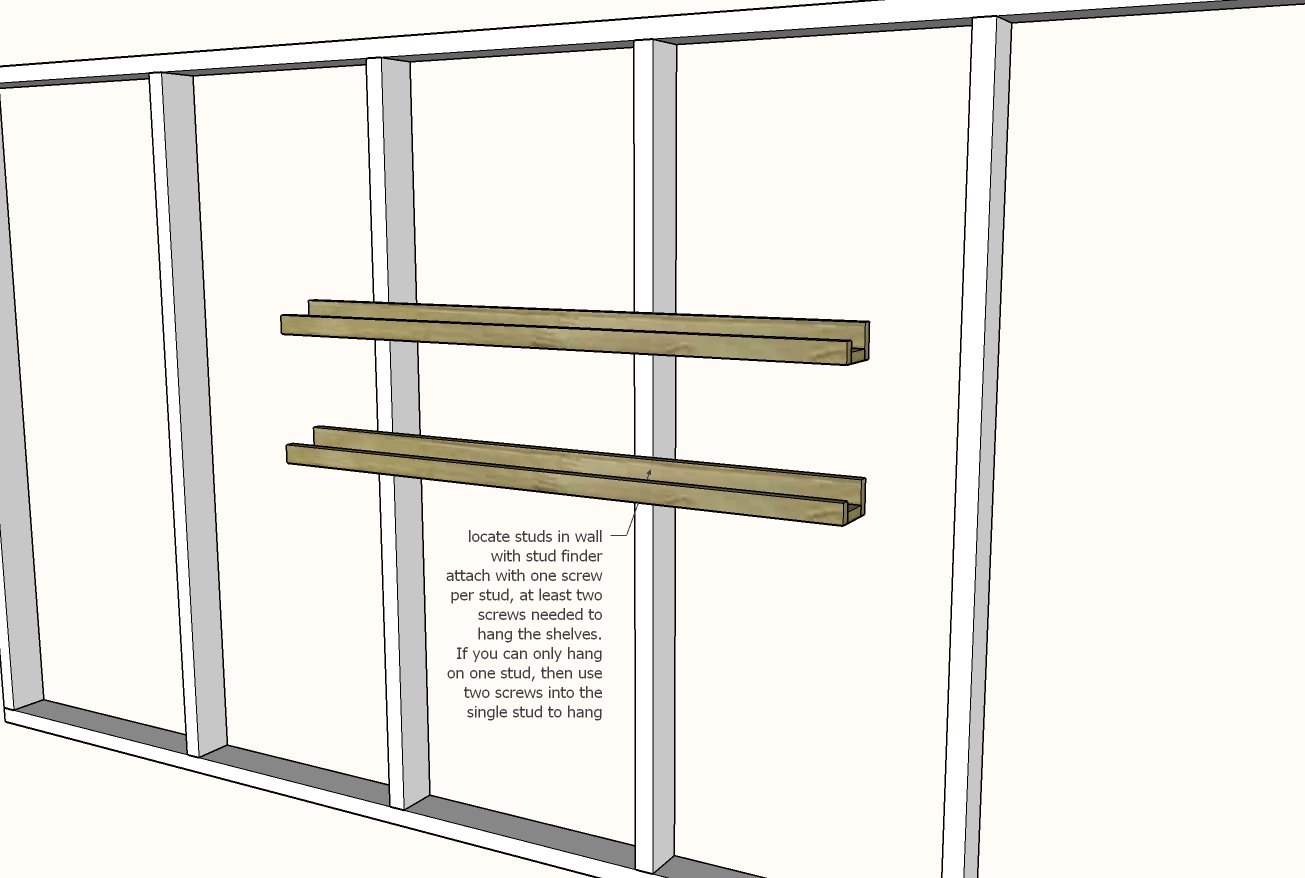
Locate studs in the wall with a stud finder.
Mark with a pencil. Place the picture ledge up on the wall at the desired location and screw through the back 1x3 into the studs in the wall. • At least two screws are needed to hang the picture ledge. • One screw per stud in the wall • If only one stud behind the picture ledge, than use two screws to attach to the one stud
Finishing
Sand all surfaces, starting with a medium grit and finishing with fine. Wipe off the dust, fill any holes or gaps with wood filler, and sand smooth once dry. Apply primer if you're painting, then finish with your choice of paint or stain and seal with a durable clear topcoat. For outdoor projects, use exterior-rated primer, paint or stain, and sealer so the piece stands up to the weather.
Source (temporary): https://www.ana-white.com/woodworking-projects/gallery-ledge-shelves