Garden Bench
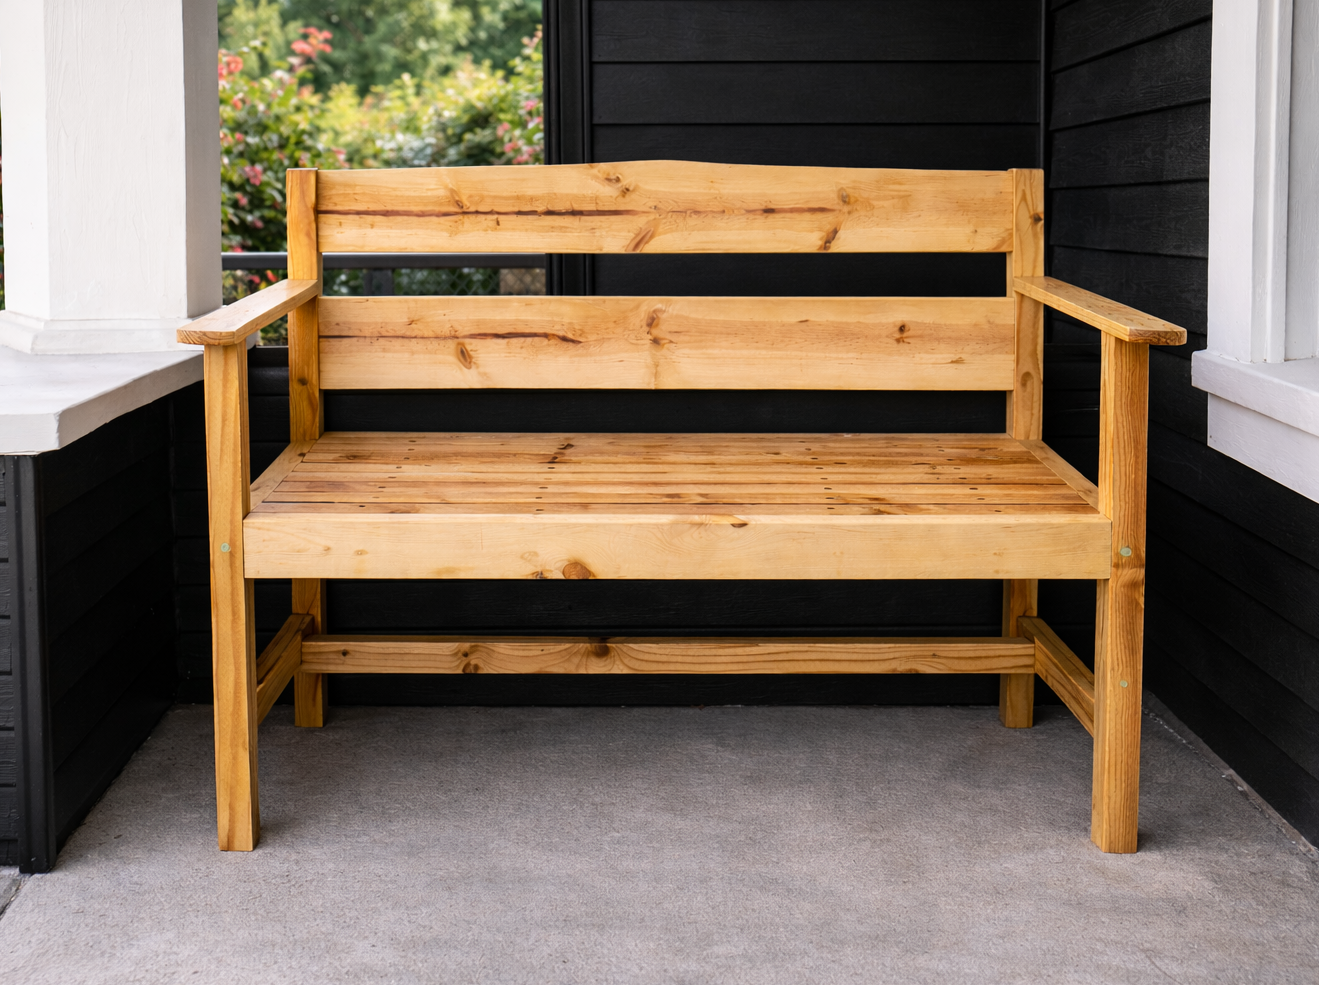
This is a great, deep bench to lounge on outside. I built it to the measurements of my love seat. If you're going to paint, it's easier to paint this before assembling.
Specifications
| Project type | Bench |
|---|---|
| Room | Outdoor |
| Style | Farmhouse Furniture |
| Difficulty | Beginner Projects |
| Estimated cost | $20 - $50 |
Dimensions
Use the size-specific shopping and cut lists below.
Shopping List
- 7 - 2x3x8
- 1 - 2x4x8
- 1 - 2x6x8
- 2 - 2x2x8
Cut List
- 4 - 2x2 @ 21'' (seat supports)
- 1 - 2x2 @ "about" 29 1/2'' - measure YOURS before cutting
- 8 - 2x3 @ 47'' (7 seat slats and 1 bottom support beam)
- 4 - 2x3 @ 19'' (2 side aprons and 2 bottom leg supports)
- 2 - 2x3 @ 27'' (arm rests)
- 2 - 2x3 @ 40'' (Back Legs)
- 2 - 2x3 @ 30'' (front legs)
- 2 - 2x4 @ 47'' (front and back apron)
- 2 - 2x6 @ 47'' (back beams)
Tools
- measuring tape
- square
- pencil
- drill
- circular saw
- compound miter saw
- countersink drill bit
Step-by-step Instructions
Step 1
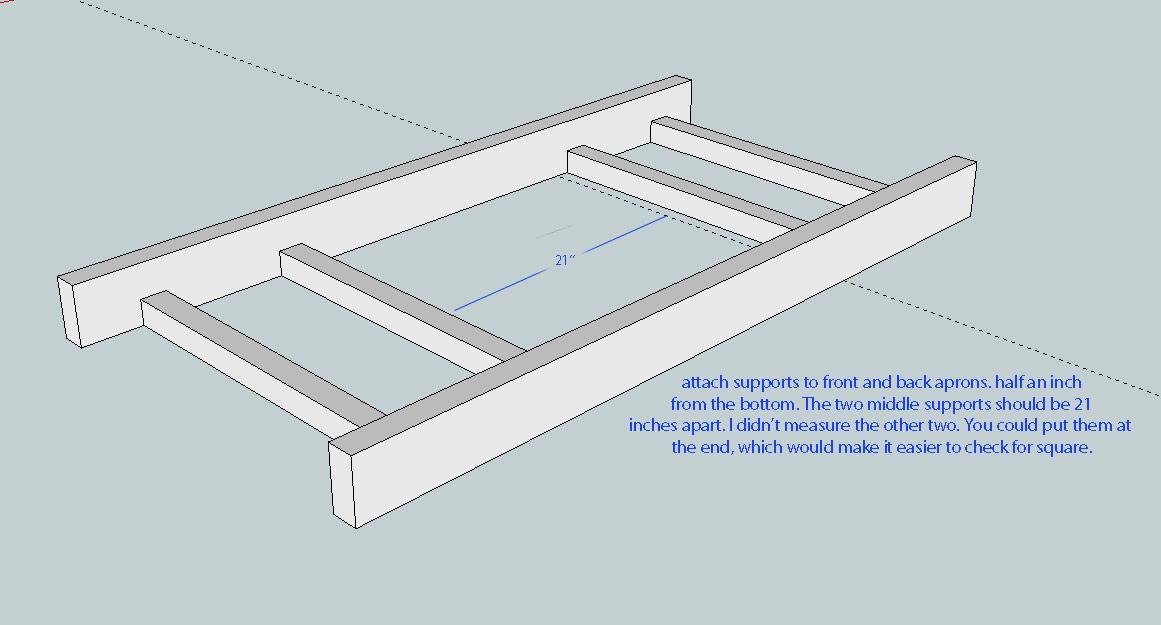
Attach supports to front and back aprons, half an inch from the bottom. The two middle supports should be 21'' apart. I didn't measure the other two, but you could put them at the ends. That would probably have been the smartest thing for me to do. I forgot to measure a half inch up in the diagram above, but the 2x2s need to be half an inch up. I used a 1/2'' square dowel to support it as I drilled in from the front and back apron.
Step 2
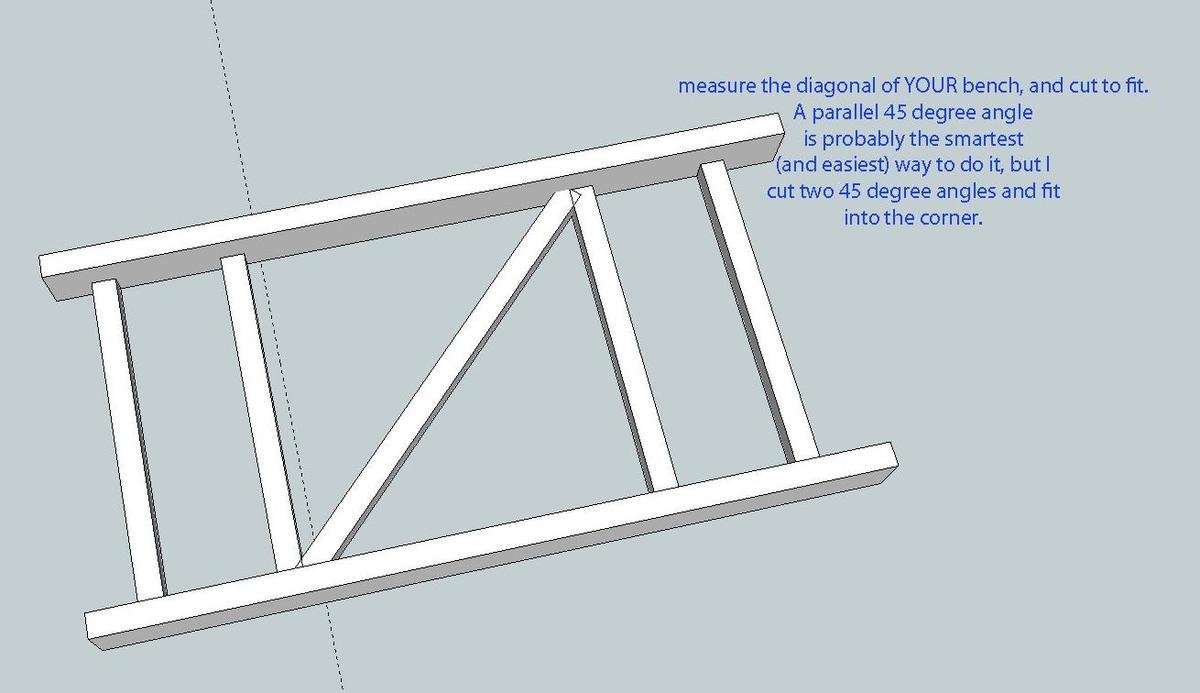
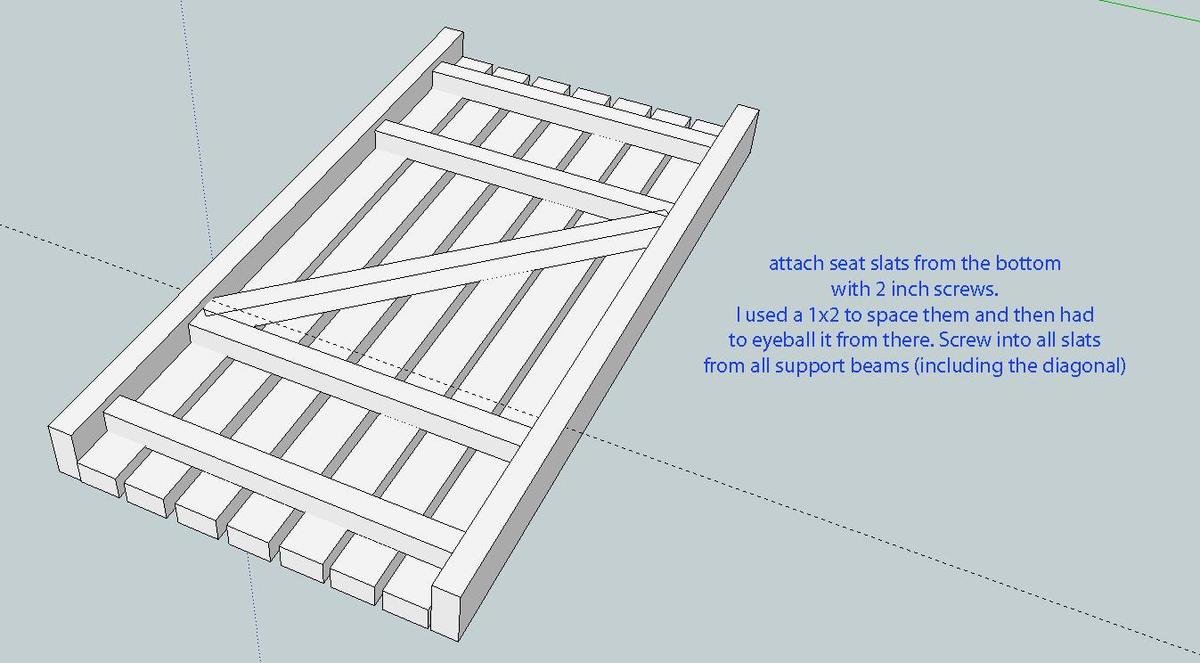
Measure the diagonal of YOUR bench and cut the diagonal support beam to fit. Parallel 45 degree angles would have been easier, but I did two 45 angles at each end to fit into the corner.
Step 3
Attach the seat slats from the bottom with 2 inch screws. Space approx 3/4'' apart and then eyeball their spacing from there.
Step 4
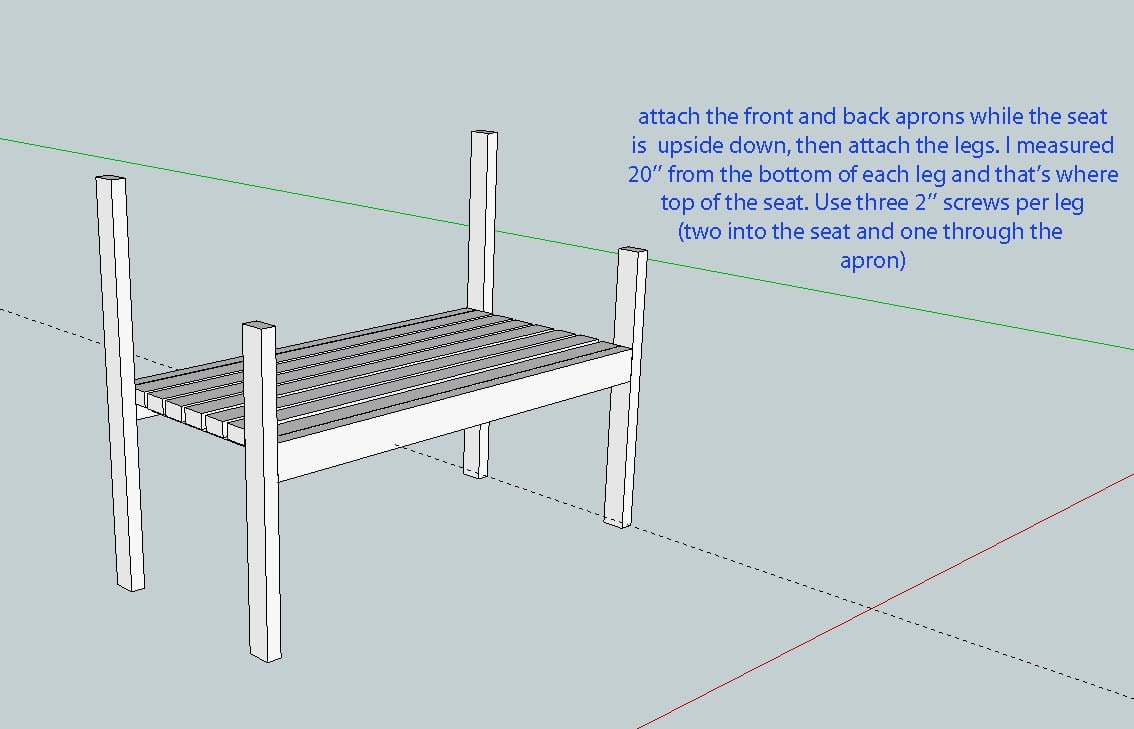
I repeated the first part of this step - oops! The aprons are already there, so ignore that part and just attach the legs. Measure 20'' from the bottom of each leg and that is where the top of the seat should go. Use three 2'' screws per leg (two into the seat and one into the apron)
Step 5
Step 6
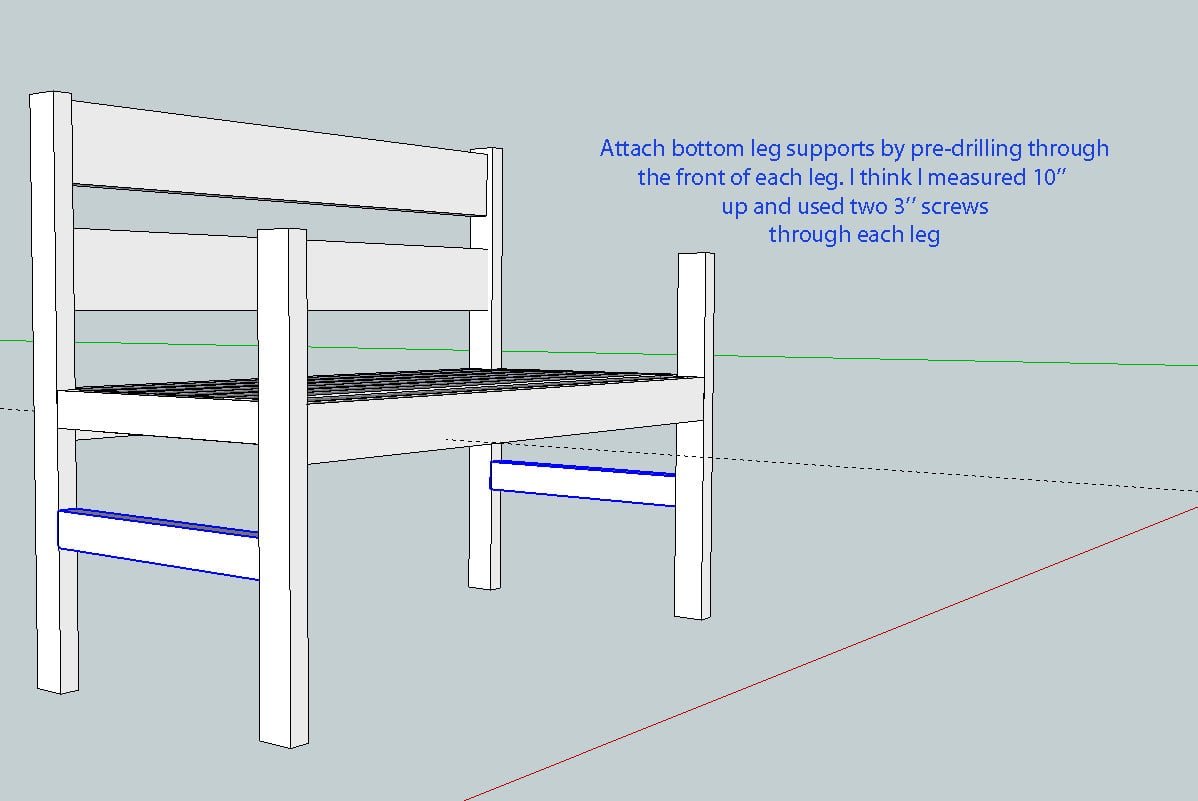
Attach bottom leg supports by pre-drilling through the front of each leg. Measure 10'' from the bottom, and the top of the beam should sit there. Use two 3'' screws per leg.
Step 7
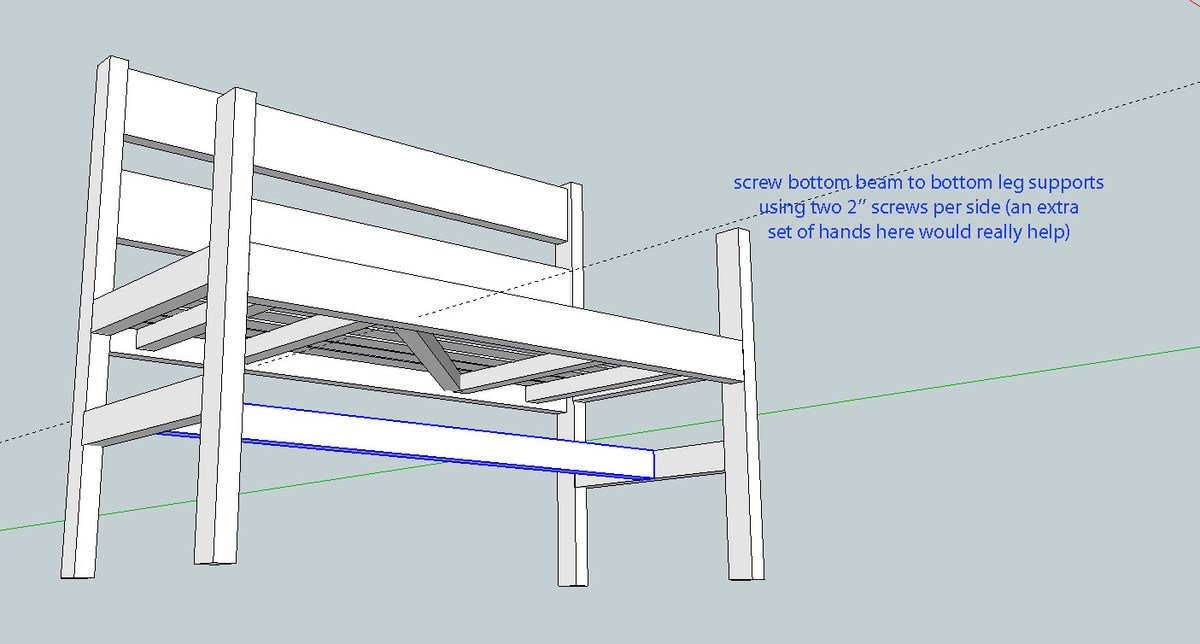
Screw the bottom beam to leg supports using 2'' screws. Use 2 screws per side (grab a stray kid to help)
Step 8
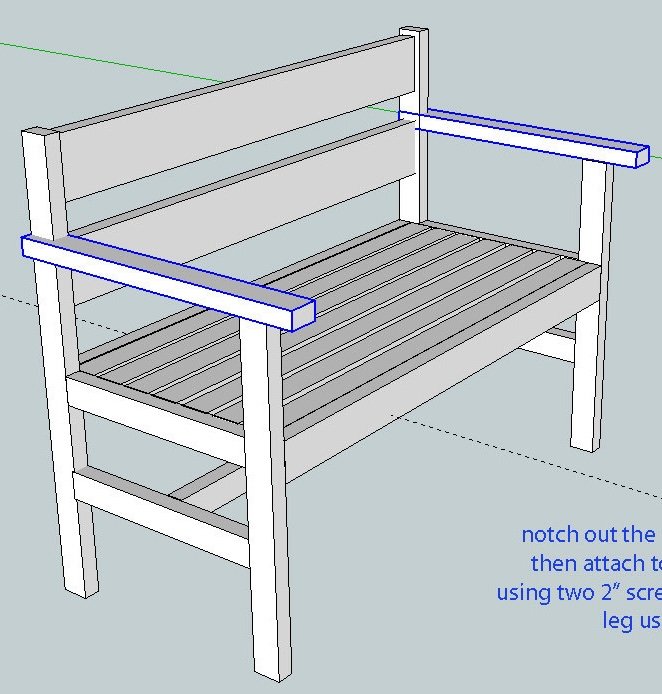
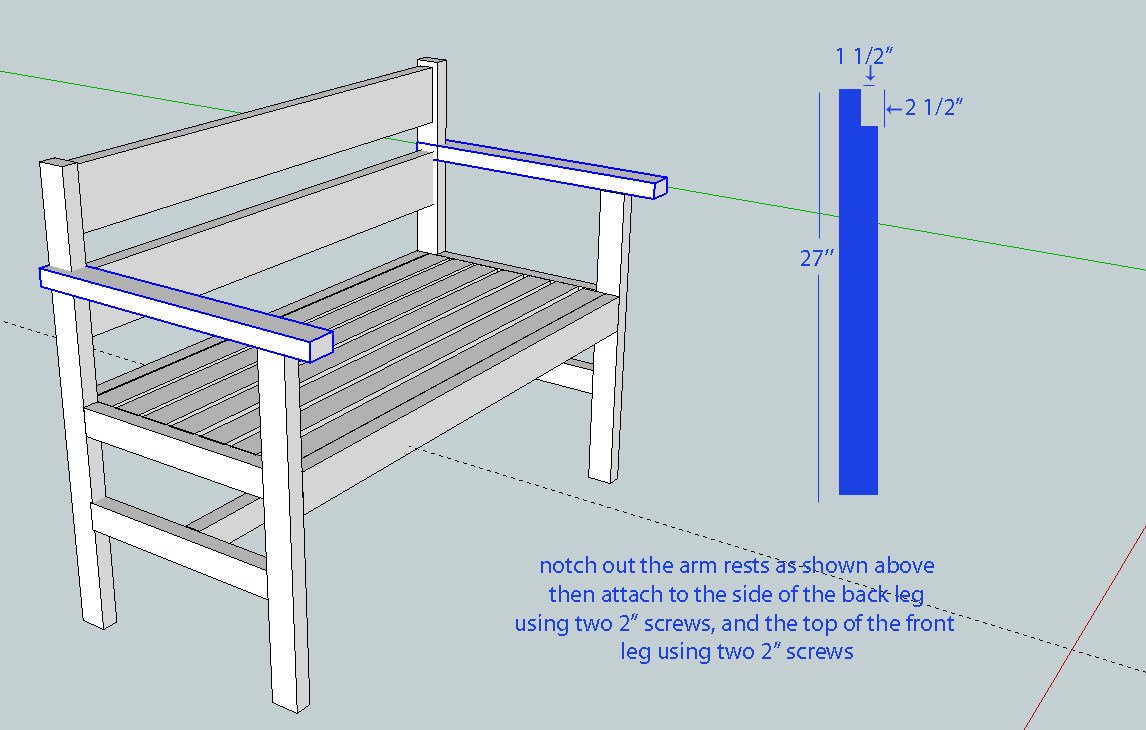
Notch out the arm rests as shown above. This should be to the exact dimensions of your 2x3, so measure your board first. Mine happened to fit perfectly into the dimensions shown. Pre-drill through the side and screw into the back leg using two 2'' screws. Screw from the top into the front leg (2 screws).
Finishing
Sand all surfaces, starting with a medium grit and finishing with fine. Wipe off the dust, fill any holes or gaps with wood filler, and sand smooth once dry. Apply primer if you're painting, then finish with your choice of paint or stain and seal with a durable clear topcoat. For outdoor projects, use exterior-rated primer, paint or stain, and sealer so the piece stands up to the weather.
Source (temporary): https://www.ana-white.com/woodworking-projects/garden-bench