Garden Enclosure
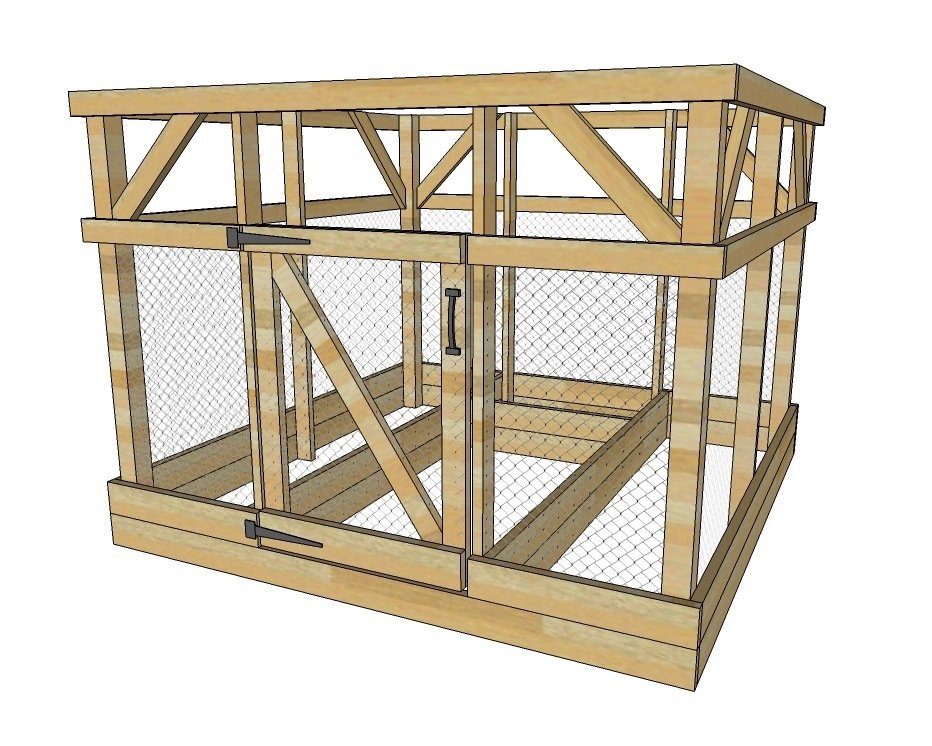
Easy DIY Garden enclosure!
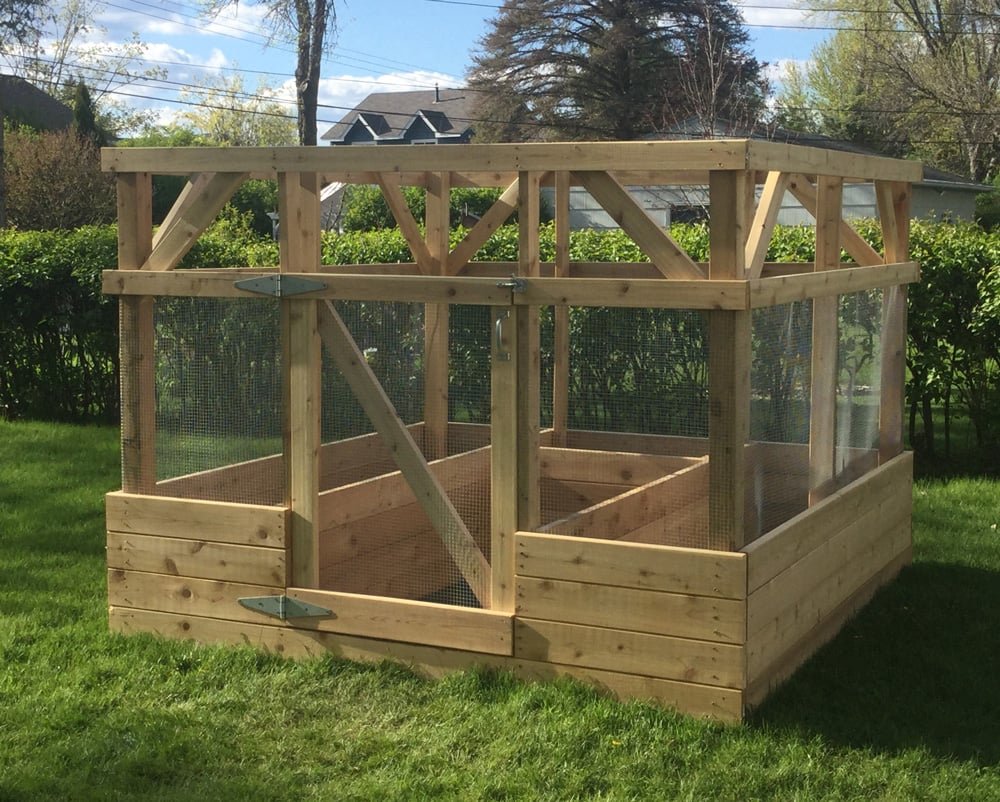
Specifications
| Project type | Planters, Garden Beds, and Greenhouses |
|---|---|
| Room | Outdoor |
| Style | Green or Eco-Friendly Style Furniture |
| Difficulty | Intermediate |
Dimensions
Use the size-specific shopping and cut lists below.

Shopping List
- 4 – 4x4 @ 72”
- 3 – 2x4 @ 144” (cut the 72” long 2x4s from these)
- 13 – 2x4 @ 96” long
- 14 – 2x6 @ 96” long
- 1 – 1x2 @ 6 feet long (Recommend exterior grade lumber)
- About 200 - 3” self tapping exterior decking screws (I like these ones)
- 32 feet of 48” width chicken wire or mesh
- Staples for attaching chicken wire
Cut List
FRAME
- 4 – 4x4 @ 72”
- 6 – 2x4 @ 72”
- 7 – 2x4 @ 96”
- 7 – 2x6 @ 96”
- 2 – 2x6 @ 30-1/2”
- 2 – 2x4 @ 30-1/2”
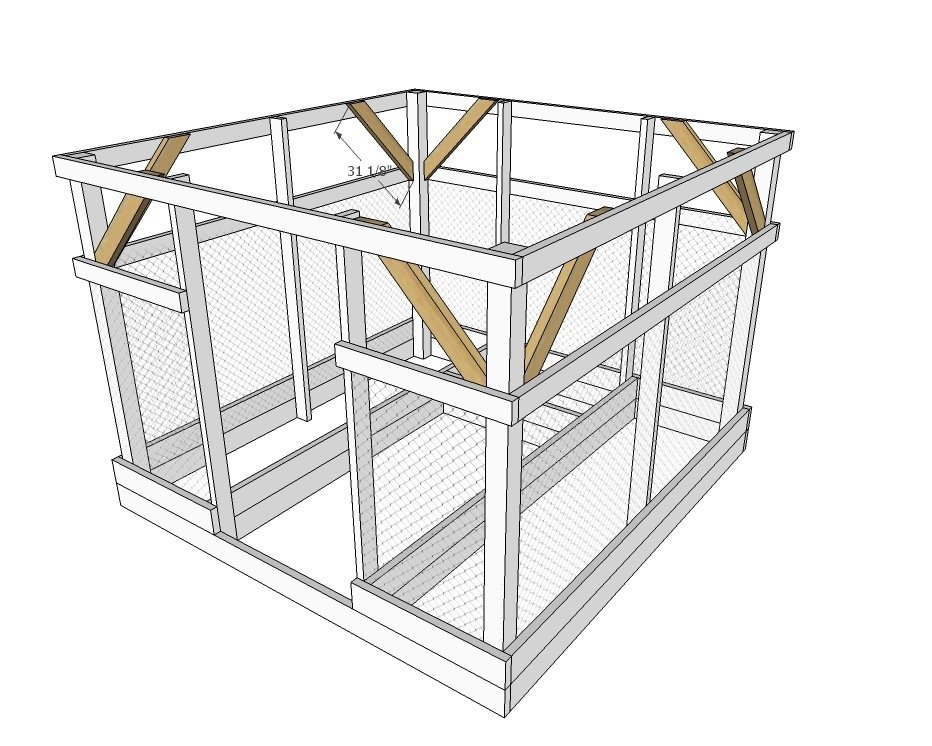
- 8 – 2x4 @ 31” – Long point to long point measurement, both ends cut at 45 degrees off square, NOT parallel
RAISED BED
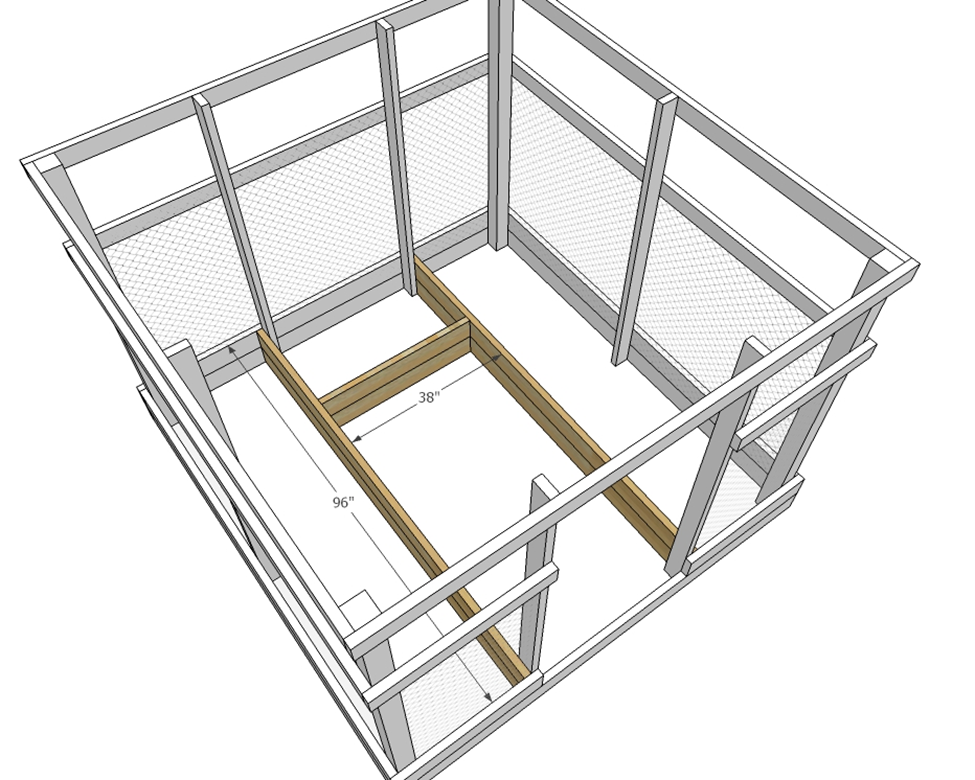
- 4 – 2x6 @ 96”
- 4 – 2x6 @ 38”
DOOR - suggest cutting door to fit the final opening
- 2 – 2x4 @ 46”
- 2 – 1x2 @ 33-1/2”
- 1 – 2x4 @ 53”
- 1 – 2x4 @ 33-1/2”
- 1 – 2x6 @ 33-1/2”
Tools
- measuring tape
- square
- pencil
- safety glasses
- hearing protection
- drill
- circular saw
Step-by-step Instructions
Step 1
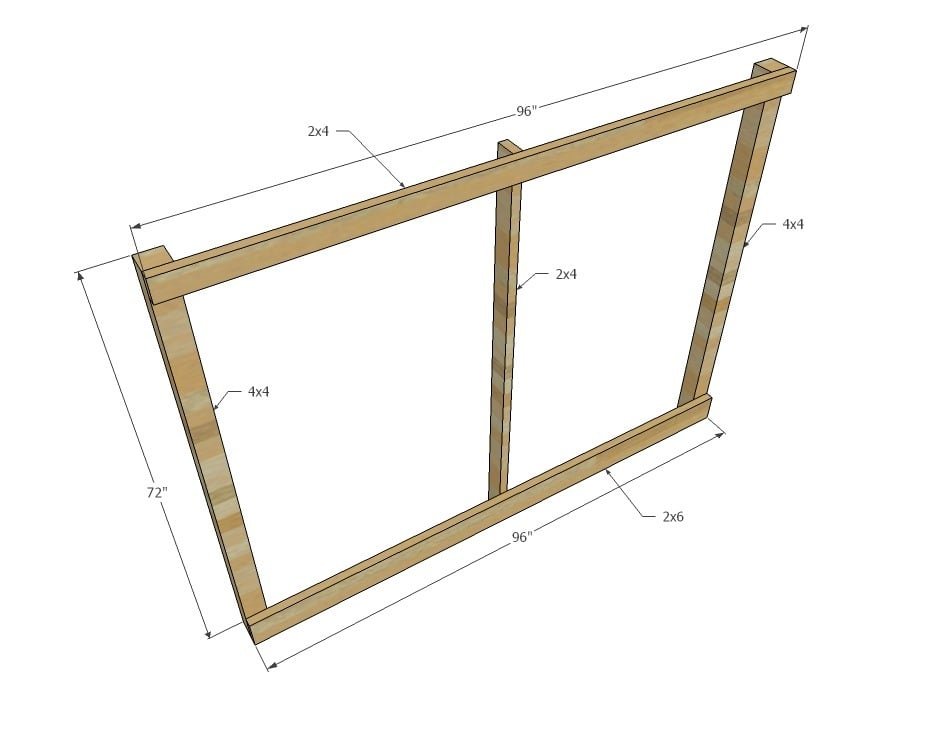
On a flat, level surface, lay the 4x4 posts out and attach the 2x4 and 2x6 to the top and bottom with 3” wood screws and exterior glue. Attach to the center a 2x4 @ 72” long on edge. Adjust for square by taking diagonal measurements and making sure the two measurements match. Build two side walls.
Step 2
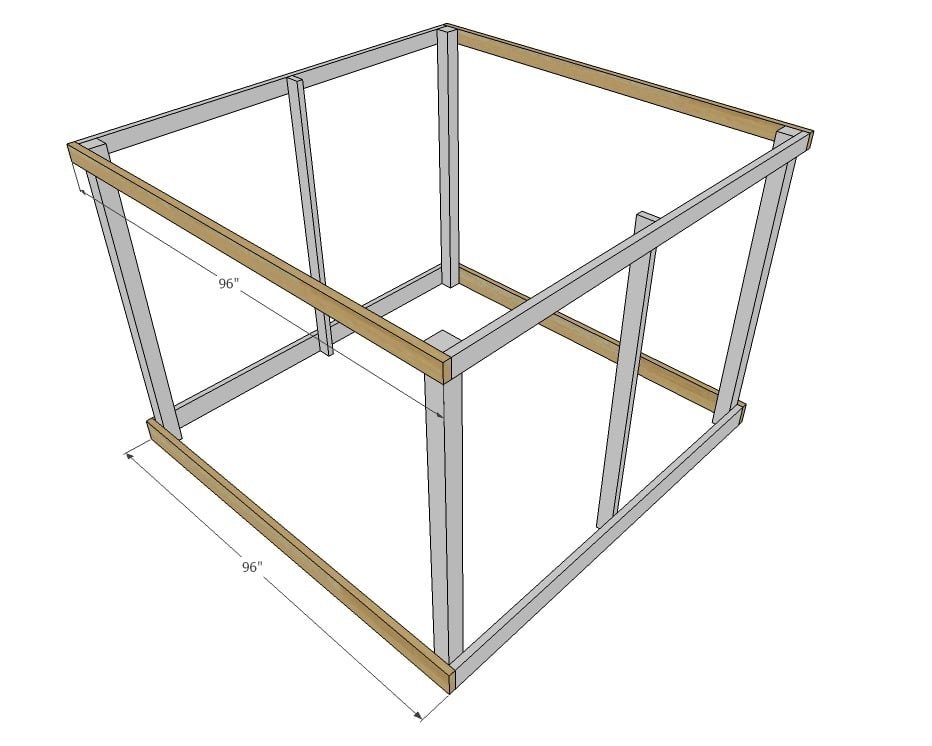
Use 3” wood screws and exterior wood glue to attach 2x4s to top and 2x6 to bottom to create the front and back wall framing. Adjust for square by taking diagonal measurements. At this point the enclosure should be placed in final position.
Step 3
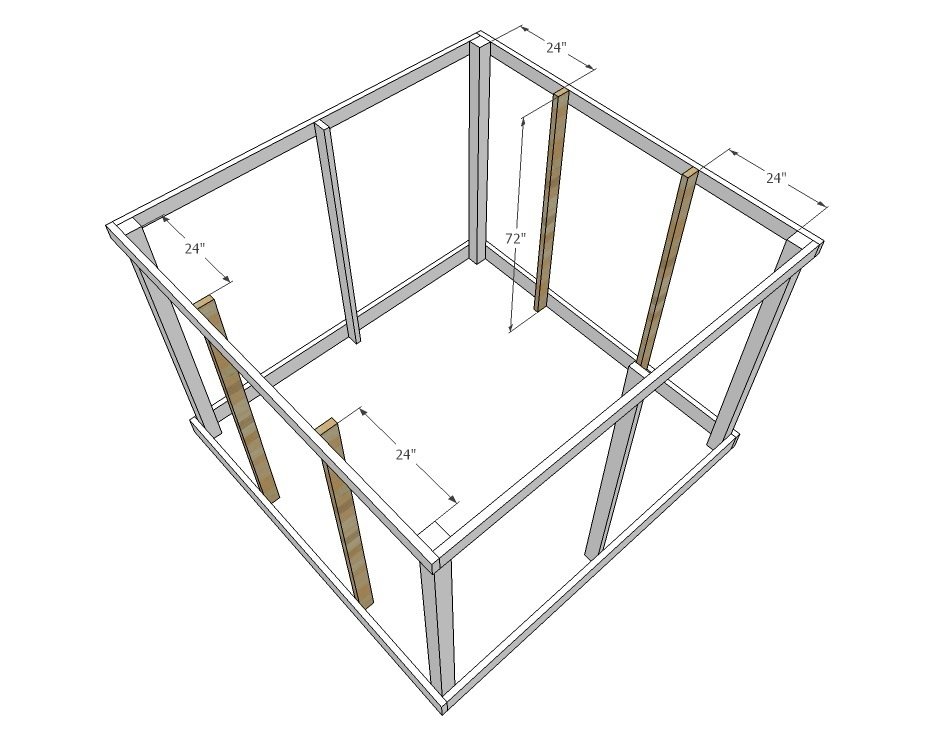
Attach remaining 2x4 @ 72” long on edge to front and back walls, 24” fron the 4x4 corner posts. Use the 3” exterior screws and exterior wood glue.
Step 4
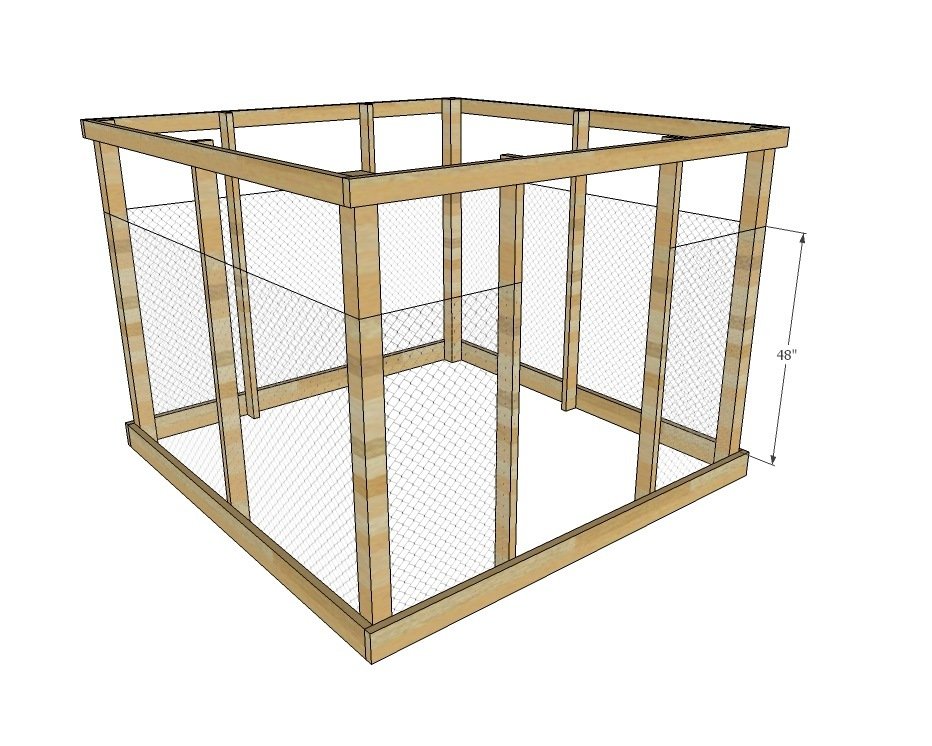
Wrap the bottom exposed 4 feet of the enclosure in chicken wire or mesh, securing with staples. Leave opening for door between 2x4 @ 72”long.
Step 5
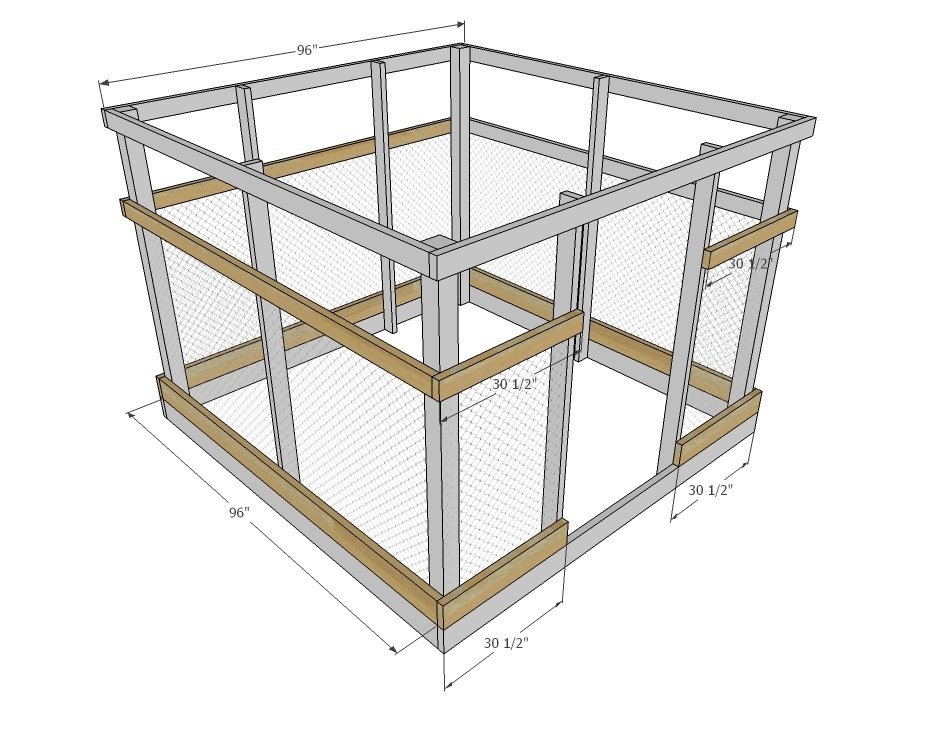
Add additional rows of wood to cover the ends of the chicken wire with screws.
Step 6
Ensure the enclosure is square. Then attach cross supports to insides of project with 2-1/2” exterior wood screws and exterior glue.
Step 7
Attach 2x6 boards to inside to create raised beds. 2x12 boards can also be used. Use 2-1/2” exterior screws.
Step 8
Attach 1x2s to top and bottom of 2x4 boards to create door frame. Use 2-1/2” exterior wood screws. Check and adjust door frame for square.
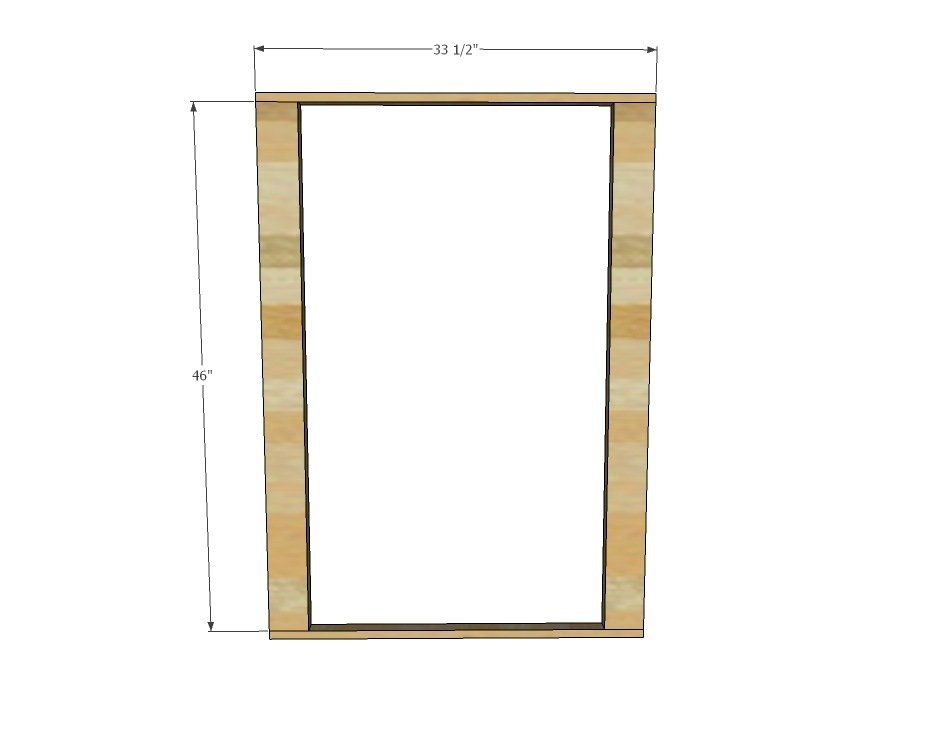
Step 9
Lay cross support board over door frame. Mark with a pencil. Cut off ends with a circular saw or jigsaw.
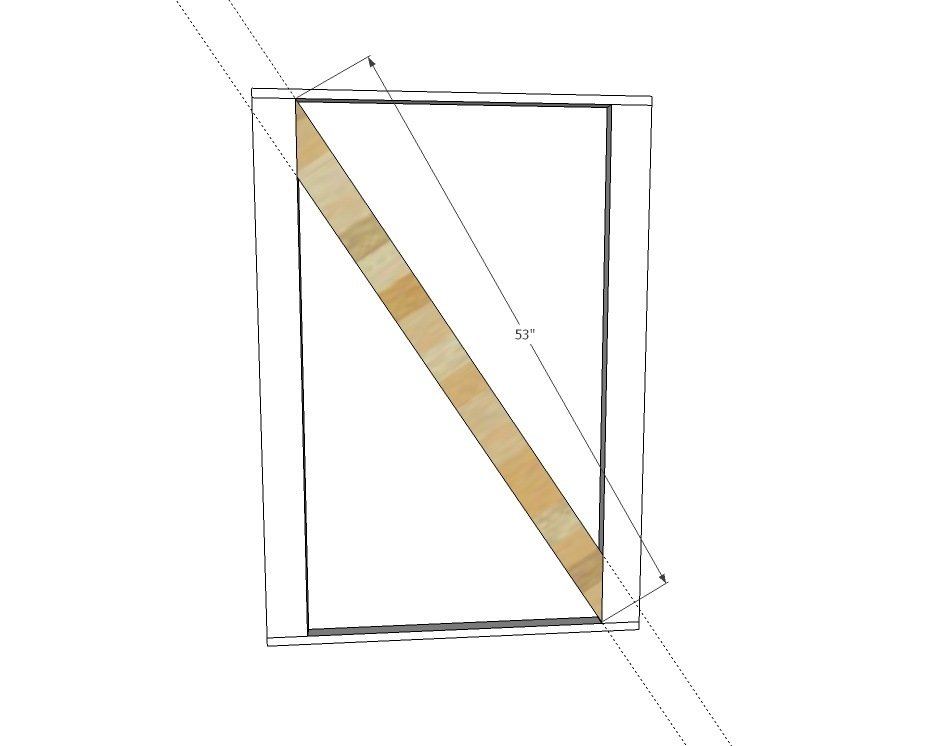
Step 10
Staple mesh or chicken wire to the door frame.
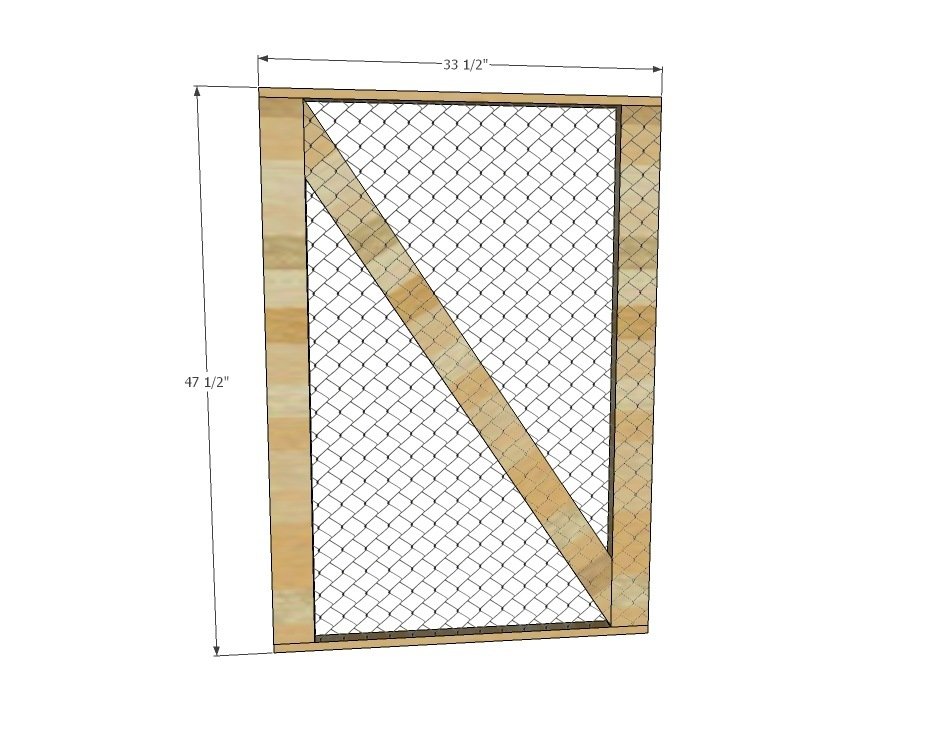
Step 11
Attach 2x4 and 2x6 door trim to the door frame with 2-1/2” screws. Also attach cross support.
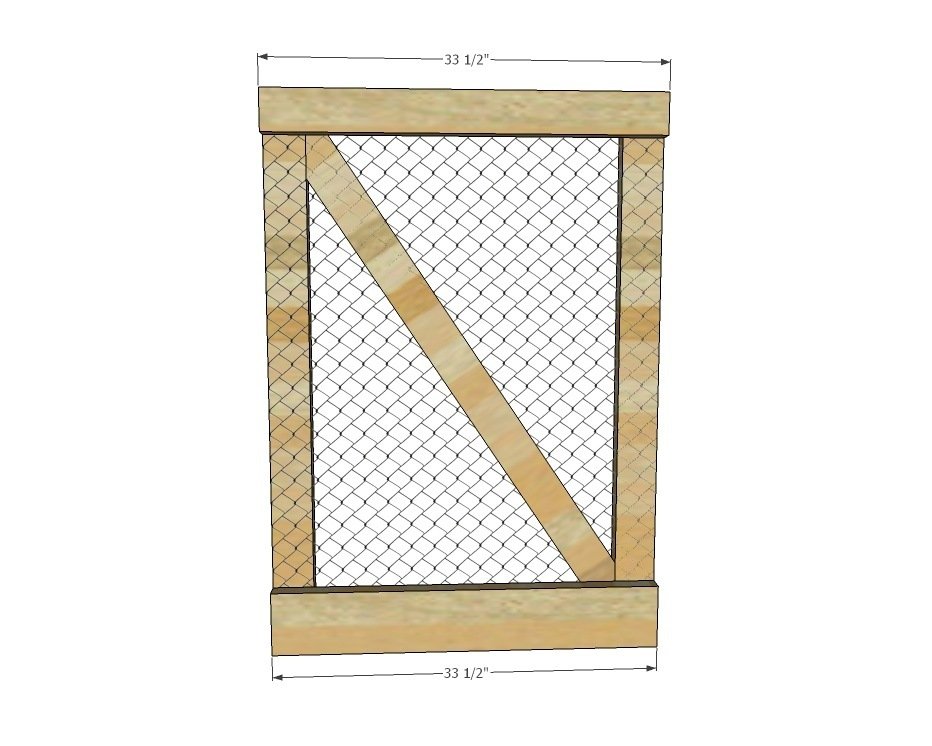
Step 12
Attach door to enclosure with gate hinges.
Finishing
Sand all surfaces, starting with a medium grit and finishing with fine. Wipe off the dust, fill any holes or gaps with wood filler, and sand smooth once dry. Apply primer if you're painting, then finish with your choice of paint or stain and seal with a durable clear topcoat. For outdoor projects, use exterior-rated primer, paint or stain, and sealer so the piece stands up to the weather.
Source (temporary): https://www.ana-white.com/woodworking-projects/garden-enclosure