Garden Tool Storage
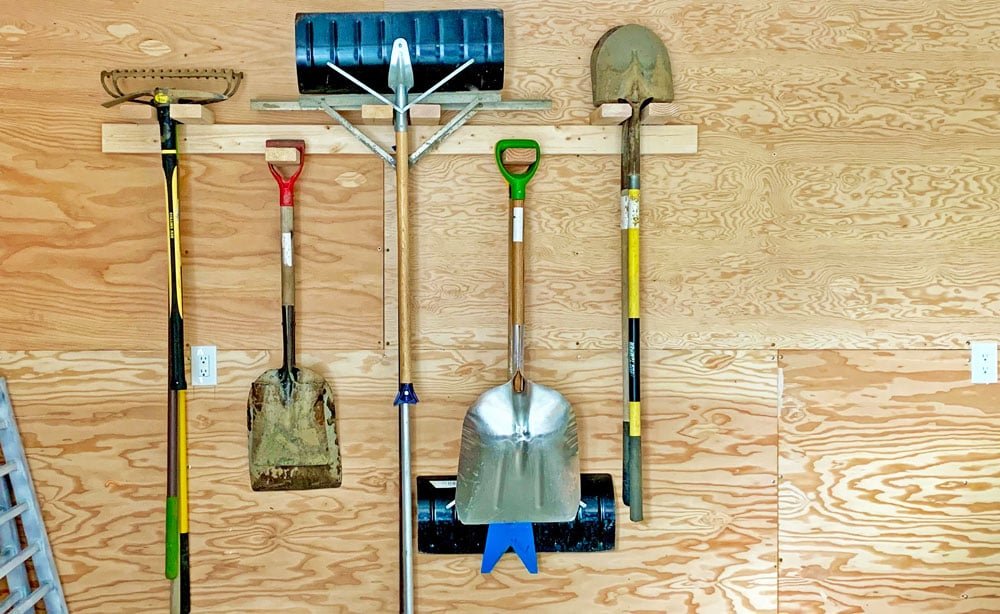
Get those rakes and shovels up off the ground and put away! Super easy and quick DIY project to organize and store your garden tools. Customize for your space and tools. About $10 in materials to build. Free. So we recommend shortening up the extending 2x4s to hold 1-2 tools (instead of 3-4).
Specifications
| Project type | Garage Storage |
|---|---|
| Room | Outdoor |
| Difficulty | Starter Projects |
| Estimated cost | Under $20 |
Dimensions
Use the size-specific shopping and cut lists below.
Shopping List
2 - 2x4 @ 8 feet long
20 - 2-1/2" to 3" long self tapping screws ( like these ) look for the star bit ones, make sure they are exterior rated if using outside
Cut List
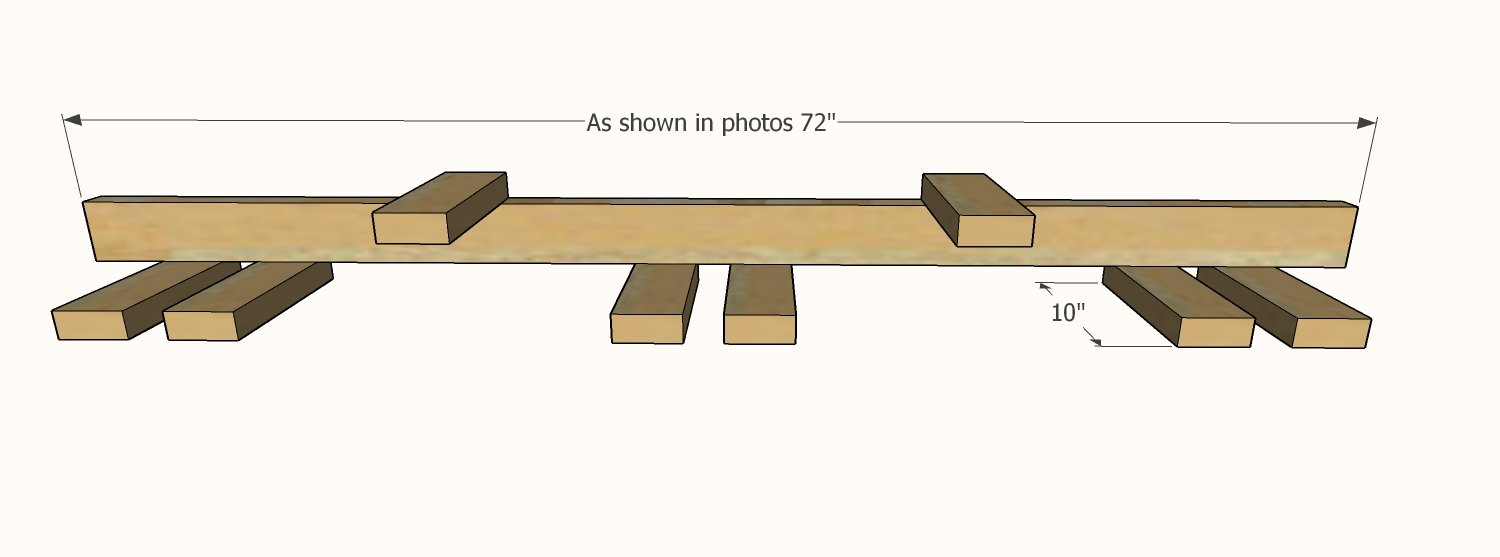
Can be made to any dimensions. Cut list as shown in photographs and video
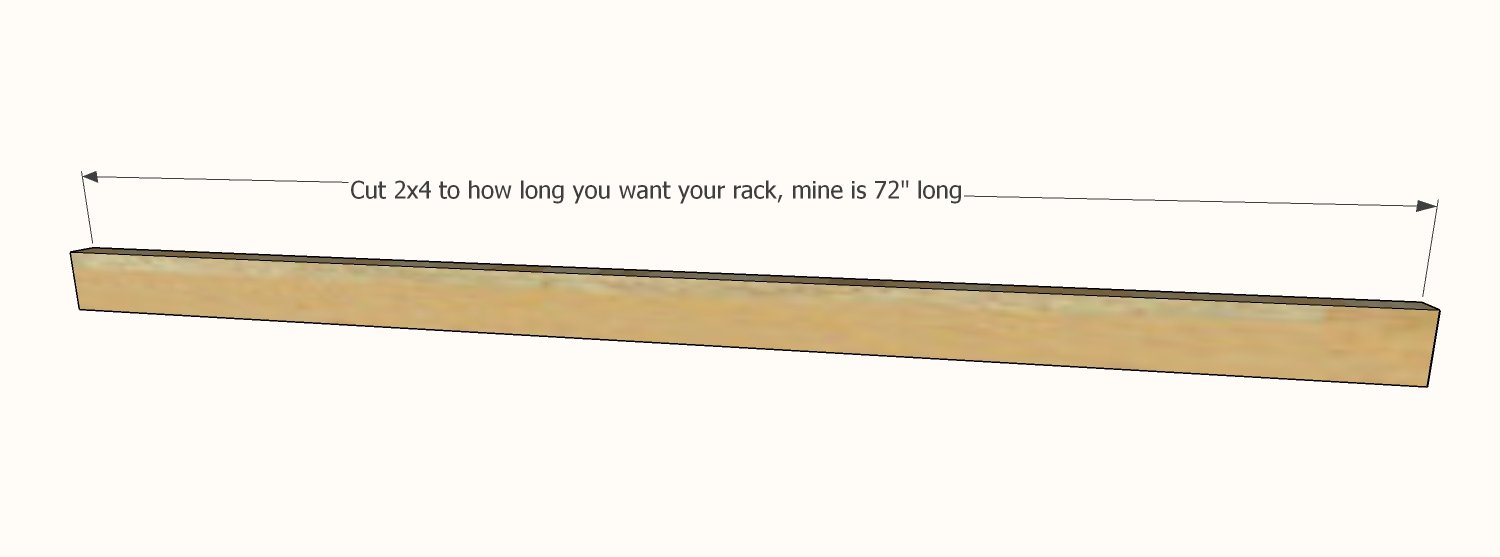
- 1 - 2x4 @ 72"
- 8 - 2x4 @ 6"
Tools
- measuring tape
- square
- pencil
- safety glasses
- drill
- circular saw
Step-by-step Instructions
If you are customizing -
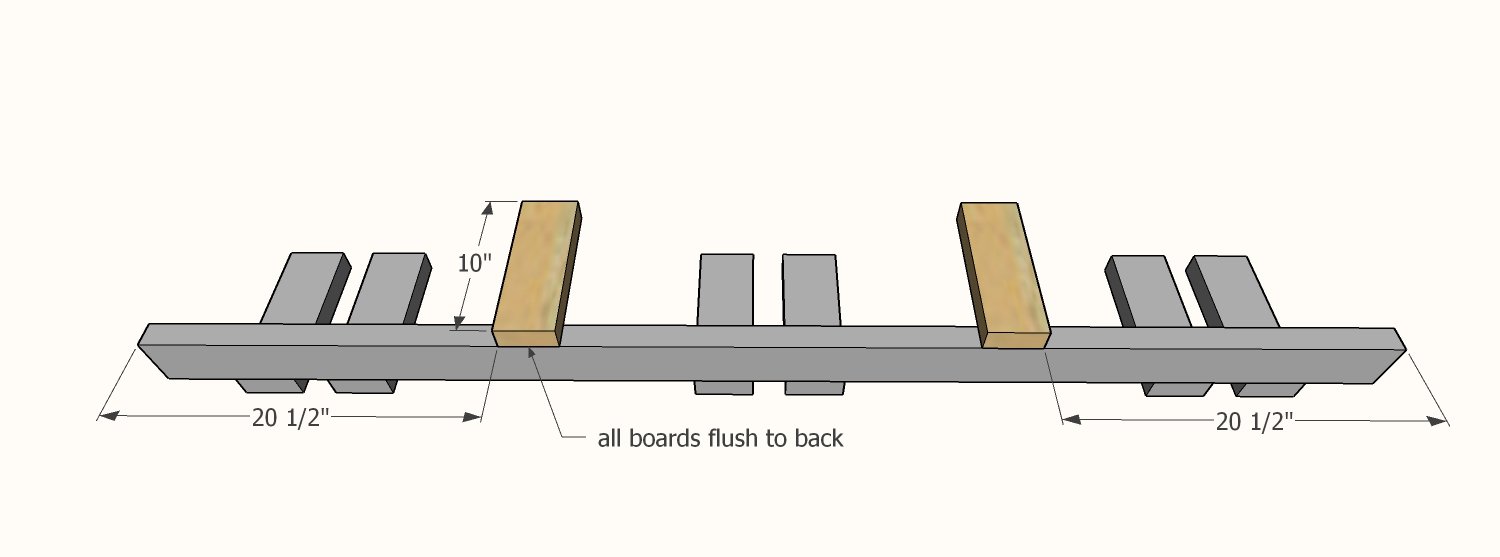
Measure your space. Cut a 2x4 to fit the desired length of the garden tool rack. Lay on a flat surface and begin placing your tools over the cut 2x4, organizing tools without D ring handles upside down at the top, and tools with a D ring handle hanging below. Lay out the position of the 10" blocks and mark.
Step 2
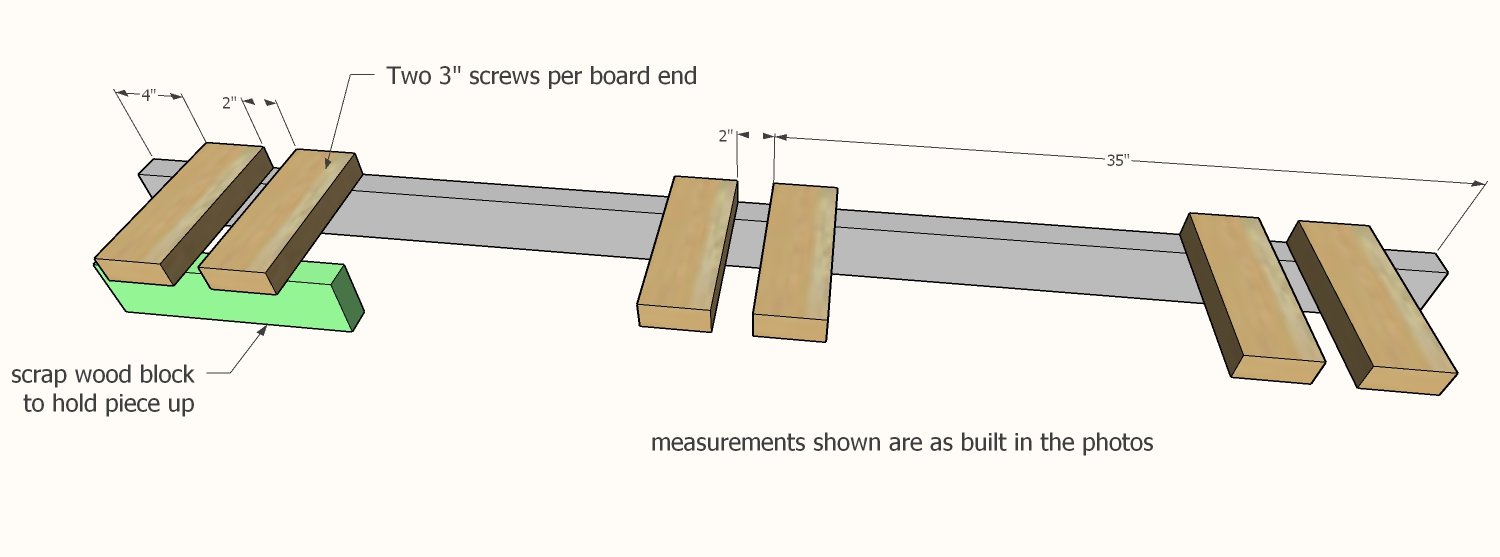
Attach the upper hanger blocks to the top edge of the 2x4 with screws, two per joint. Leave a 2" gap in between for sliding tools in.
Step 3
Add the bottom row of hanger blocks.
Step 4
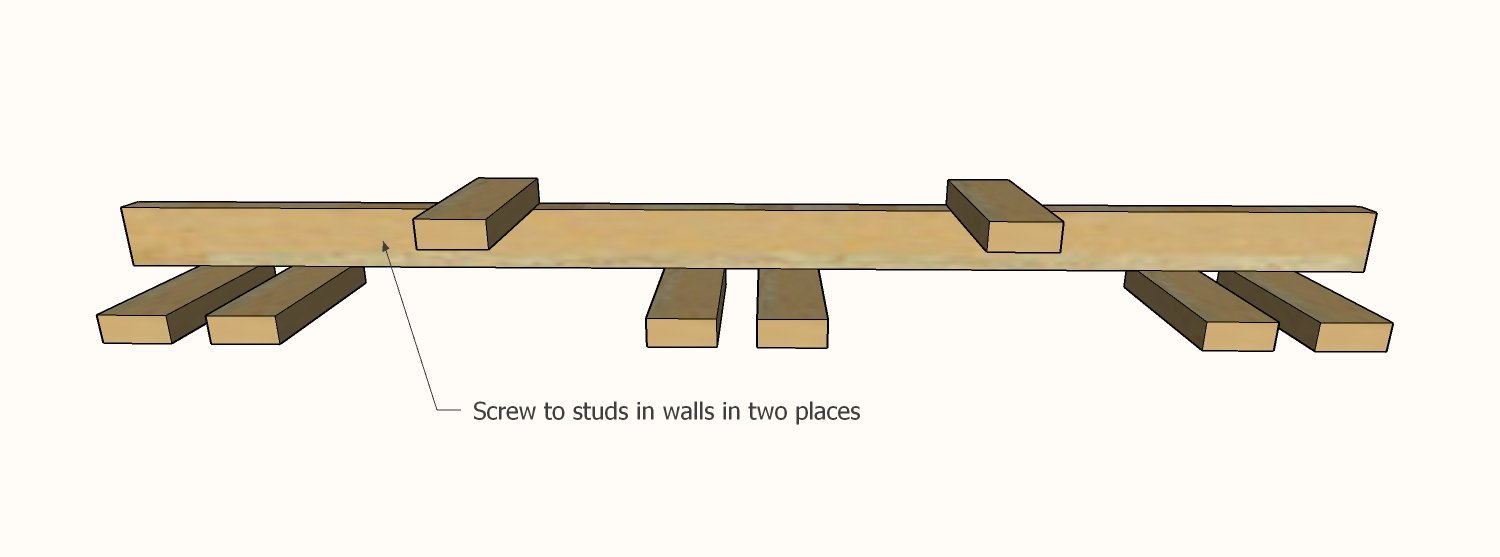
Locate two studs in the wall and hang to the studs, high enough so the longest tool does not hit the ground (I hung ours at 72"). You need two screws per stud, minimum four screws.
Finishing
Sand all surfaces, starting with a medium grit and finishing with fine. Wipe off the dust, fill any holes or gaps with wood filler, and sand smooth once dry. Apply primer if you're painting, then finish with your choice of paint or stain and seal with a durable clear topcoat. For outdoor projects, use exterior-rated primer, paint or stain, and sealer so the piece stands up to the weather.
Source (temporary): https://www.ana-white.com/woodworking-projects/garden-tool-storage