Gathering Kitchen Island
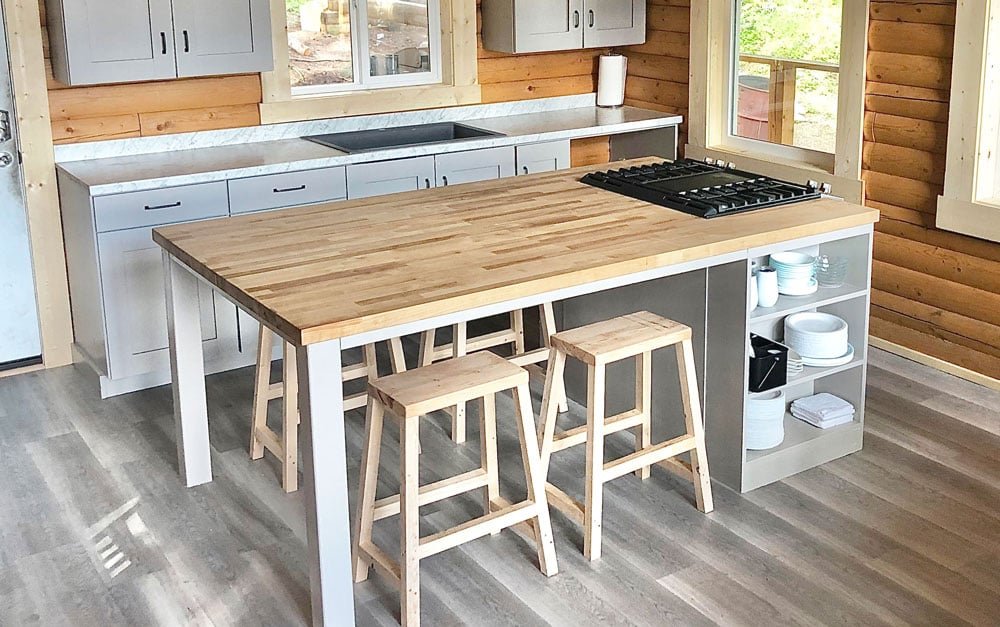
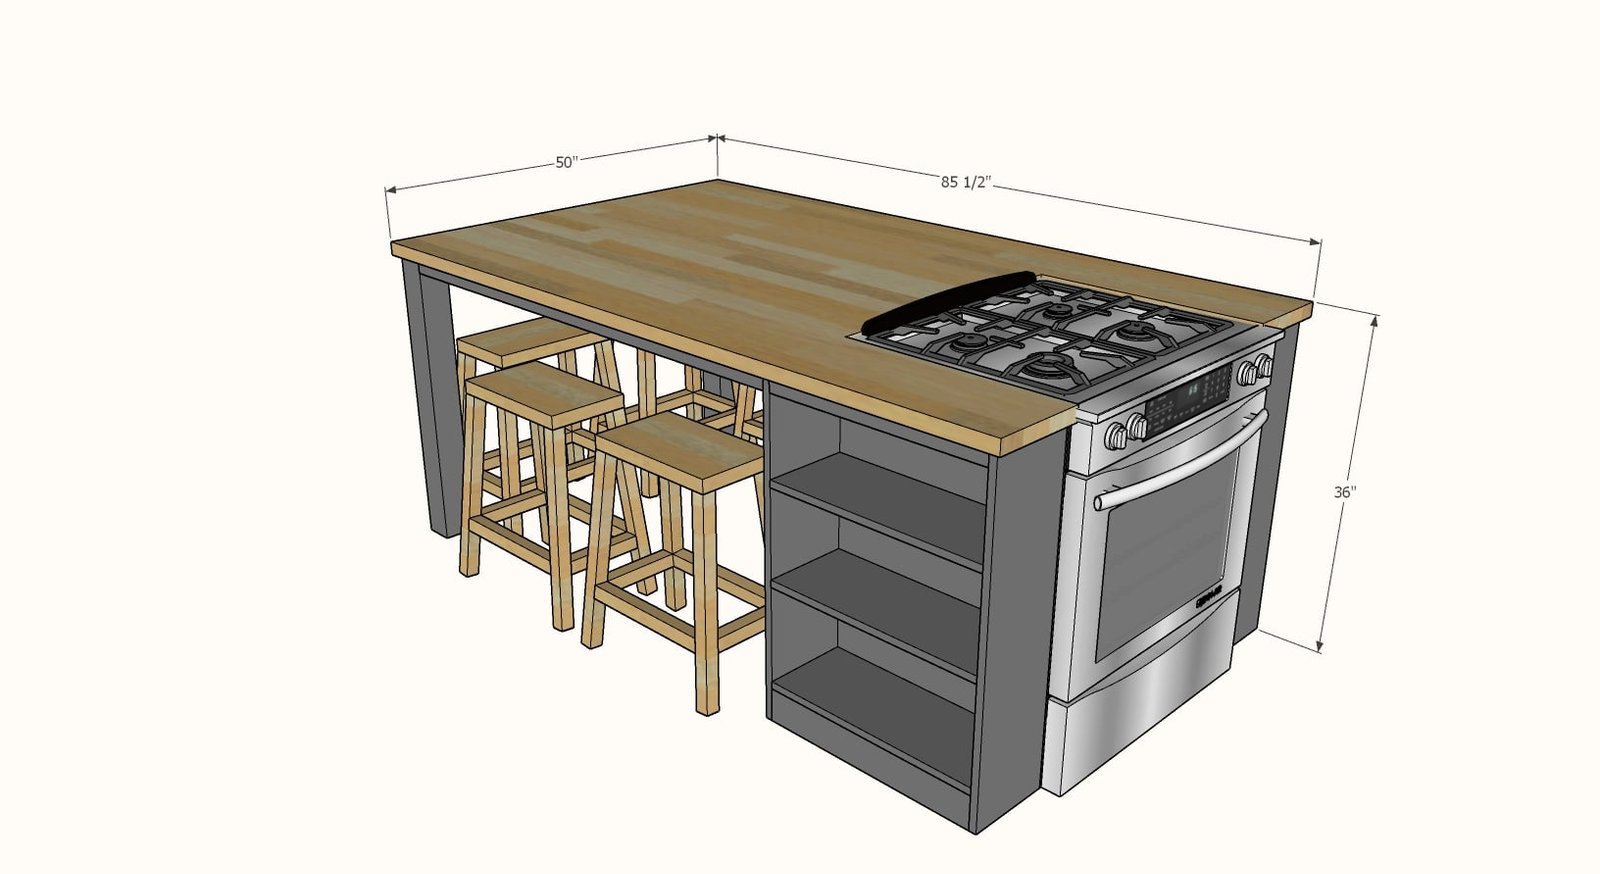
Build your own kitchen island designed for gathering. Made with off the shelf butcher block countertops and pine boards, designed to fit around a slide in range for cooking. from
Specifications
| Project type | Kitchen Island Plans |
|---|---|
| Room | kitchen |
| Style | Farmhouse Furniture |
| Difficulty | Intermediate |
Dimensions
Use the size-specific shopping and cut lists below.
Shopping List
- 2 - 25" x 96" butcher block countertops, 1-1/2" thick
- 1 - 4x4 @ 6 feet long
- 4 - 1x10 @ 6 feet long
- 1 - 1x4 @ 8 feet long
- 1 - 2x2 @ 8 feet long
- 4 - 2x4 @ 8 feet long
- 1 - 1/4" plywood, 4x8 sheet
Cut List
- 6 - 1x10 @ 23-1/2" long - shelves
- 4 - 1x4 @ 23-1/2" long - bottom supports
- 4 - 1x10 @ 34-1/2" long - sides
- 4 - 2x2 @ 23-1/2" long - top supports
- 2 - 1/4" plywood @ 25" x 34-1/2" - backs
- 2 - 4x4 @ 34-1/2" - legs
- 3 - 2x4 @ 42" - island framing
- 2 - 2x4 @ 55-1/2" - island framing
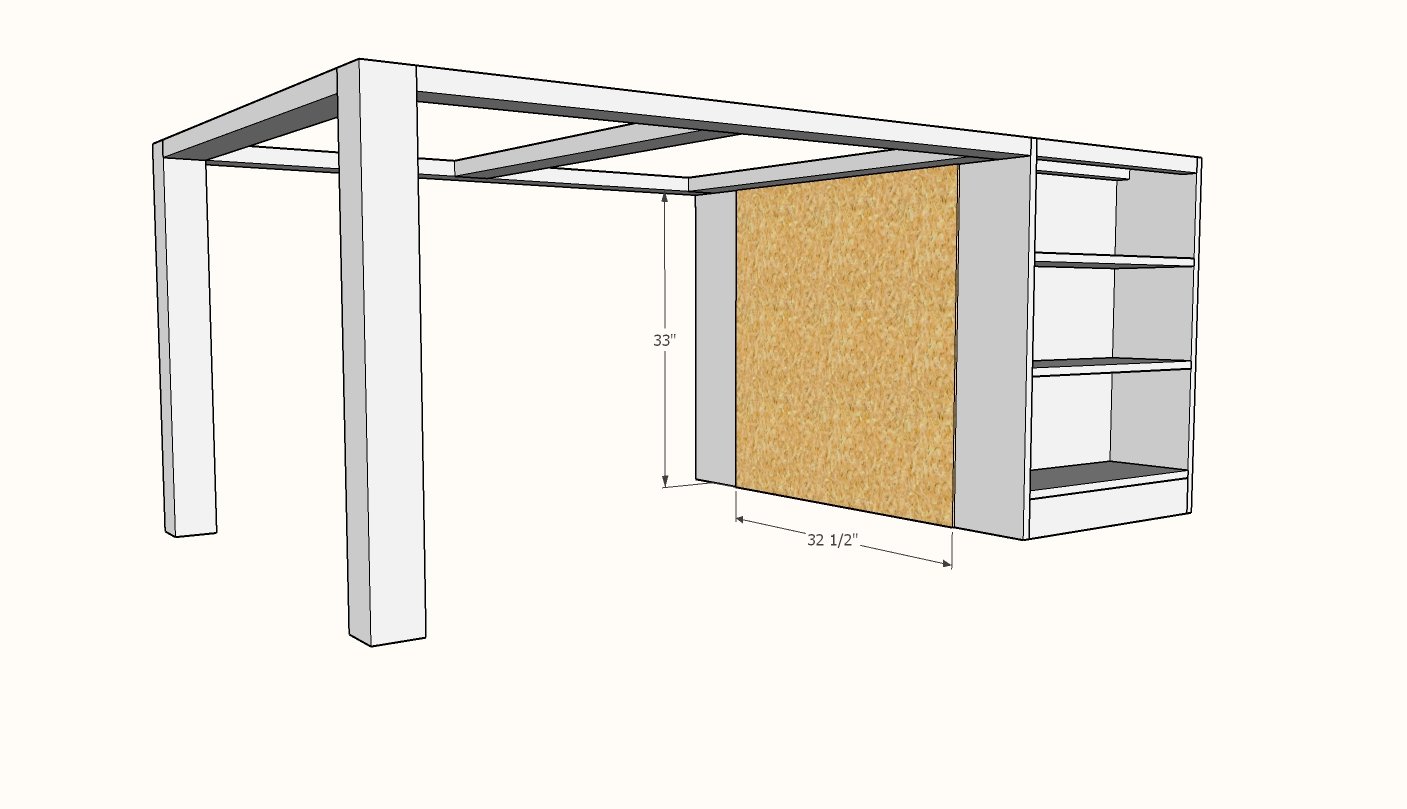
- 1 - 1/4" plywood @ 33" x 32-1/2" - back of range
Tools
- measuring tape
- square
- pencil
- safety glasses
- kreg-jig
- drill
- circular saw
- compound miter saw
- nailer
- sander
Step-by-step Instructions
Step 1
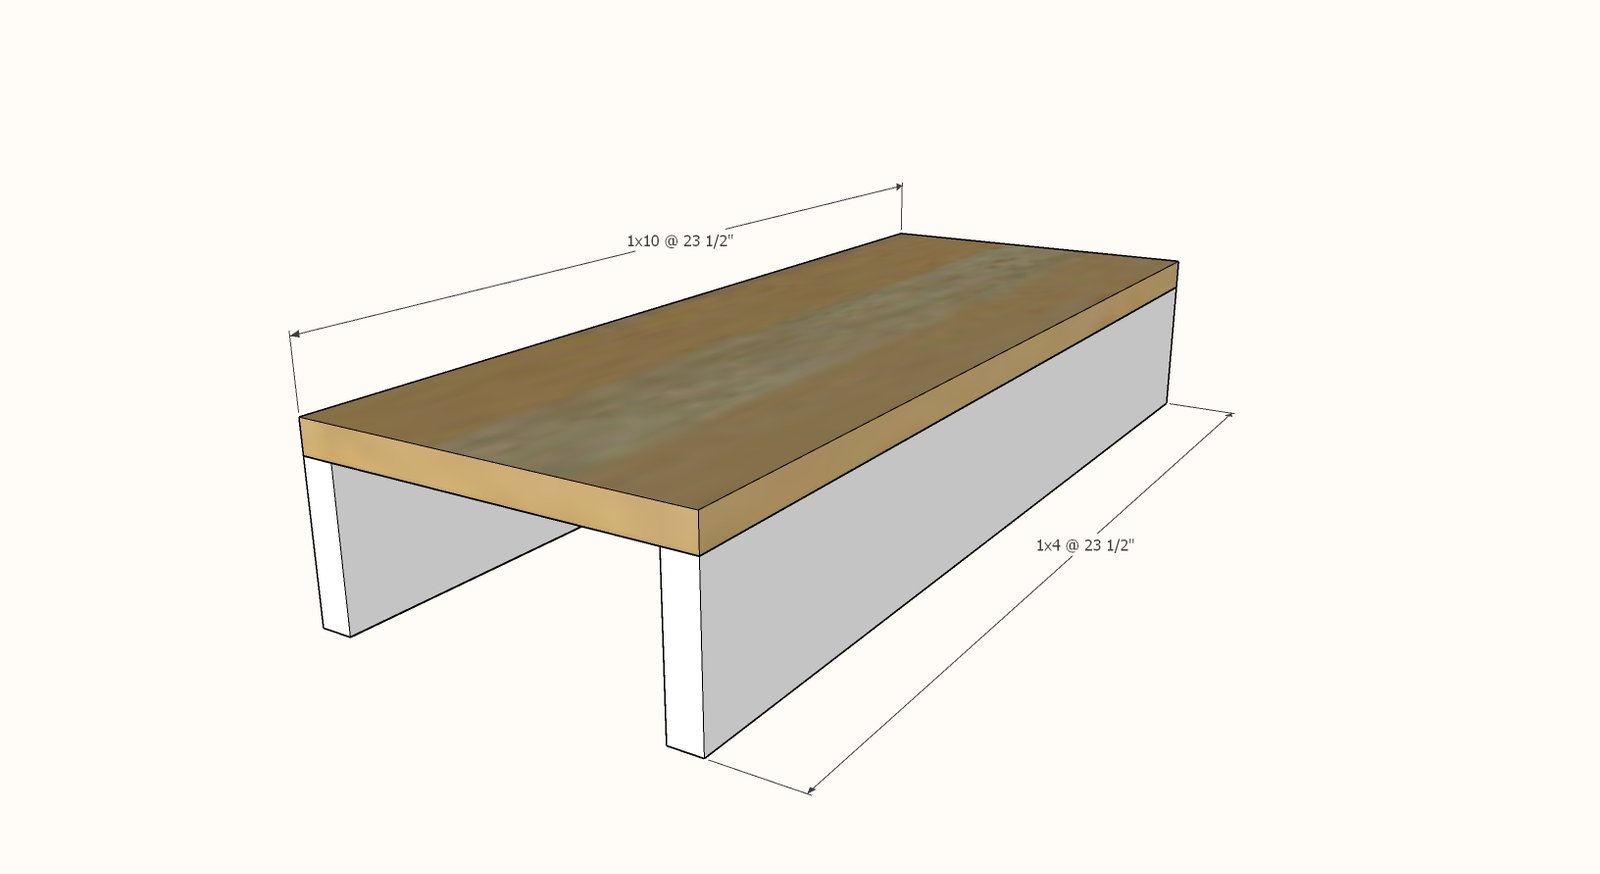
Attach 1x4s to bottom of bottom shelf with either pocket holes or 1-1/4" brad nails and glue.
Step 2
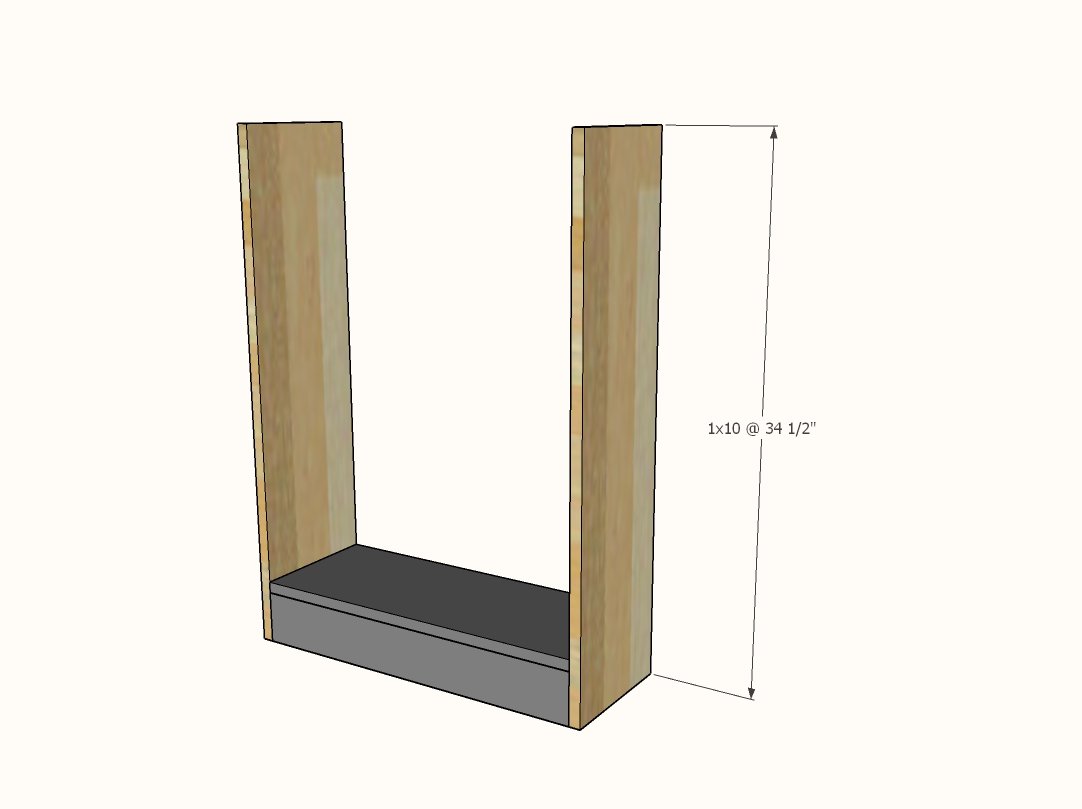
Attach bottom shelf to sides with either pocket holes or 1-1/4" nails and glue.
Step 3
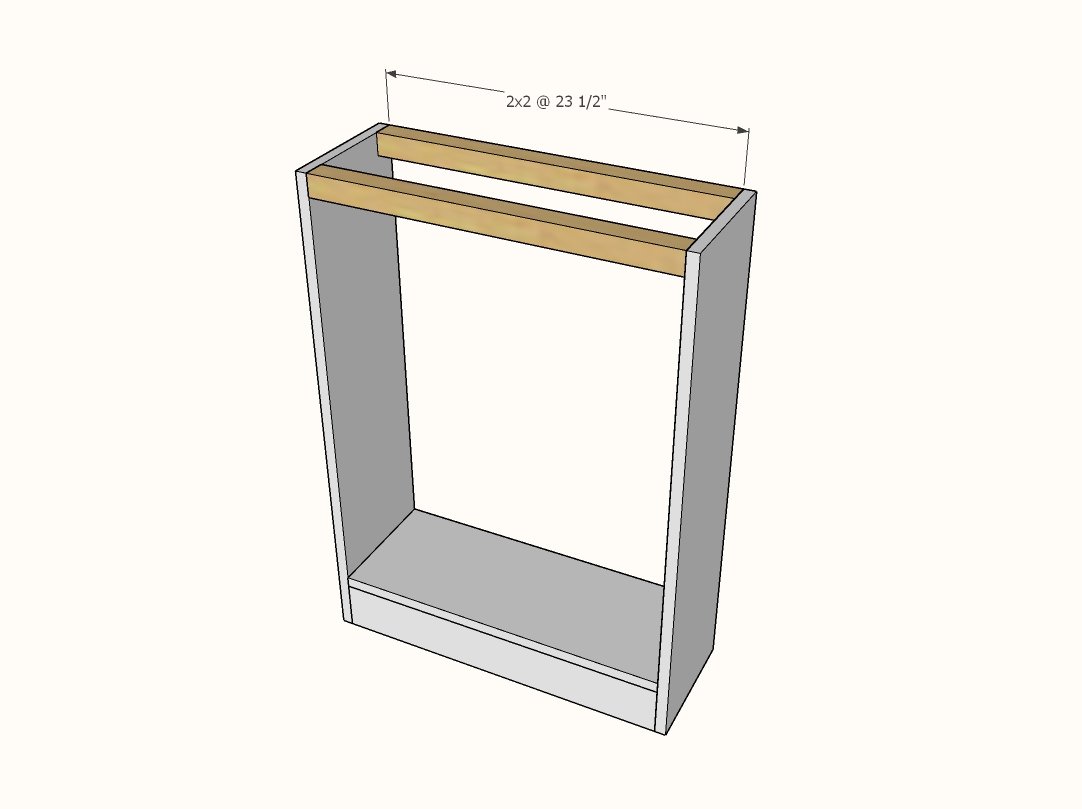
Attach 2x2 tops with either pocket holes (keep 3/4" setting and still use 1-1/4" pocket holes) or 1-1/4" nails and glue.
Step 4
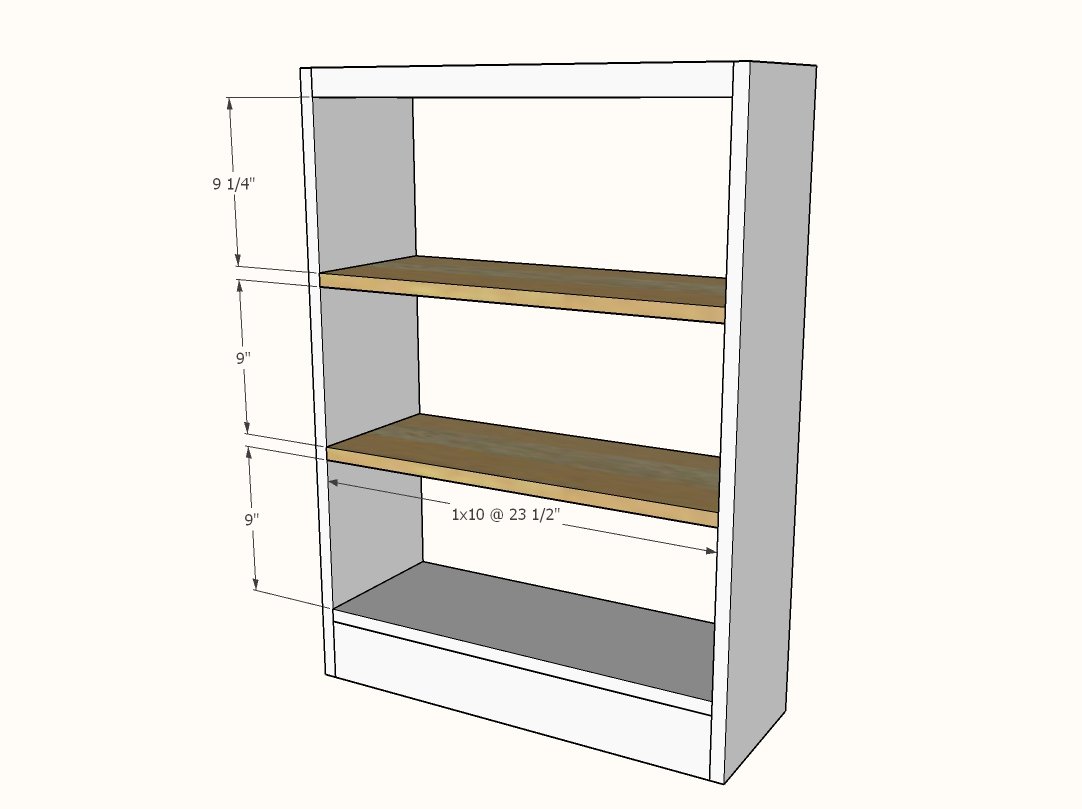
Add shelves inside. Shelves can also be made adjustable with shelf pins, they are not structural.
Step 5
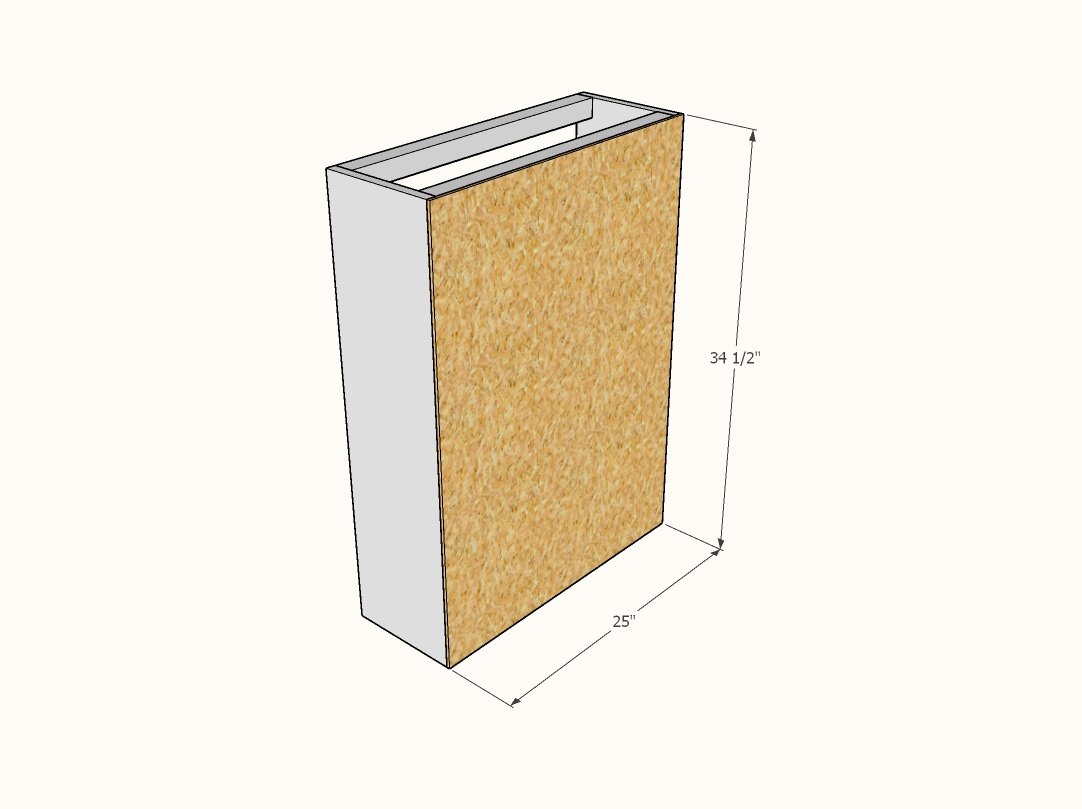
Attach 1/4" plywood to the back with 3/4" brad nails and glue. Attach to all fixed shelves as well.
Step 6
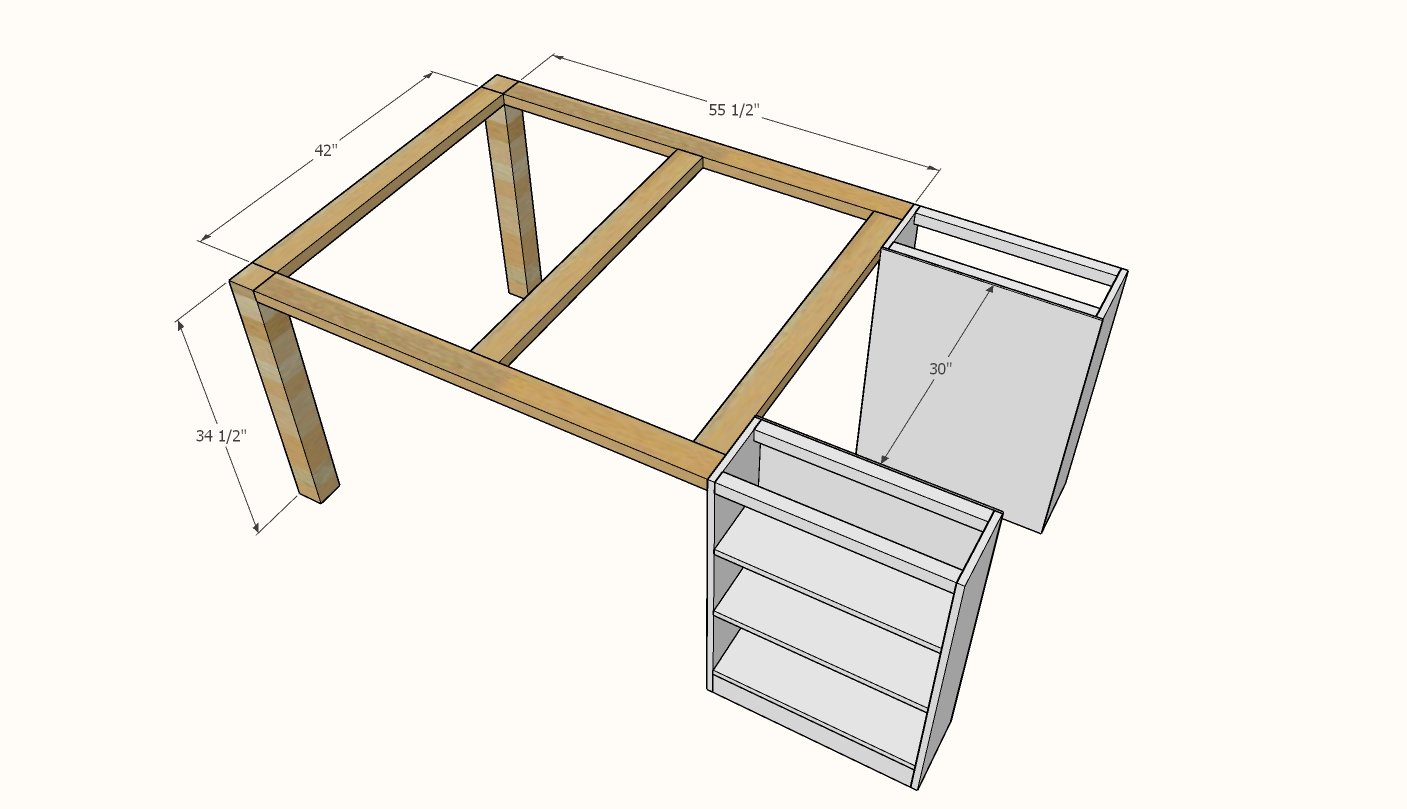
Cut out the framing for the island extension. Drill pocket holes on ends of all 2x4s, two per end, on the 1-1/2" setting. Use 2-1/2" pocket holes to attach together.
Step 7
Attach the 1/4" plywood panel to the back of the range area with 3/4" brad nails and glue.
Step 8
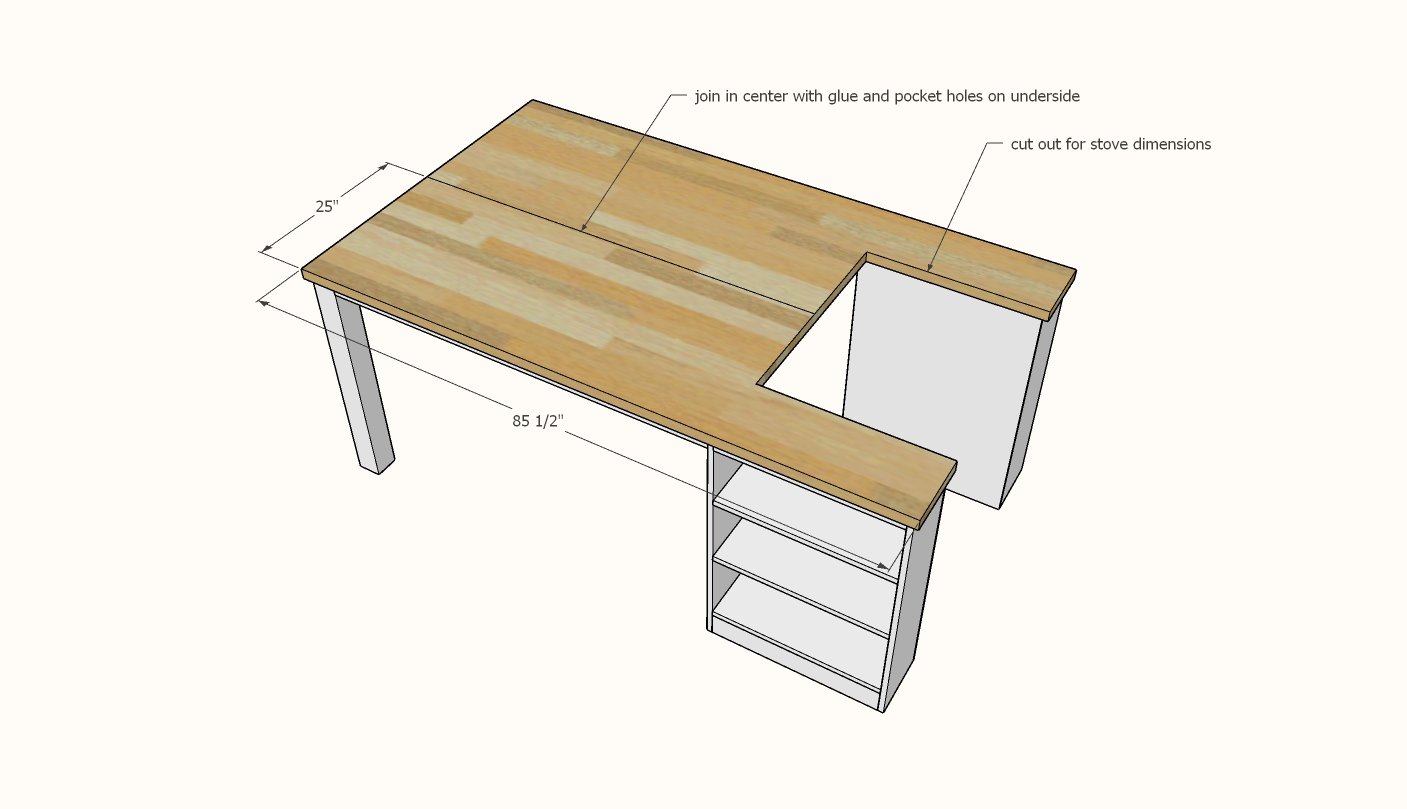
Attach the two butcher block countertops together with glue and pocket holes on 1-1/2" setting and 2-1/2" long screws (use the Kreg HD if you have it). NOTE: We also squared the edges of the butcher block up before joining using a hand planer. Cut out for the oven range. Attach with screws from underneath. You can use the 2-1/2" Kreg Jig screws to attach.
Finishing
Sand all surfaces, starting with a medium grit and finishing with fine. Wipe off the dust, fill any holes or gaps with wood filler, and sand smooth once dry. Apply primer if you're painting, then finish with your choice of paint or stain and seal with a durable clear topcoat. For outdoor projects, use exterior-rated primer, paint or stain, and sealer so the piece stands up to the weather.
Source (temporary): https://www.ana-white.com/woodworking-projects/gathering-kitchen-island