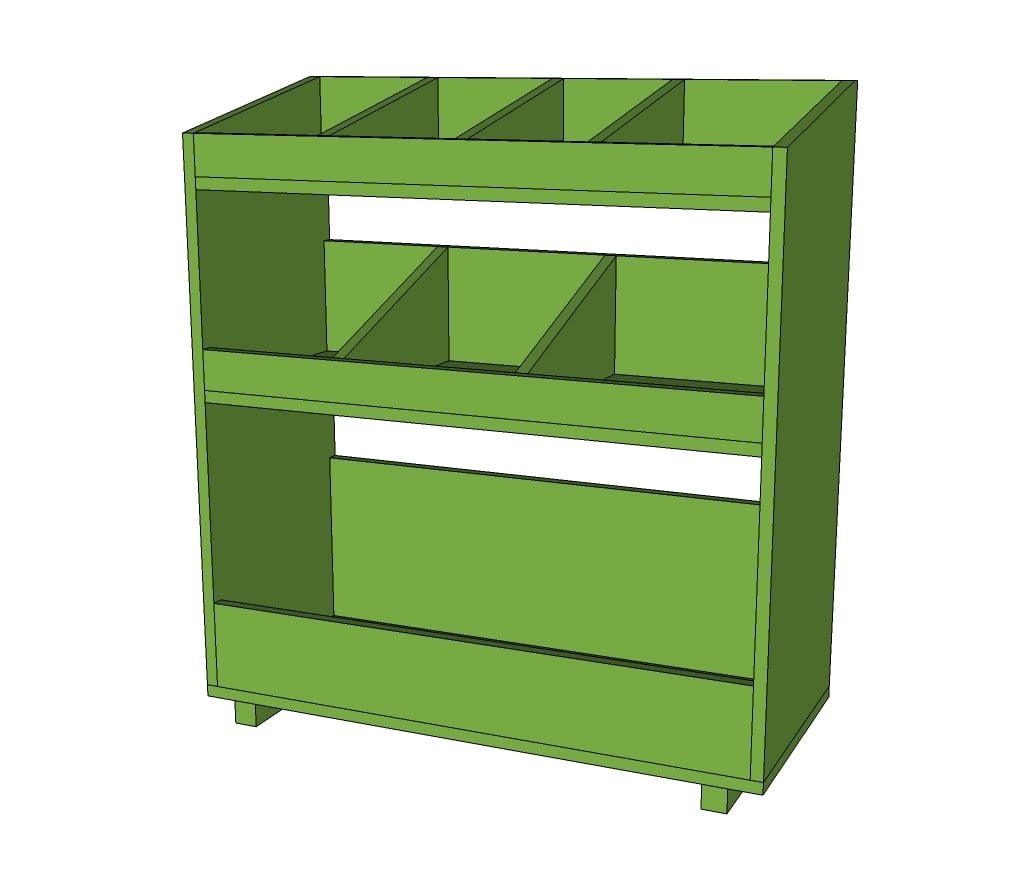
General Store Bin Bookshelf
Sort toys and stuff with this Land of Nod inspired bookshelf! from
Specifications
| Project type | Bookshelf and Bookcase Plans |
|---|---|
| Room | Storage Solutions |
| Style | Children's and Kid's Room Furniture and Toy Plans |
| Difficulty | Intermediate |
| Estimated cost | $50 - $100 |
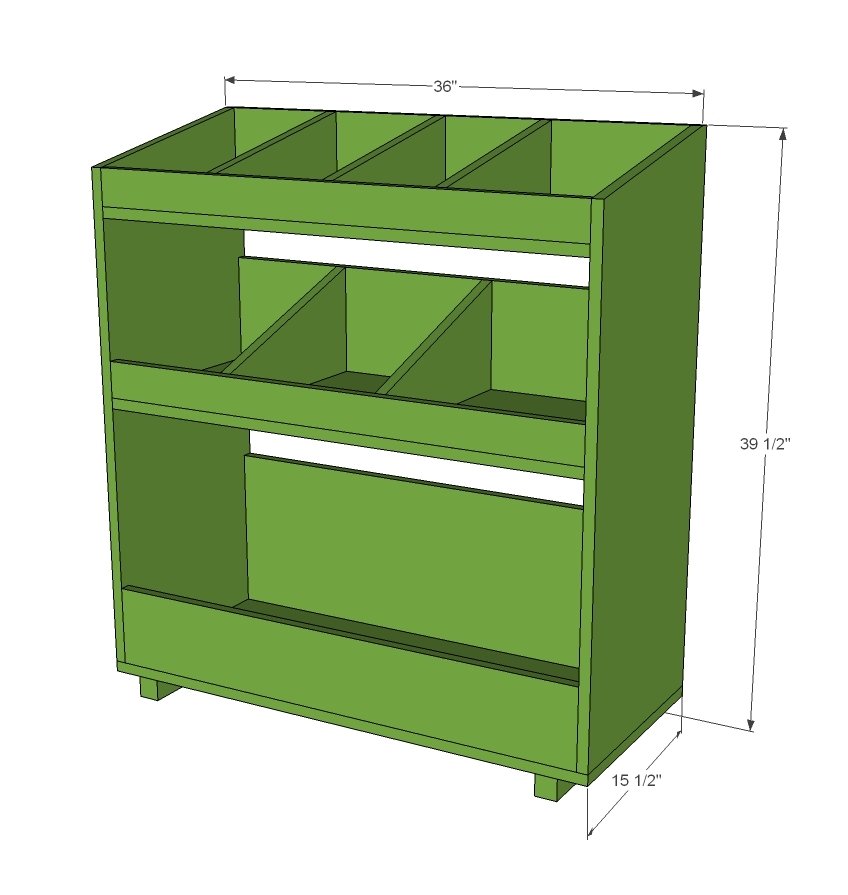
Dimensions
Use the size-specific shopping and cut lists below.
Shopping List
1 - sheet 3/4" hardwood plywood cut into 3 strips 15 1/2" wide by 8 feet long
1 - 2x2 @ 3 feet long
1 - 1x6 @ 8 feet long
1 - 1x8 @ 8 feet long
1 - 1x12 @ 3 feet long
1 - 1x3 @ 6 feet long
1 1/4" finish nails
either 1 1/4" pocket hole screws or 2" wood screws
Edge banding or wood filler for finishing exposed plywood edges
Cut List
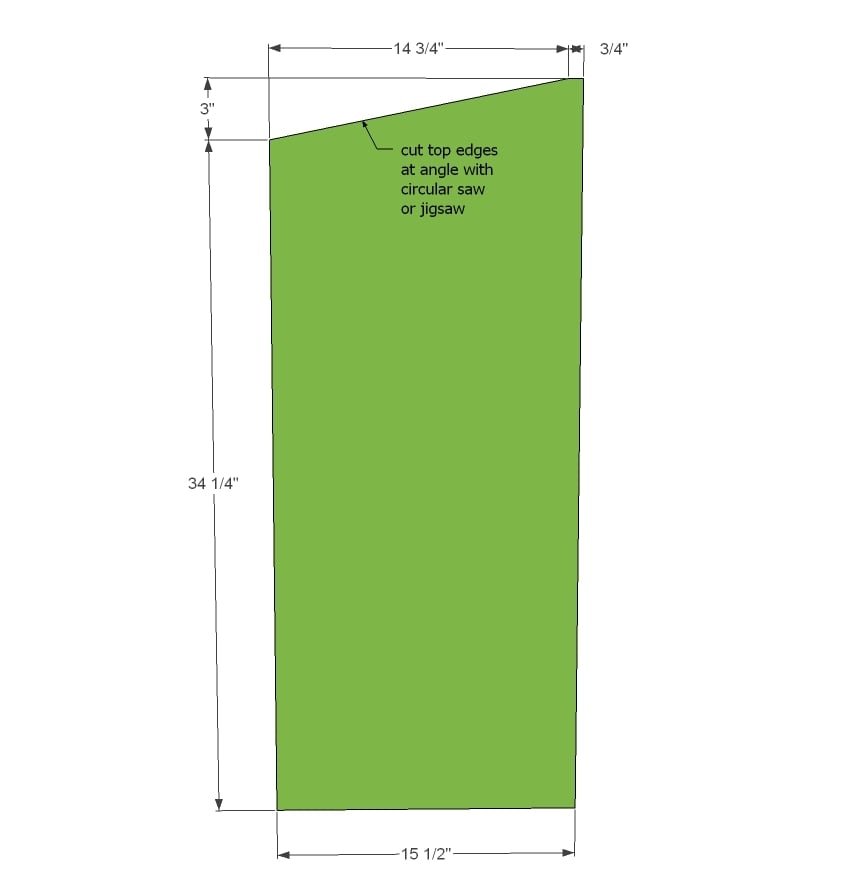
2 - 3/4" plywood @ 15 1/2" x 34 1/2" (sides)
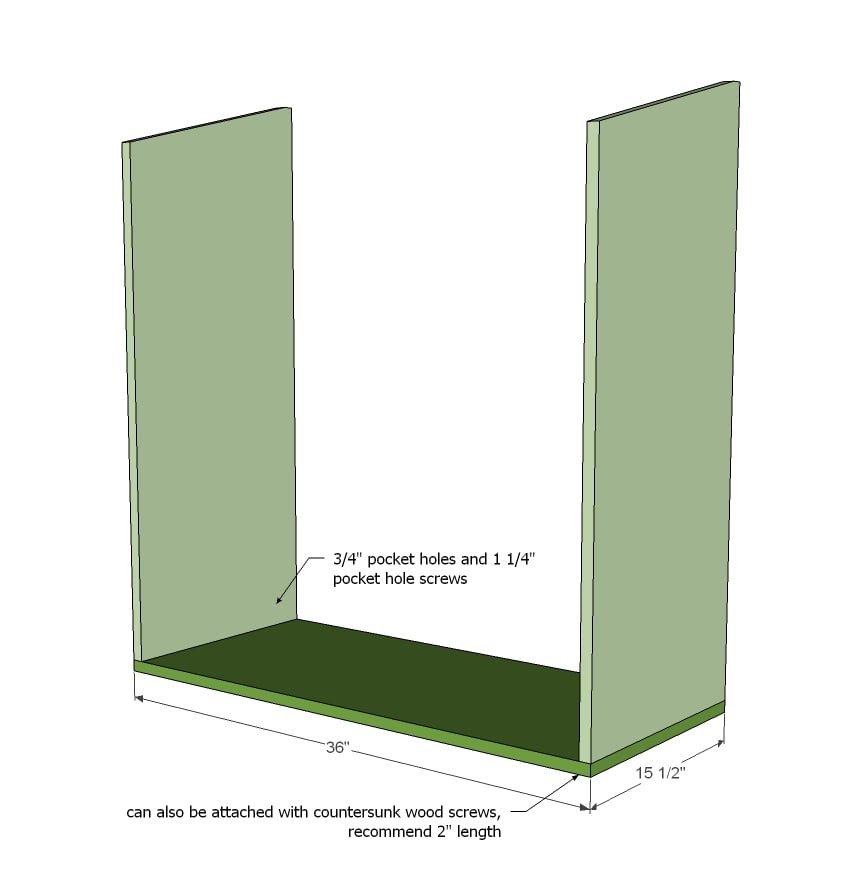
1 - 3/4" plywood @ 15 1/2" x 36" (bottom)
2 - 3/4" plywood @ 15 1/2" x 34 1/2" (shelves)
2 - 2x2 @ 15 1/2" (feet)
2 - 1x6 @ 34 1/2" (shelf trim)
1 - 1x8 @ 34 1/2" (shelf trim)
1 - 1x12 @ 34 1/2" (bottom shelf back trim - could use 3/4" plywood here too)
2 - 1x3 @ 34 1/2" (shelf trim)
3 - 1x6 @ 14" (top dividers)
2 or 3 - 1x8 @ 14" (middle dividers)
Tools
- measuring tape
- square
- pencil
- safety glasses
- hearing protection
- kreg-jig
- drill
- circular saw
- jigsaw
- nailer
- sander
Step-by-step Instructions
Step 1
Cut the sides down and sand the cut edge.
Step 2
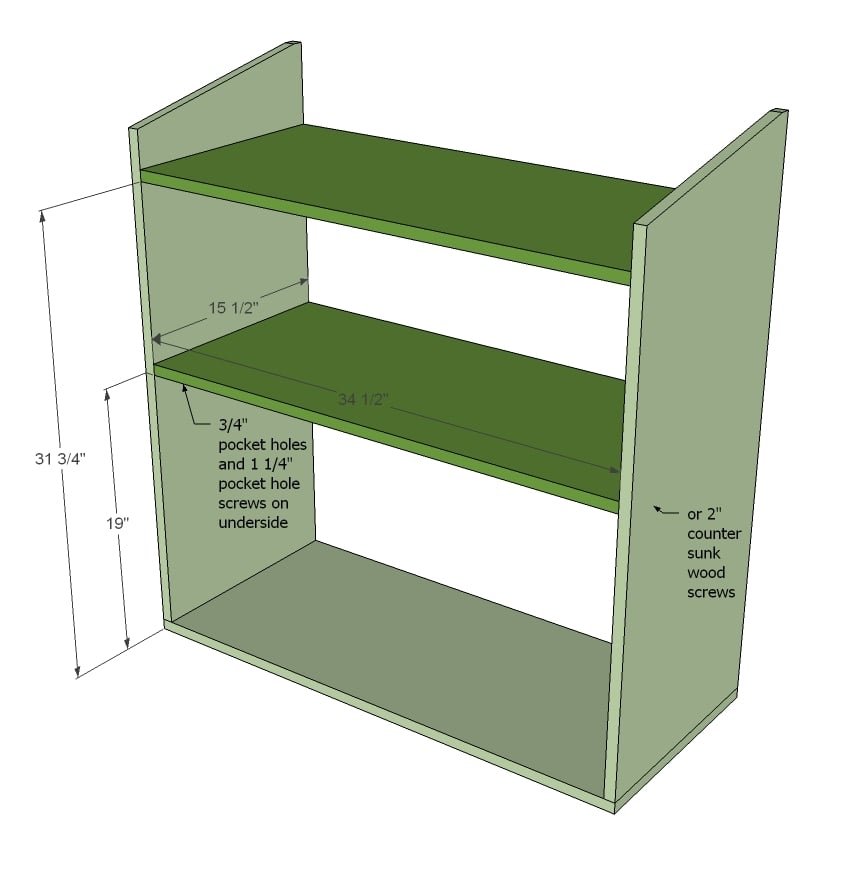
Attach bottom shelf to sides.
Step 3
Attach upper shelves to sides.
Step 4
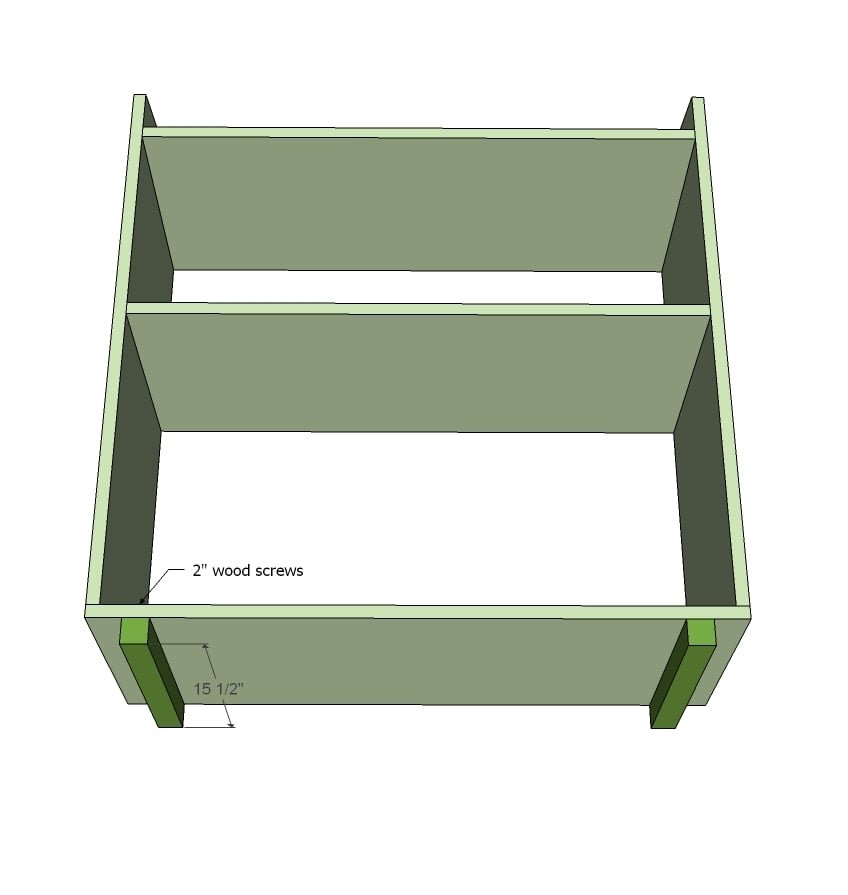
Attach feet to bottom shelf. I have them inset 2" from each end.
Step 5
Step 6
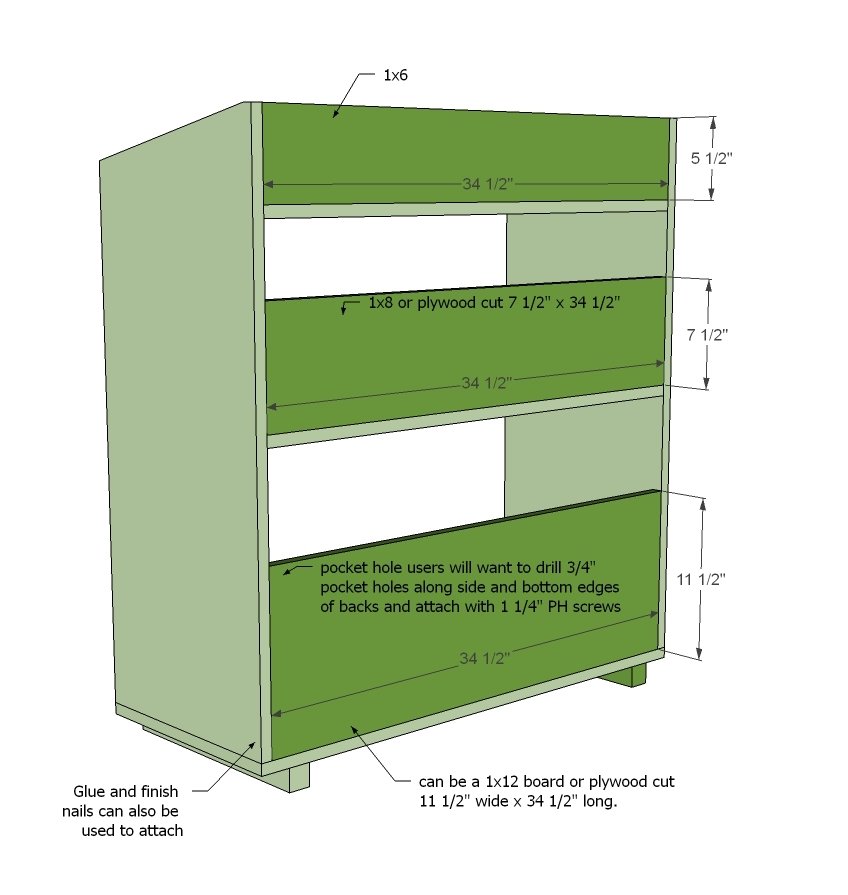
Attach fronts to shelves.
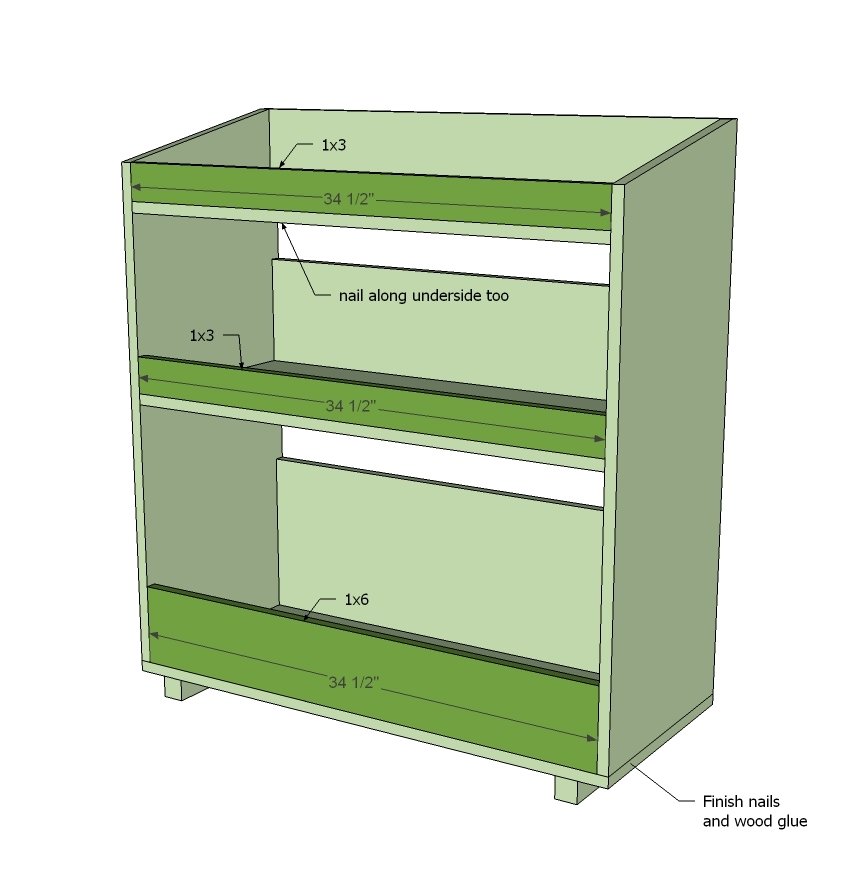
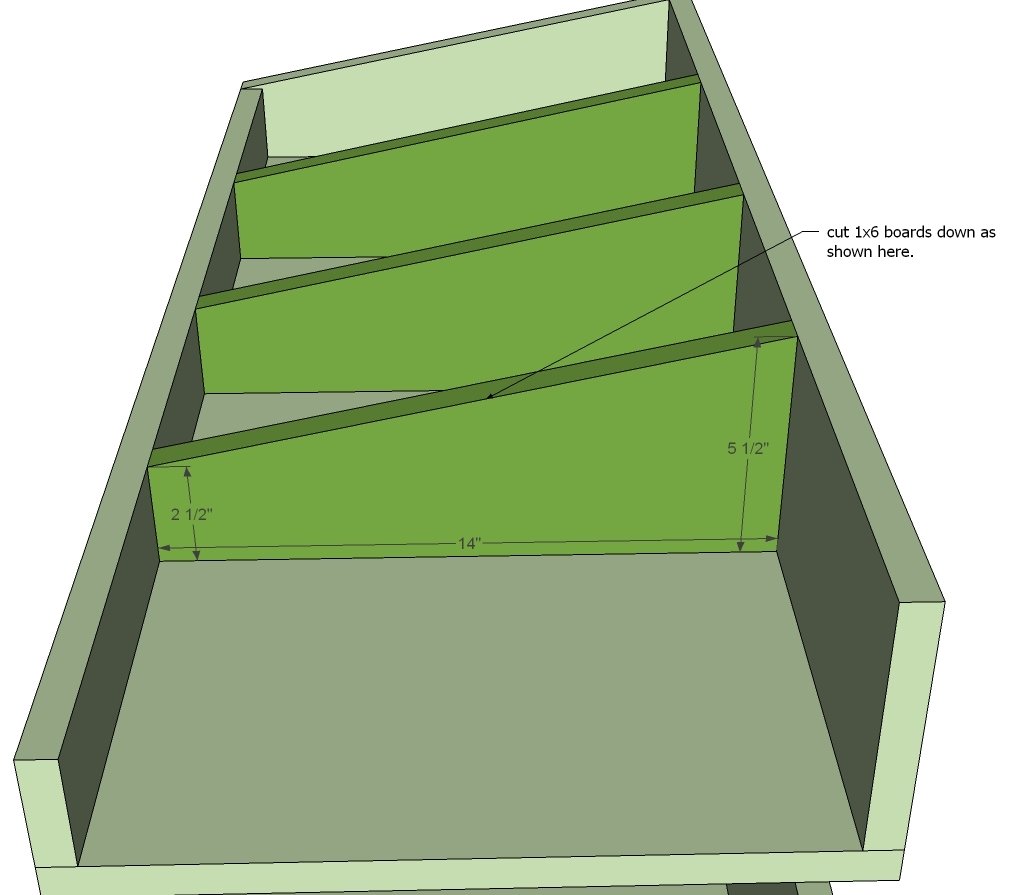
Take the 1x6 dividers and cut at angles to create the angled dividers. Nail in place as desired.
NOTE: Another option is to cut these guys very tight so they don't need to be nailed down and can be removed.
Step 8
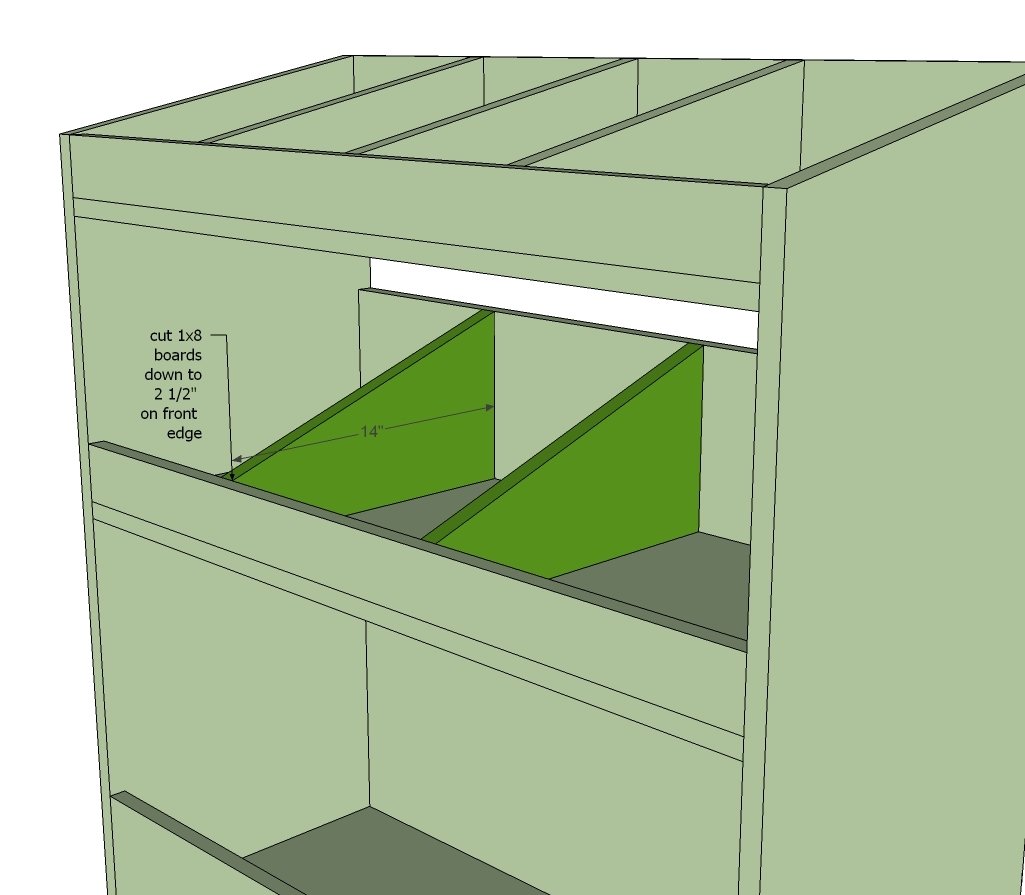
Do the same for the bottom shelf dividers.
Step 9
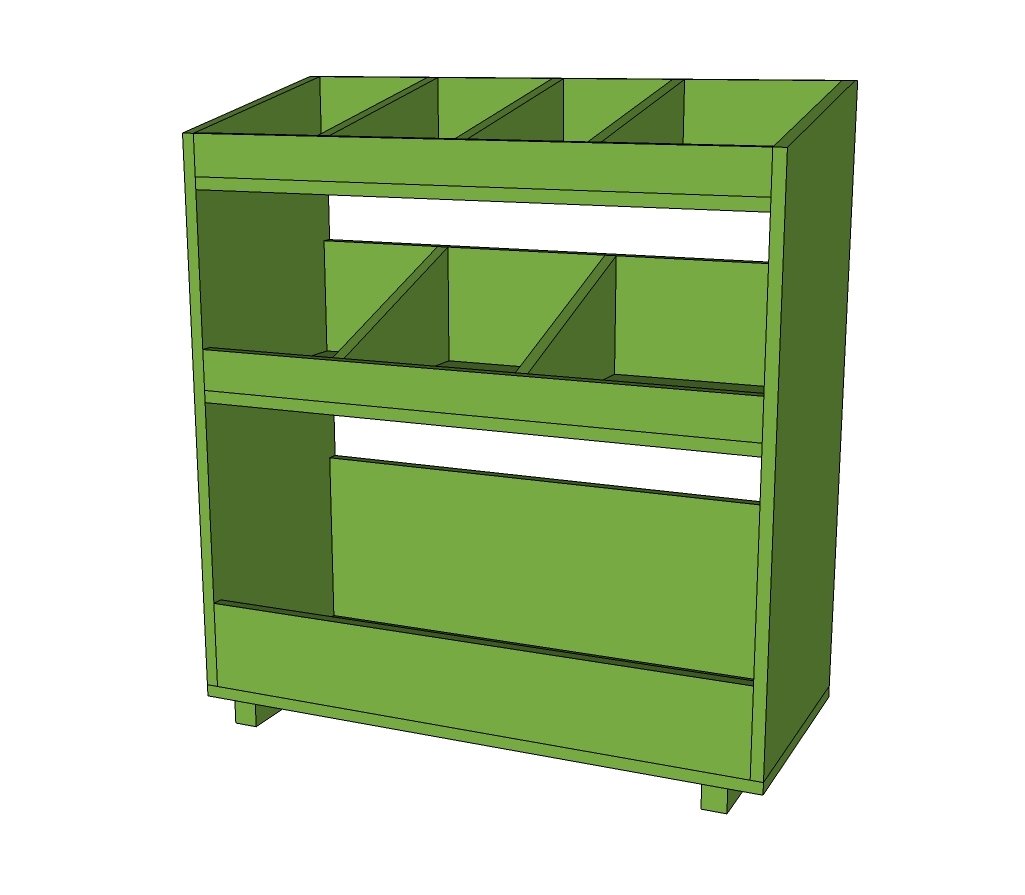
For a painted finish, you'll need to fill any exposed plywood edges with wood filler, sand well, and then paint. For a stained finish, I recommend edge banding, although I've seen plenty of stained plywood edges (especially on more modern furniture) that looks great too!
Finishing
Sand all surfaces, starting with a medium grit and finishing with fine. Wipe off the dust, fill any holes or gaps with wood filler, and sand smooth once dry. Apply primer if you're painting, then finish with your choice of paint or stain and seal with a durable clear topcoat. For outdoor projects, use exterior-rated primer, paint or stain, and sealer so the piece stands up to the weather.
Source (temporary): https://www.ana-white.com/woodworking-projects/general-store-bin-bookshelf