Georgia's Jewelry Box
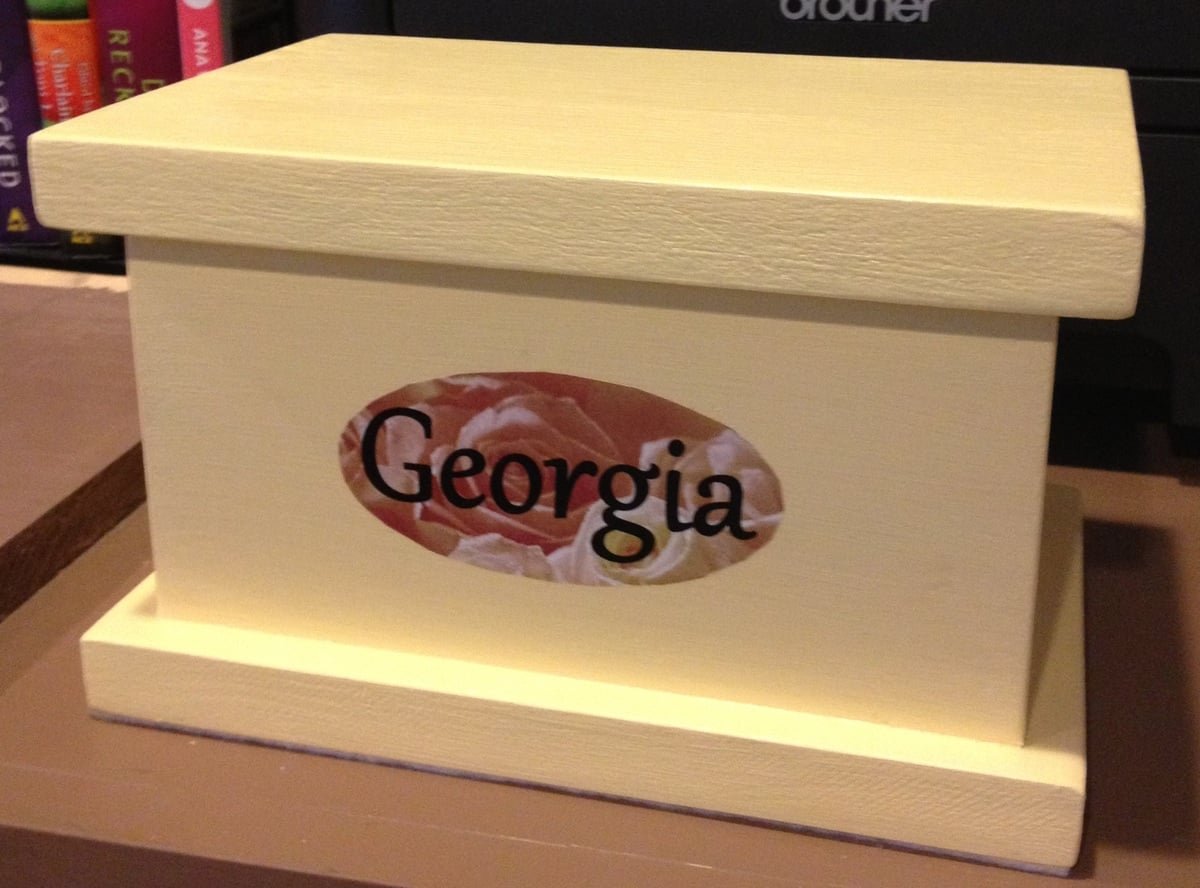
Build Georgia's Jewelry Box from scrap wood and a few decorations!
Specifications
| Project type | Other Projects |
|---|---|
| Room | Craftroom |
| Style | Cottage Style Furniture Plans |
| Difficulty | Beginner Projects |
| Estimated cost | scraps |
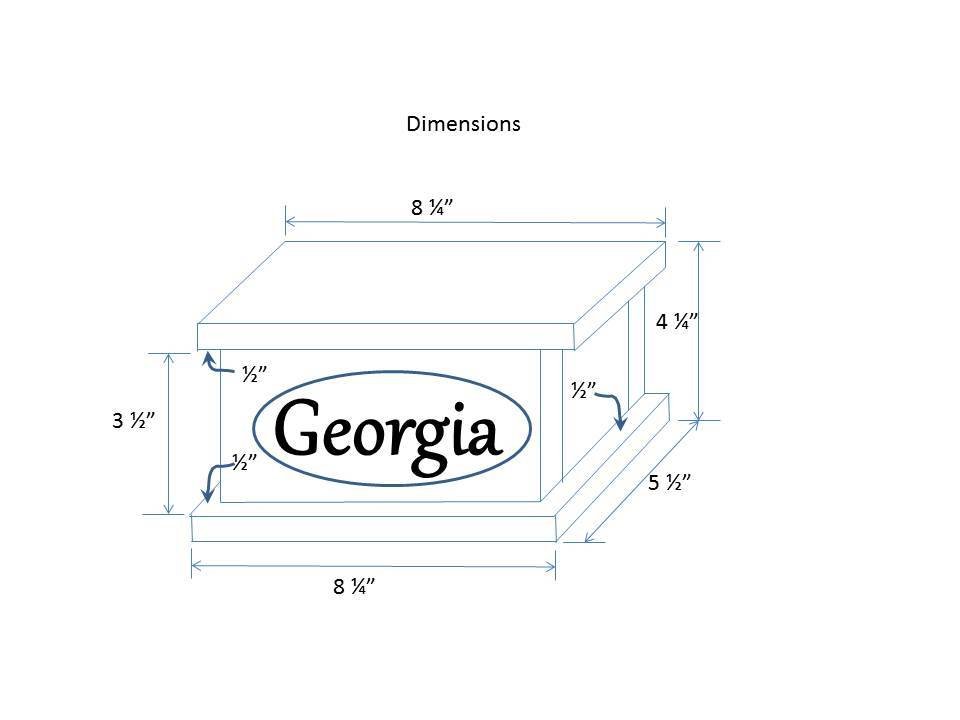
Dimensions
Use the size-specific shopping and cut lists below.
Shopping List
Shopping list: (Check your scrap wood – you’d need 22” of 1x4 and 17” of 1x6, or cut larger pieces of scrap down to the “will be” sizes in the cut list)
1 pc 1x4 at 2 feet long
1 pc 1x6 at 2 feet long
1 ¼” finish nails
Glue
1 pair flat hinges (see picture in.pdf for example)
Finishing supplies for finish of choice
Cut List
Cut List
(all of these can be cut to size from larger pieces of scrap wood, to the “will be” measurements):
1x4 – 2 pc @ 7 ¼” (front/back – will be 7 ¼” x 3 ½”)
1x4 – 2 pc @ 3 ½” (sides – will be 3 ½” x 3 ½”)
1x6 – 2 pc @ 8 ¼” (top & bottom – will be 5 ½” x 8 ¼”)
Tools
- measuring tape
- square
- pencil
- hammer
- safety glasses
- hearing protection
- drill
- compound miter saw
- nailer
Step-by-step Instructions
Step 1
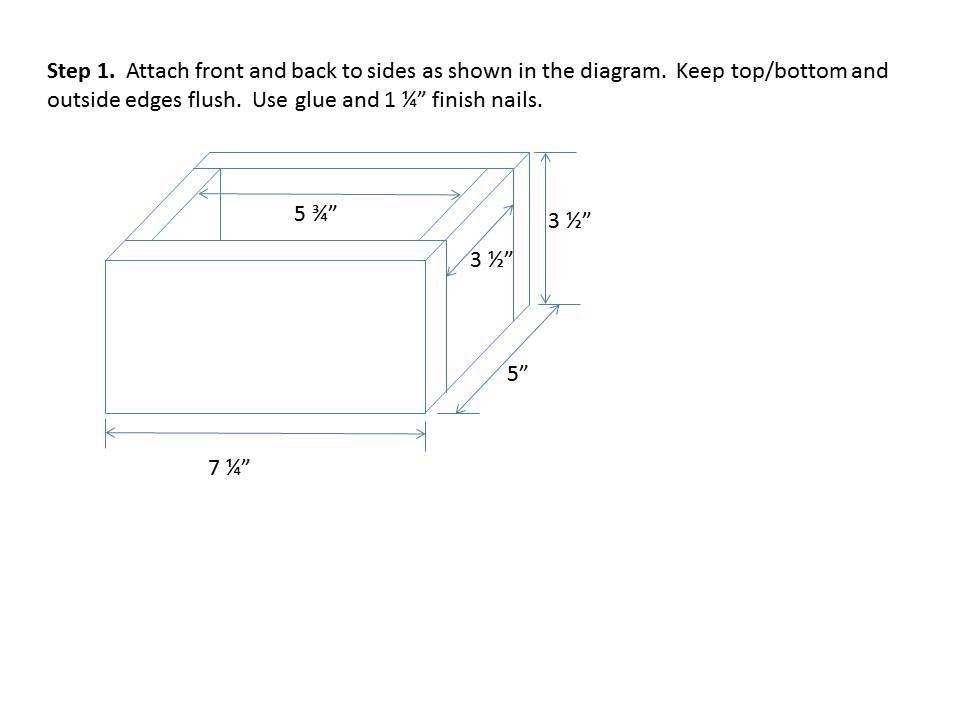
Step 1. Attach front and back to sides as shown in the diagram. Keep top/bottom and outside edges flush. Use glue and 1 ¼” finish nails.
Step 2
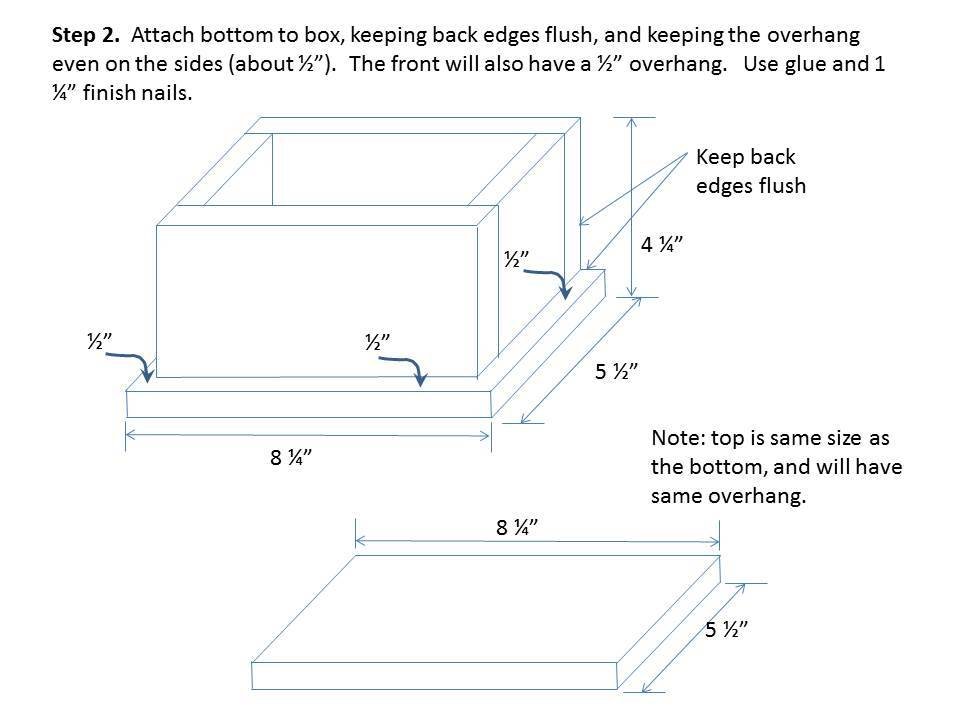
Step 2. Attach bottom to box, keeping back edges flush, and keeping the overhang even on the sides (about ½”). The front will also have a ½” overhang. Use glue and 1 ¼” finish nails. Note: top is same size as the bottom, and will have same overhang.
Step 3: Finishing: At this point finish the box and top.
Fill nail holes. Use matching or stainable filler if staining. After filler dries, sand until smooth, remove all sanding residue, and apply desired finish.
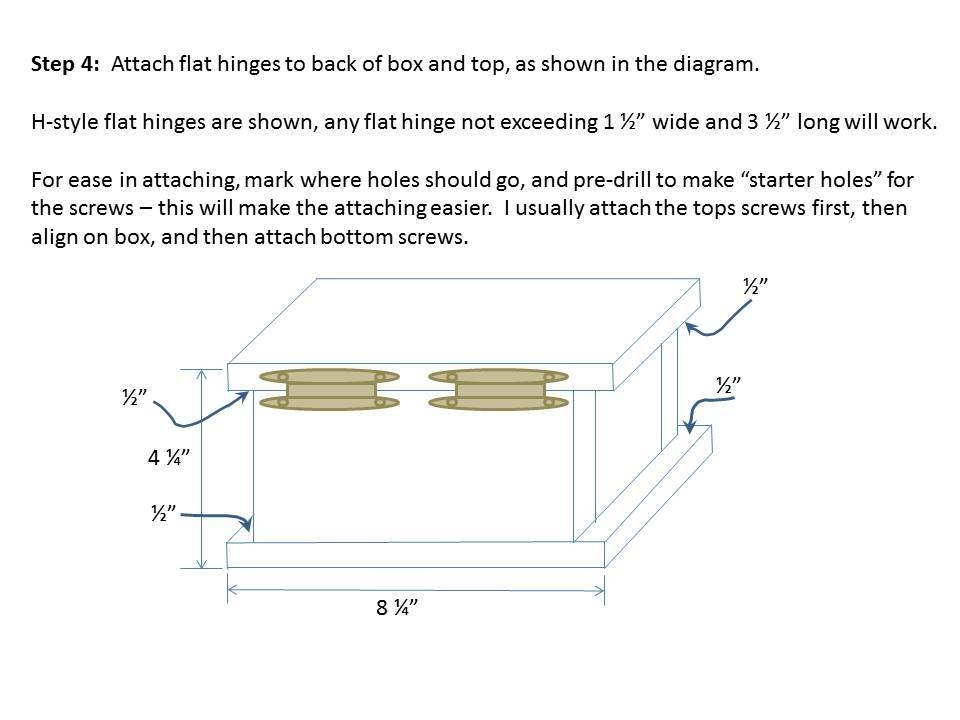
Step 4: Attach flat hinges to back of box and top, as shown in the diagram.
H-style flat hinges are shown, any flat hinge not exceeding 1 ½” wide and 3 ½” long will work. For ease in attaching, mark where holes should go, and pre-drill to make “starter holes” for the screws – this will make the attaching easier. I usually attach the tops screws first, then align on box, and then attach bottom screws.
Step 5
Finishing
Sand all surfaces, starting with a medium grit and finishing with fine. Wipe off the dust, fill any holes or gaps with wood filler, and sand smooth once dry. Apply primer if you're painting, then finish with your choice of paint or stain and seal with a durable clear topcoat. For outdoor projects, use exterior-rated primer, paint or stain, and sealer so the piece stands up to the weather.
Source (temporary): https://www.ana-white.com/woodworking-projects/georgias-jewelry-box